For 1990-2009 cars only
Coolant Heater Replacement LL8
Removal Procedure
- Drain the engine coolant. Refer to Cooling System Draining and Filling.
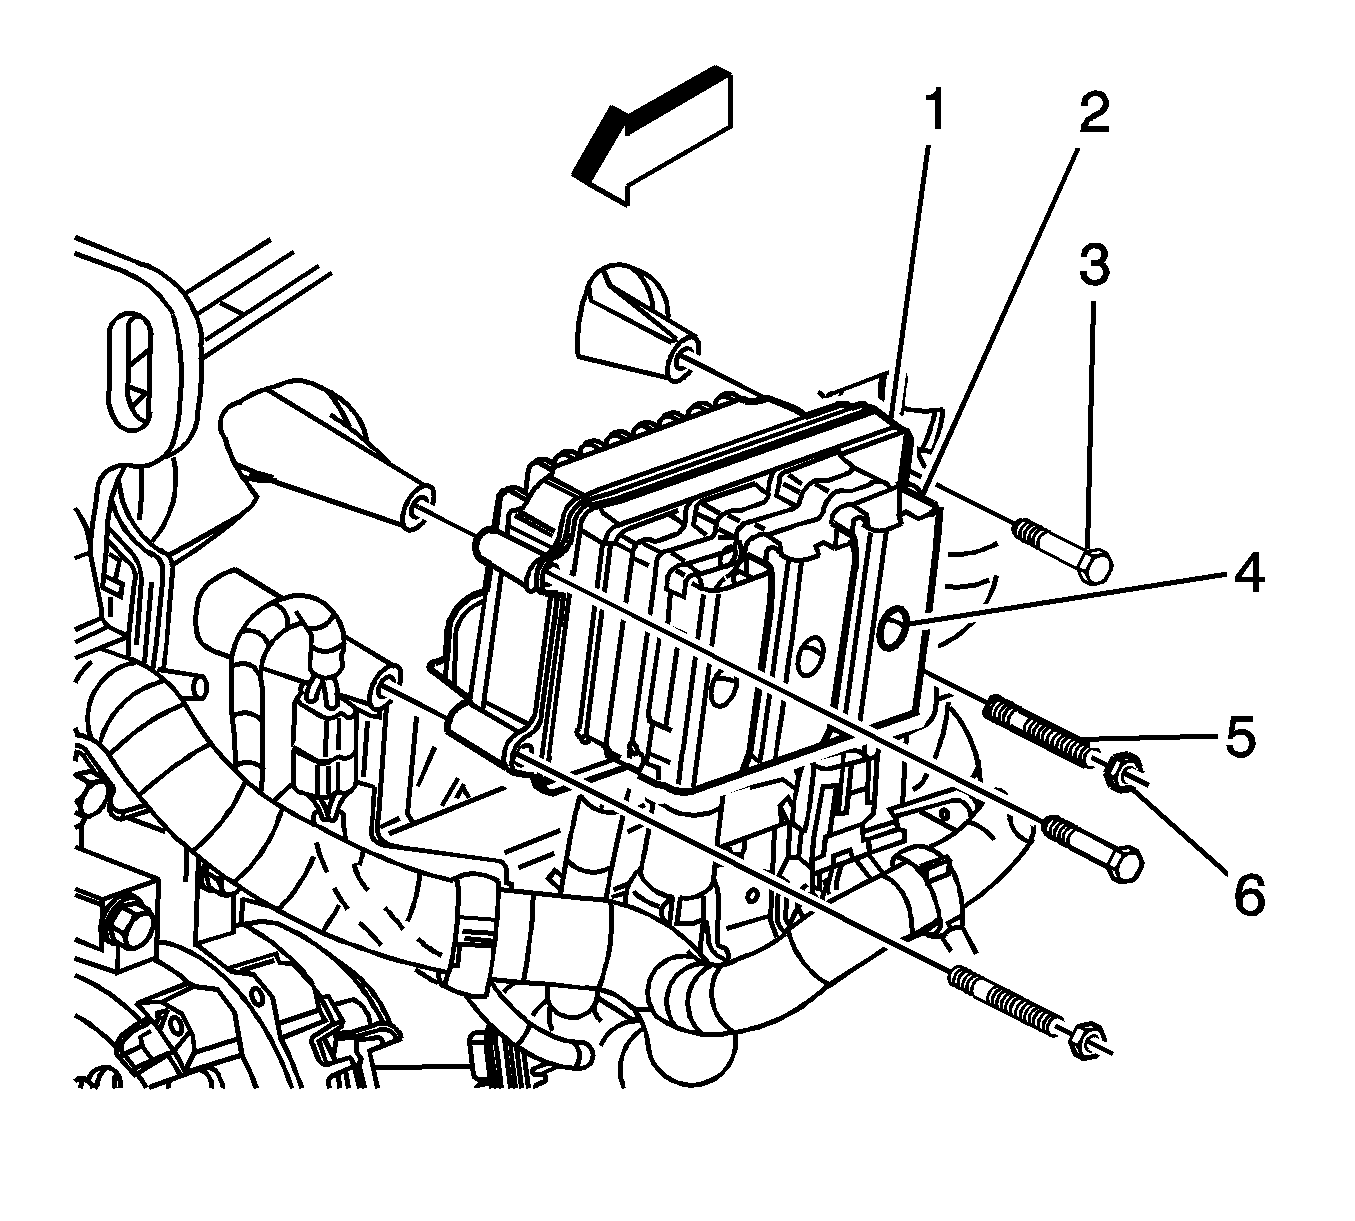
- Remove the powertrain control module (PCM) retaining bolts (3) and nuts (6).
- Remove the PCM mounting studs (5) and position the PCM out of the way.
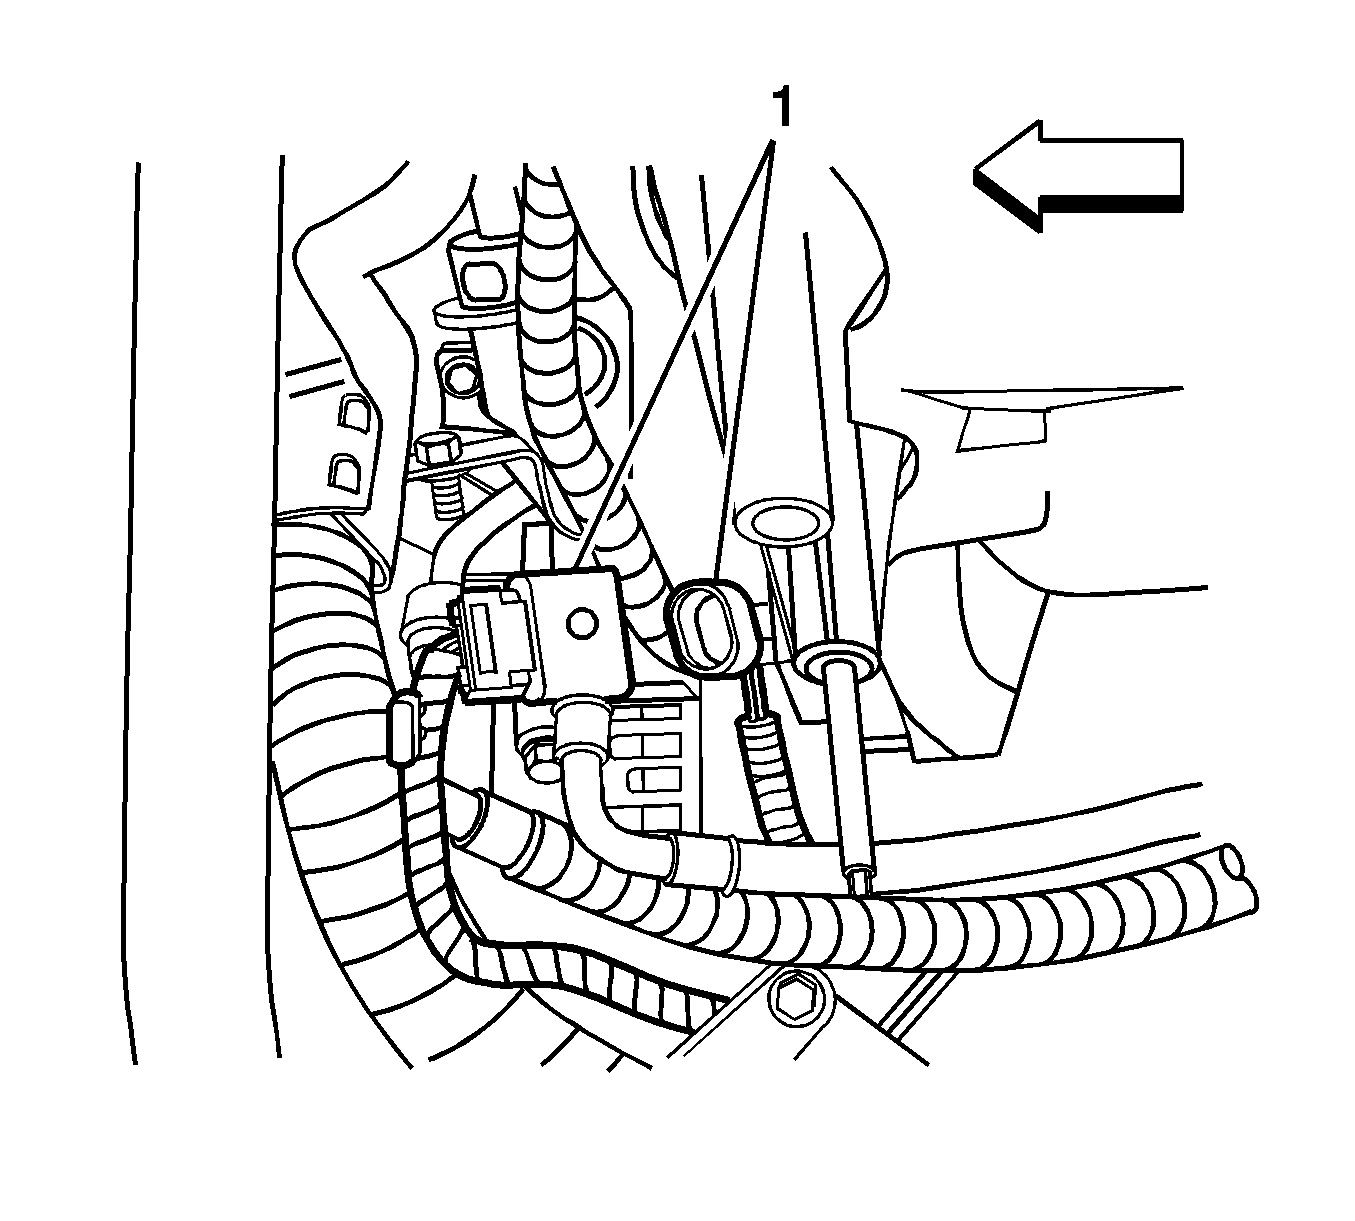
- Disconnect the engine coolant temperature (ECT) sensor electrical connector (1).
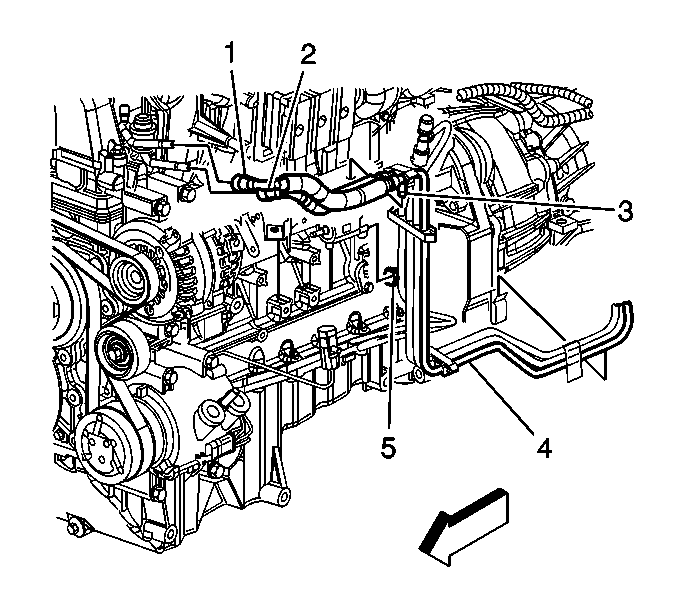
- Disconnect the fuel feed (1) and fuel return (2) pipes from the fuel rail. Refer to Metal Collar Quick Connect Fitting Service.
- Disconnect the integral clip (3) from the wire harness bracket.
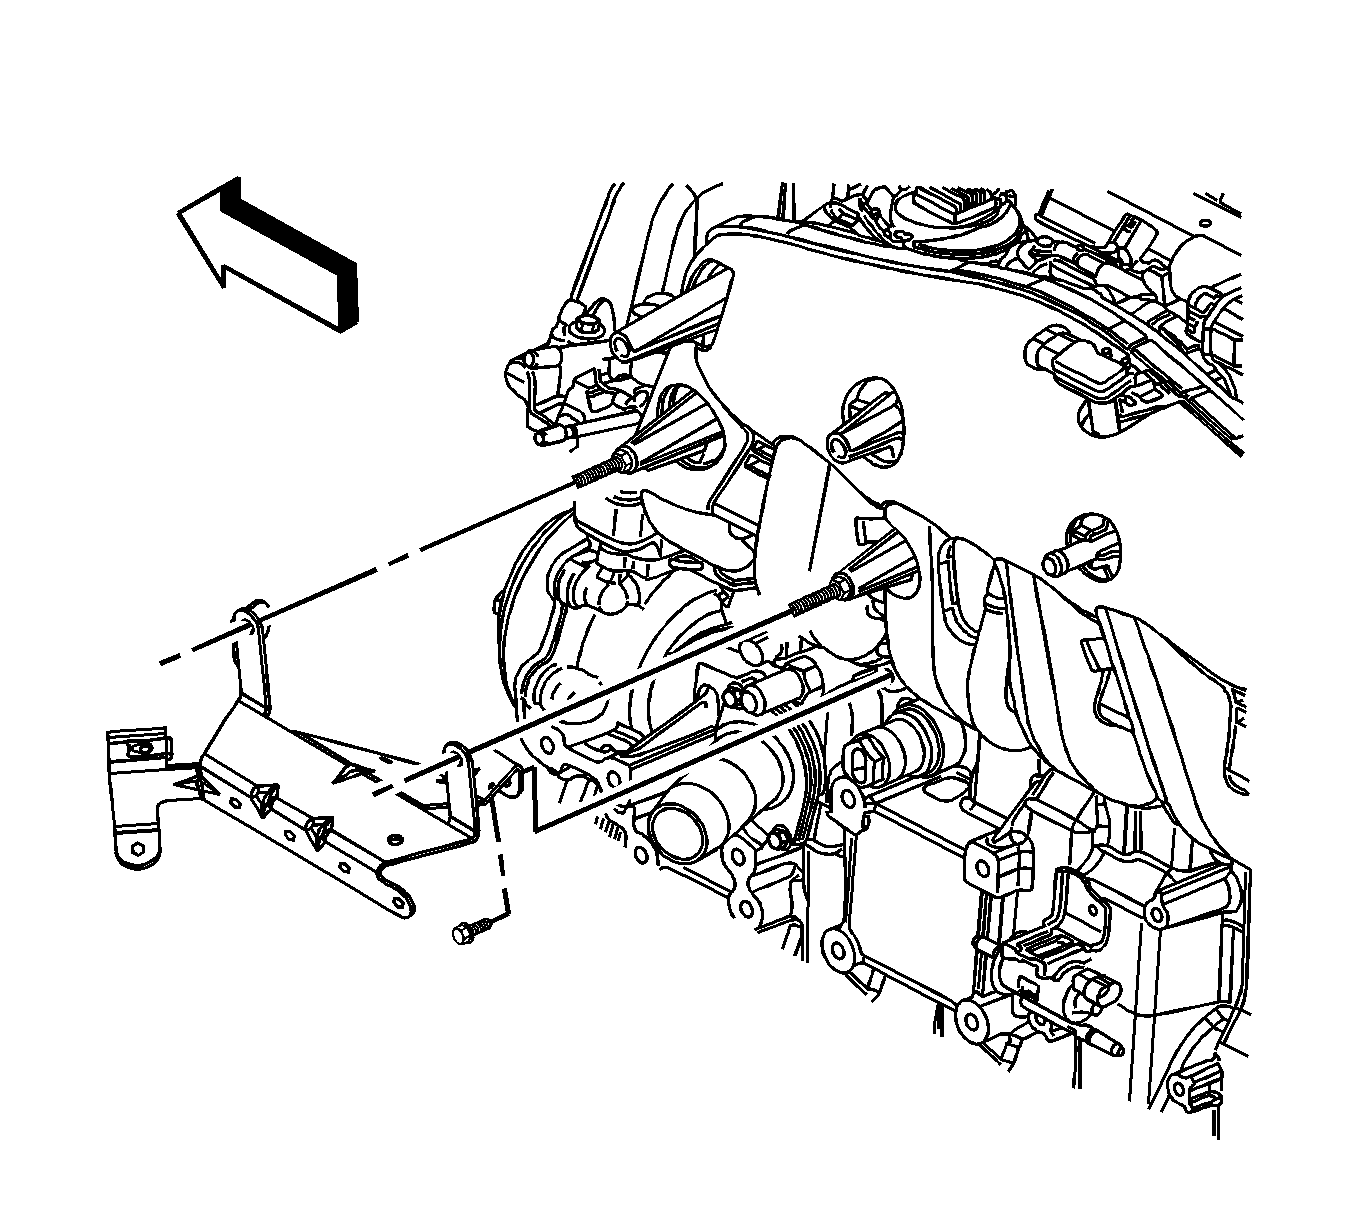
- Remove the engine wire harness bracket bolt.
- Position the engine electrical wire harness bracket with wires attached out of the way.
- Remove the coolant heater cord from the heater (2).
- Remove the coolant heater from the block.
Caution: Refer to Fuel and Evaporative Emission Hose/Pipe Connection Cleaning Caution in the Preface section.
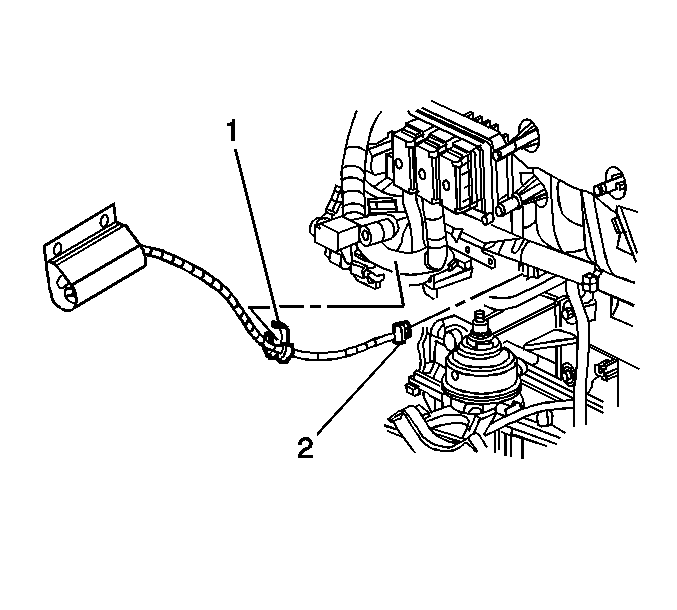
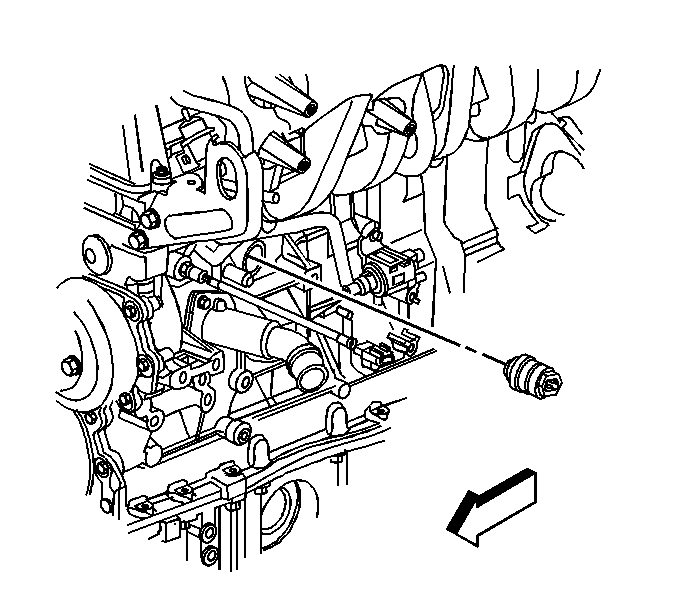
Note: Do not score the surface of the engine block hole when removing the coolant heater.
Installation Procedure
- Remove any burrs, sealer, paint or other foreign material from the threads/sealing surface of the engine block and from the old coolant heater if the heater is to be reused.
- If reusing the old coolant heater, apply thread sealant GM P/N 12346004 (Canadian P/N 10953480), or equivalent to the threads.
- Install the coolant heater to the engine block and tighten to 50 N·m (37 lb ft).
- Install the coolant heater cord to the heater (2).
- Properly position the engine electrical harness bracket to the intake manifold.
- Install the engine electrical harness bracket bolt and tighten to 10 N·m (89 lb in).
- Connect the integral clip (3) to the wire harness bracket.
- Connect the fuel feed (1) and fuel return (2) pipes to the fuel rail. Refer to Metal Collar Quick Connect Fitting Service.
- Connect the ECT sensor electrical connector (1).
- Install the PCM mounting studs (5) to the intake manifold and tighten to 6 N·m (53 lb in).
- Install the PCM (1) onto the studs (5).
- Install the PCM retaining bolts (3) and tighten to 8 N·m (71 lb in).
- Install the PCM retaining nuts (6) and tighten to 8 N·m (71 lb in).
- Fill the cooling system. Refer to Cooling System Draining and Filling.
Caution: Refer to Fastener Caution in the Preface section.


Coolant Heater Replacement LH6, LS2
Removal Procedure
- Drain the cooling system. Refer to Cooling System Draining and Filling.
- Raise and suitably support the vehicle. Refer to Lifting and Jacking the Vehicle.
- Disconnect the coolant heater (1) electrical connector.
- Remove the coolant heater from the engine block.
- Remove any burrs, sealer, paint or other rough spots.
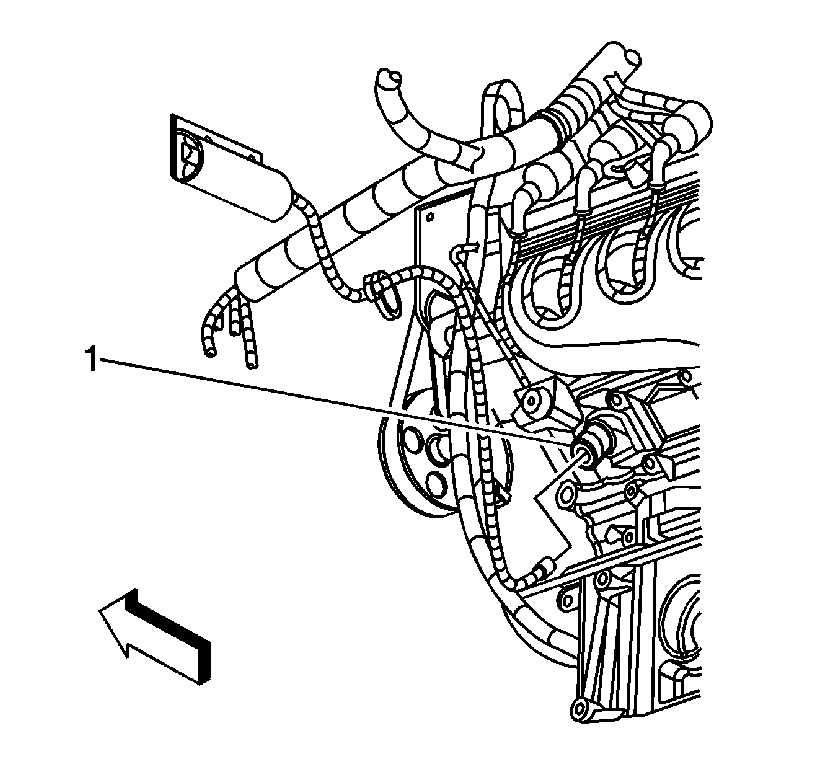
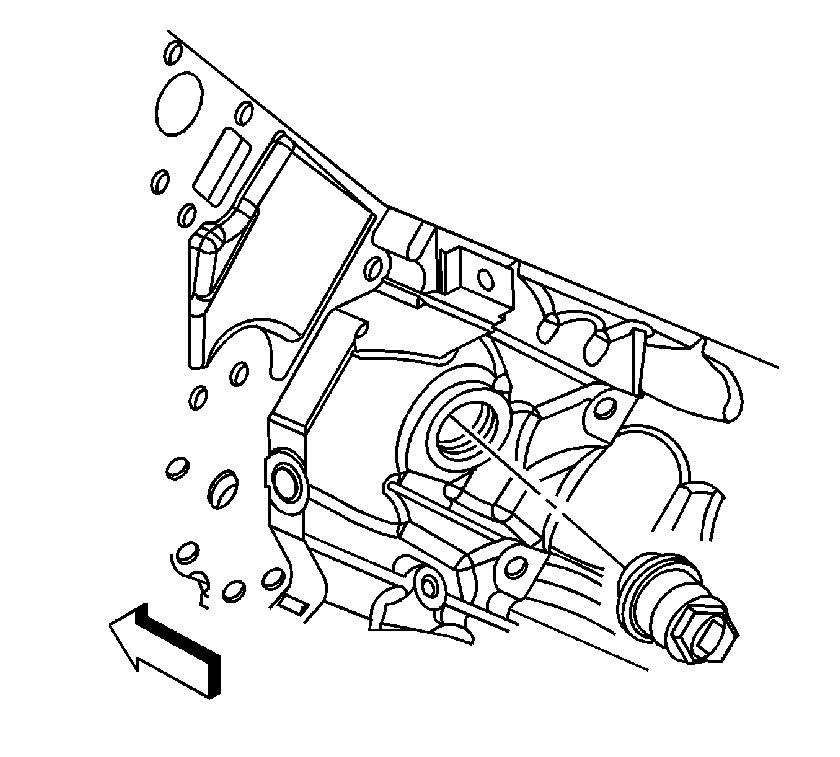
Note: Do not score the surface of the engine block hole when removing the coolant heater.
Installation Procedure
- If re-using the old coolant heater, apply thread sealant GM P/N 12346004 (Canadian P/N 10953480), or equivalent to the threads.
- Install the coolant heater to the engine block.
- Connect the coolant heater (1) electrical connector.
- Lower the vehicle.
- Fill the cooling system. Refer to Cooling System Draining and Filling.

Caution: Refer to Fastener Caution in the Preface section.
Tighten
Tighten the coolant heater to 50 N·m (37 lb ft).

Notice: The heater cord must not touch the engine, hot pipes, manifold, or any moving parts. Route the cord to the left front of the engine compartment securing with tie straps as necessary to prevent damage.
