For 1990-2009 cars only
Removal Procedure
- Disable the SIR system. Refer to SIR Disabling and Enabling.
- Remove the instrument panel (I/P) storage compartment door. Refer to Instrument Panel Storage Compartment Replacement.
- Remove the left and right windshield garnish moldings. Refer to Windshield Pillar Garnish Molding Replacement.
- Remove the left and right front door sill plates. Refer to Front Side Door Sill Trim Plate Replacement.
- Remove the left and right hinge pillar trim panels. Refer to Body Hinge Pillar Trim Panel Replacement - Left Side and Body Hinge Pillar Trim Panel Replacement - Right Side.
- Remove the lower center I/P extension. Refer to Instrument Panel Lower Center Trim Replacement.
- Remove the accessory trim panel. Refer to Instrument Panel Accessory Trim Plate Replacement.
- Remove the radio. Refer to Radio Replacement.
- Remove the HVAC control assembly. Refer to Heater and Air Conditioning Control Replacement.
- If replacing the I/P assembly, remove the left air outlet. Refer to Instrument Panel Outer Air Outlet Replacement - Left Side.
- Remove the right air outlet. Refer to Instrument Panel Outer Air Outlet Replacement - Right Side.
- Remove the knee bolster trim panel. Refer to Driver Knee Bolster Panel Replacement.
- Remove the knee bolster. Refer to Knee Bolster Replacement.
- Remove the instrument panel cluster (IPC) bezel. Refer to Instrument Panel Cluster Trim Plate Bezel Replacement.
- Remove the IPC. Refer to Instrument Cluster Replacement.
- If replacing the I/P, remove the headlamp switch and retain for transfer. Refer to Headlamp Switch Replacement.
- Remove the daytime running lamp (DRL) sensor from the I/P. Refer to Ambient Light Sensor Replacement.
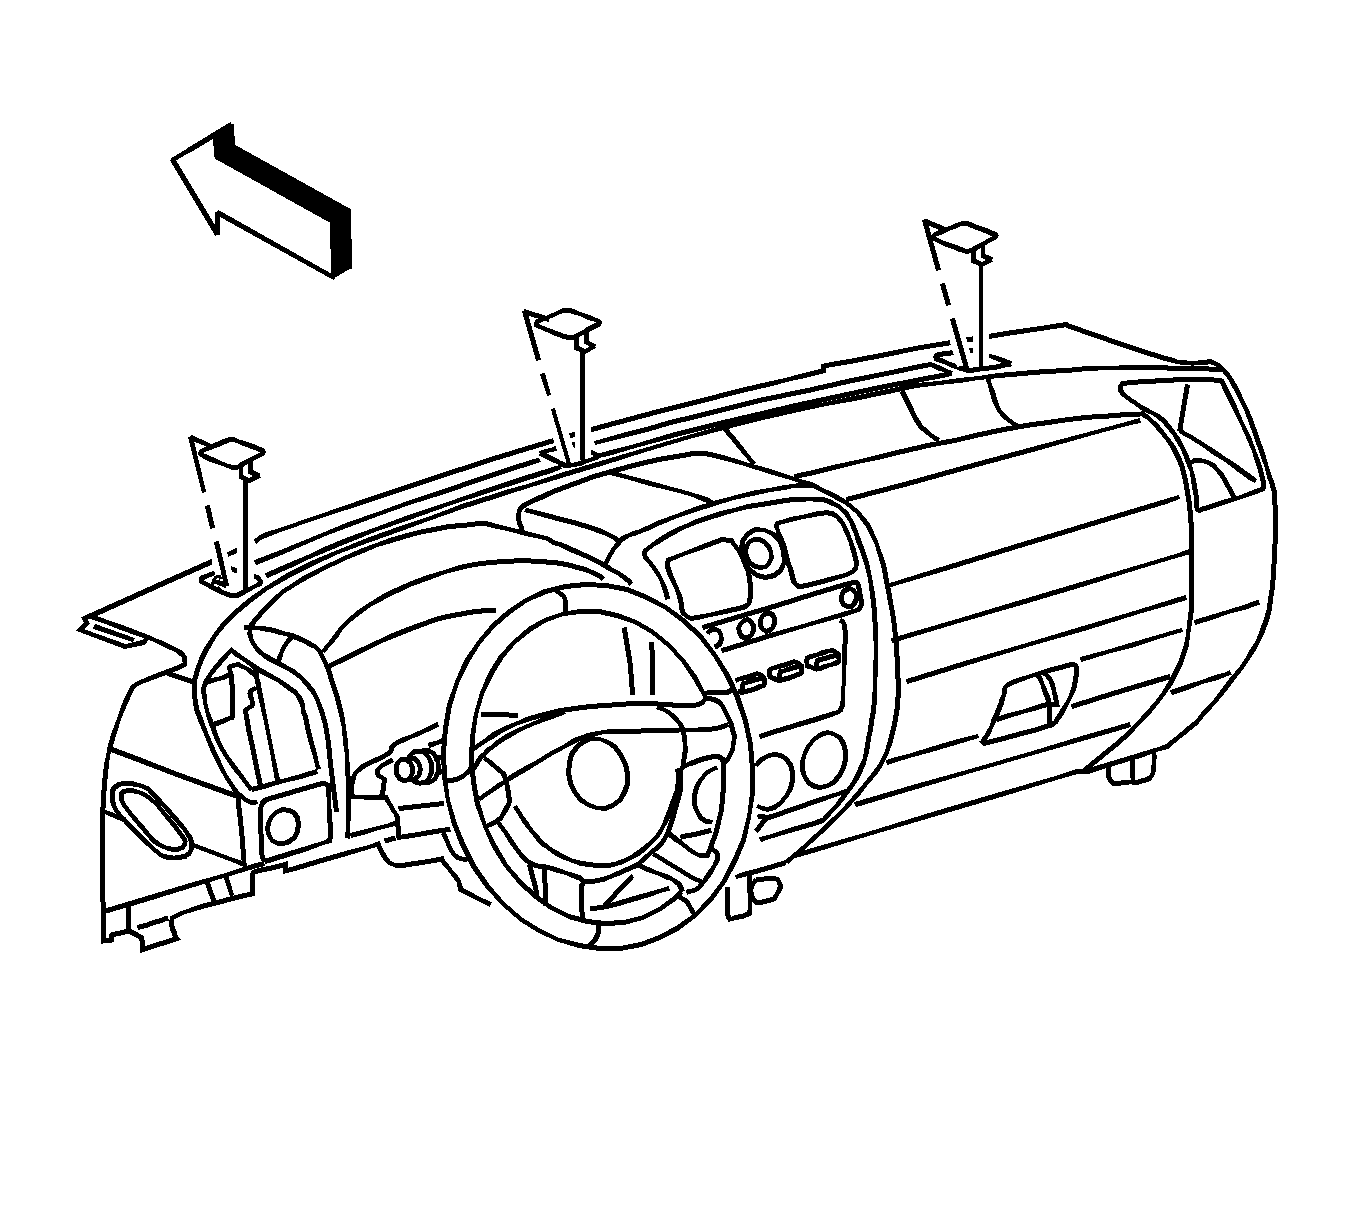
- Remove the 3 upper I/P bolt covers located on top of the I/P.
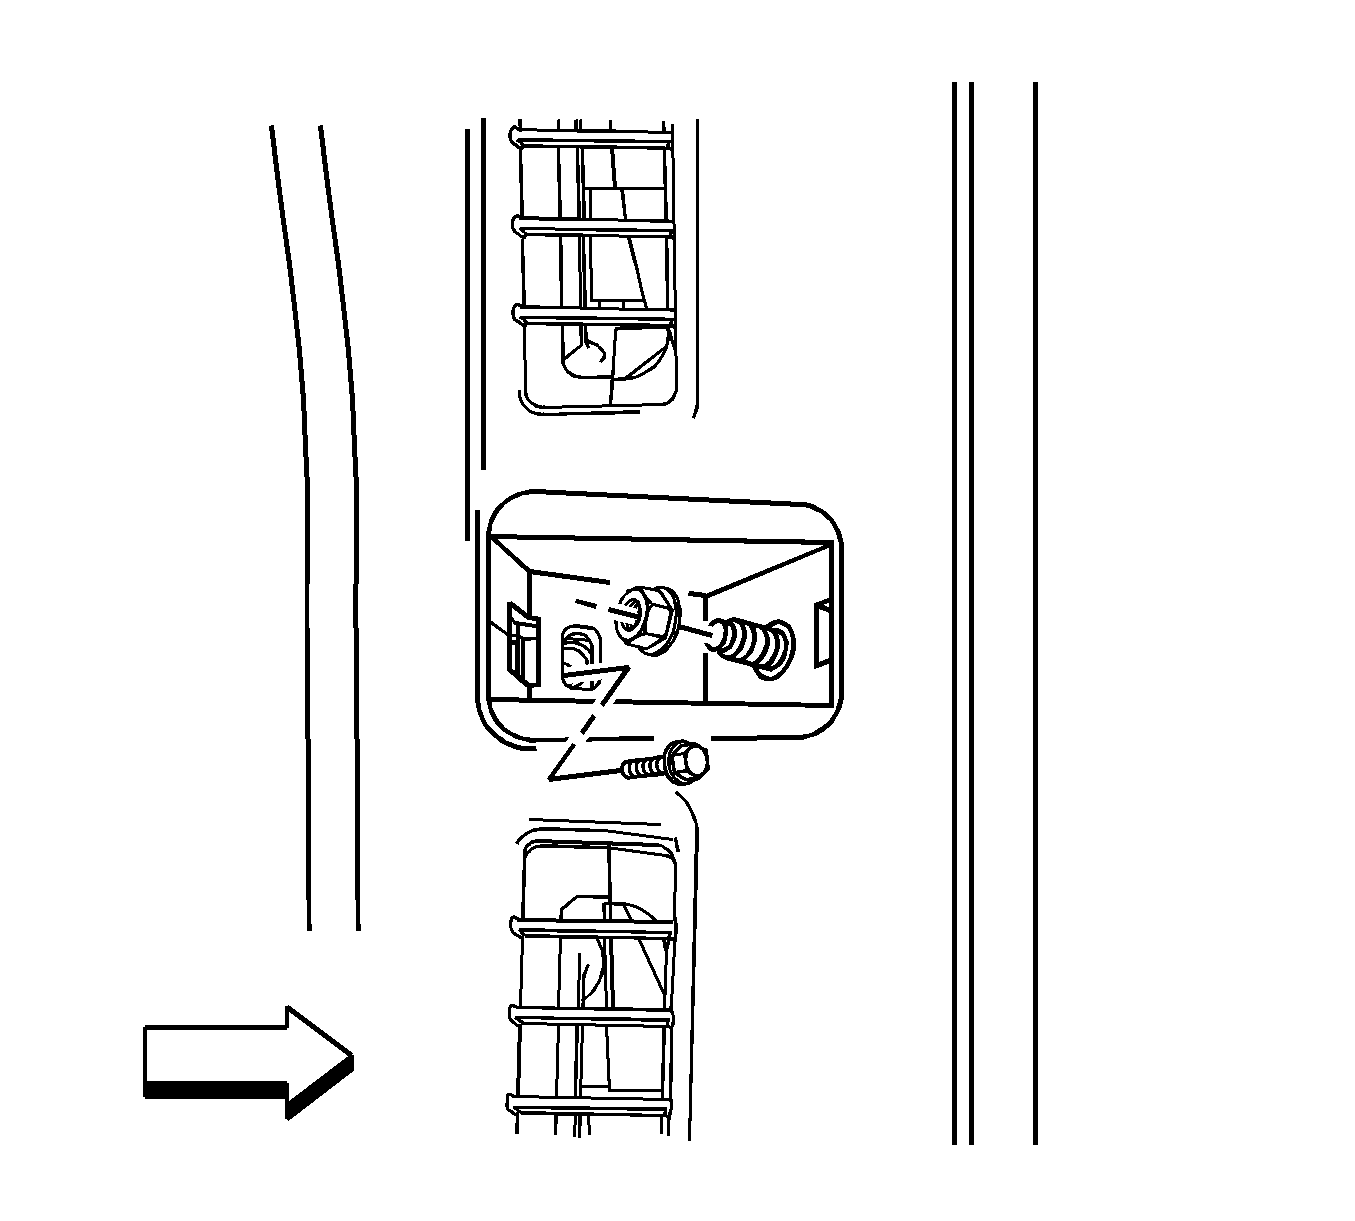
- Remove the 3 upper I/P nuts retaining the I/P to the bulkhead.
- Remove the 3 upper HVAC duct screws retaining the duct to the I/P.
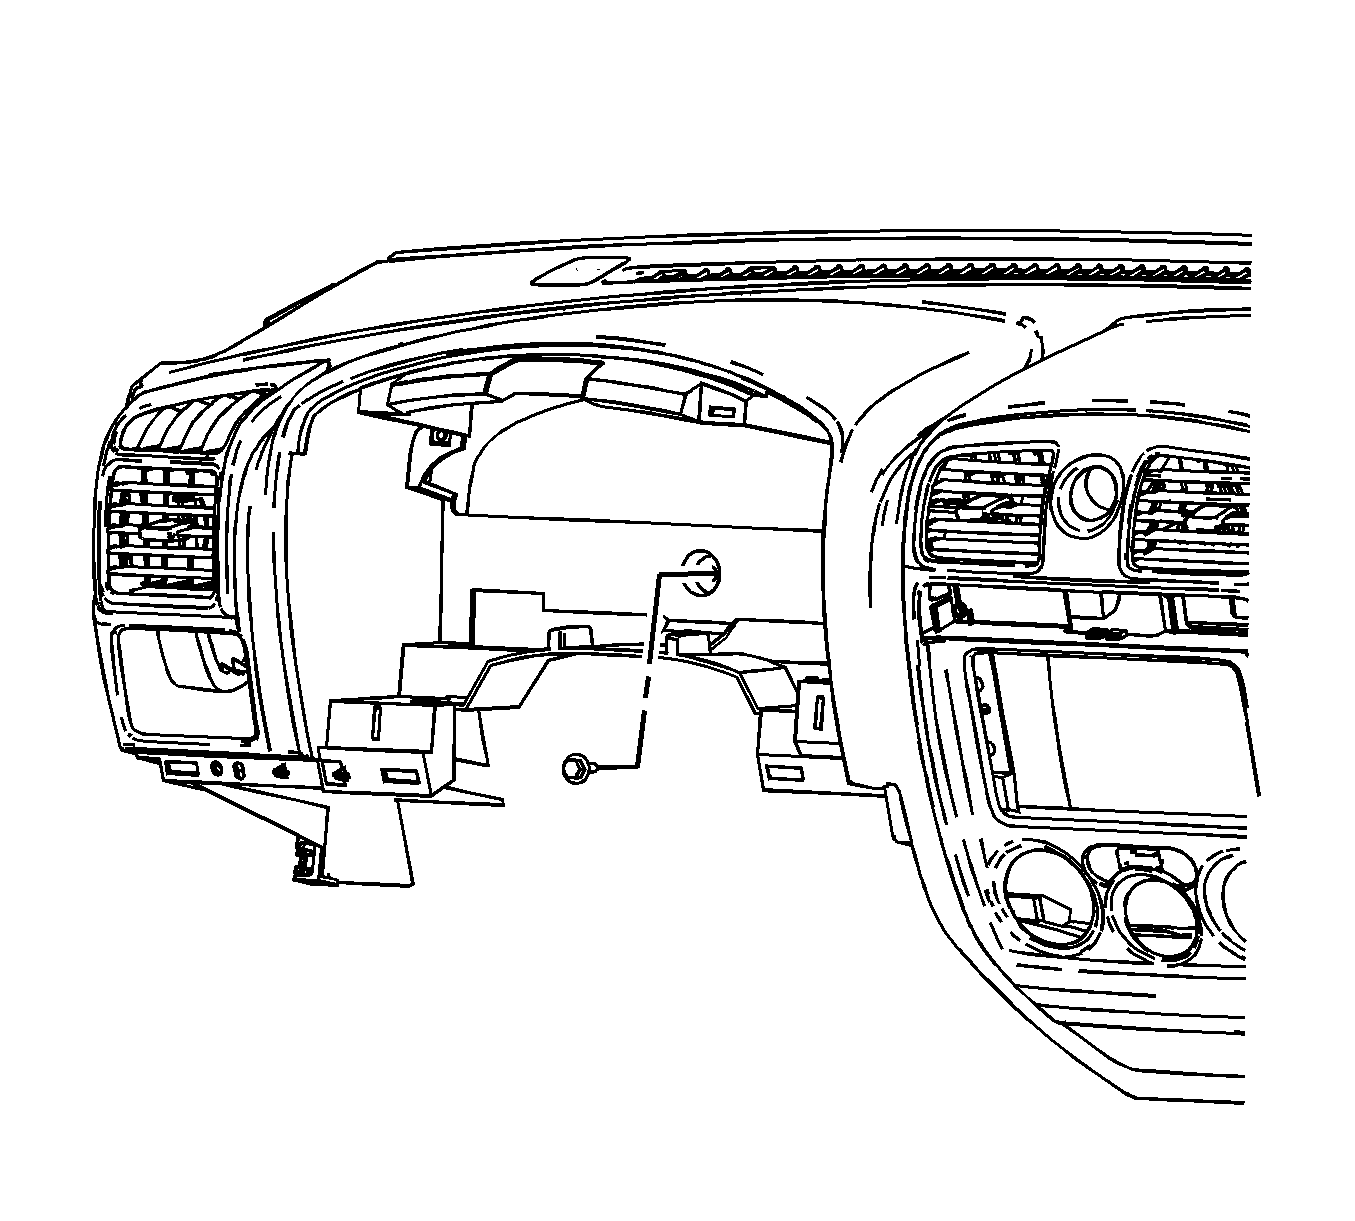
- Remove the screw located behind the IPC.
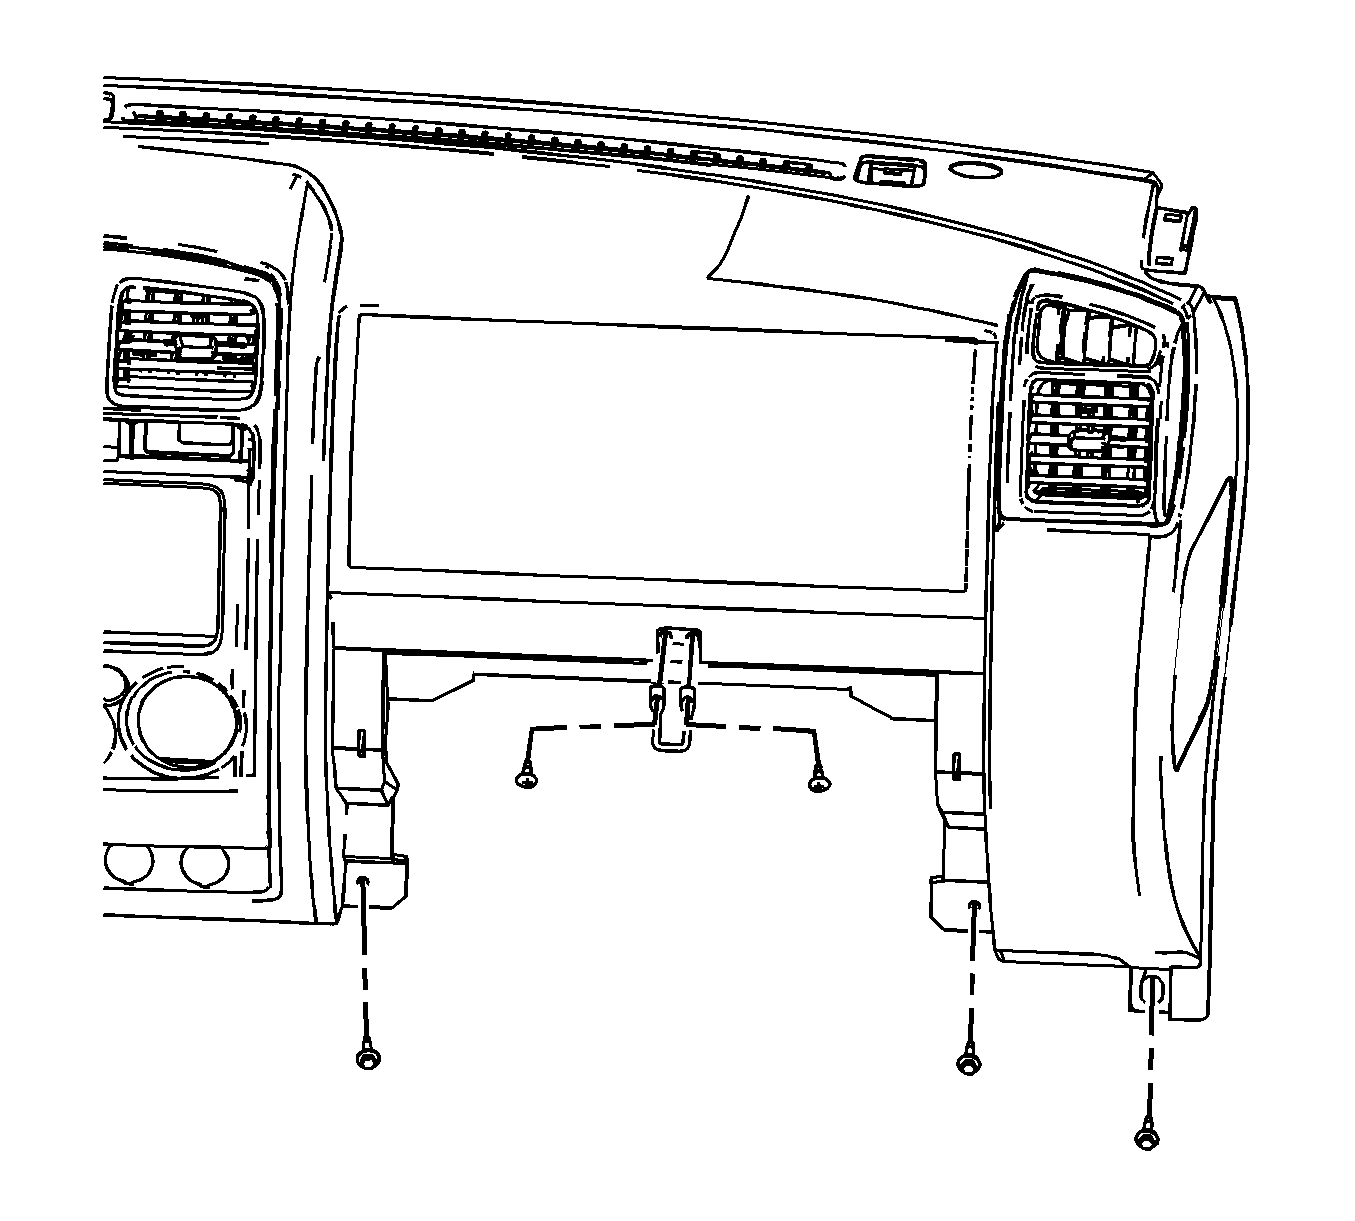
- Remove the 2 screws retaining the I/P compartment door latch.
- Remove the 3 lower I/P retaining screws located near the I/P storage compartment.
- Remove the hazard switch harness from the routing hole.
- Remove the digital radio receiver. Refer to Digital Radio Receiver Replacement.
- Remove the instrument panel module (IPM). Refer to Instrument Panel Inflatable Restraint Module Replacement.
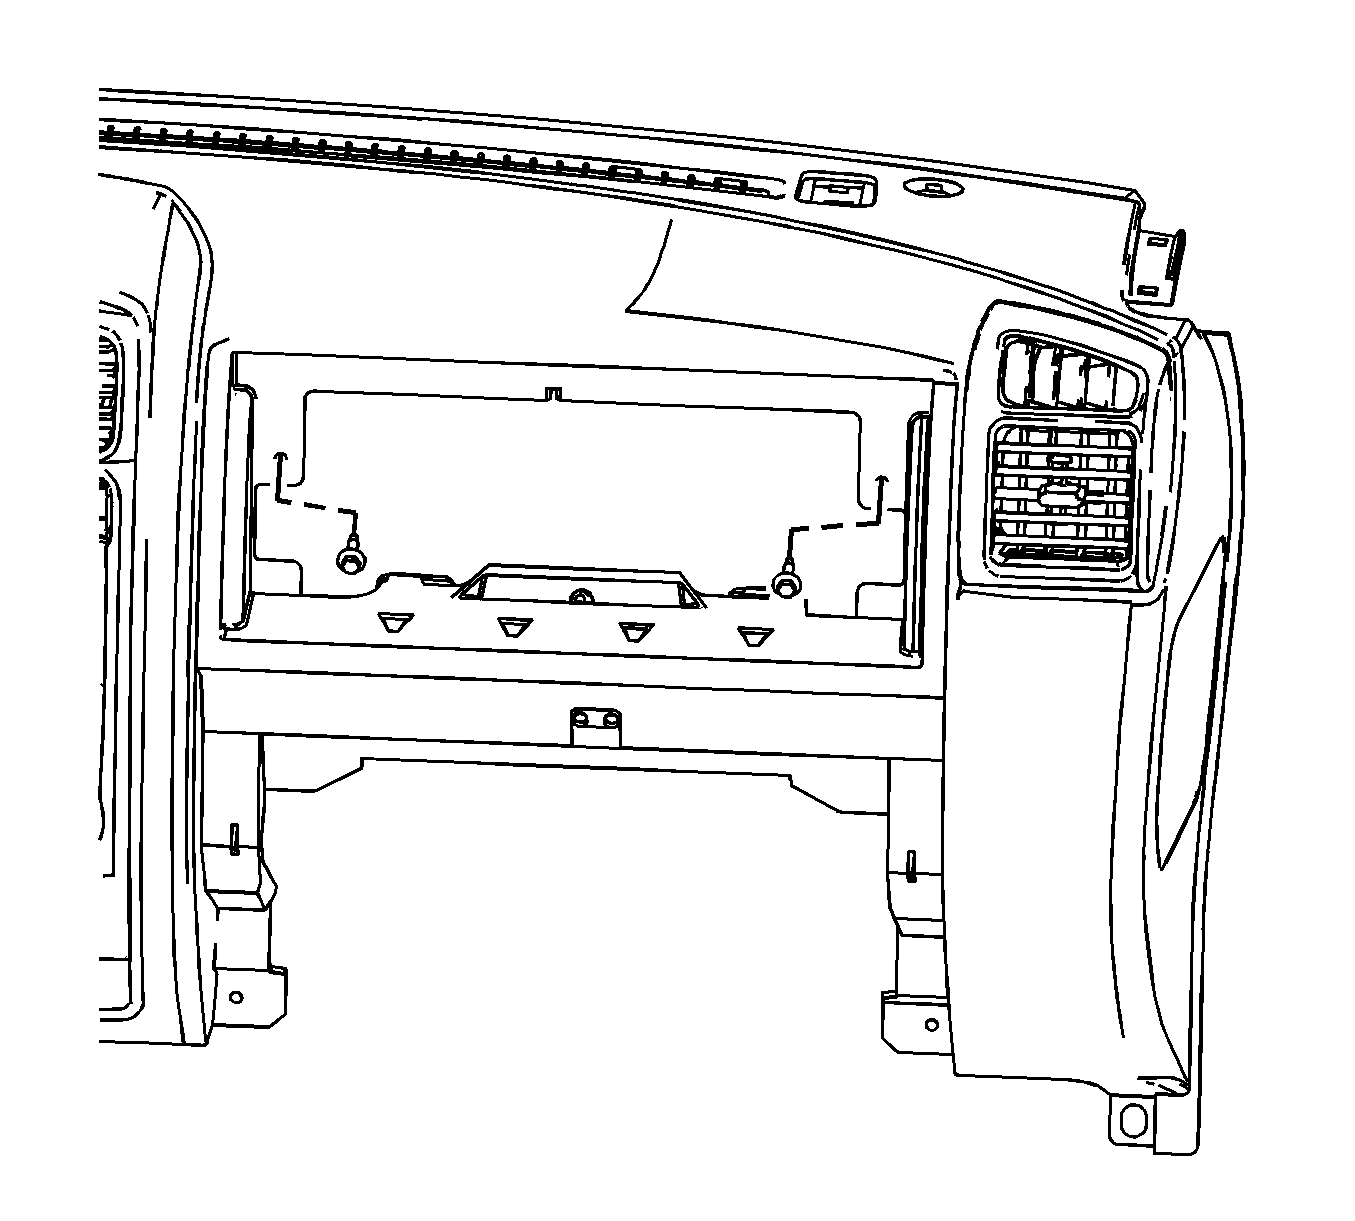
- Remove the 2 screws located in the IPM opening.
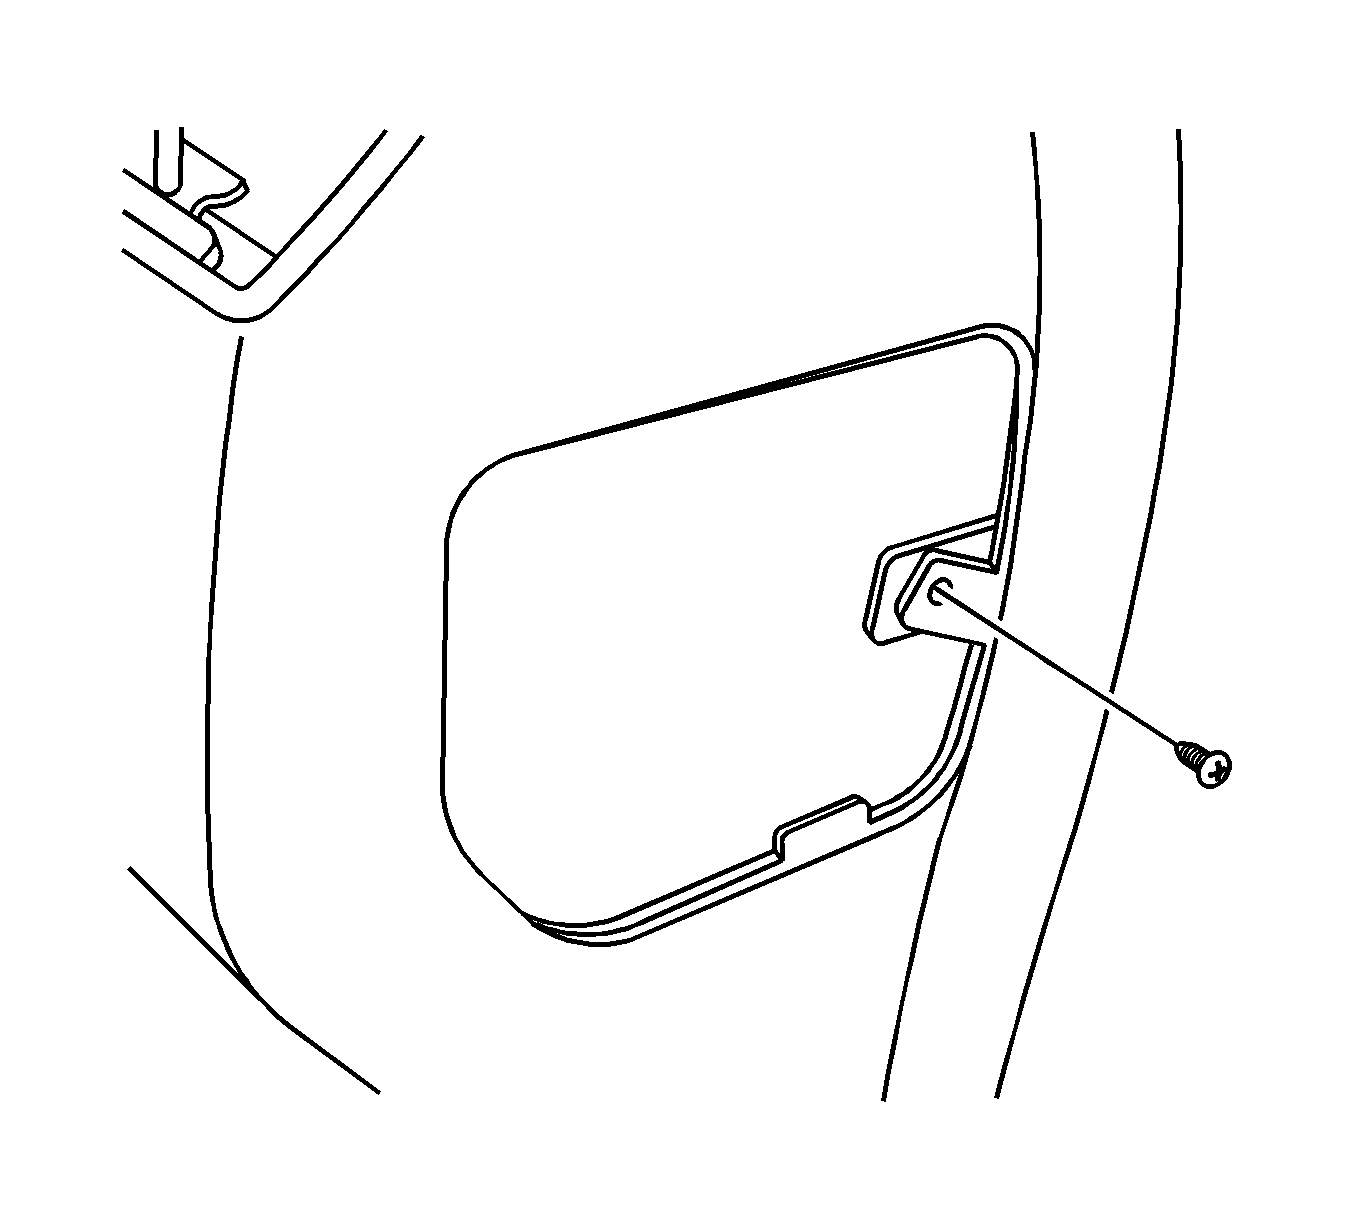
- Remove the screw from the I/P end cap.
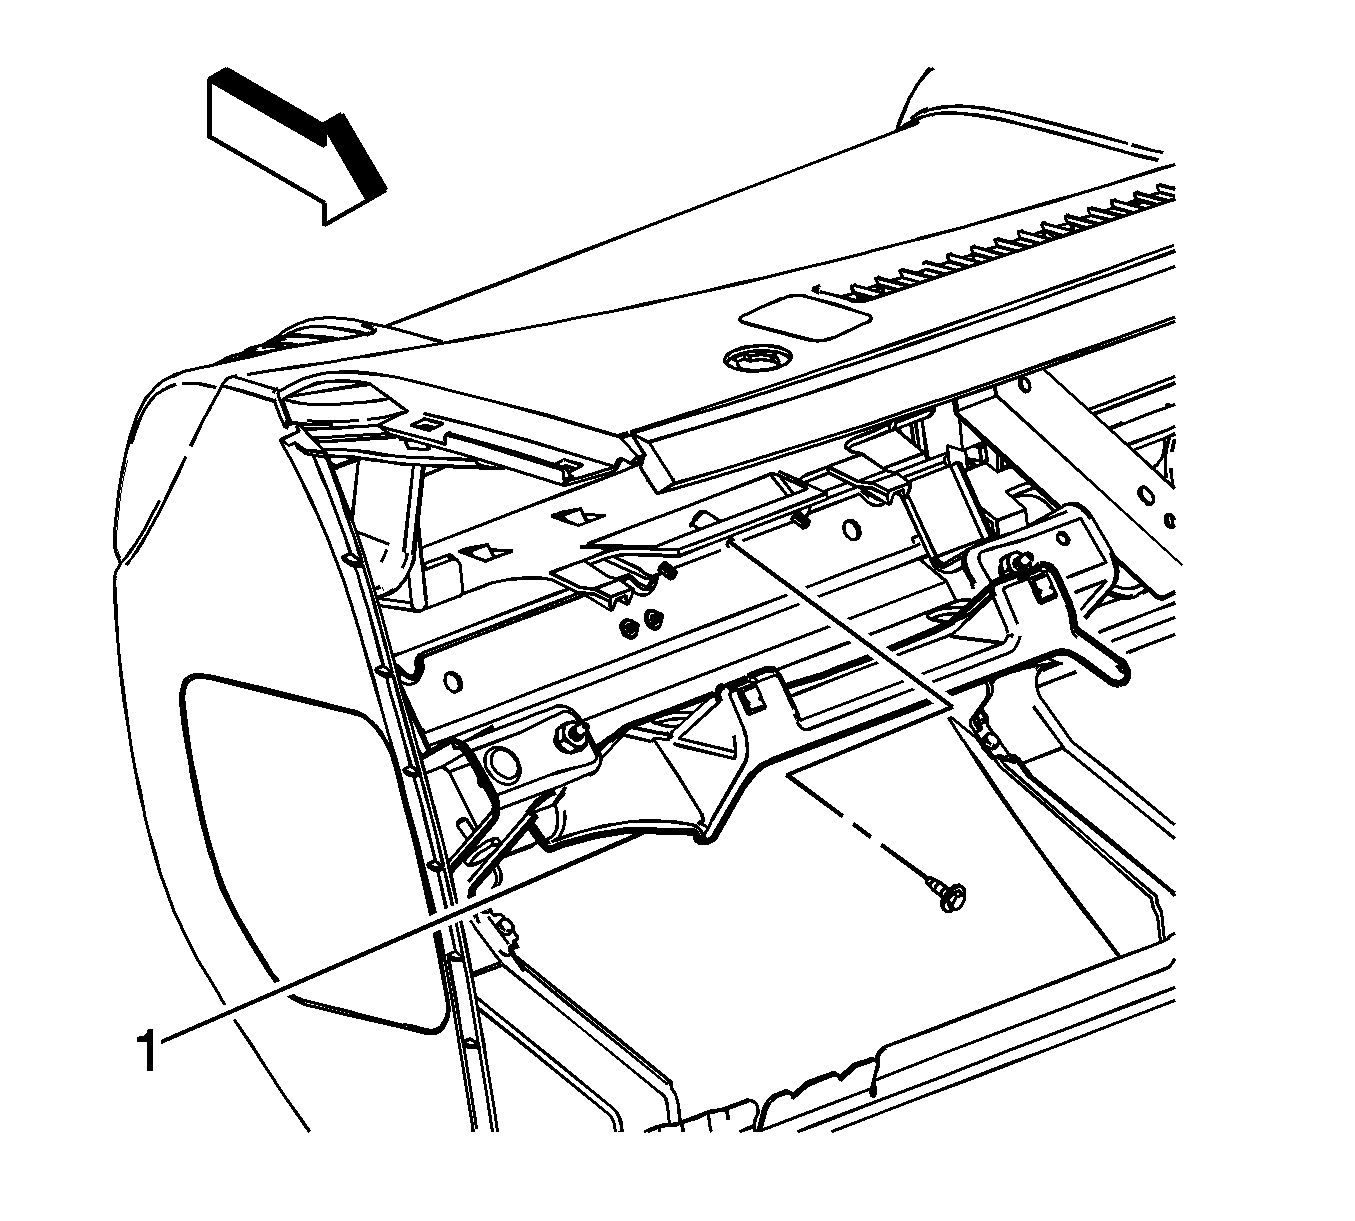
- Pull the I/P compartment folding panel (1) down and rearward to reveal the screw.
- Reach through the I/P storage compartment opening and remove the screw retaining the I/P carrier to the I/P structure.
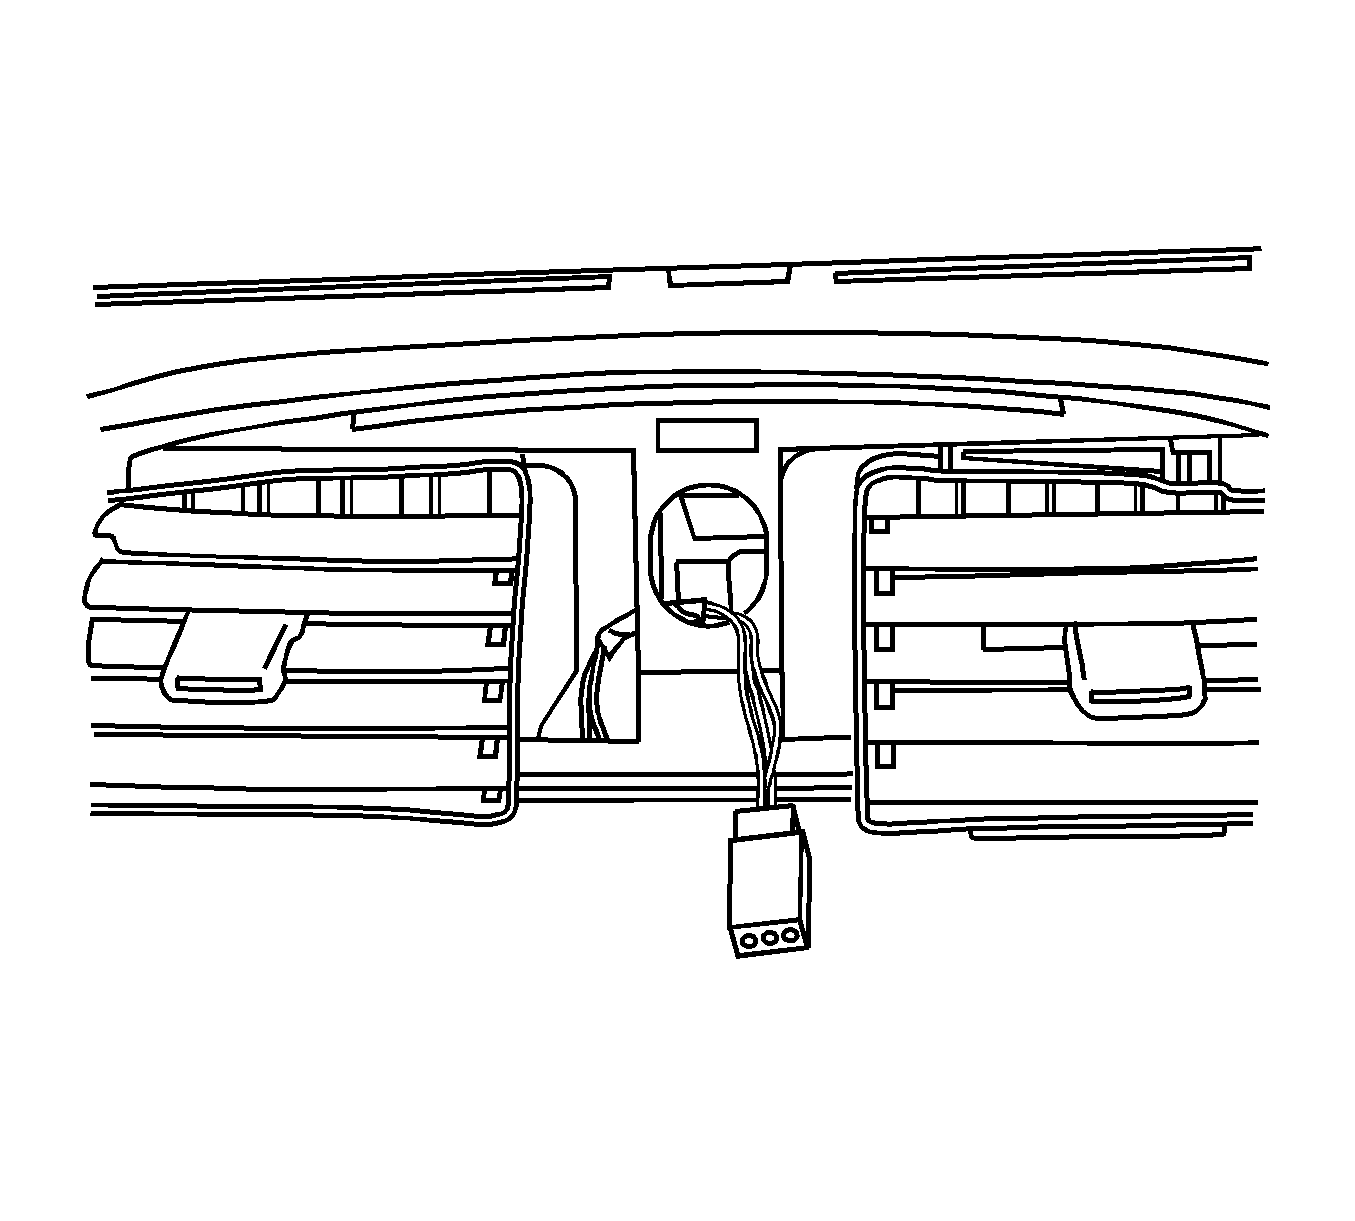
- If equipped, disconnect the accessory power outlet electrical connectors.
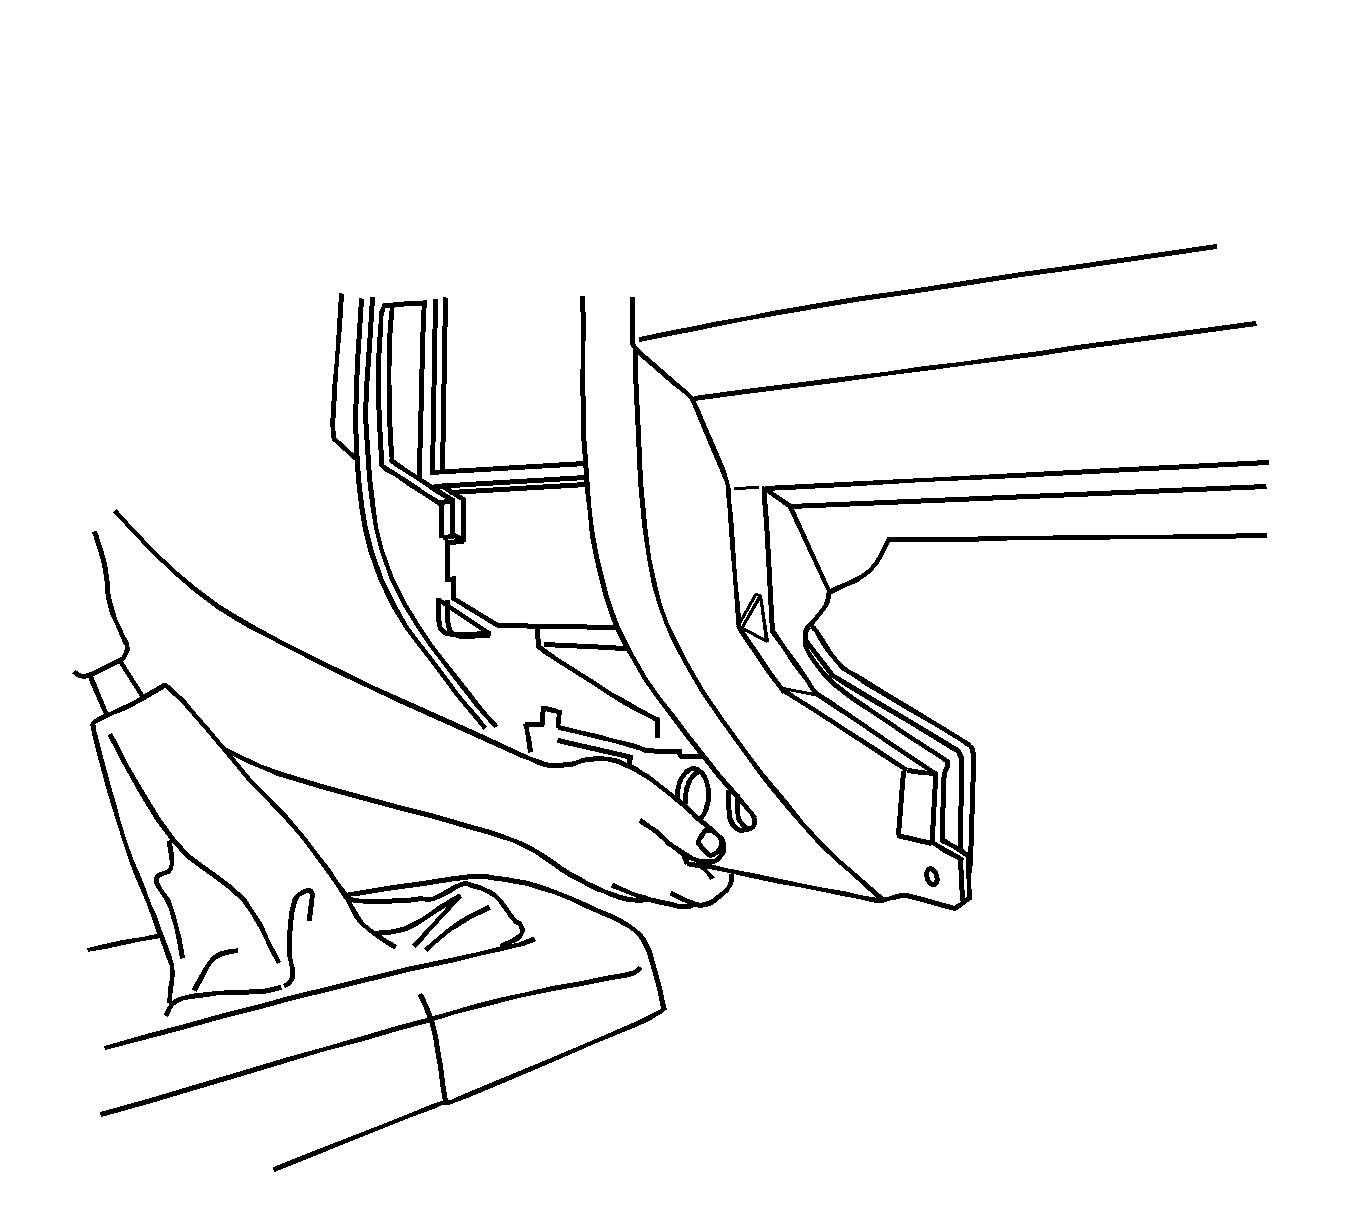
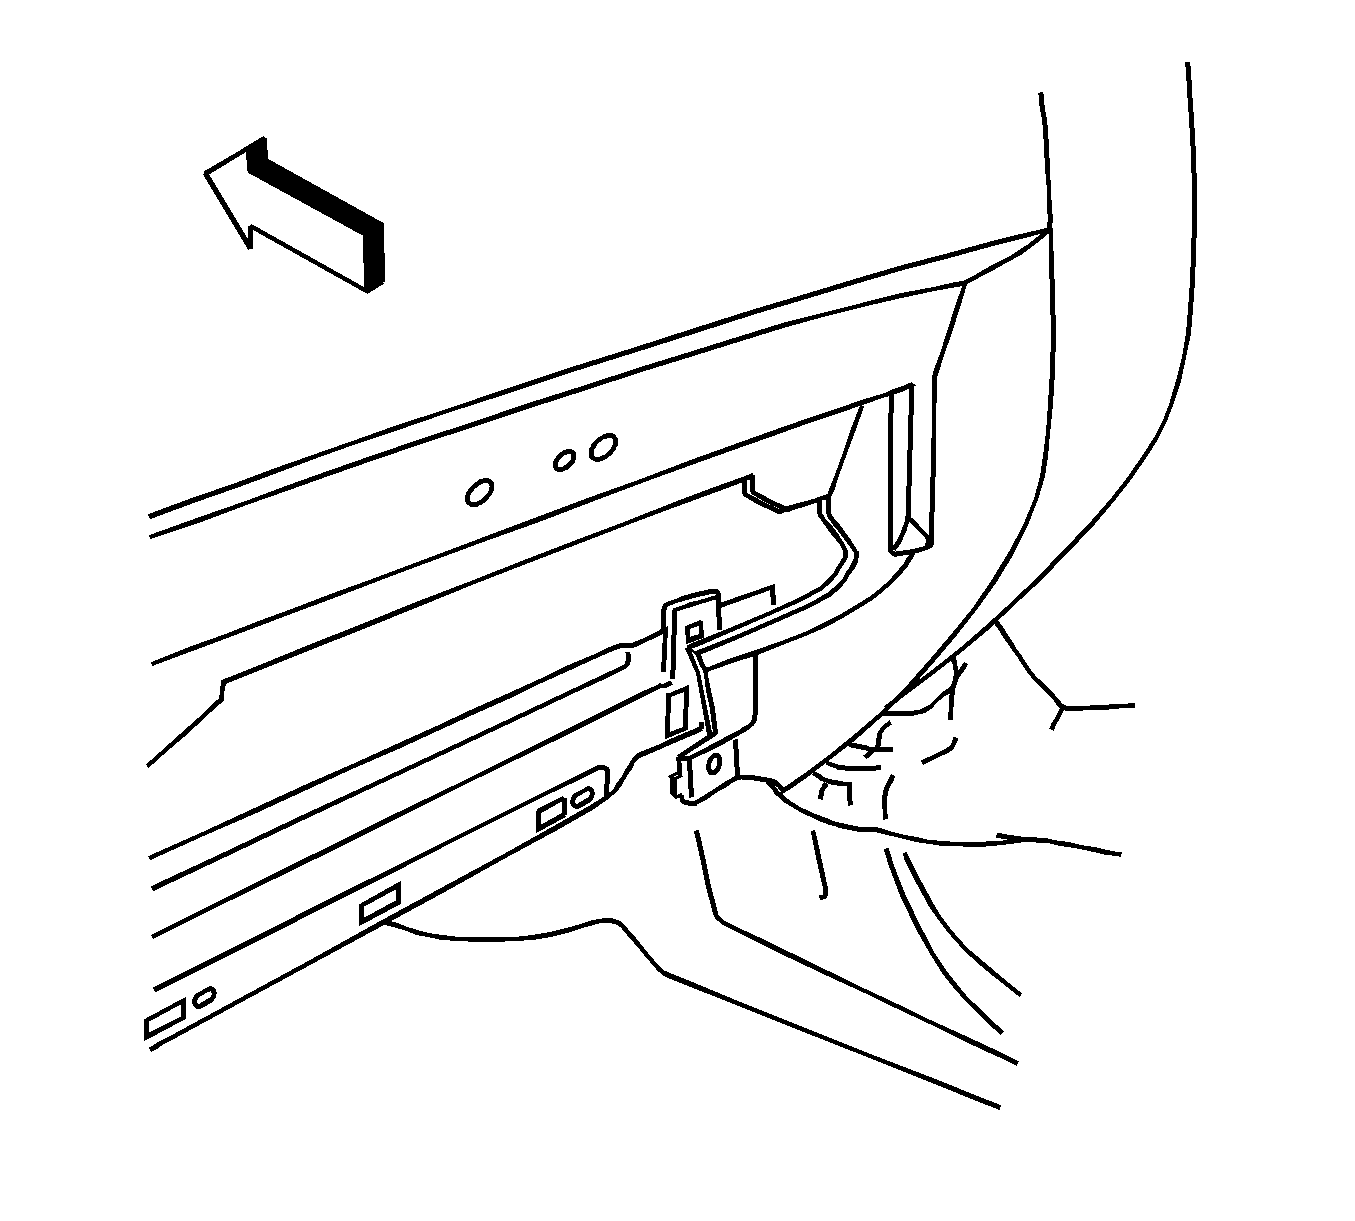
- Grasp the lower center edge of the I/P and pull rearward in order to release the 2 retaining clips.
- Grasp the lower right edge of the I/P and pull rearward in order to release the retaining clip.
- Pull the I/P partially away from the I/P structure.
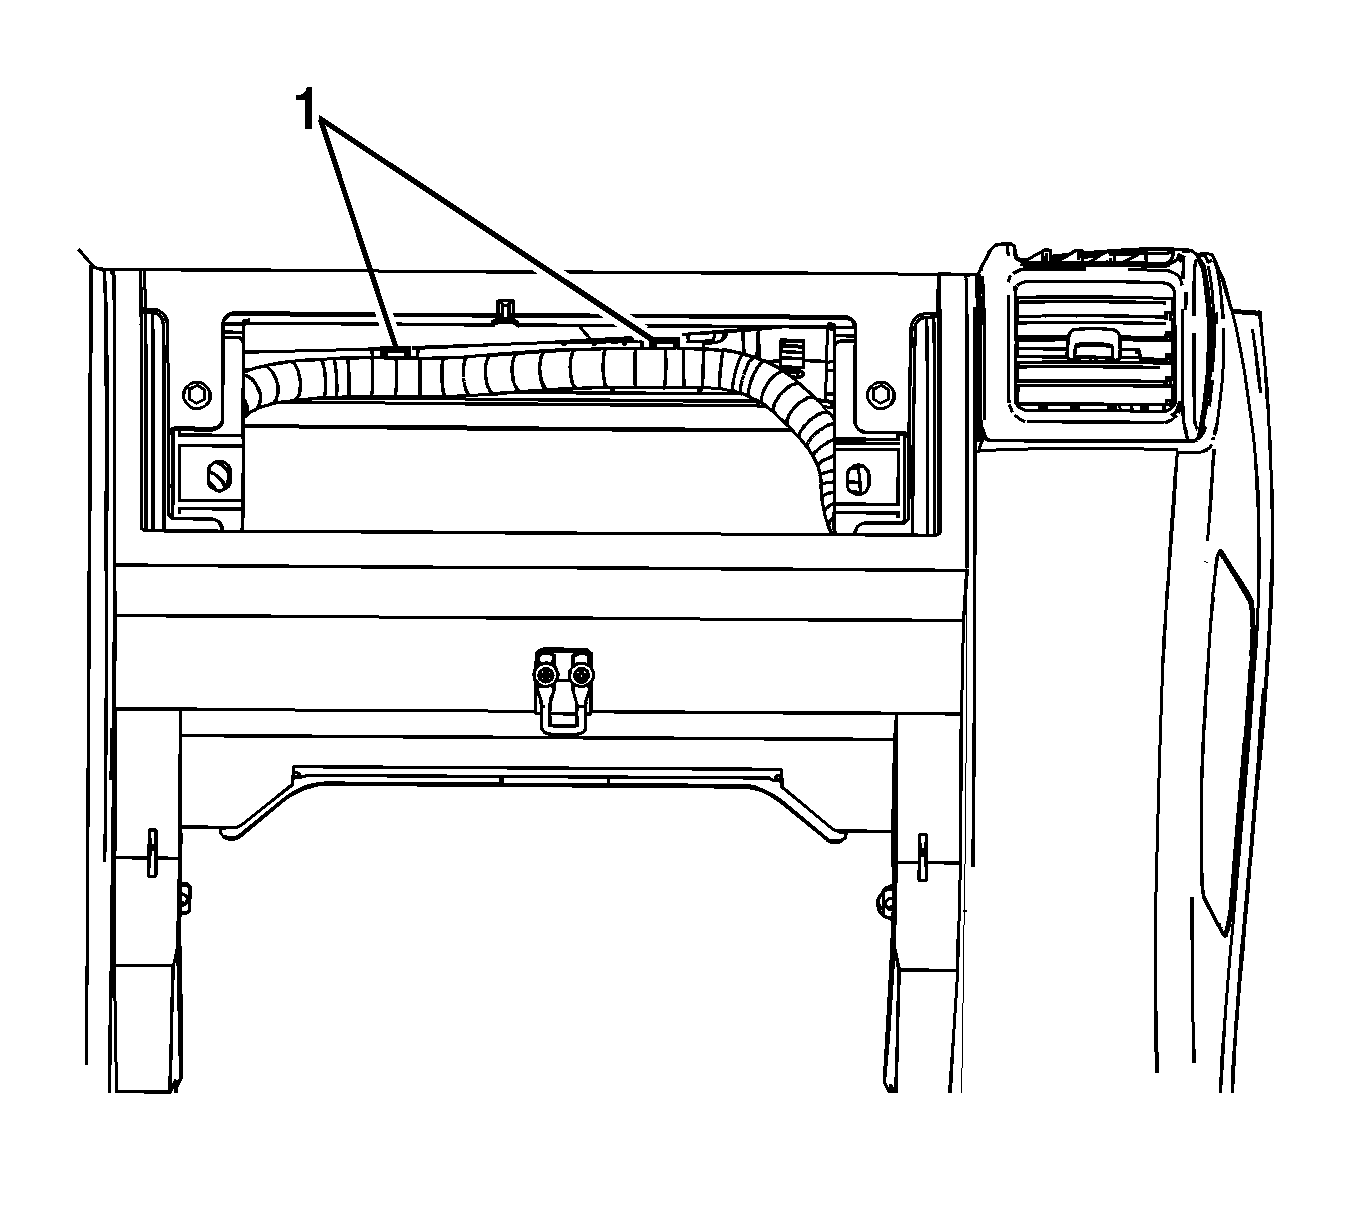
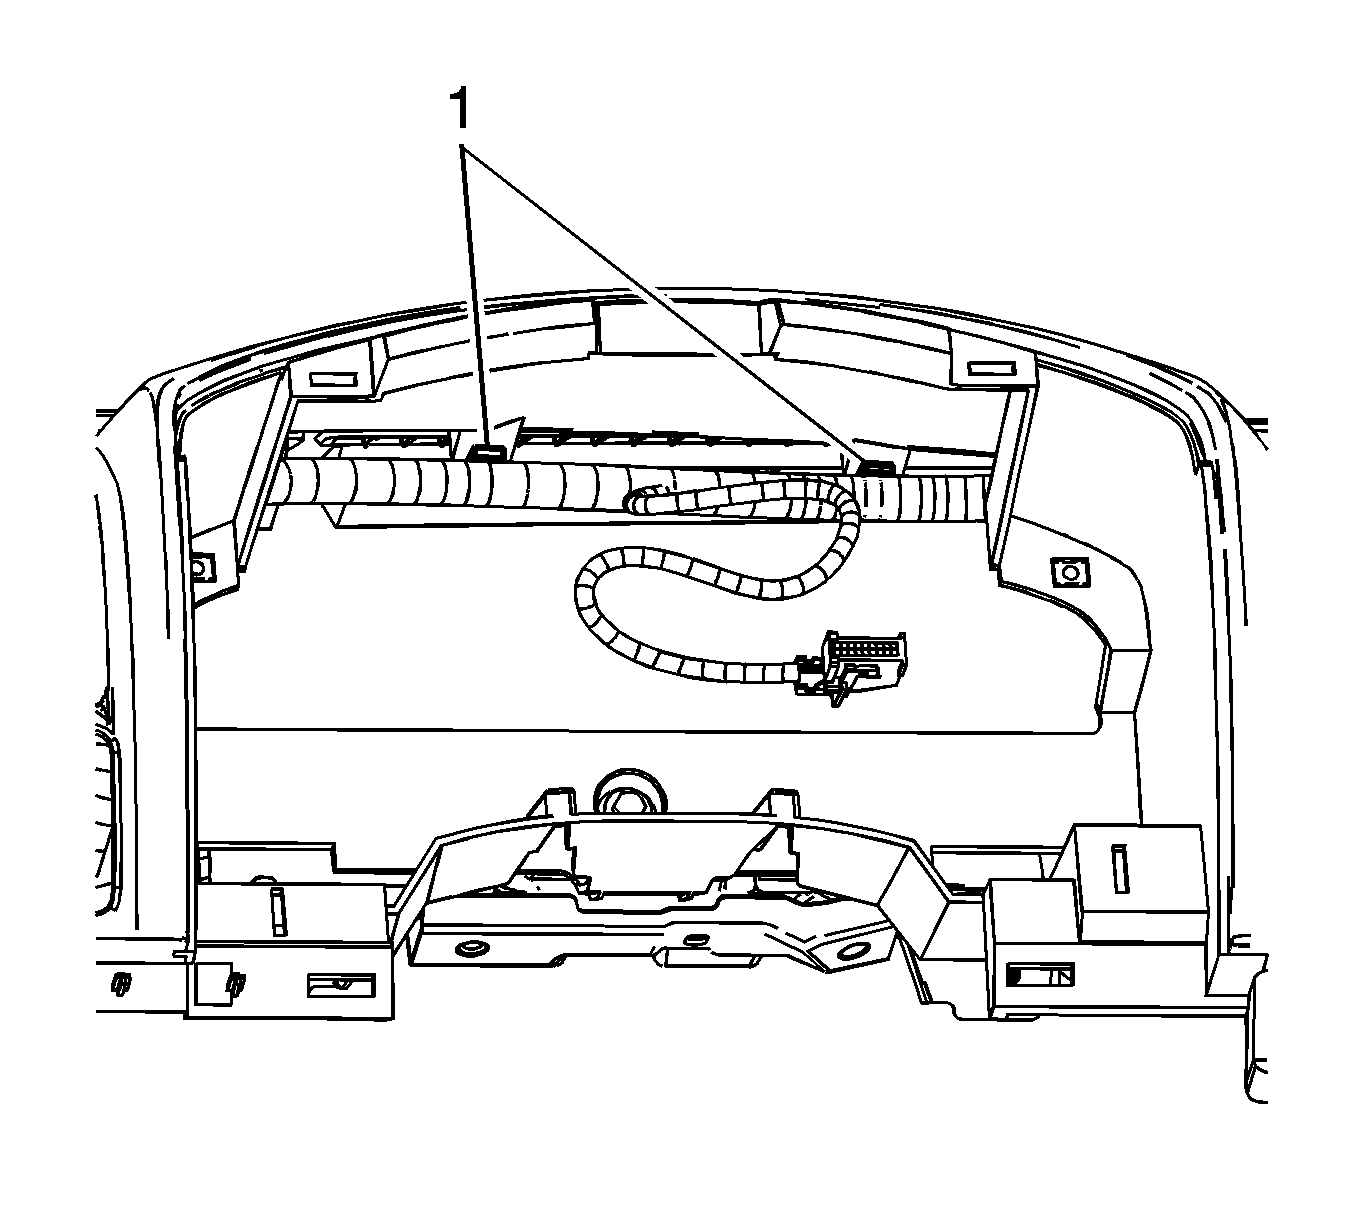
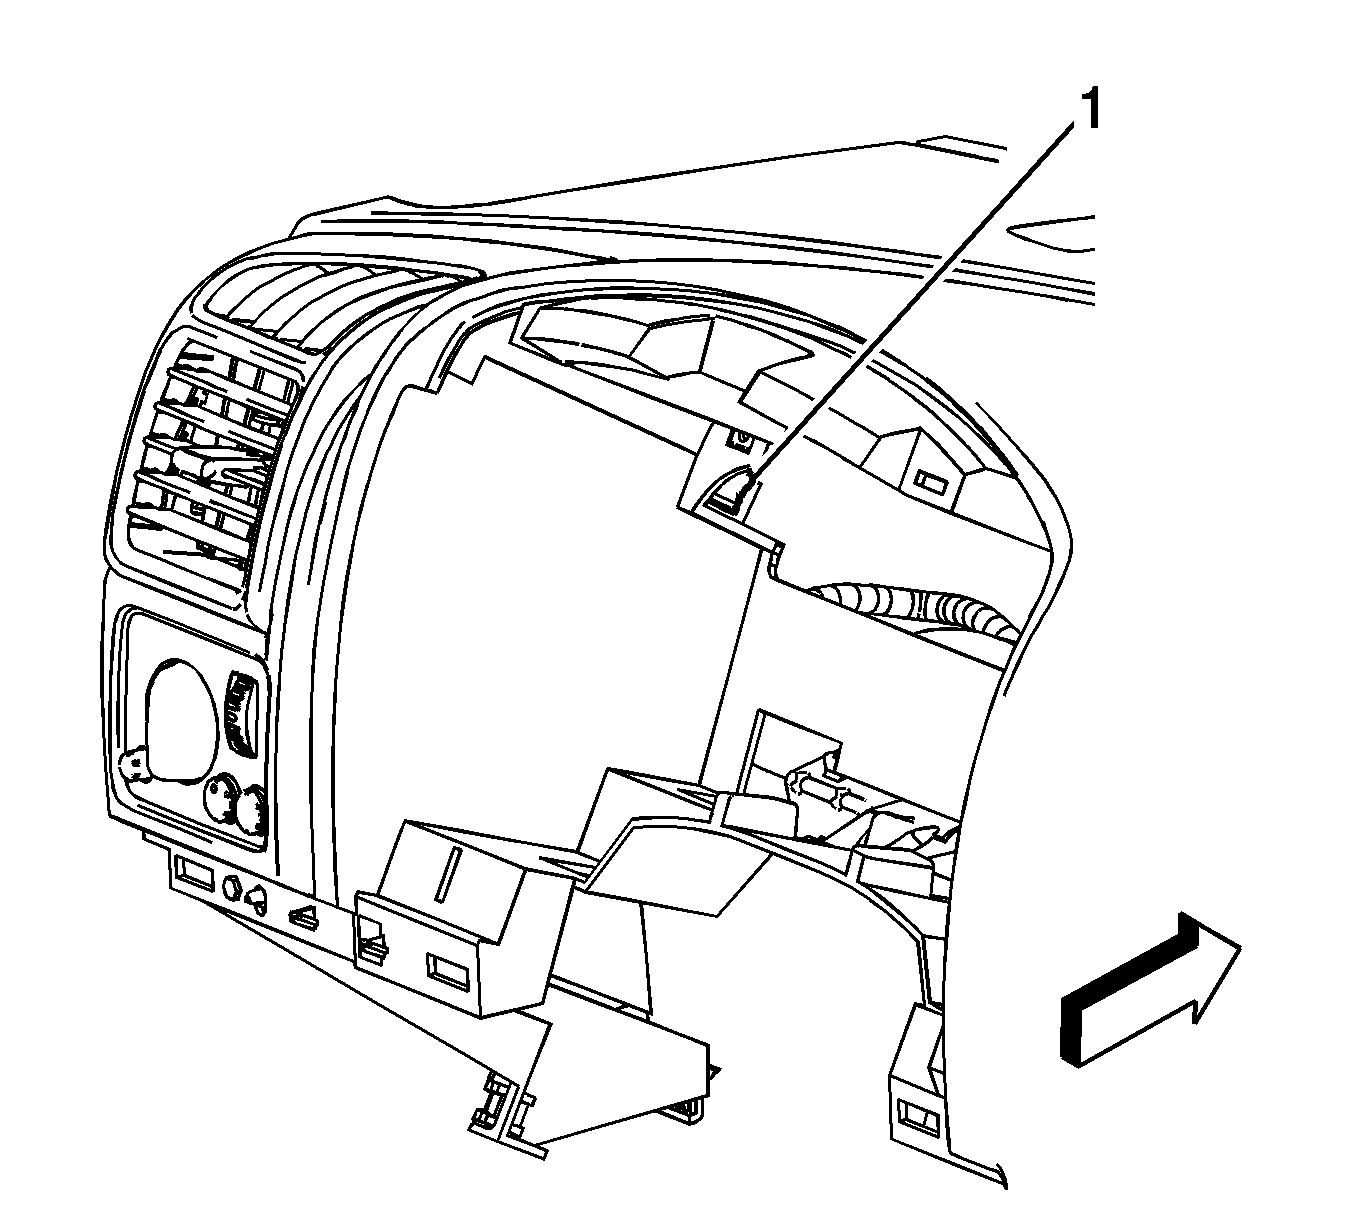
- Reach through the IPM opening and remove the I/P wiring harness clips (1) from the I/P.
- Reach through the center stack opening and remove the I/P wiring harness clips (1) from the HVAC vent.
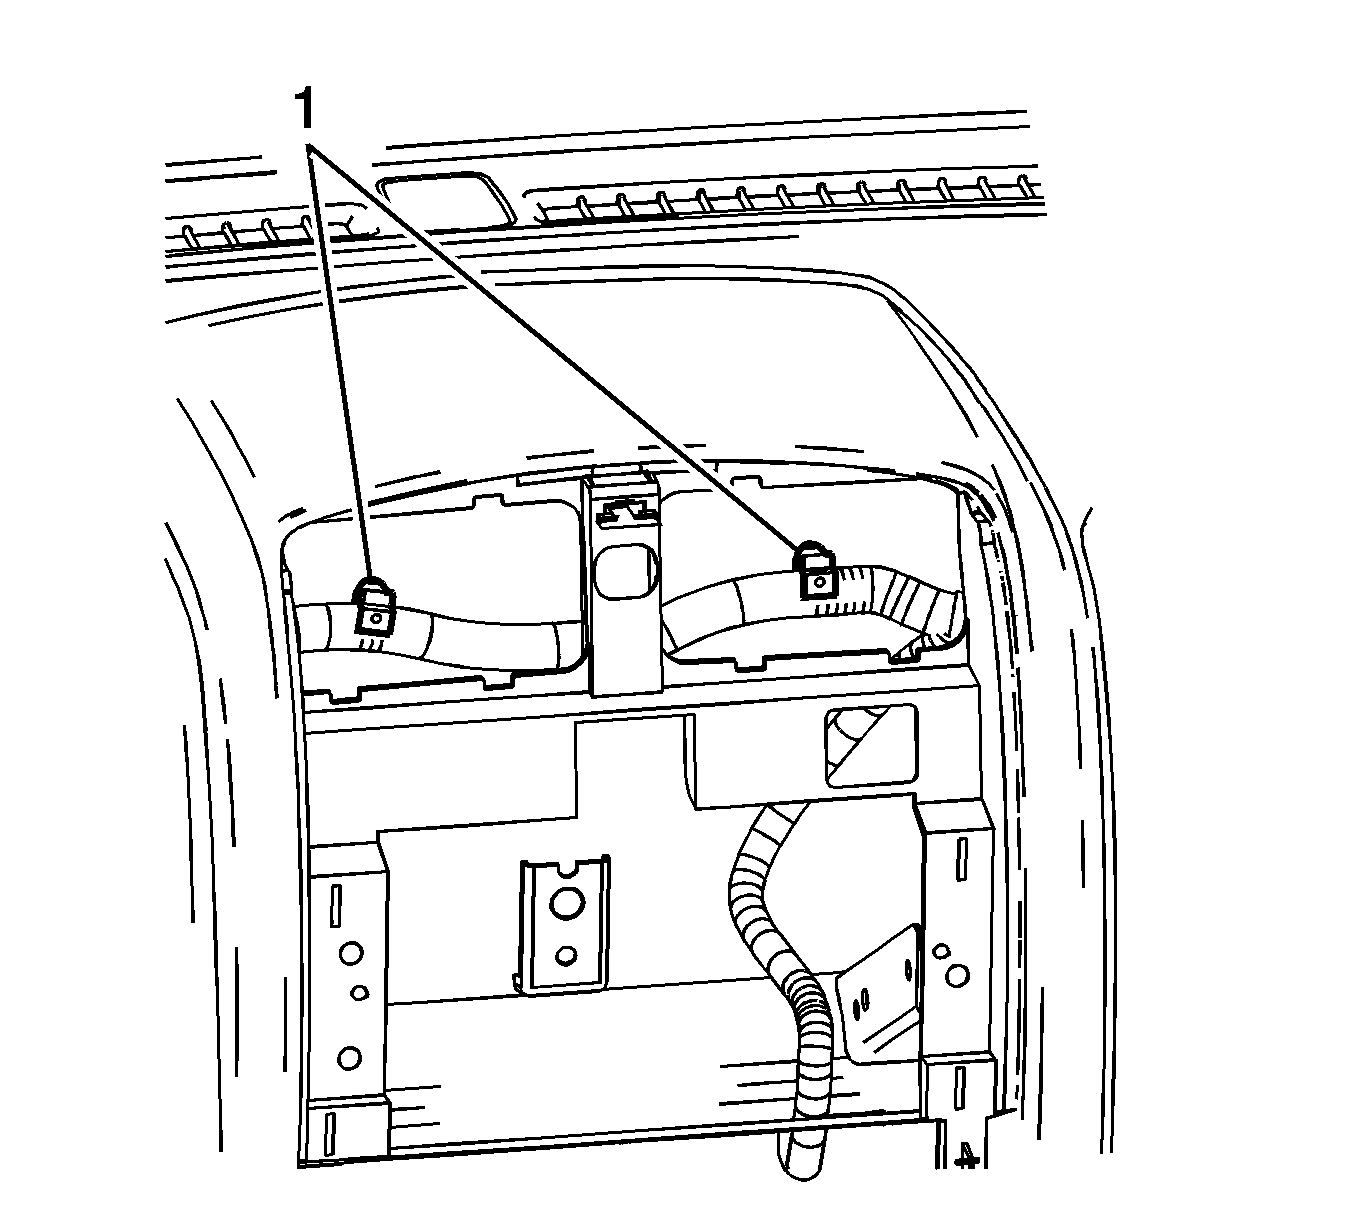
- Reach through the IPC opening and remove the I/P wiring harness clips (1) from the I/P.
- Reach through the left side of the IPC opening and remove the I/P wiring harness clips (1) from the I/P.
- With the aid of an assistant, carefully remove the I/P from the vehicle.
If removing the I/P, disconnect the headlamp switch electrical connector.
Installation Procedure
- With the aid of an assistant, partially install the I/P to the I/P structure.
- Reach through the left side of the IPC opening and install the I/P wiring harness clips (1) to the I/P.
- Reach through the IPC opening and install the I/P wiring harness clips (1) to the I/P.
- Reach through the center stack opening and install the I/P wiring harness clips (1) to the HVAC vent.
- Reach through the IPM opening and install the I/P wiring harness clips (1) to the I/P.
- Ensure all the wire harness and electrical connectors are not pinched between the I/P and I/P structure.
- Connect the electrical connectors to the power outlets.
- Grasp the lower center edge of the I/P and seat the 2 retaining clips.
- Grasp the lower right edge of the I/P and seat the retaining clip.
- Install the 3 upper HVAC duct screws retaining the duct to the I/P. Tighten the screws to 3 N·m (27 lb in).
- Install the 3 upper nuts retaining the I/P to the bulkhead. Tighten the nuts to 9 N·m (80 lb in).
- Pull the I/P compartment folding panel (1) down and rearward to reveal the screw installation area.
- Reach through the I/P storage compartment opening and install the screw retaining the I/P carrier to the I/P structure. Tighten the screw to 3 N·m (27 lb in).
- Install the 2 screws located in the IPM opening. Tighten the screws to 3 N·m (27 lb in).
- Install the end cap screw. Tighten the screws to 2.5 N·m (22 lb in).
- Install the hazard switch harness through the routing hole.
- Install the 2 screws retaining the I/P compartment door latch. Tighten the screws to 3 N·m (27 lb in).
- Install the 3 lower I/P retaining screws located near the I/P storage compartment. Tighten the screws to 9 N·m (80 lb in).
- Install the screw located behind the IPC. Tighten the screw to 9 N·m (80 lb in).
- Install the 3 upper I/P bolt covers located on top of the I/P.
- Install the DRL sensor to the I/P. Refer to Ambient Light Sensor Replacement.
- If replacing the I/P, install the headlamp switch. Refer to Headlamp Switch Replacement.
- Install the left air outlet. Refer to Instrument Panel Outer Air Outlet Replacement - Left Side.
- Install the IPC. Refer to Instrument Cluster Replacement.
- Install the IPC bezel. Refer to Instrument Panel Cluster Trim Plate Bezel Replacement.
- Install the knee bolster. Refer to Knee Bolster Replacement.
- Install the knee bolster trim panel. Refer to Driver Knee Bolster Panel Replacement.
- Install the IPM. Refer to Instrument Panel Inflatable Restraint Module Replacement.
- Install the digital radio receiver. Refer to Digital Radio Receiver Replacement.
- Install the right air outlet. Refer to Instrument Panel Outer Air Outlet Replacement - Right Side.
- Install the HVAC control assembly. Refer to Heater and Air Conditioning Control Replacement.
- Install the radio. Refer to Radio Replacement.
- Install the accessory trim panel. Refer to Instrument Panel Accessory Trim Plate Replacement.
- Install the I/P storage compartment door. Refer to Instrument Panel Storage Compartment Replacement.
- Install the left and right windshield garnish moldings. Refer to Windshield Pillar Garnish Molding Replacement.
- Install the left and right hinge pillar trim panels. Refer to Body Hinge Pillar Trim Panel Replacement - Left Side and Body Hinge Pillar Trim Panel Replacement - Right Side.
- Install the left and right front door sill plates. Refer to Front Side Door Sill Trim Plate Replacement.
- Install the lower center I/P extension. Refer to Instrument Panel Lower Center Trim Replacement.
- Enable the SIR system. Refer to SIR Disabling and Enabling.


Caution: Refer to Fastener Caution in the Preface section.


If reinstalling the original I/P, connect the headlamp switch electrical connector.
