For 1990-2009 cars only
Removal Procedure
- Remove the seat from the vehicle. Refer to Front Seat Replacement - Bucket or Split Bench Seat Replacement .
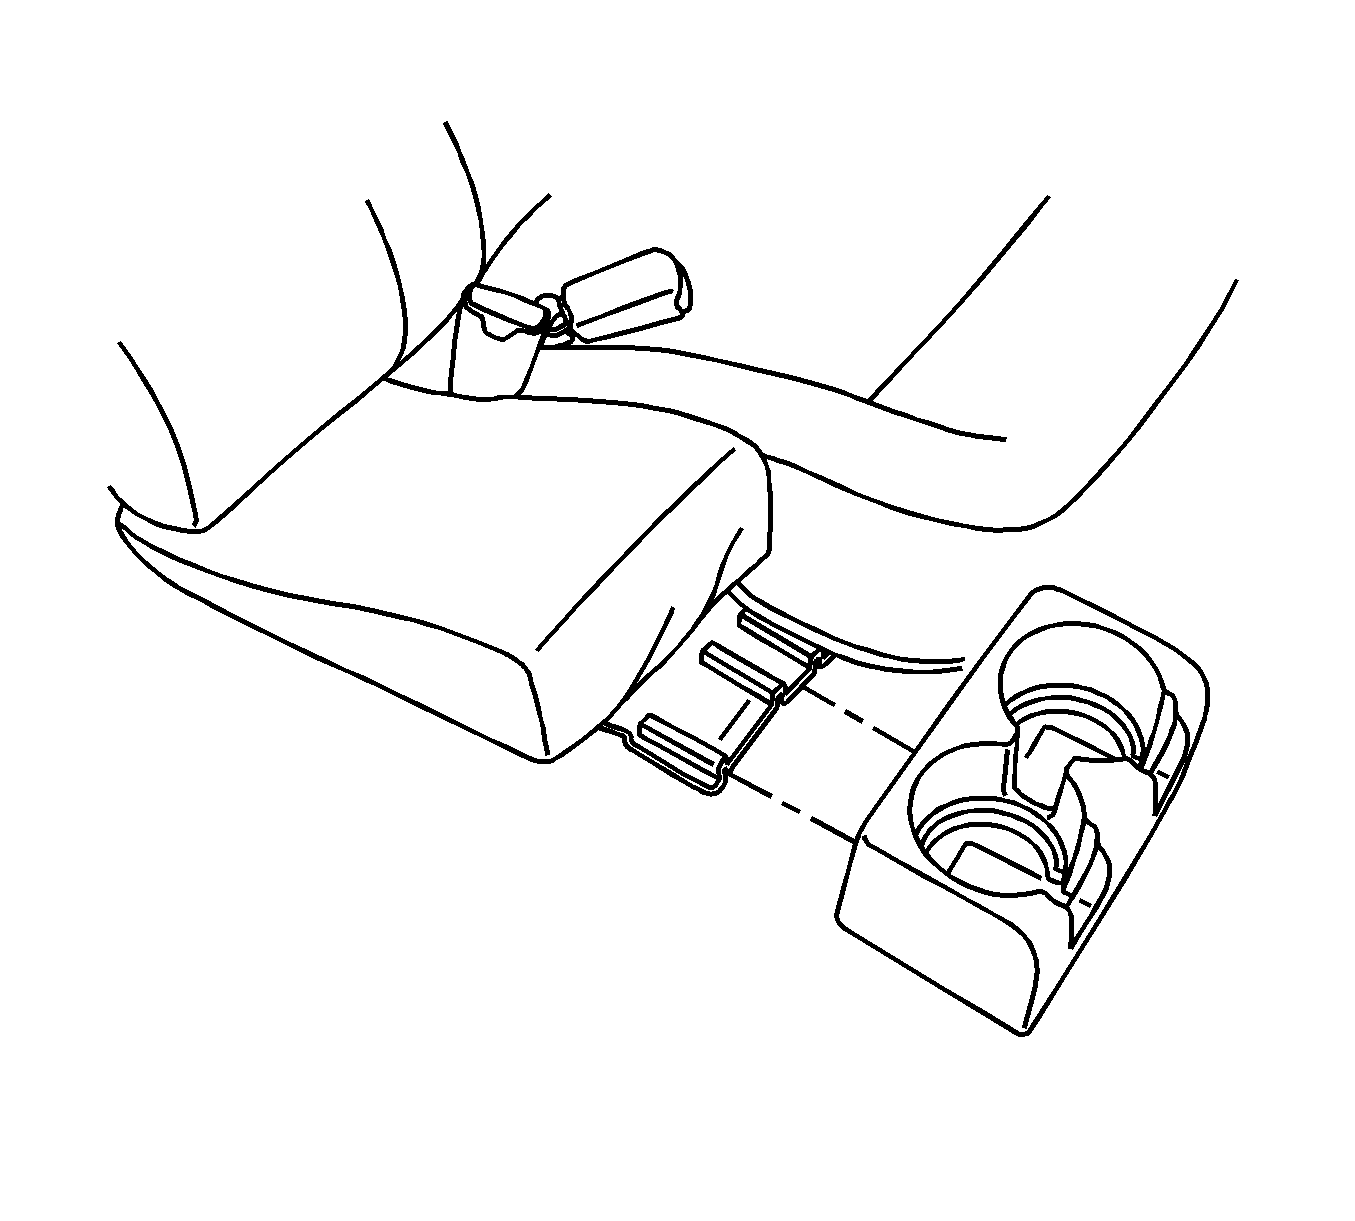
- Remove the cupholder from the seat by pulling it straight off the bracket.
- Remove the front seat cushion outer trim panel. Refer to Seat Cushion Outer Trim Panel Replacement .
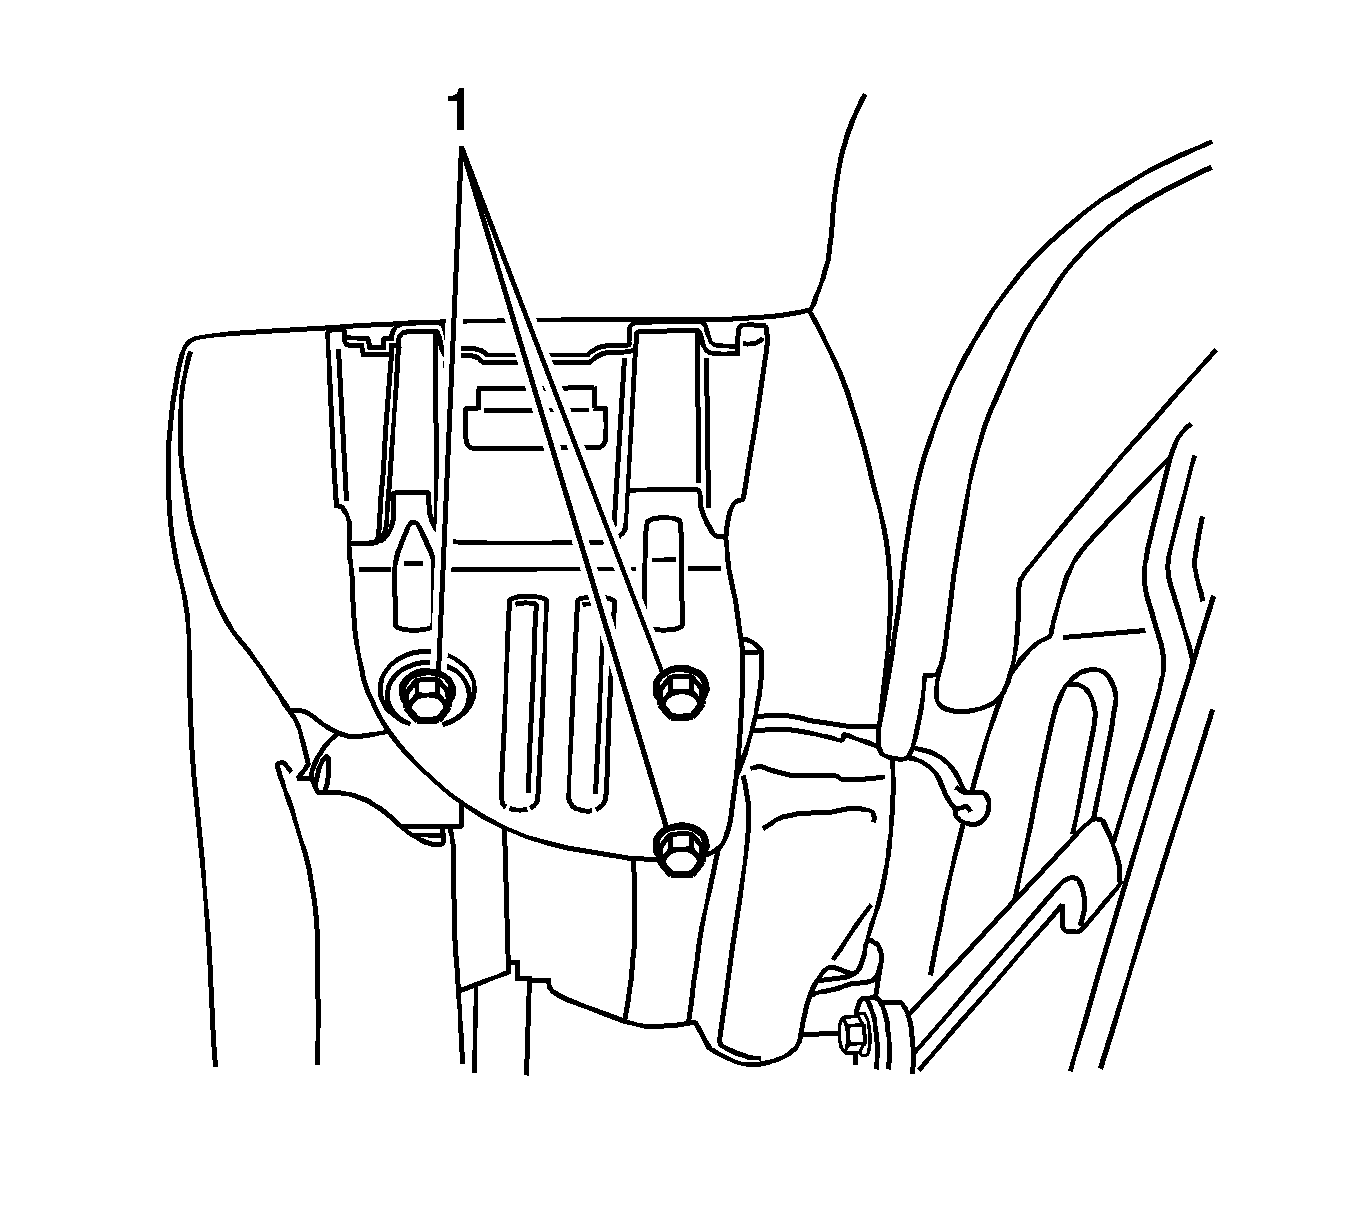
- Remove the 3 bolts (1) securing the cupholder bracket to the seat frame , if equipped.
- Unclip the front, rear, and side J-strips (1, 2) on the underside of the seat.
- Remove the lumbar knob by pulling the knob straight away from the seat, if equipped.
- Remove the seat switch bezel, if equipped. Refer to Driver Seat and Passenger Seat Adjuster Switch Bezel Replacement .
- Remove the recliner handle. Refer to Driver Seat and Passenger Seat Recliner Handle Replacement .
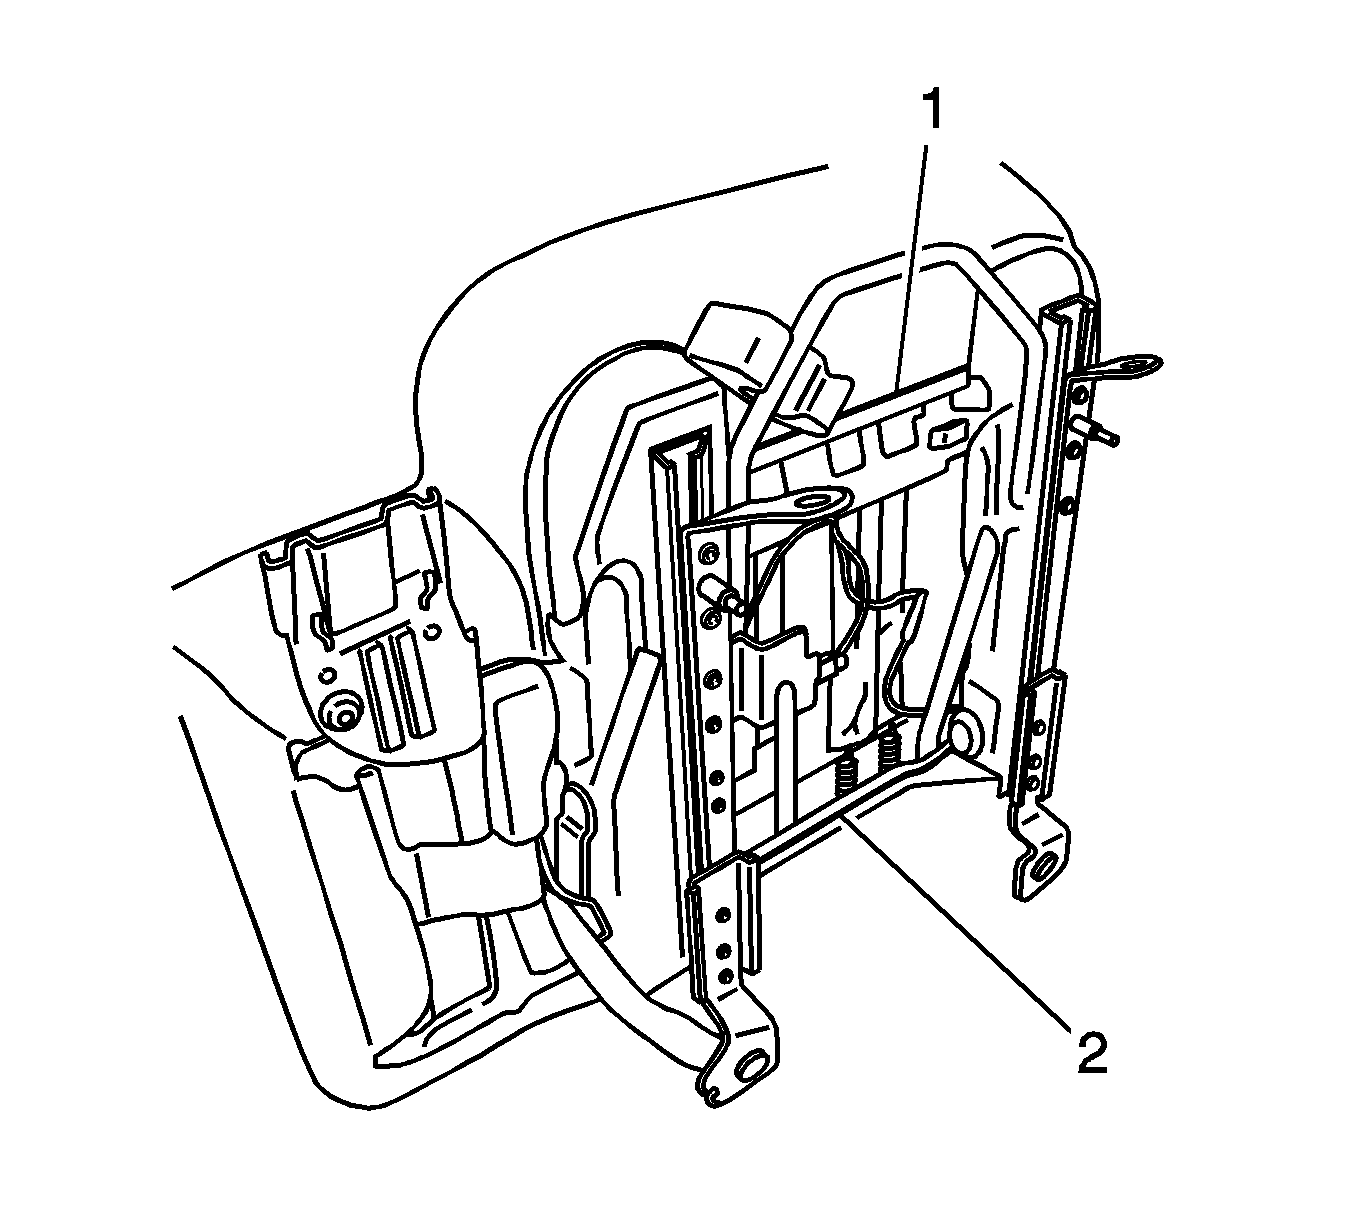
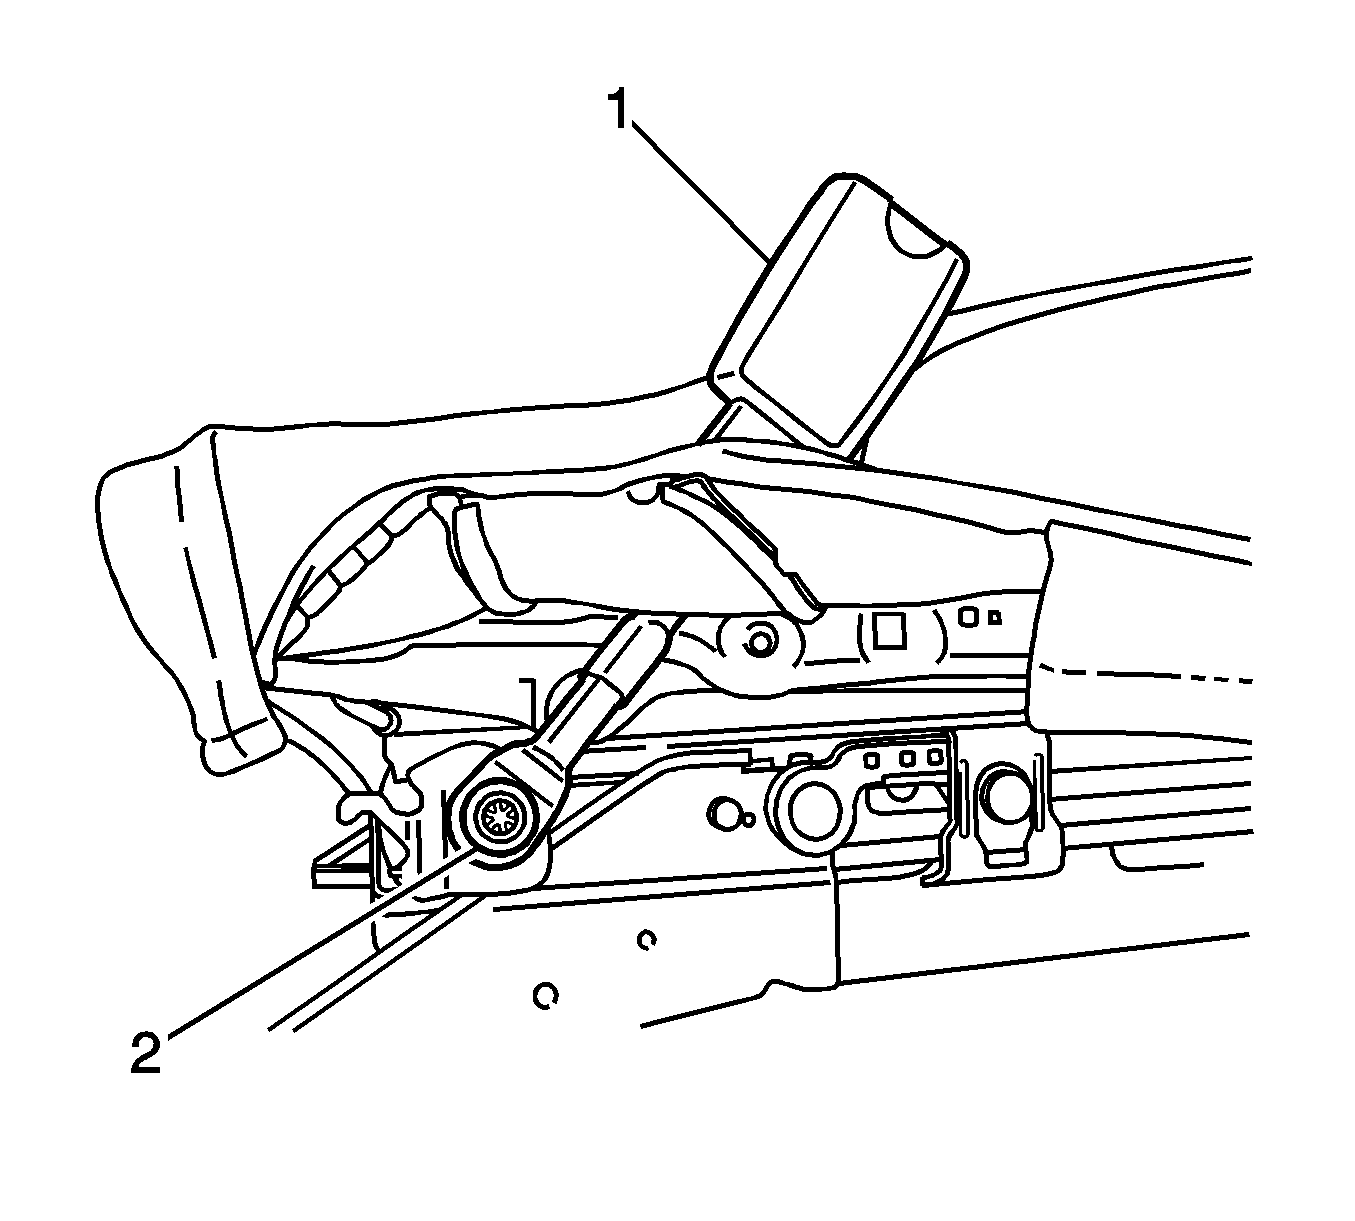
- Remove the screws (2) that retain the lumbar adjustment mechanism (1) to the seat adjuster.
- Remove the lumbar cable from the lumbar adjustment mechanism.
- Remove the 2 bolts (1) securing the seat recliner to the seat adjuster.
- Remove the seat back assembly from the seat cushion assembly.
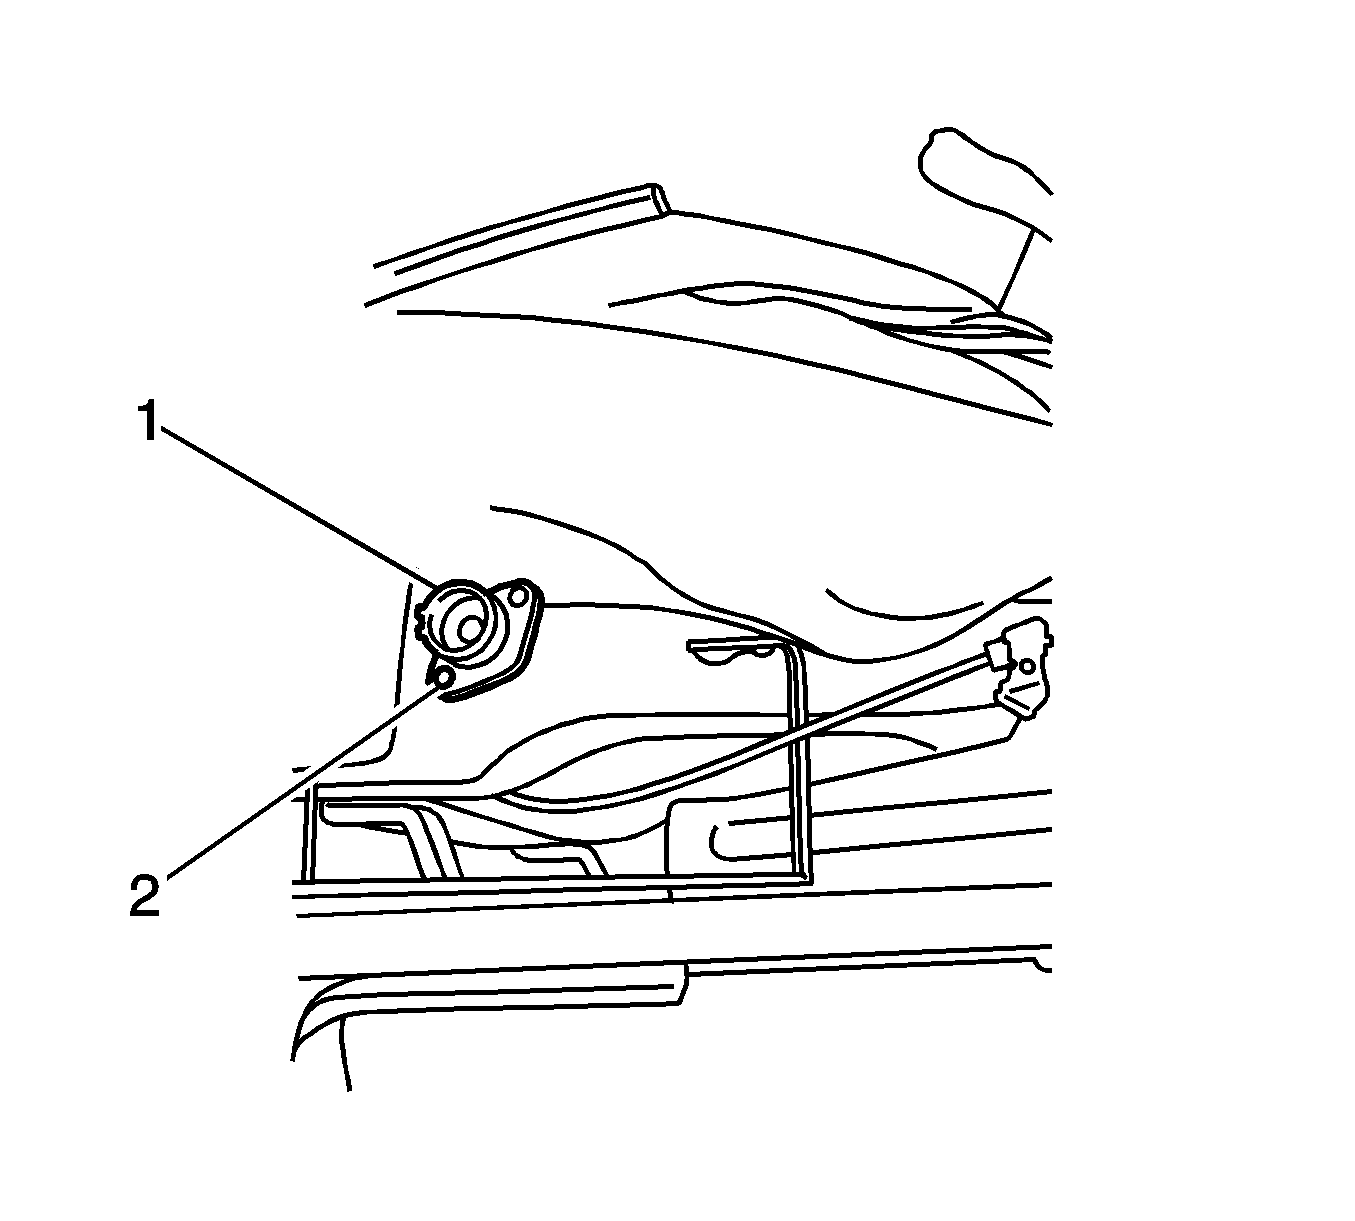
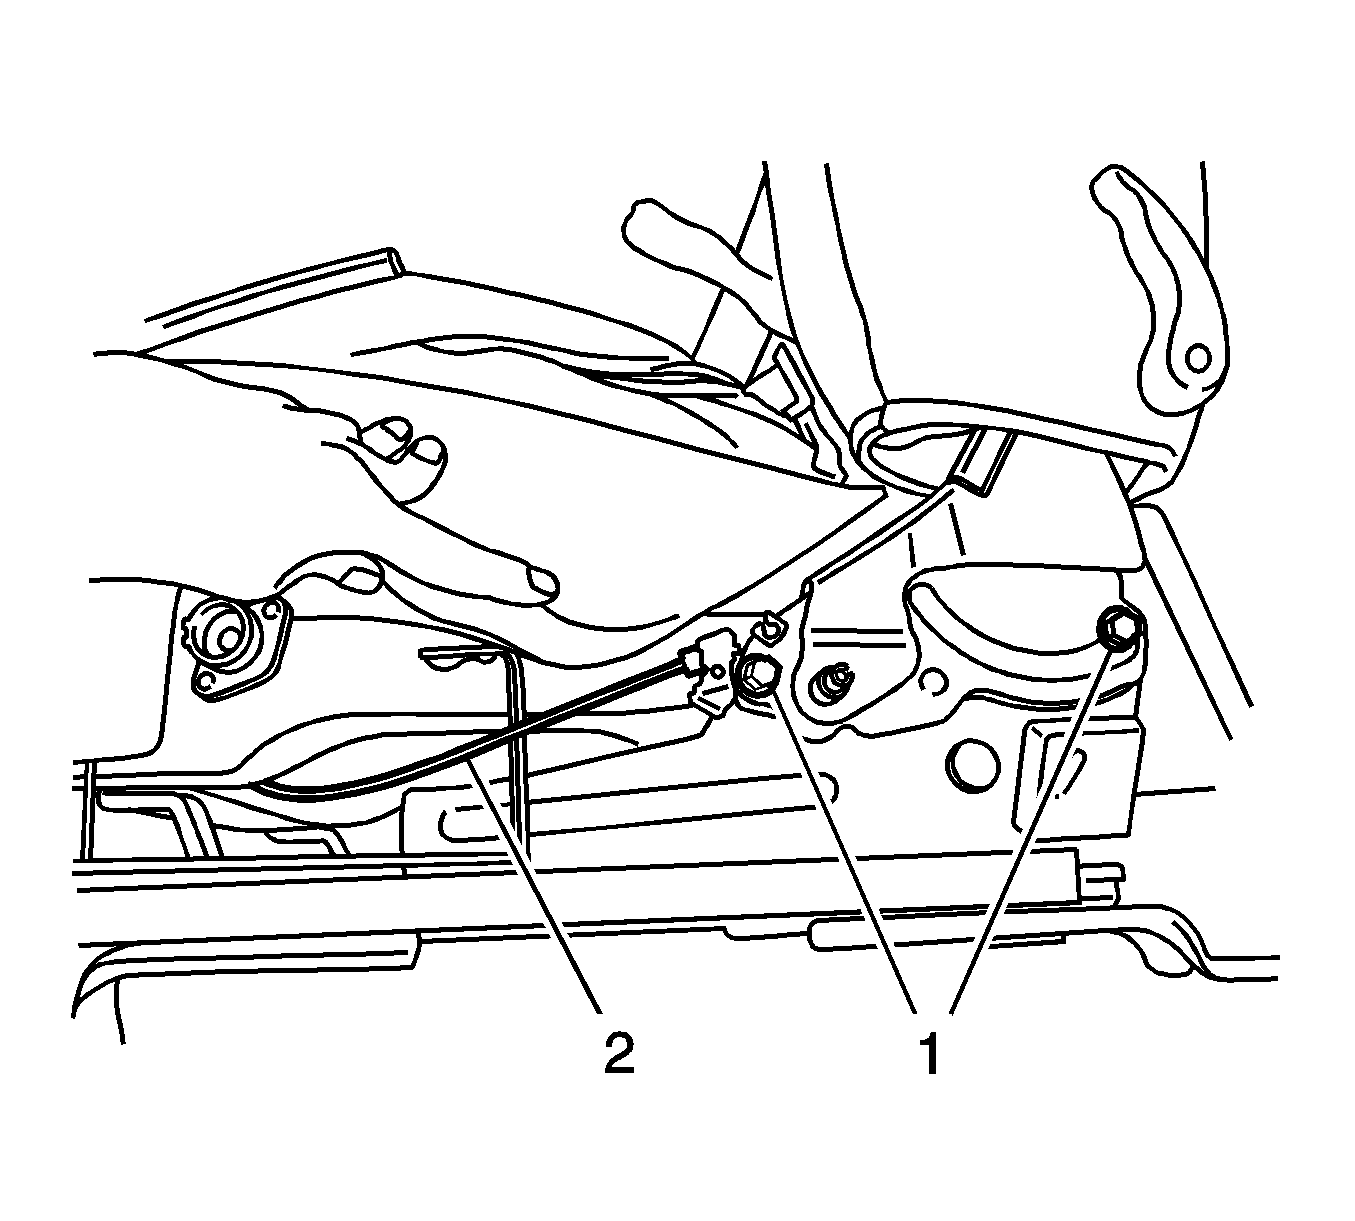
- Disconnect the seat belt buckle electrical connector (1).
- Remove any clips or straps securing the electrical harness to the bottom of the seat cushion frame.
- Remove the bolt (2) securing the seat belt buckle assembly (1) to the seat adjuster.
- Remove the seat cushion cover and foam.
- Remove the assist spring.
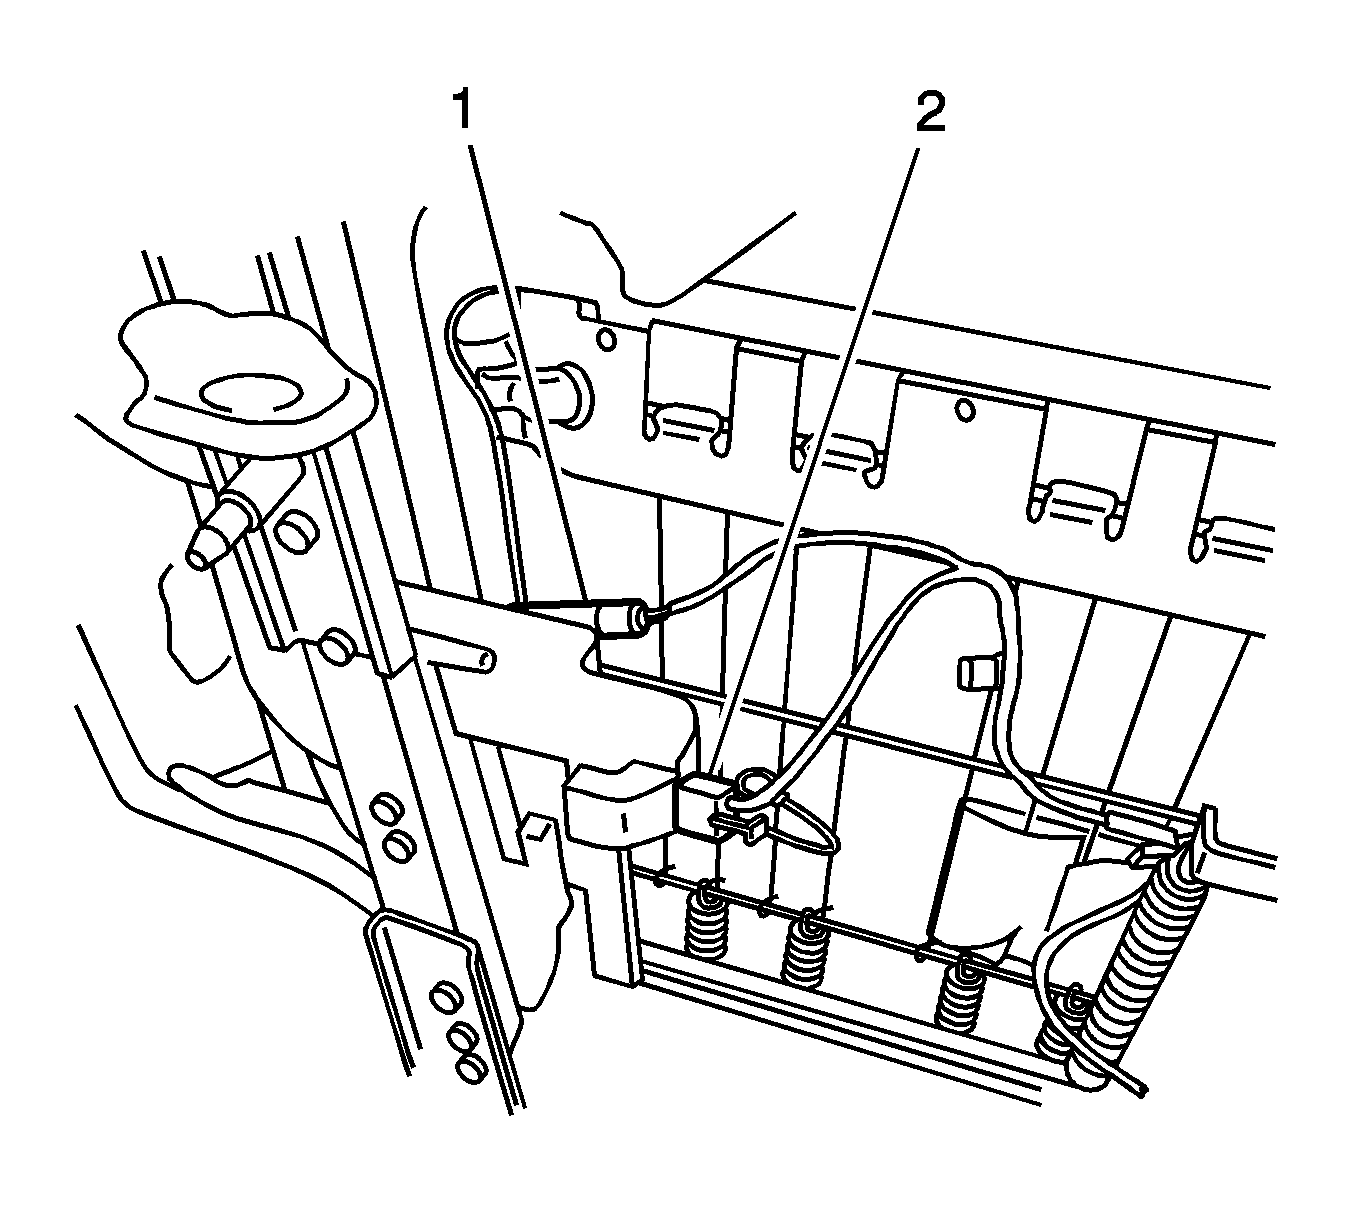
- Disconnect the wire harness for the lumbar and seat heat switches and pull the harness (2) back through the hole in the seat cushion frame.
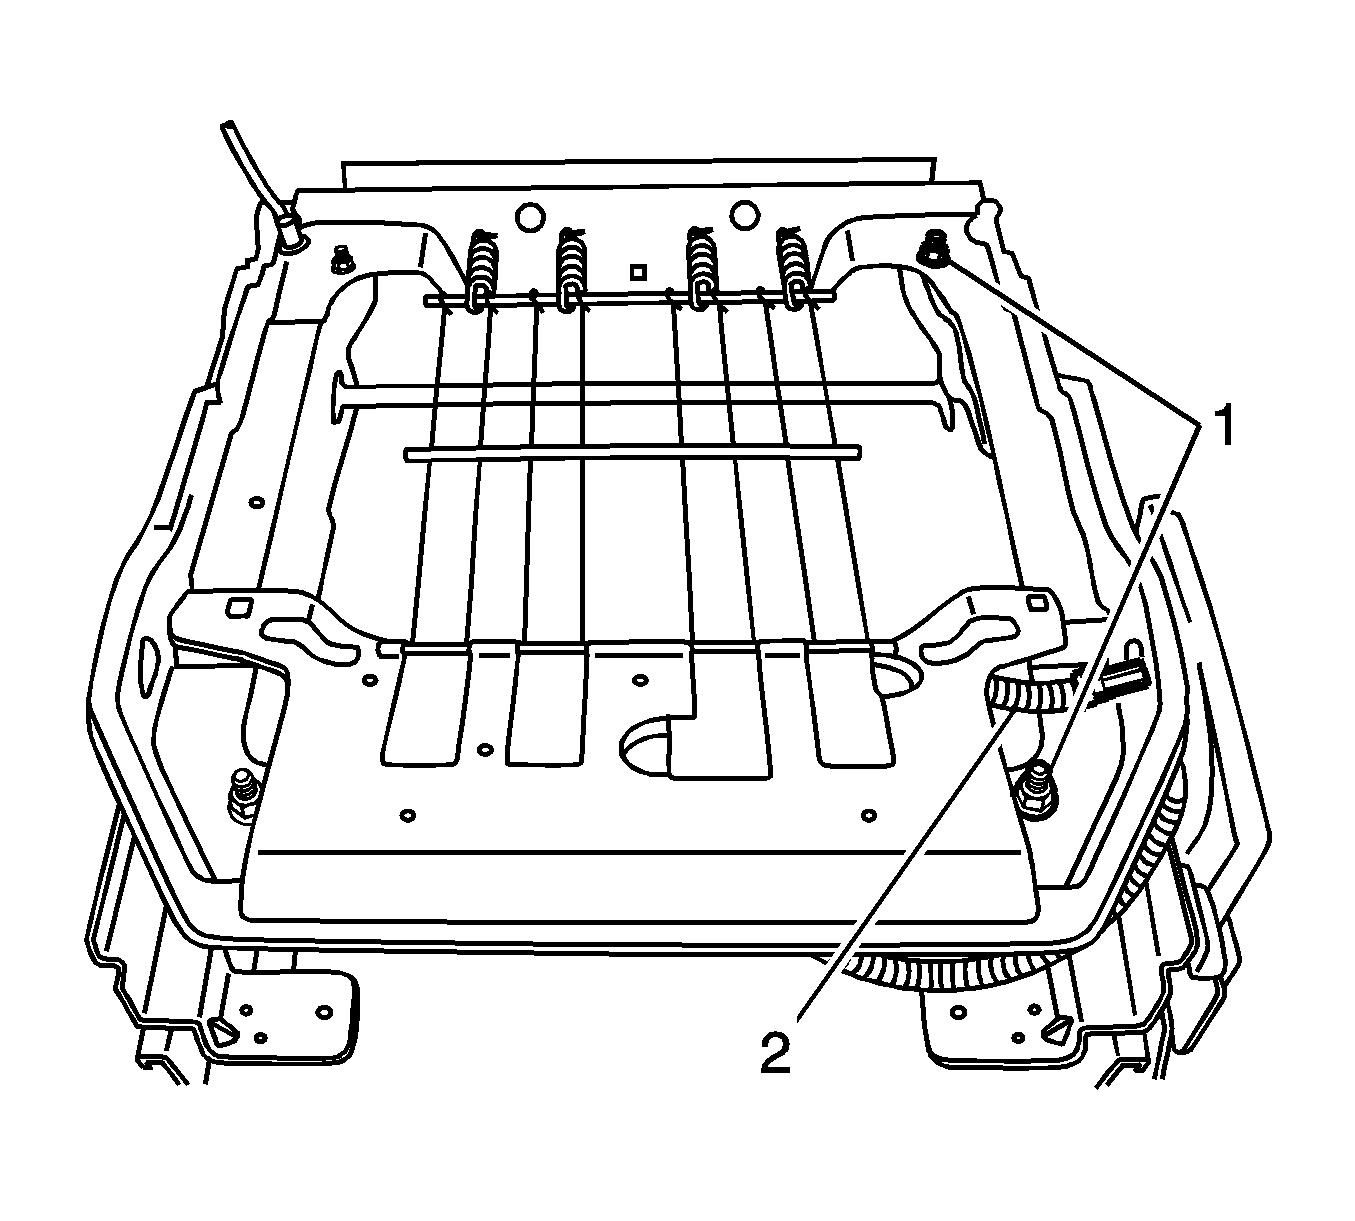
- Remove the 4 nuts (1) securing the seat cushion frame to the seat adjuster.
- Remove the seat cushion frame.
Installation Procedure
- Install the seat cushion frame to the seat adjuster with 4 nuts (1).
- Route the wire harness for the lumbar and seat heat switches through the hole in the seat cushion frame and connect the connectors.
- Install the assist spring.
- Install the seat cushion foam pad and cover to the frame.
- Install the seat belt buckle assembly (1) through the seat cushion pad.
- Install the seat belt buckle assembly (1) to the seat adjuster with the bolt (2).
- Connect the seat belt buckle electrical connector (1).
- Install any clips or straps securing the electrical harness to the bottom of the seat cushion frame.
- Position the seat back assembly on the seat cushion assembly.
- Install the 2 bolts (1) securing the seat recliner to the seat adjuster.
- Install the lumbar adjustment mechanism (1) to the seat adjuster with the 2 screws (2).
- Install the lumbar cable to the lumbar adjustment mechanism.
- Install the seat switch bezel, if equipped. Refer to Driver Seat and Passenger Seat Adjuster Switch Bezel Replacement .
- Install the lumbar knob by pushing the knob straight onto the shaft, if equipped.
- Install the recliner handle. Refer to Driver Seat and Passenger Seat Recliner Handle Replacement .
- Install the front, rear, and side J-strips (1, 2) to the underside of the seat.
- Install the 3 bolts (1) securing the cupholder bracket to the seat frame , if equipped.
- Install the front seat cushion outer trim panel. Refer to Seat Cushion Outer Trim Panel Replacement .
- Install the cupholder to the seat by pushing it straight onto the bracket.
- Install the seat in the vehicle. Refer to Front Seat Replacement - Bucket or Split Bench Seat Replacement .
Notice: Refer to Fastener Notice in the Preface section.
Tighten
Tighten the front seat cushion frame mounting nuts to 24 N·m (18 lb ft).
Tighten
Tighten the front seat belt buckle bolt to 55 N·m (41 lb ft).
Tighten
Tighten the front seat recliner bolts to 24 N·m (18 lb ft).
Tighten
Tighten the front seat cupholder bracket bolts to 9.1 N·m (80 lb in).
