For 1990-2009 cars only
Removal Procedure
- Remove the radio. Refer to Radio Replacement .
- Remove the mounting screw from the evaporator temperature control module.
- Disconnect the electrical connector from the control module.
- Cut the evaporator temperature sensor wire near the control module.
- Remove the evaporator core. Refer to Air Conditioning Evaporator Core Replacement .
- Using needle nose pliers, carefully remove the evaporator temperature sensor from the evaporator core.

Important:
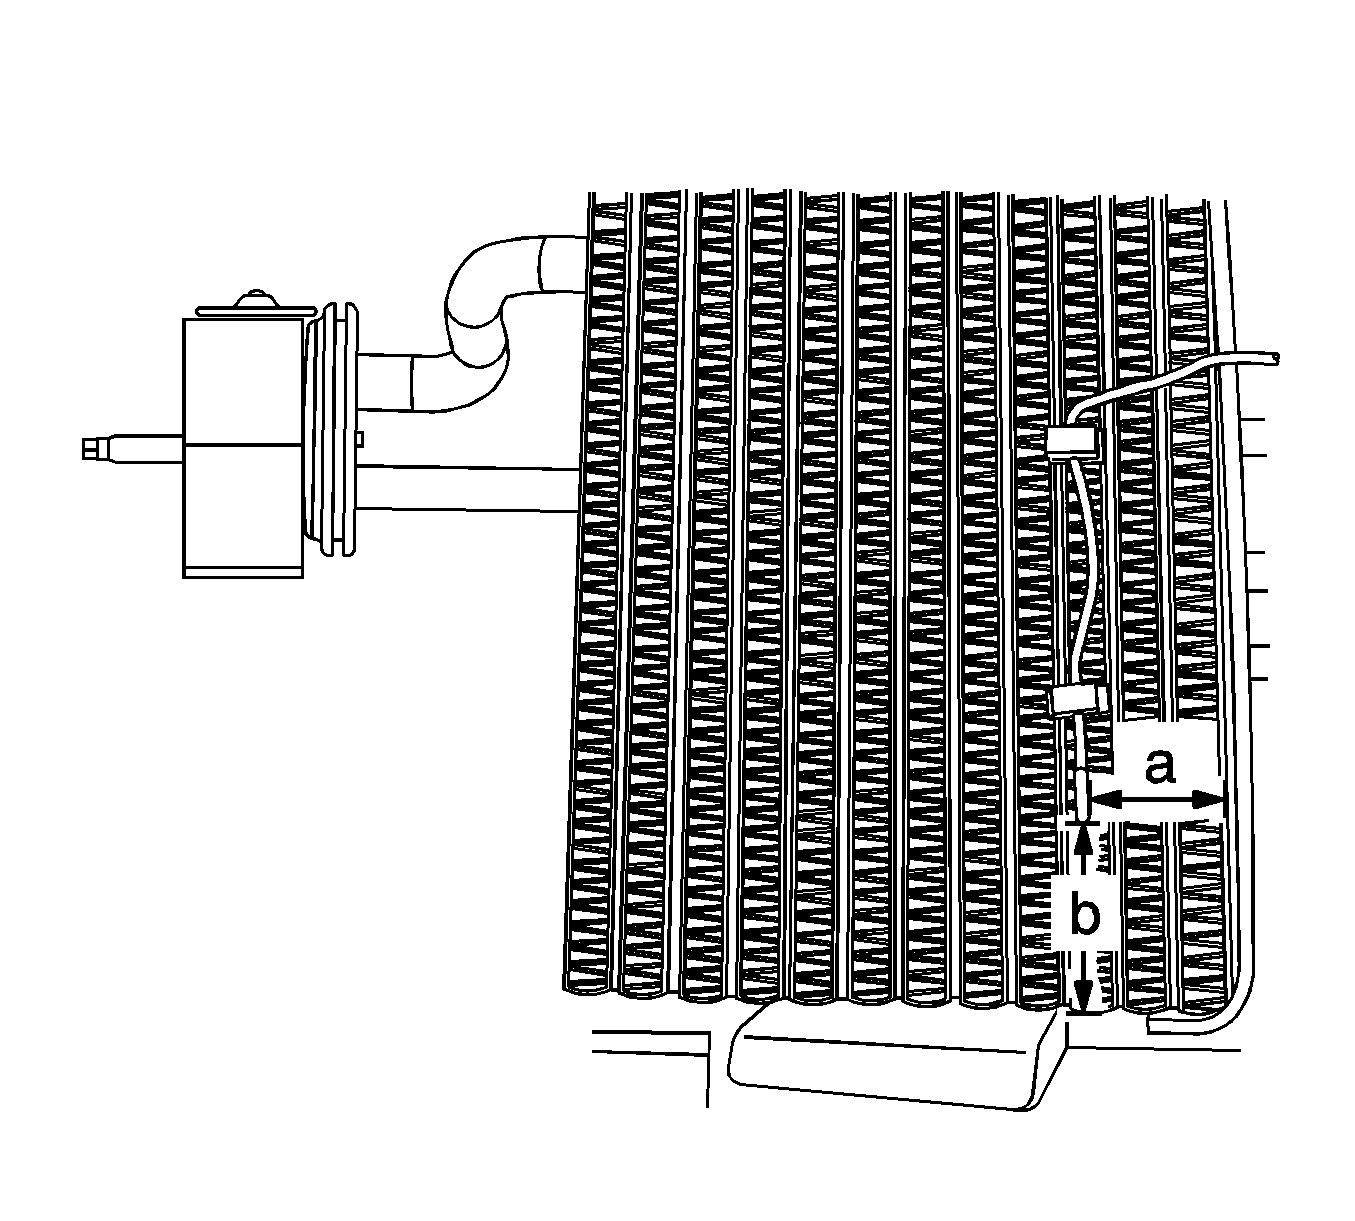
• Note the mounting position of the evaporative temperature sensor (a, b) and use these measurements upon installation. • If you are replacing only the control module, proceed to Step 4 of the Installation Procedure.
Installation Procedure
- Install the evaporator temperature sensor to the evaporator core. Place the sensor approximately 3.5 cm (1.4 in) from the side (a) and 5 cm (2 in) from the bottom (b) corner of the evaporator core.
- Align the evaporator temperature sensor wires with the opening in the upper HVAC module case.
- Install the evaporator core. Refer to Air Conditioning Evaporator Core Replacement .
- Cut the evaporator temperature sensor from the replacement assembly.
- Connect the original sensor wire to the replacement assembly. Refer to Splicing Copper Wire Using Splice Sleeves .
- Connect the electrical connector to the evaporator temperature control module.
- Install the mounting screw to the control module.
- Install the radio. Refer to Radio Replacement .

Important: Improper wire alignment will pinch and may cut the sensor wires.
Notice: Refer to Fastener Notice in the Preface section.
Tighten
Tighten the screw to 1.9 N·m (17 lb in).
