For 1990-2009 cars only
Tools Required
J 39400-A Halogen Leak Detector
Removal Procedure
- Recover the refrigerant from the A/C system. Refer to Refrigerant Recovery and Recharging .
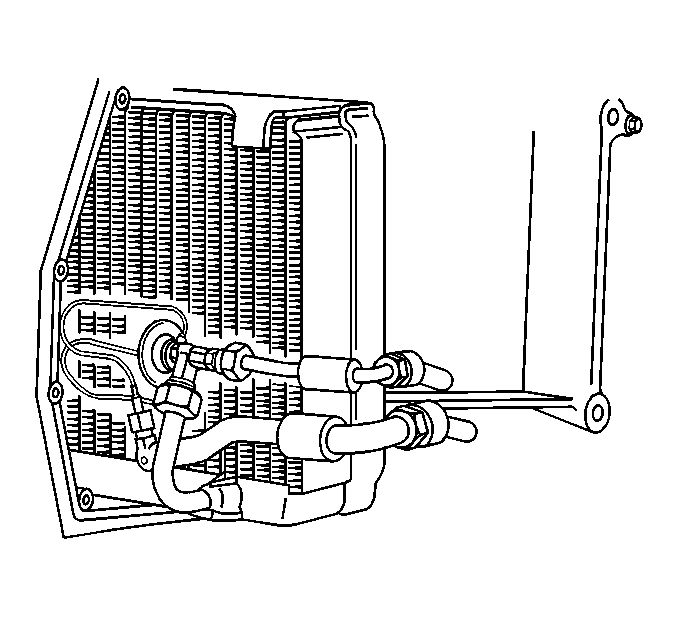
- Remove the right wiper arm linkage from the wiper arm pivot.
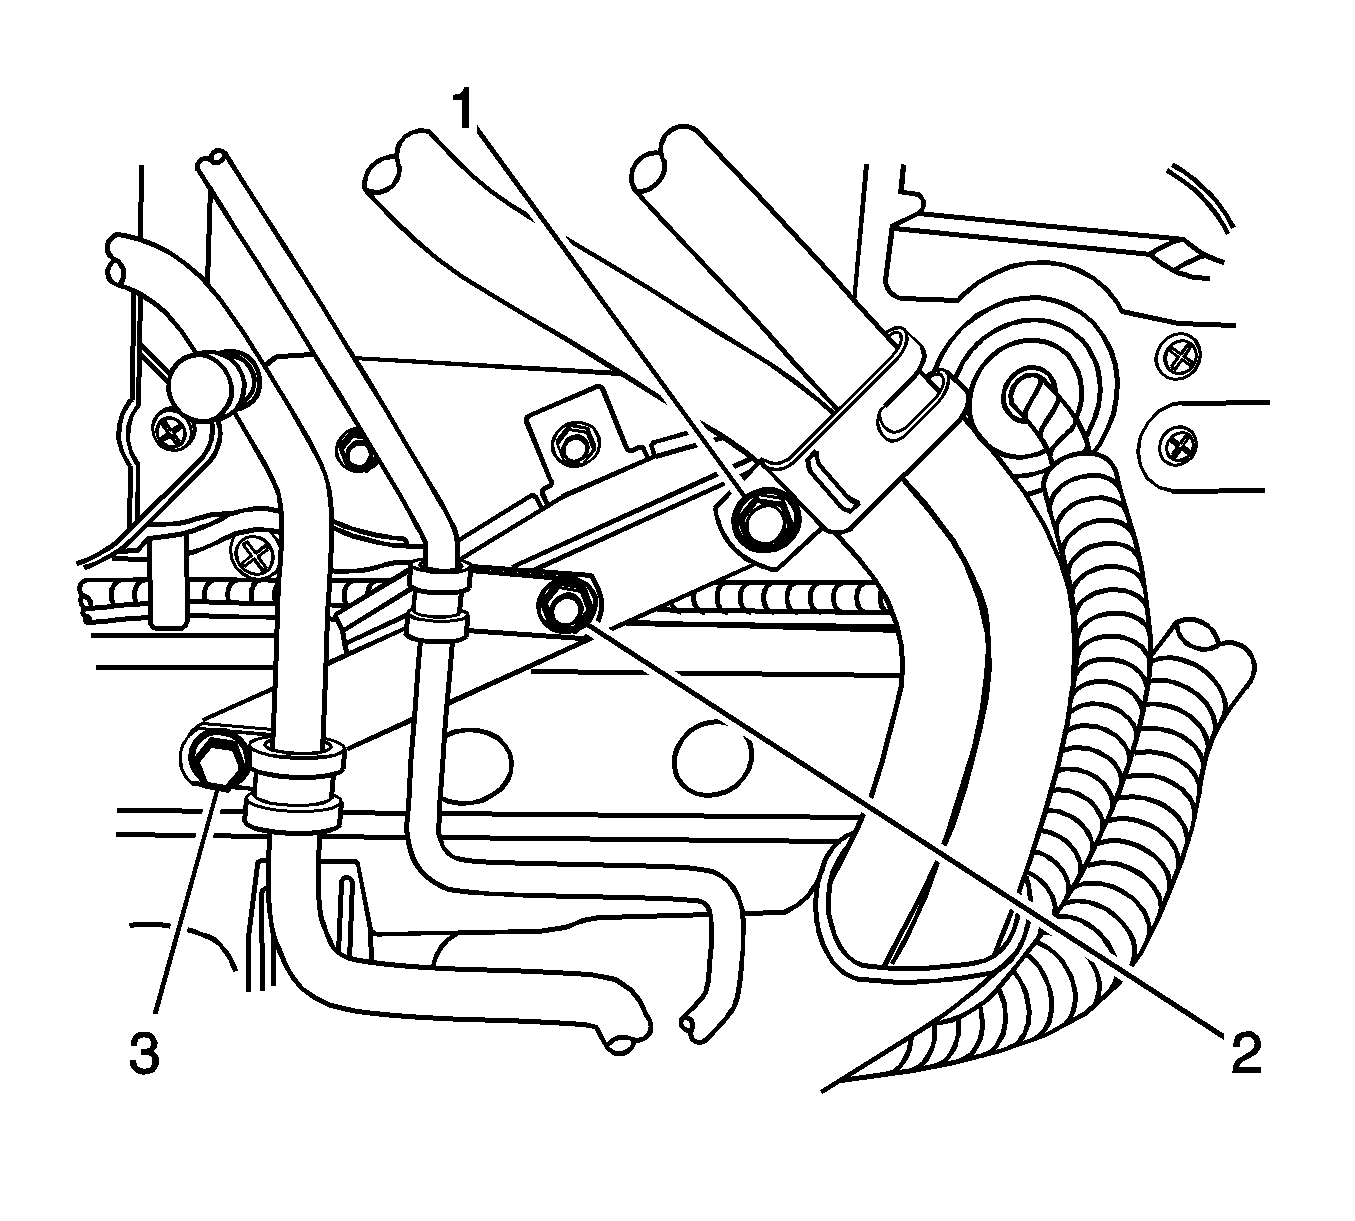
- Remove the nut (2) from the hose bracket.
- Remove the nut (3) from the hose bracket.
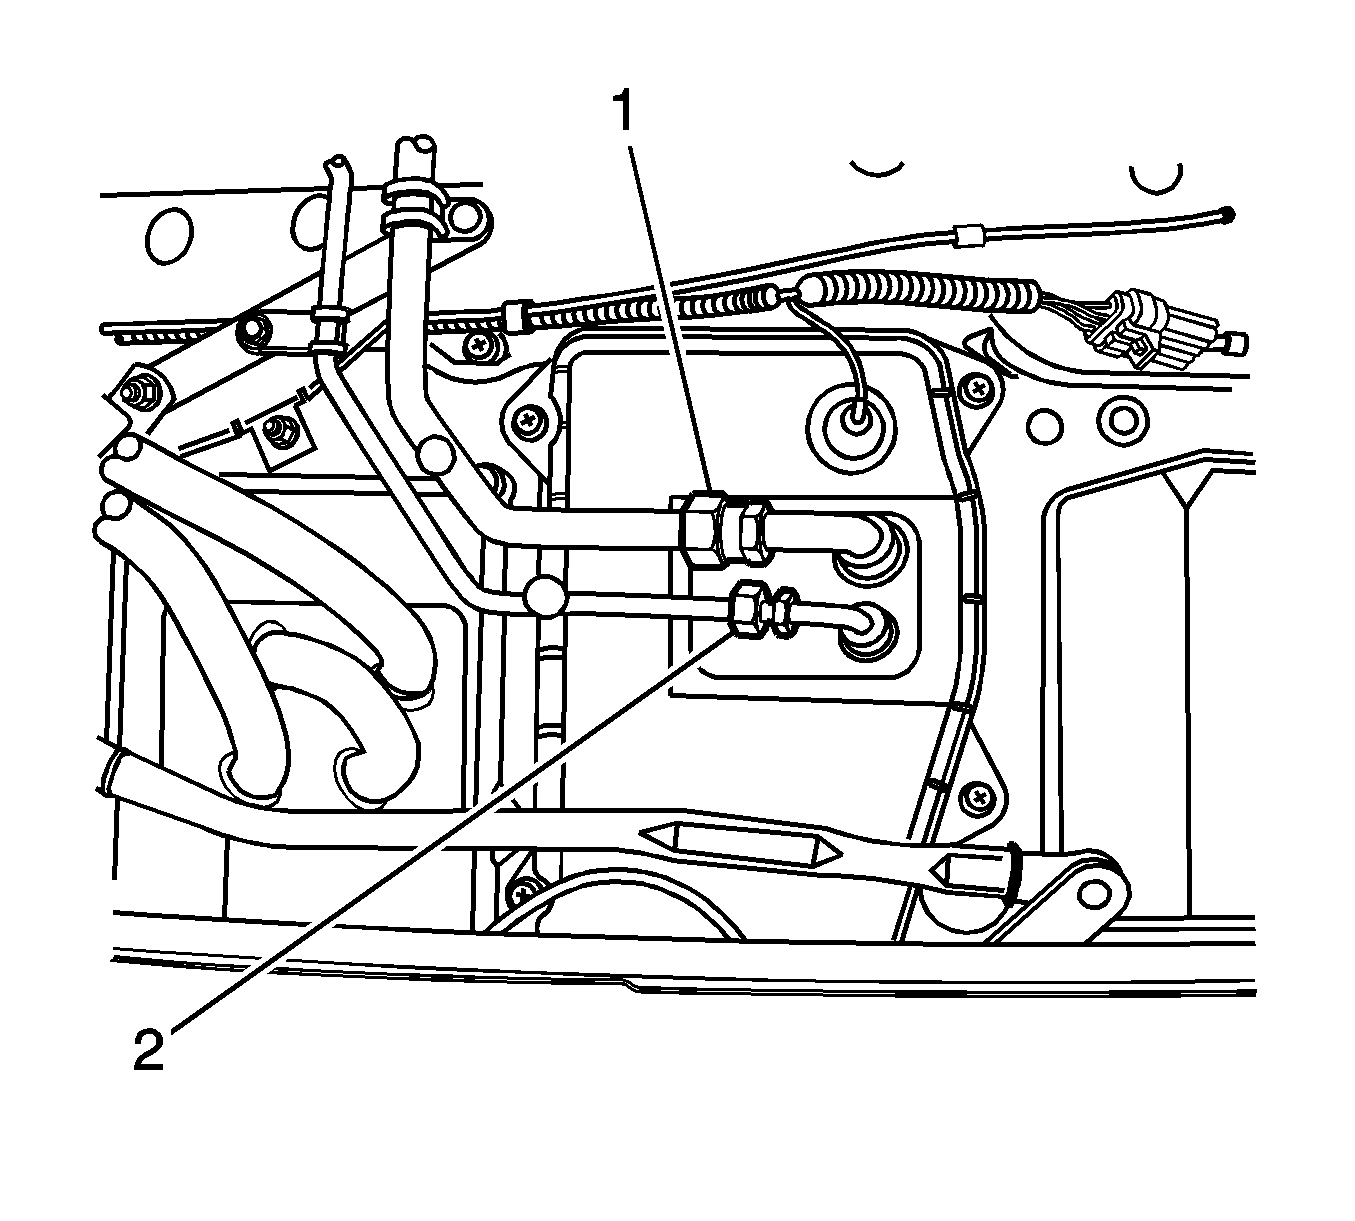
- Remove the evaporator outlet hose (1) from the evaporator.
- Remove the evaporator outlet hose O-ring seal.
- Remove the evaporator inlet hose (2) from the evaporator.
- Remove the evaporator inlet hose O-ring seal.
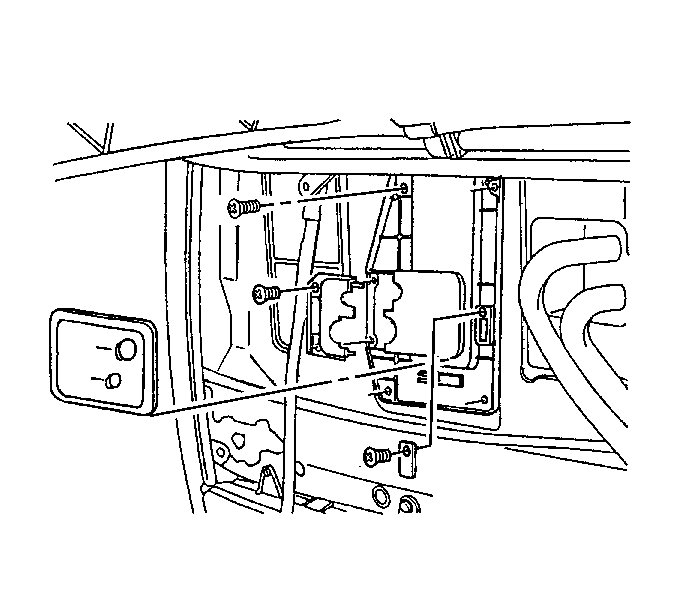
- Remove the primary evaporator core cover screws.
- Remove the primary evaporator core cover, foam insulator, and cover.
- Remove the secondary evaporator core cover screws.
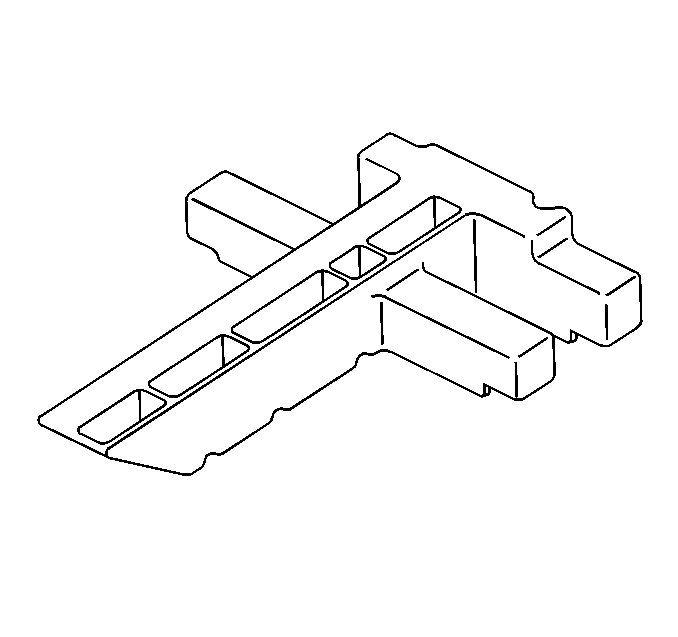
- Remove the secondary evaporator core cover, the capture insert, and Styrofoam insulator.
- Remove the primary evaporator spacer.
- Remove the evaporator.
Installation Procedure
- If replacing the evaporator add refrigerant oil. Refer to Refrigerant System Capacities .
- Install the evaporator.
- Install the evaporator spacer.
- Install the secondary evaporator core Styrofoam insulator, cover, tube capture insert, and screws.
- Install the primary evaporator core cover and foam insulator.
- Install the primary evaporator core cover screws.
- Install the new O-ring seals. Refer to O-Ring Replacement .
- Install the evaporator outlet hose (1) to the evaporator.
- Install the evaporator inlet hose (2) to the evaporator.
- Install the hose bracket and nut (2).
- Install the hose bracket and nut (3).
- Push the right wiper arm linkage carefully onto the wiper arm pivot and install the retaining screw.
- Evacuate and recharge the A/C system. Refer to Refrigerant Recovery and Recharging .
- Leak test the fittings of the repaired or reinstalled components using the J 39400-A .


Notice: Refer to Fastener Notice in the Preface section.
Tighten
Tighten the screws to 2 N·m (17 lb in).

Tighten
Tighten the screws to 6 N·m (53 lb in).

Tighten
Tighten the fitting to 32 N·m (24 lb ft).
Tighten
Tighten the fitting to 18 N·m (13 lb ft).

Tighten
Tighten the nut to 30 N·m (22 lb ft).
Tighten
Tighten the nut to 30 N·m (22 lb ft).
