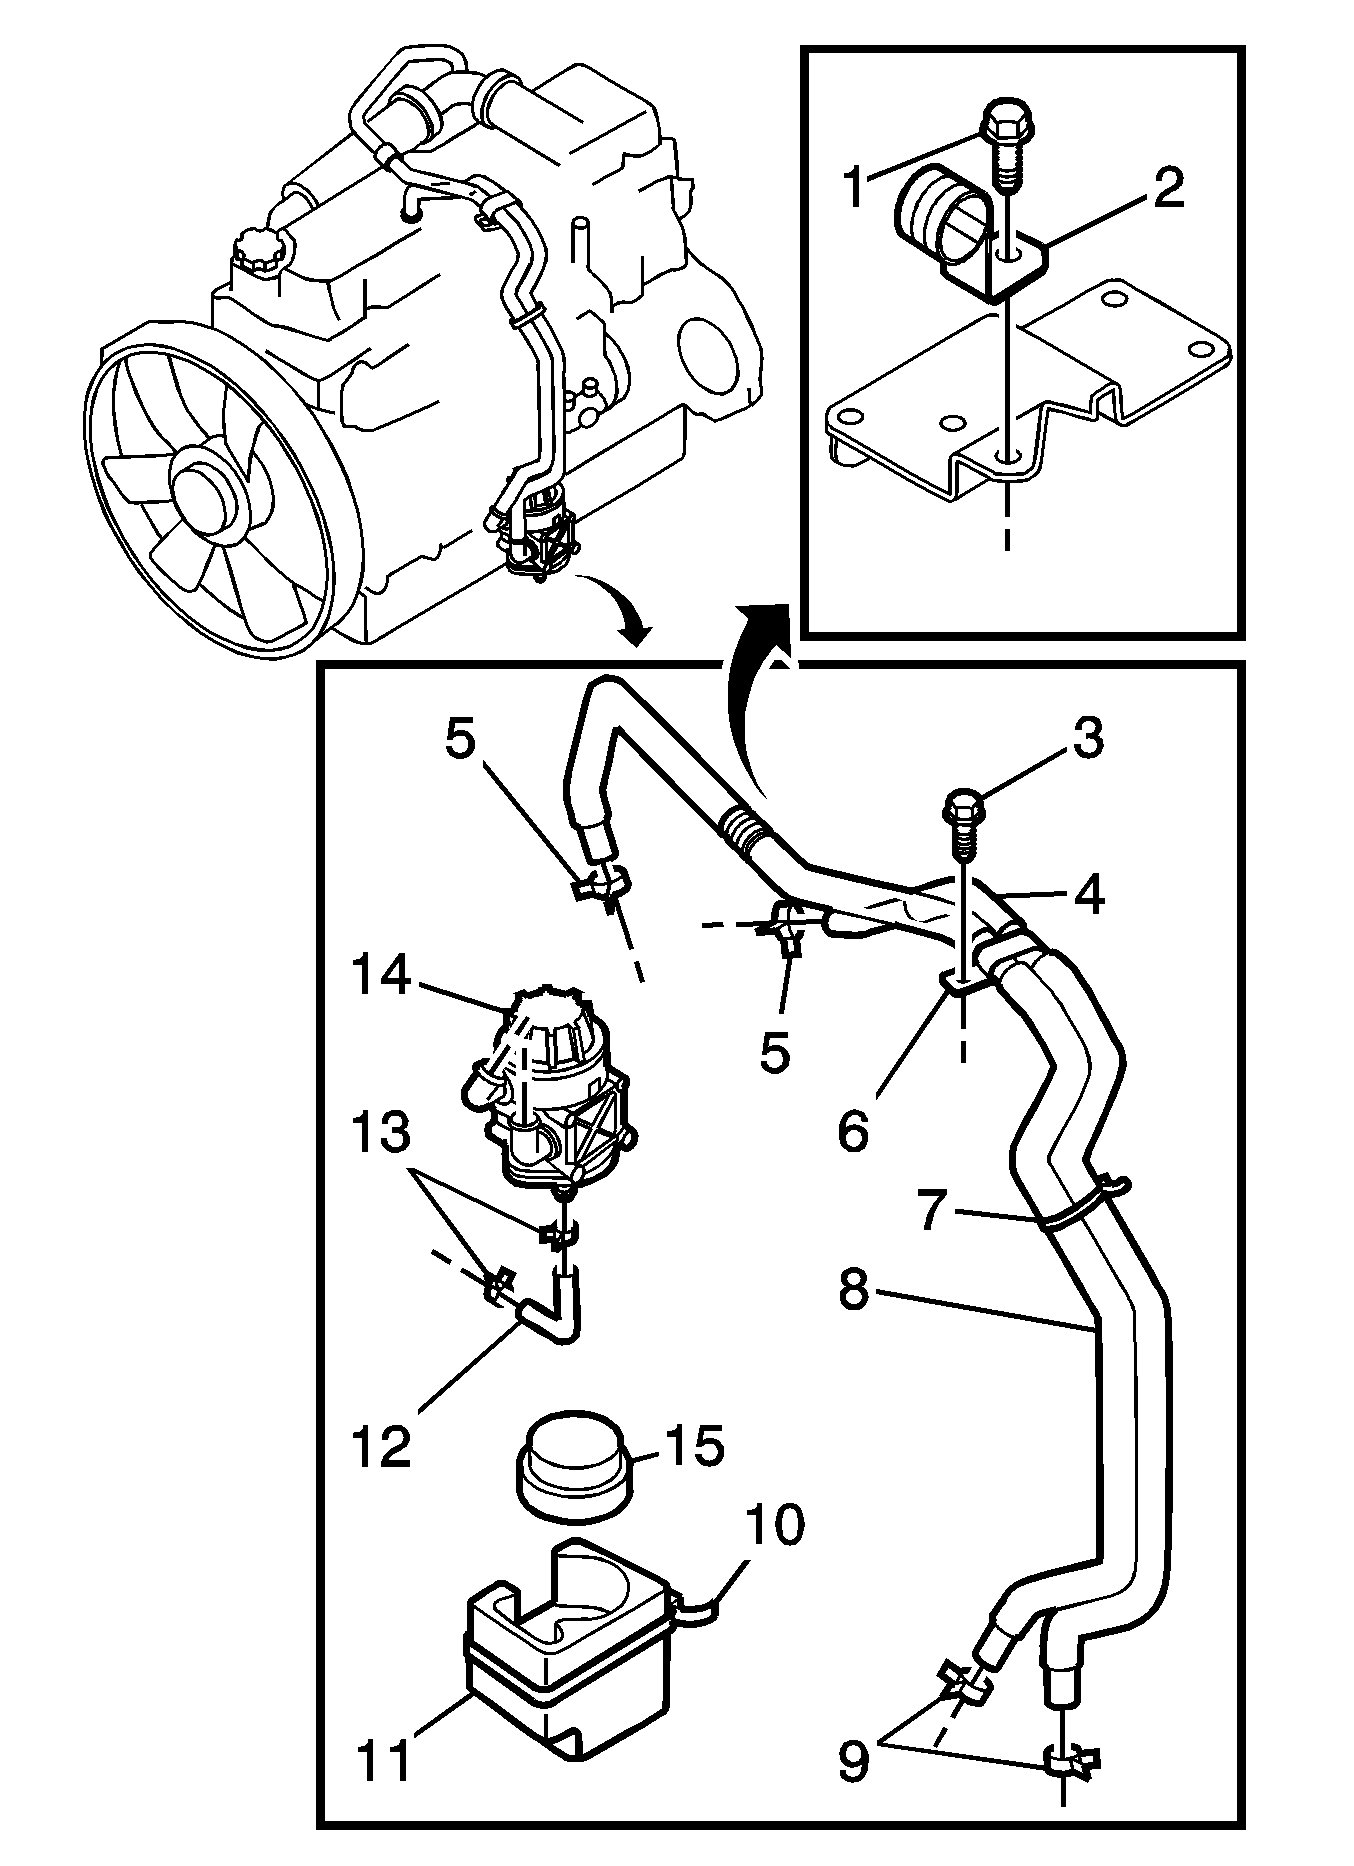
For 1990-2009 cars only
Removal Procedure
- Remove the engine oil level gage tube (2).
- Remove the engine harness clip (15) attached to the oil separator bracket (14).
- Remove the oil separator body cover (7). Refer to Oil Separator Body Cover Replacement.
- Remove the oil separator cap cover (11).
- Remove the PCV rubber hose (4) together with the clip.
- Remove the oil drain rubber hose (8).
- Remove the oil separoator (PCV) (10) with bracket attached (14).
- Remove the bracket (14) from the oil separator (PCV) (10).

Important: Before removing, mark the hose's assembly position.
Installation Procedure
- Install the oil separator (PCV) (10) to the bracket (14).
- Install the oil separator (PCV) (10) and the bracket (14) to the engine.
- Install the oil drain rubber hose (8).
- Assemble the PCV rubber hose (4) to the oil separator with the clip.
- Install the oil separator cap cover (11).
- Install the oil separator body cover (7). Refer to Oil Separator Body Cover Replacement.
- Install the engine harness clip (15) attached to the oil separator bracket (14).
- Install the engine oil level gage tube (2).
Notice: Refer to Fastener Notice in the Preface section.

Tighten
Tighten the oil separator to bracket to 14N·m (10 lb ft).
Tighten
Tighten the oil separator bracket to engine 40N·m (30 lb ft).
Important: Assemble the aligned mark made prior to the removal.
Tighten
Tighten the oil leve gage tube to 24N·m (18 lb ft).
