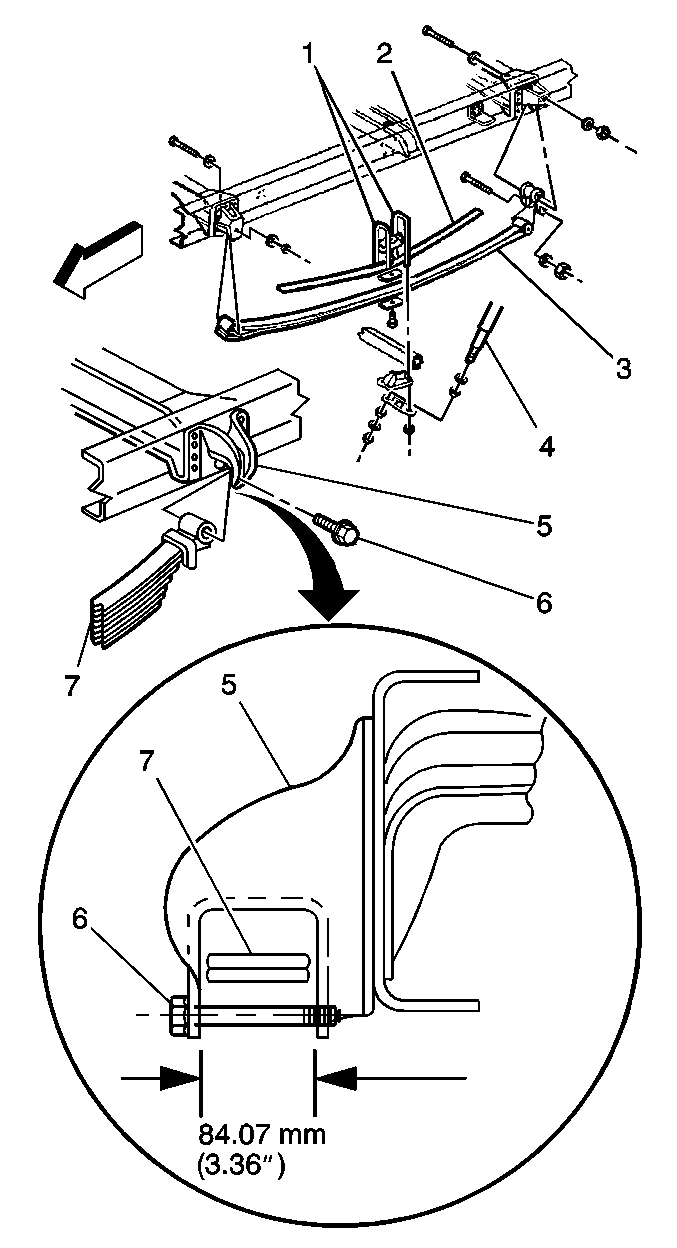
- Install the spring assembly onto the axle pad or axle stabilizer/spring seat, if equipped, using a suitable hoist.
- Install the following components:
- Install the U-bolt spacer over the center bolt.
- Install the U-bolts into the spacer grooves.
- Install the U-bolt anchor plate (1) and seat.
- Install the shock absorber bracket or stabilizer shaft/spring seat, if equipped.
Notice: Use the correct fastener in the correct location. Replacement fasteners
must be the correct part number for that application. Fasteners requiring
replacement or fasteners requiring the use of thread locking compound or sealant
are identified in the service procedure. Do not use paints, lubricants, or
corrosion inhibitors on fasteners or fastener joint surfaces unless specified.
These coatings affect fastener torque and joint clamping force and may damage
the fastener. Use the correct tightening sequence and specifications when
installing fasteners in order to avoid damage to parts and systems.
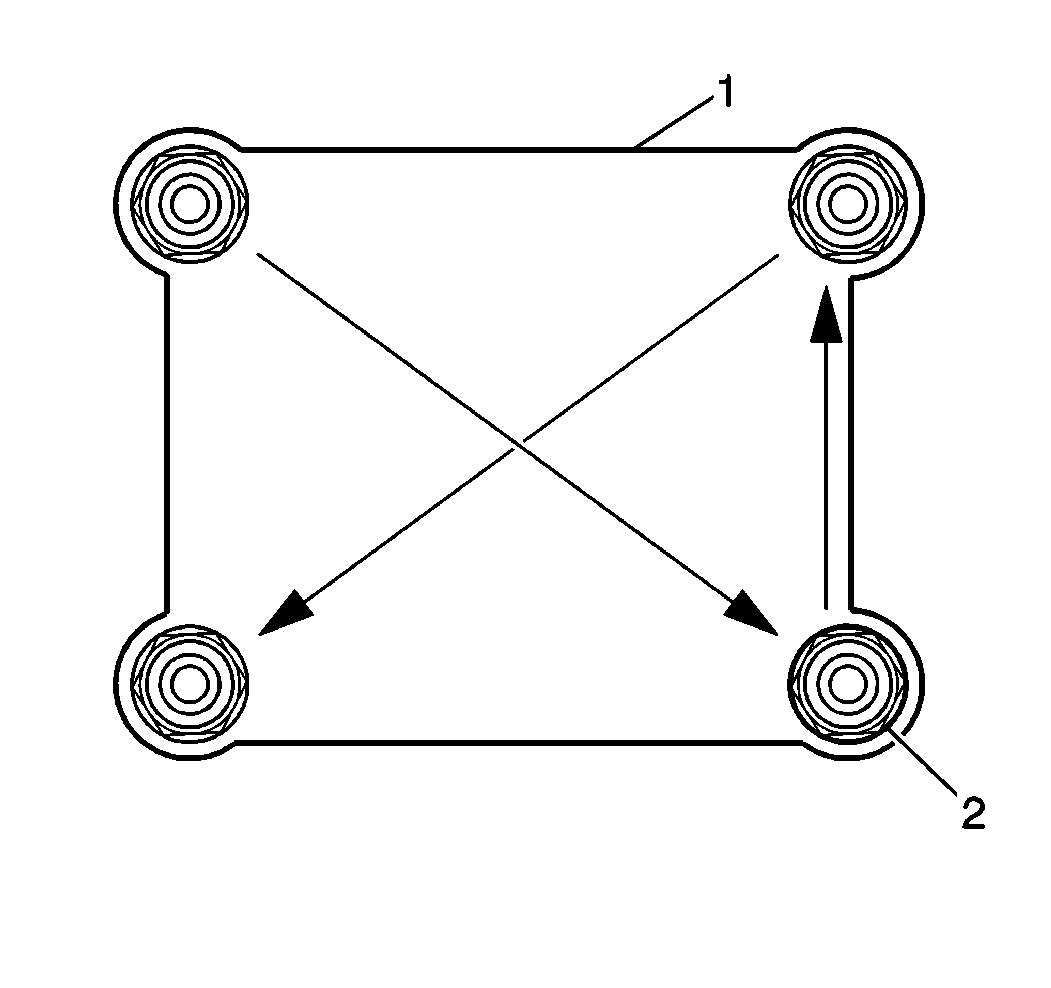
Important: In order to properly tighten the U-bolt nuts, torque the nuts progressively as outlined below.
- Install the proper U-bolt, nuts (2) and washers to the axle:
Tighten
- Tighten the U-bolt nuts to 150 N·m (111 lb ft) in sequence.
- Tighten the U-bolt nuts to 275 N·m (203 lb ft) in sequence.
- On family 3, 20 mm (0.787 in) U-bolt nuts, tighten the nuts to 330 N·m (243 lb ft) in sequence.
- On family 3, 22 mm (0.866 in) U-bolt nuts, tighten the nuts to 415 N·m (308 lb ft) in sequence.
- Install the following components:
| • | The spring eye bolt nut |
Tighten
Tighten the spring front eye bolt to 415 N·m (305 lb ft).
- Install the shock absorber. Refer to
Shock Absorber Replacement
.
Tighten
Tighten the lower shock absorber nut to 85 N·m (62 lb ft).
- Lower the frame until the hangers touch the surface of the spring eye.

- For tapered leaf springs, install the following components:
| • | The rear spring hanger rebound bolt |
Tighten
Tighten the bolt to 415 N·m (305 lb ft).
- For multileaf springs, install the rear spring eye bolt (6).
Tighten
Tighten the spring eye bolt to 485 N·m (358 lb ft).


