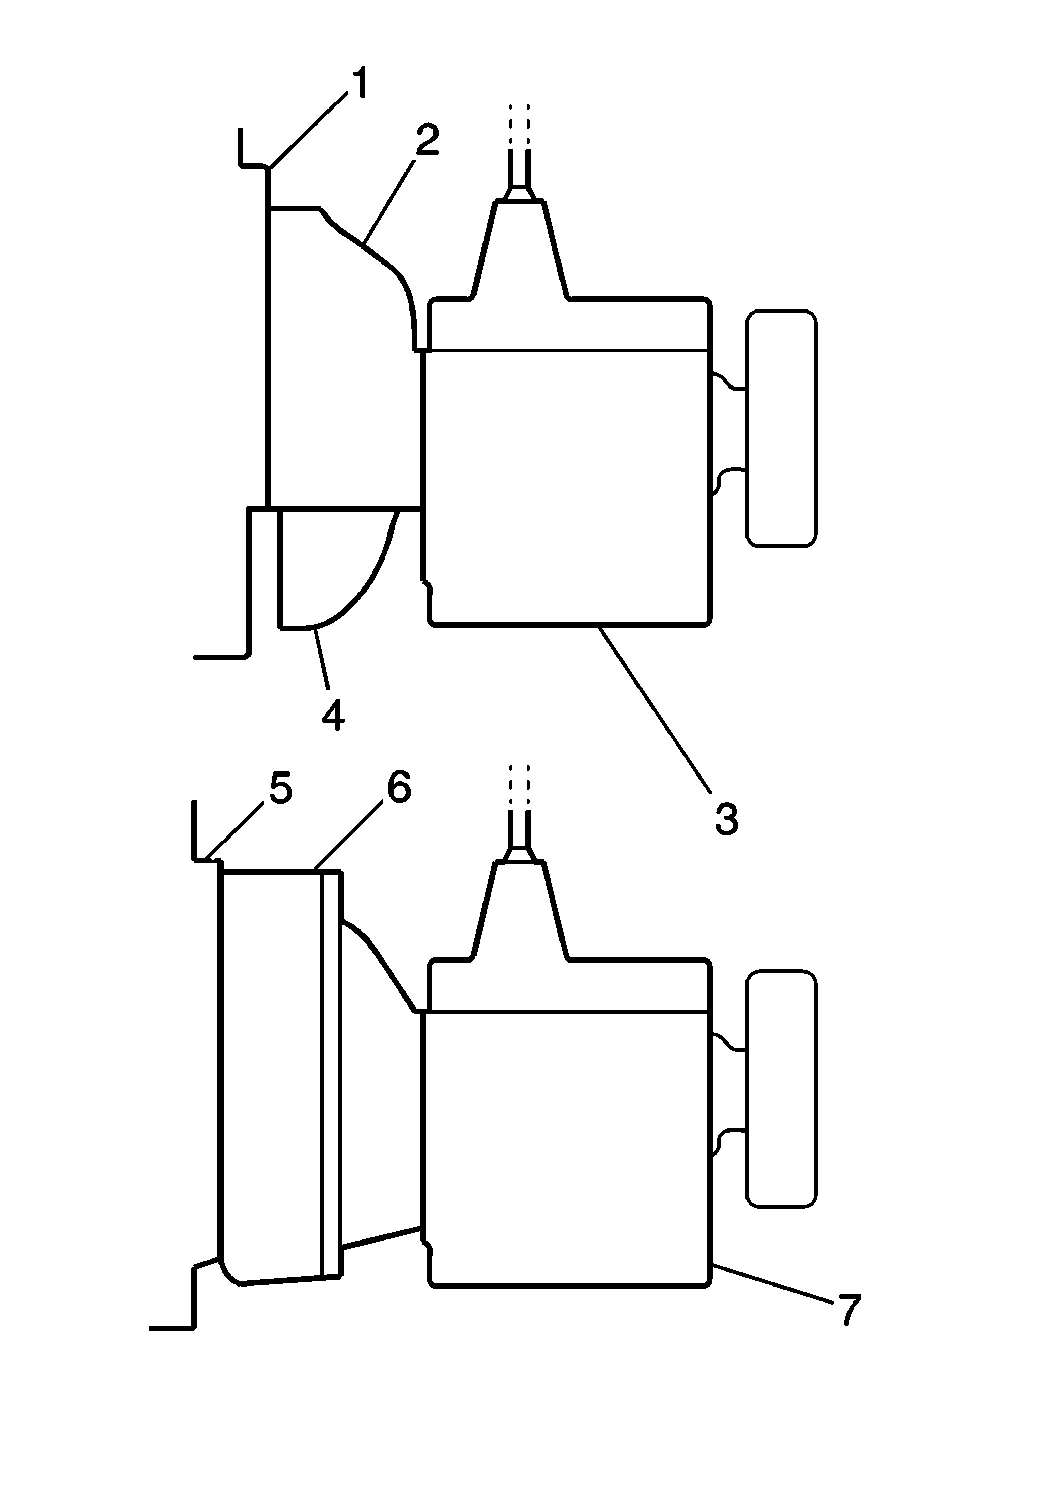
Removal Procedure

Important:
| • | Remove components in order to provide clearance for transmission removal, if necessary. |
| • | The SAE number 2 type flywheel housing (2, 4, 6) also surrounds the flywheel. The SAE number 2 type flywheel housing uses a separate clutch housing (3, 7). Transmission replacement procedures are different for each
type of flywheel housing. |
- Block the wheels of the vehicle.
- Disconnect the negative battery cable. Refer to
Battery Negative Cable Disconnection and Connection
.

Important:
| • | Before you disconnect any air operated components or air lines, bleed all air pressure from the system. |
| • | Verify what type of front engine mount is used. If a single cushion center mount is used, support the engine with an overhead hoist during transmission or clutch replacement. |
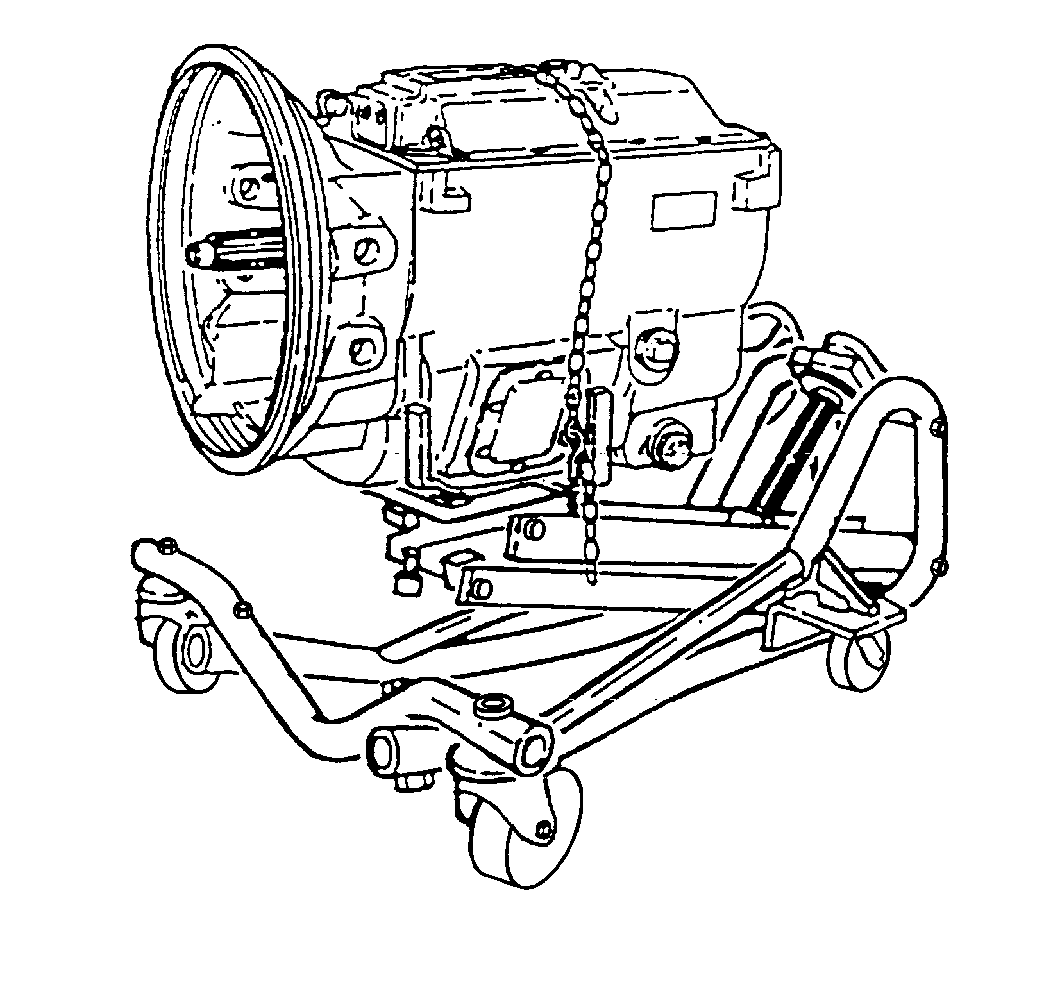
| • | When removing or installing the transmission, use a transmission dolly jack in order to support the weight of the transmission. Fasten a safety chain over the top of the transmission and to both sides of the dolly. |
- Shift the transmission into neutral.
- Remove the air shift lines from the transmission. Refer to
Air Shift Control Valve Replacement
.
- Remove the clutch actuator cylinder from the transmission. Refer to
Clutch Actuator Cylinder Replacement
.
- Remove the shift cables from the transmission. Refer to
Shift Cable Replacement
.
- Remove the electric connectors, as necessary.
- Remove the air lines from the air shift control valve.
- Remove the oil from the transmission.
- Remove the exhaust front pipe and bracket, if required. Refer to
Front Pipe Replacement
.
- Remove the parking brake lever and controls, if used. Refer to
Parking Brake Lever Replacement
.
- Remove the propeller shaft. Refer to the proper procedure:
- Remove the power take-off and controls, if used.
| • | Place a protective cover over the opening. |
| • | Position a transmission dolly jack under the vehicle. Adjust the dolly jack in order to carry the weight of the transmission. |
- Remove the rear support beam, if required. Refer to
Transmission Support Replacement
.
Notice: When removing the transmission, do not allow the weight of the transmission
to hang on the clutch disc hub. The clutch disc will become distorted and
seriously affect the operation of the clutch.
- In order to remove the transmission from the engine (SAE number 2 flywheel housing), perform the following procedure :
| 15.1. | If the engine rear mounting is attached to the transmission, support the engine weight with a hoist or jack. |
| 15.2. | Adjust the transmission dolly in order to support the transmission's weight. |
| 15.3. | Remove all bolts attaching the clutch housing to the engine. |
| 15.4. | Move the transmission straight back from the engine. Keep the mainshaft in alignment with the clutch disc hub. |
| 15.5. | When the transmission is free from the engine, lower and remove the transmission from beneath the vehicle. |
Installation Procedure
- Transfer all brackets to the new transmission, if required.
- Shift the transmission into high gear.

- Mount the transmission on a suitable dolly and move the transmission into position under the vehicle.
- Rotate the output flange or yoke to align the main drive gear shaft with the clutch disc hub.
Notice: When removing the transmission, do not allow the weight of the transmission
to hang on the clutch disc hub. The clutch disc will become distorted and
seriously affect the operation of the clutch.
- Move the transmission forward, guiding the main drive gear shaft into the clutch disc splines.
Install the transmission into the vehicle.
| • | Avoid springing the clutch when you install the transmission. |
| • | Do not let the transmission drop or hang unsupported in the splined hub of the clutch disc. |
Notice: Refer to Fastener Notice in the Preface section.
- In order to install 2 type flywheel housing, install the bolts and washers that attach the transmission clutch housing to the transmission flywheel housing.
Tighten
Tighten all the attaching bolts to 55 N·m (41 lb ft).
- If equipped, install the rear transmission support. Refer to
Transmission Support Replacement
.
- Install the power take-off and the controls, if used.
- Install the propeller shaft. Refer to the proper procedure:
- Install the parking brake lever and the controls, if used. Refer to
Parking Brake Lever Replacement
.
- Install the clutch actuator cylinder. Refer to
Clutch Actuator Cylinder Replacement
.
- Install the shift cables to the transmission. Refer to
Shift Cable Replacement
.
- Install the exhaust front pipe and bracket, as necessary. Refer to
Front Pipe Replacement
.
- Install the electrical connectors, as necessary.
- Install the air lines to the transmission, as used.
- Install the air shift lines to the transmission. Refer to
Air Shift Control Valve Replacement
.
- Fill the transmission with transmission oil. Refer to
Transmission Oil Changing
.


