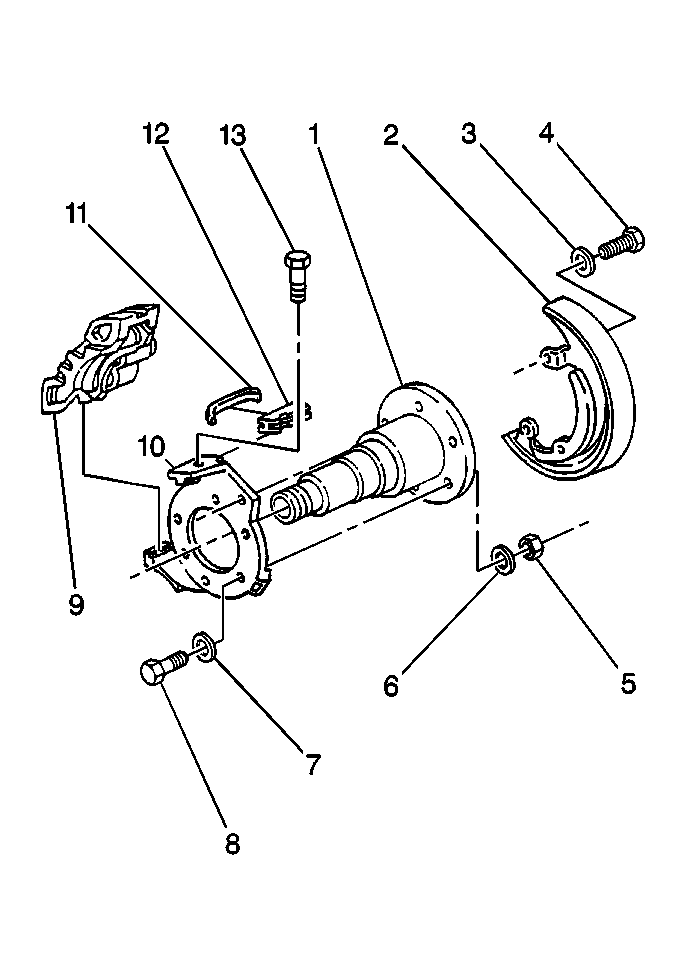
For 1990-2009 cars only
Rear Brake Caliper Mount Plate Replacement Dayton-Walther
Caution: Refer to Brake Dust Caution in the Preface section.
Use the brake caliper mounting plate in order to mount all of the stationary brake components. An L or R following the part number cast on the back of the plates indicates left or right side mounting. Some plates may also have an L or R painted on the front.
Removal Procedure
- Apply the parking brake.
- Block the wheels.
- Remove the brake caliper (9). Refer to Rear Brake Caliper Replacement.
- Do not remove the brake line from the caliper.
- Remove the hub and brake rotor assembly. Refer to Rear Brake Rotor Replacement.
- Remove the bolts and washers.
- Remove the brake caliper mounting plate (10).
- Inspect the support rails for rust, corrosion, and wear.
- Clean the support rails with a wire brush.
- Inspect the brake caliper mounting plate for cracks or elongated bolt holes.

Notice: Refer to Brake Caliper Notice in the Preface section.
Replace the mounting plate, if necessary.
Installation Procedure
- Install the brake caliper mounting plate (10) to the steering knuckle.
- Apply 272 Threadlocker GM P/N 12345493 (Canadian P/N 10953488) or equivalent, to the threads of each brake caliper mounting plate bolt.
- Install the bolts and washers.
- Install the hub and brake rotor assembly. Refer to Rear Brake Rotor Replacement.
- Install the brake caliper. Refer to Rear Brake Caliper Replacement.
- Remove the wheel blocks.

Important: Ensure that the threads are clean and greaseless before applying threadlocker.
Notice: Refer to Fastener Notice in the Preface section.
Tighten
| • | Tighten the brake shield bolts to 32 N·m (24 lb ft). |
| • | Tighten the brake caliper mounting plate bolts to 280 N·m (206 lb ft). |
