For 1990-2009 cars only
Tools Required
J 39400-A Halogen Leak Detector
Removal Procedure
- Tilt the cab. Refer to Cab Tilting .
- Recover the refrigerant from the A/C system. Refer to Refrigerant Recovery and Recharging .
- Remove the drive belt. Refer to Drive Belt Replacement .
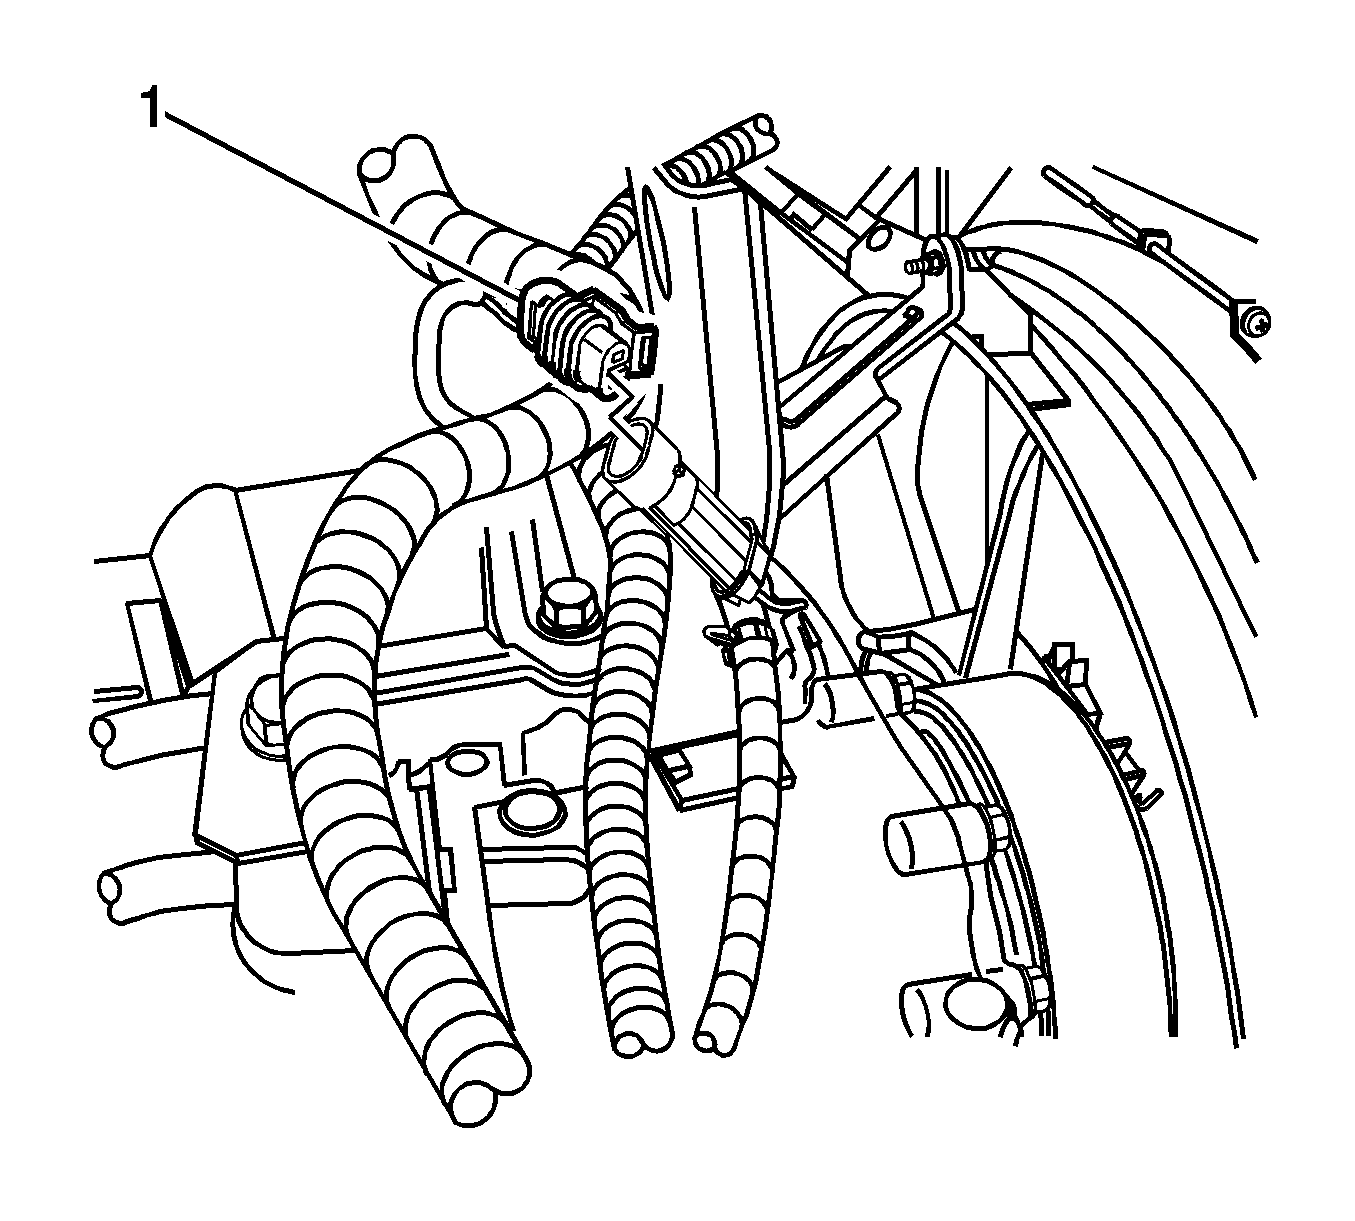
- Remove the electrical connector (1) from the compressor.
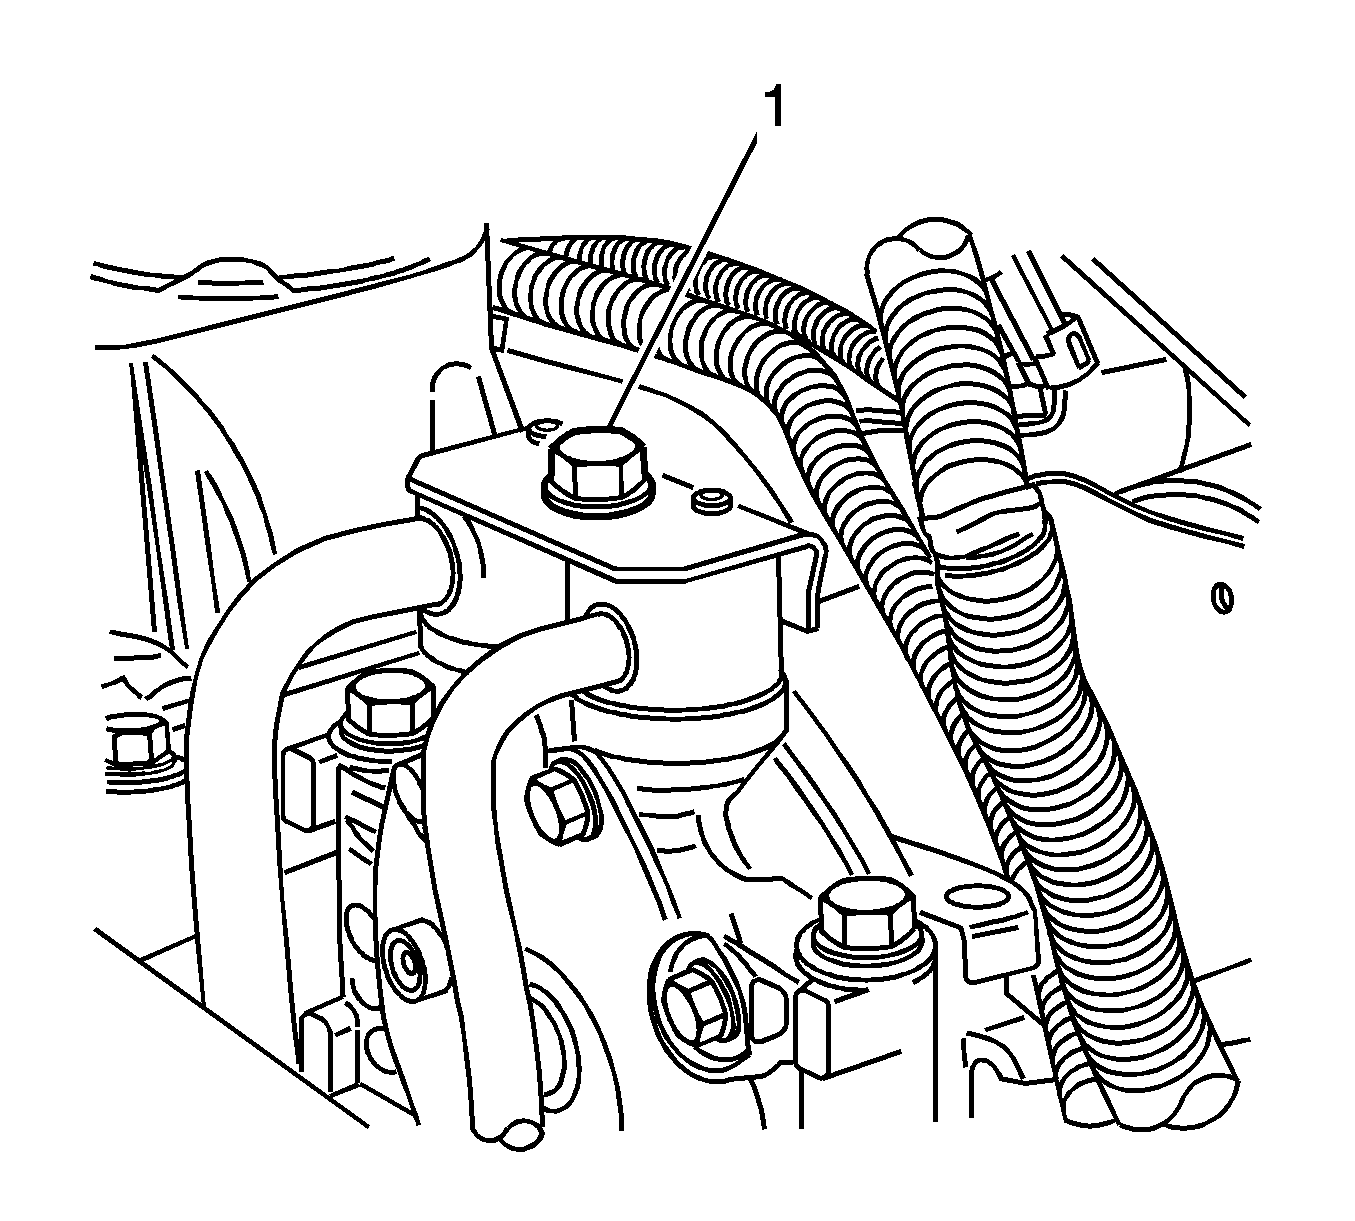
- Remove the compressor block fitting bolt (1).
- Remove the compressor hose assembly.
- Remove the sealing washers. Refer to Sealing Washer Replacement .
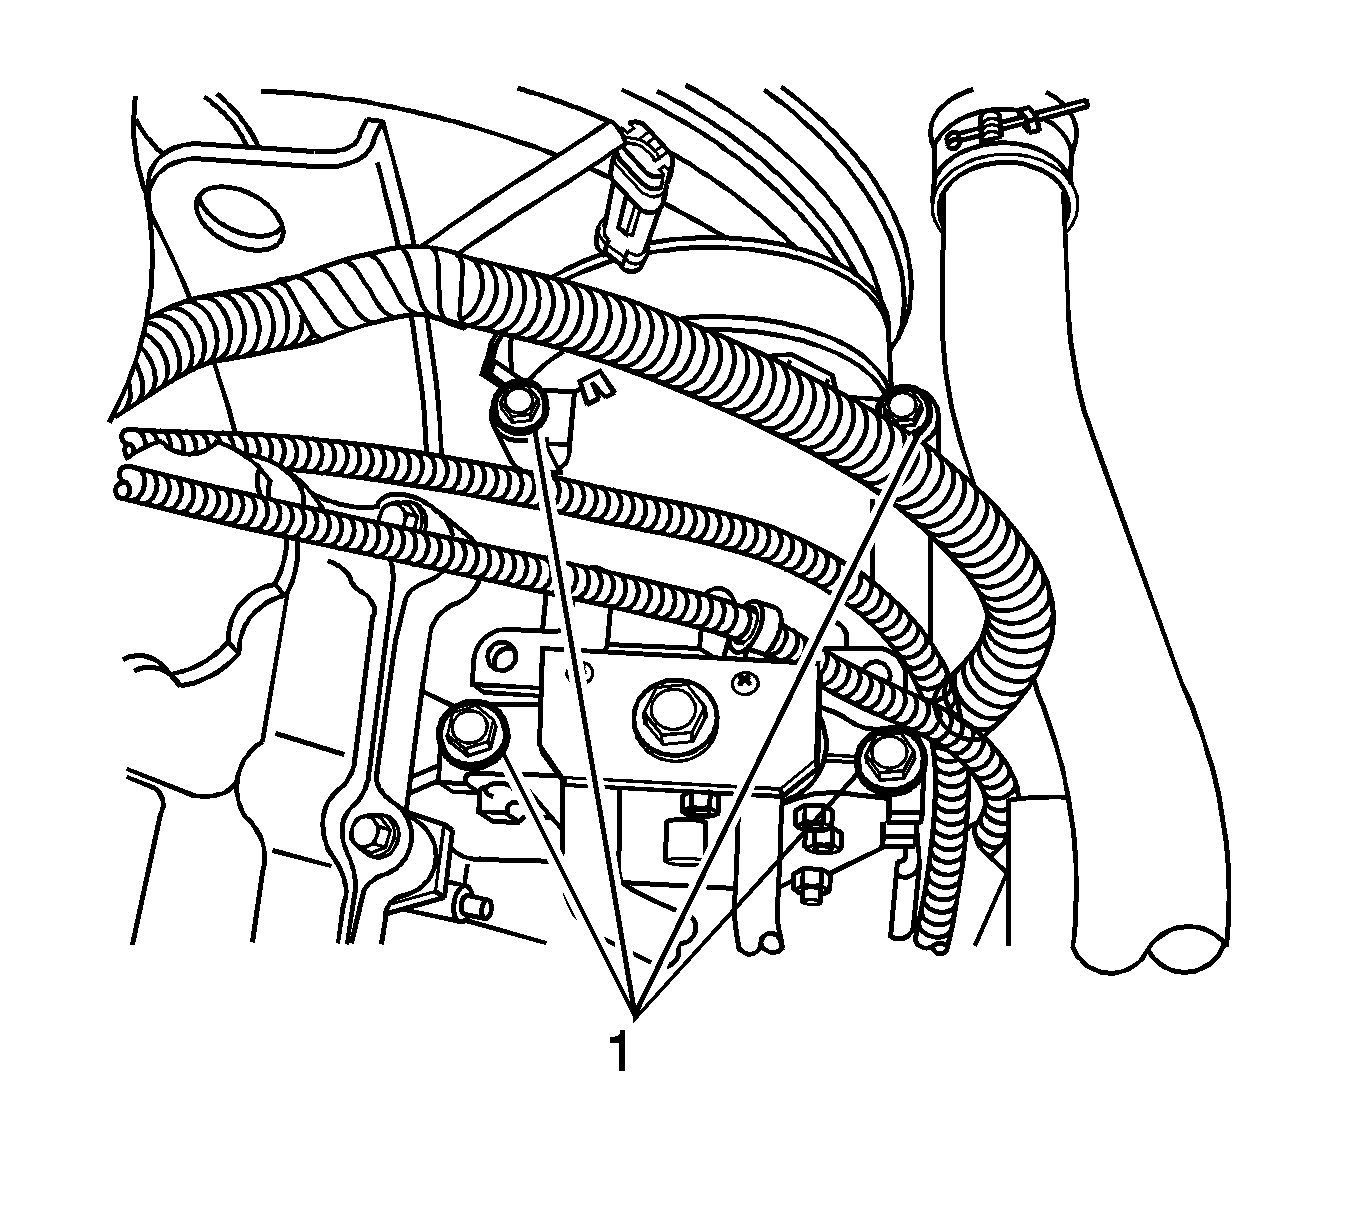
- Remove the compressor mounting bolts (1).
- Remove the compressor from the mounting bracket.


Important: When removing sealing washers, keep dirt and foreign material from getting in the compressor.
Clean all of the sealing surfaces with a lint-free rag.
Installation Procedure
- If replacing the A/C compressor balance the compressor. Refer to Air Conditioning Compressor Oil Balancing .
- Position the compressor to the mounting bracket.
- Install the bolts to the mounting bracket. Do not tighten at this time.
- Install new sealing washers onto the pilots of the fittings. Refer to Sealing Washer Replacement .
- Install the compressor hose assembly to the compressor.
- Install the compressor hose assembly bolt (1).
- Hold the block in place. Hand tighten the compressor hose assembly bolt (1).
- Install the compressor mounting bolts (1).
- Install the electrical connector (1) to the compressor.
- Evacuate and recharge the A/C system. Refer to Refrigerant Recovery and Recharging .
- Leak test the fittings of the repaired or reinstalled components using the J 39400-A .
- Lower the cab. Refer to Cab Tilting .

Notice: Refer to Fastener Notice in the Preface section.
Tighten
Tighten the bolt to 35 N·m (26 lb ft).

Tighten
Tighten the bolts to 22 N·m (16 lb ft).

