Tools Required
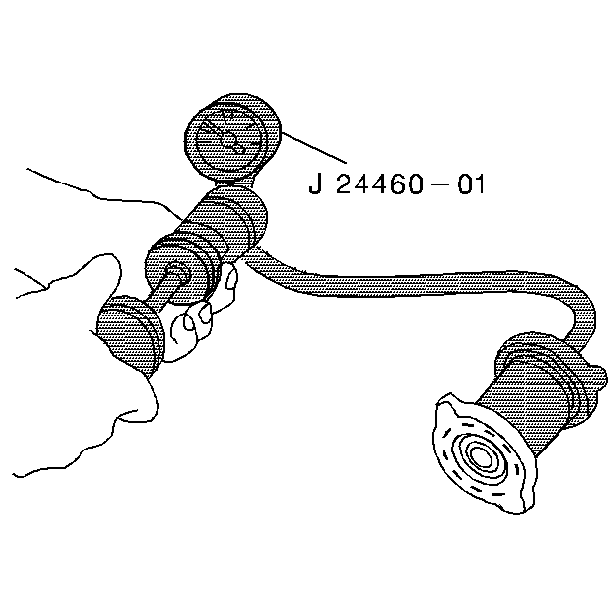
J 24460-01 Cooling System Tester
- Test the radiator cap for correct opening and closing pressures.
- Replace any faulty caps.
- Remove the radiator cap.
- Wash off any sediment on the sealing surfaces of the radiator cap.
- Wet the radiator cap gasket with coolant.
- Install the cap to the J 24460-01 .
- Operate the plunger handle of the J 24460-01 .
- Note the rate of the decrease in pressure.
- Replace the cap if the cap does not hold the pressure for 10 seconds.
Caution: To avoid being burned, do not remove the radiator cap while the engine is at normal operating temperature. The cooling system will relieve scalding fluid and steam under pressure if the cap is removed while the engine and radiator are still hot, causing serious injury.
Correct opening and closing pressures ensure the safe, efficient operation of the cooling system. A pressure cap that cannot maintain pressure lowers the boiling point of the engine coolant. A lower boiling point causes the engine cooling system to operate at a higher than normal temperature.
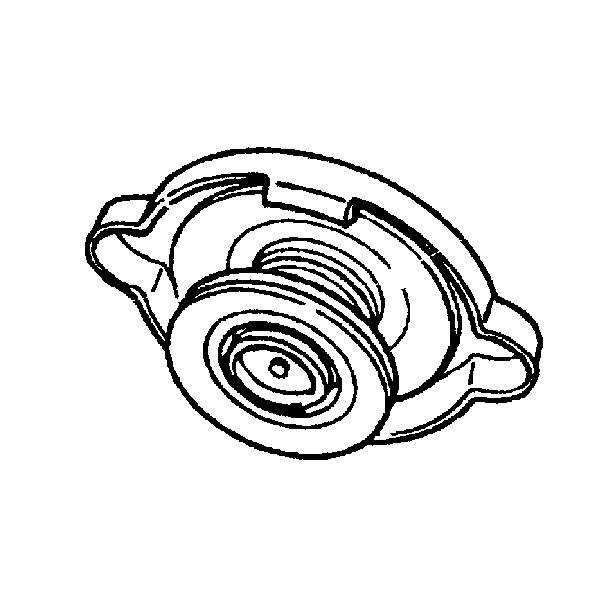
Pump up the pressure to the pressure that is stamped on the cap.
Verify that the pressure reading remains within the corresponding pressure segment of the scale for about 10 seconds.
Cooling System
Tools Required
J 24460-01 Cooling System Tester
- Tighten the following components:
- Inspect the connections for leaks at the following locations:
- Remove the filler cap.
- Fill the cooling system to the level of the filler cap seat.
- Attach the J 24460-01 to the filler neck.
- Follow the instructions that are supplied with the J 24460-01 .
- Increase the pressure to 138 kPa (20 psi).
| • | The radiator hose clamps |
| • | The heater hose clamps |
| • | The surge tank |
| • | The expansion tank |
| • | The air compressor coolant lines |

Do not exceed 138 kPa (20 psi). The system should hold the pressure for about 2 minutes.
Off-Vehicle Pressure Testing
- Install test fittings or rubber test caps in the inlet and the outlet necks.
- Seal the oil cooler fittings with metal plugs.
- Attach the pressure tester.
- Gradually apply air pressure until 138 kPa (20 psi) is attained.
- Inspect the gauge in order to see if a pressure leak exists.
- Run a mixture of water and mild detergent over the radiator.
Notice: Do not use boil-out tanks or vats or other tanks that have been used for copper or brass radiators. The flux, acid, and caustic cleaners remaining in these tanks and will attack the aluminum and cause radiator failure. Use a separate test tank containing clean water for servicing aluminum/plastic radiators.
Sealing the fittings will protect the cooler and prevent fluid loss.
Do not exceed 138 kPa (20 psi).
Inspect for bubbles in order to ensure that no leaks exist. Bubbles indicate leaks.
