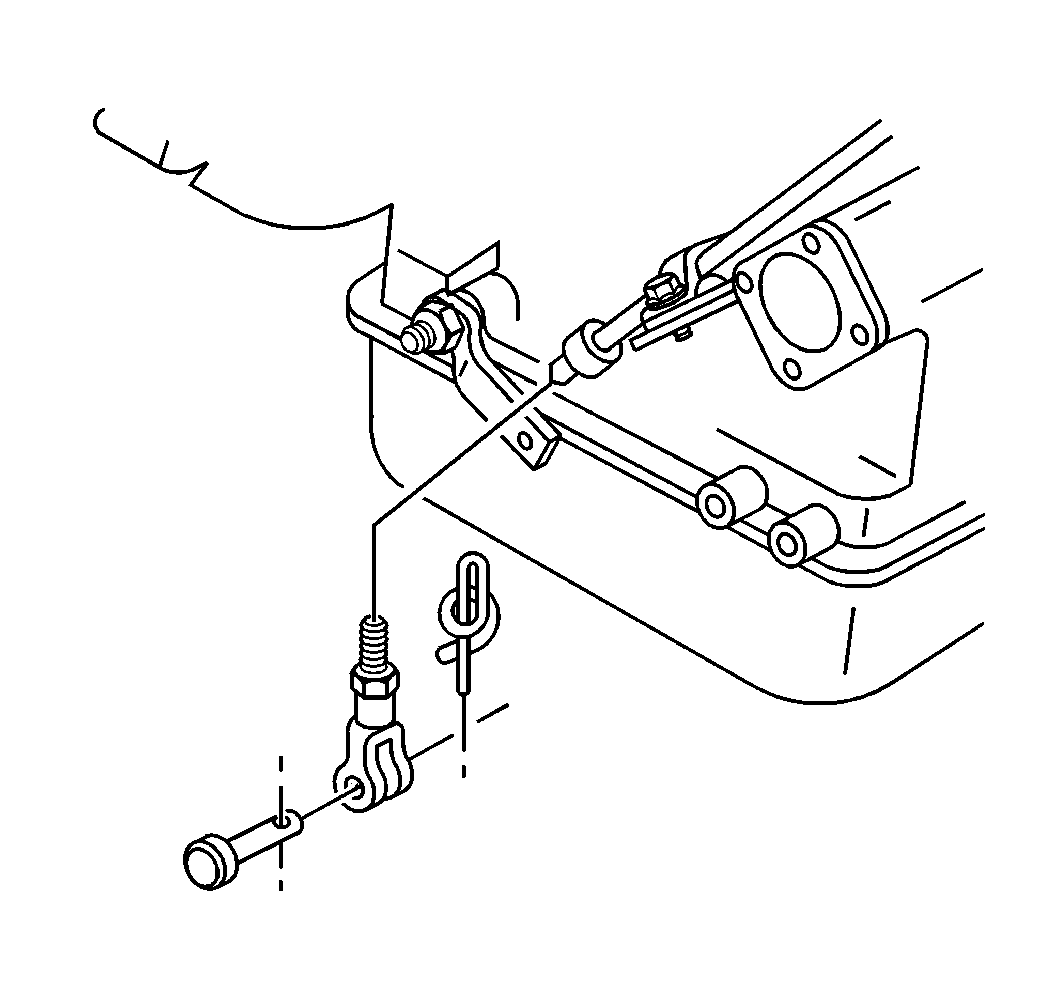
Inspection Procedure
- Turn the ignition OFF.
- Block the wheels.
- Shift the selector lever through each drive range while feeling
for full engagement of the transmission.
| 3.1. | Make sure the shift control fully engages all the transmission
detent positions in the transmission before the range selector hits a stop. |
| 3.2. | Note the position of the selector lever after each shift. |
| 3.3. | Make sure the transmission detent R (reverse) does not engage
until the selector lever is completely out of the neutral notch. |
- If the selector lever is not properly located or operating, adjust
the shift control cable.
| • | Before adjusting the shift cable, make sure that all the shift
controls are not damaged and operate smoothly. |
| • | Have an assistant select the required range selector position
while you listen for the full engagement of the gears at the transmission
shift lever. |
Adjustment Procedure
- Place the range selector against the stop in the R (reverse) position.

- Disconnect the clevis from the transmission
shift lever.
- Position the transmission shift lever into the mechanical reverse
position.
- Loosen the jam nut at the clevis.
- Turn the clevis on the threaded cable core until the holes in
the clevis align with the hole in transmission shift lever.
- Install the clevis pin.
| 6.1. | Make sure that the clevis pin enters the holes freely. |
| 6.2. | If the clevis pin does not enter the holes freely, adjust the
clevis by turning the clevis one half turn in either direction. |
Important: Do not spread the cotter pin.
- Secure the clevis pin to the transmission shift lever with a new cotter
pin.
- Move the range selector lever in order to check for the detent
engagement.
| 8.1. | Make sure the transmission detents fully engage just before the
range selector lever hits the stops in the shift control lever. |
| 8.2. | Check for the detent engagement in the N (neutral) position. |
| 8.3. | Check for the detent engagement in the D (drive) position. |
| 8.4. | Check for the detent engagement in the R (reverse) position. |
| 8.5. | Check for the detent engagement in all the other range positions. |
- Spread the cotter pin.
- Tighten the jam nut against the clevis pin.

