Body Mount Replacement Cab Mounts
Removal Procedure
Notice: The cab must be properly supported and the weight of the cab evenly
distributed during cab mount replacement. Failure to provide proper support
could result in damage to the vehicle.
- Raise the cab. Refer to
Cab Tilting
in
General Information.
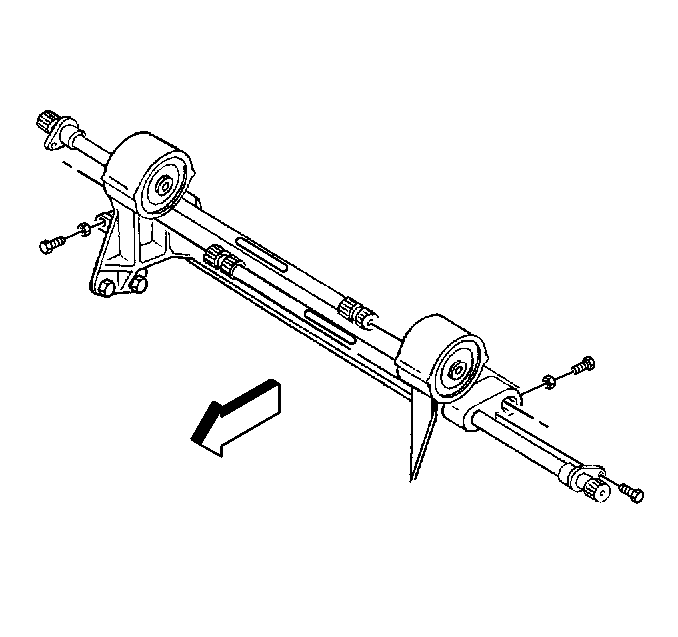
- Mark the shaft and gear in order to aid in reassembly.
- Remove the steering shaft at the steering gear.
- Remove the cab lock cover.
- Fasten a rope securely to the cable lock. Use a hoist or a chain
block in order to keep the cab tilted.
- Remove the torsion bar
levers.
- Remove the cab tilt support.

- While slowly lowering
the cab, remove each one of the center pins by tapping the pin with a hammer.
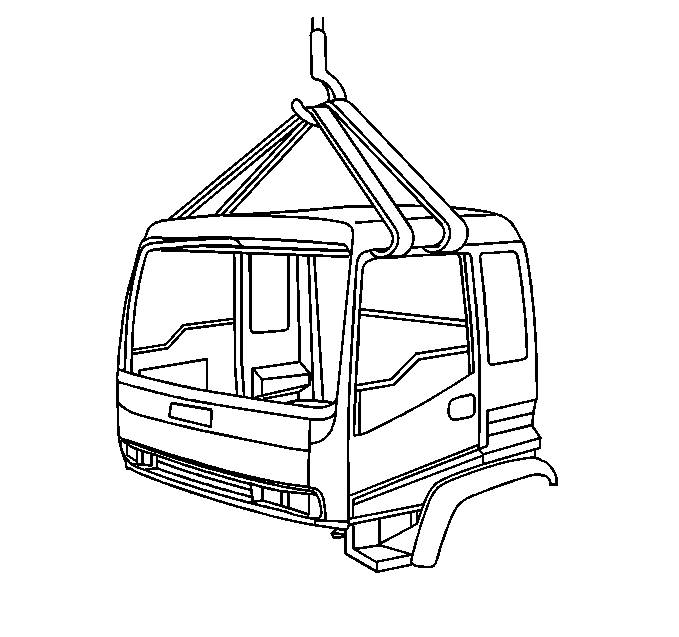
Important: The trimmed cab weighs about 373 kg (1,000 lbs).
- Perform the following procedure:
| 9.1. | Use 4 commercial straps that are 152 mm (6 in)
wide and about 3 m (10 ft) long in order to lift the cab from
the chassis. |
| 9.2. | Pass the straps into the cab through the door on each side at
the top rear of the window openings. |
| 9.3. | Connect the straps in the center. |
| 9.5. | Lift the cab from the chassis just enough to clear the mounts. |
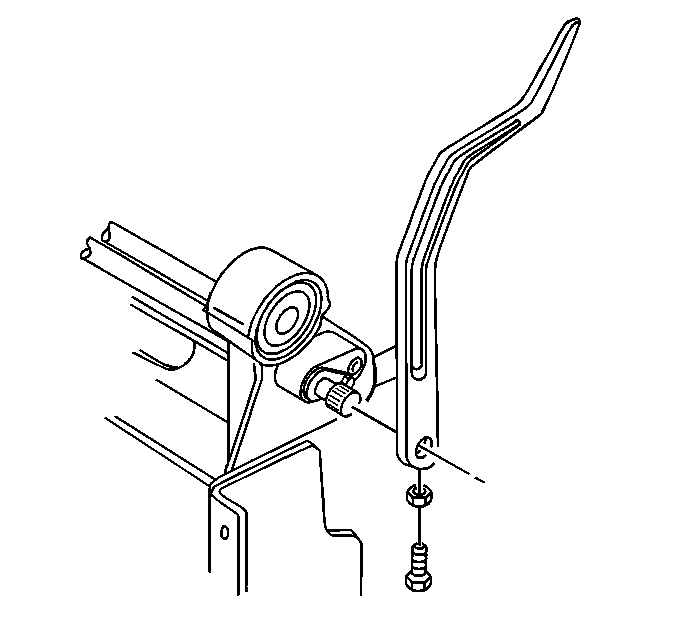
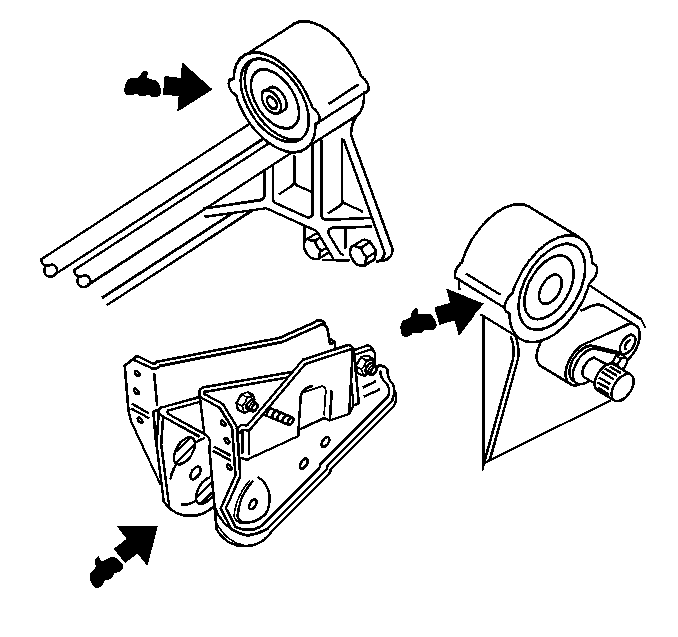
- Remove the front cab mount
assembly from the frame.
Installation Procedure
Notice: The cab must be properly supported and the weight of the cab evenly
distributed during cab mount replacement. Failure to provide proper support
could result in damage to the vehicle.
Notice: Use the correct fastener in the correct location. Replacement fasteners
must be the correct part number for that application. Fasteners requiring
replacement or fasteners requiring the use of thread locking compound or sealant
are identified in the service procedure. Do not use paints, lubricants, or
corrosion inhibitors on fasteners or fastener joint surfaces unless specified.
These coatings affect fastener torque and joint clamping force and may damage
the fastener. Use the correct tightening sequence and specifications when
installing fasteners in order to avoid damage to parts and systems.
- Install the front
cab mount assembly to the frame.
Tighten
Tighten the bolts to 162 N·m (119 lb ft).
- Slowly lower the cab into
position.
- Install the left and right
center pins.
- Hook a wire to the cab striker, pull the safety lever, and tilt
the cab slowly. Use the wire in order to keep the cab from floating up.
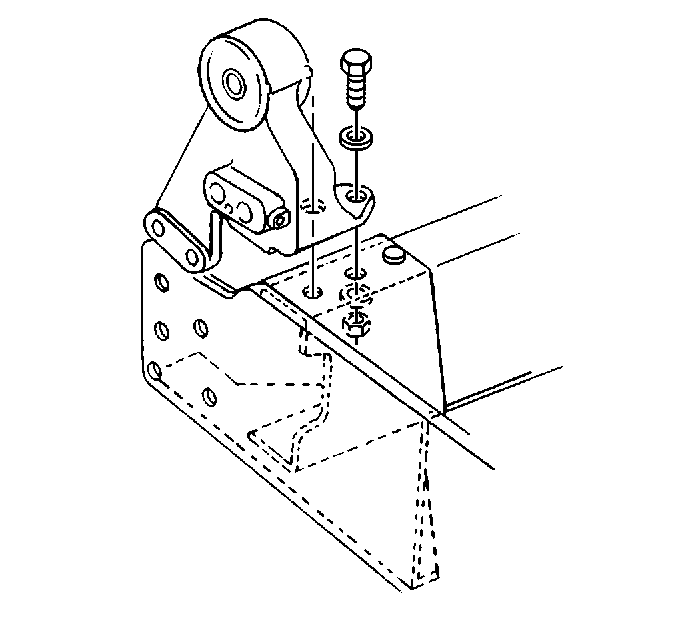
- Install the cab tilt support to the cab.
- Lower the bracket.
Tighten
Tighten the bolt to 45 N·m (33 lb ft).
- Lower the cab until the
hole in the cab support inner channel aligns with the top hole in the cab
support outer channel.
- Install the following components:
- Perform the following
in order to install the torsion bar levers:
| 9.1. | Locate the left and right identification marks. |
| 9.2. | Match the serration. |
| 9.3. | Install the torsion bar levers. |
Tighten
Tighten the bolt/nut to 37 N·m (27 lb ft).
- Apply grease to the steering
shaft.
- Use the match marks made during disassembly as a guide to install
the steering shaft.
- Securely insert the steering shaft and the steering unit to the
far end.
- Tighten the key bolt.
Tighten
Tighten the bolt to 61 N·m (45 lb ft).
- Lower the cab.
Body Mount Replacement Cab Mount
Removal Procedure
- Raise the cab. Refer to
Cab Tilting
in General Information.
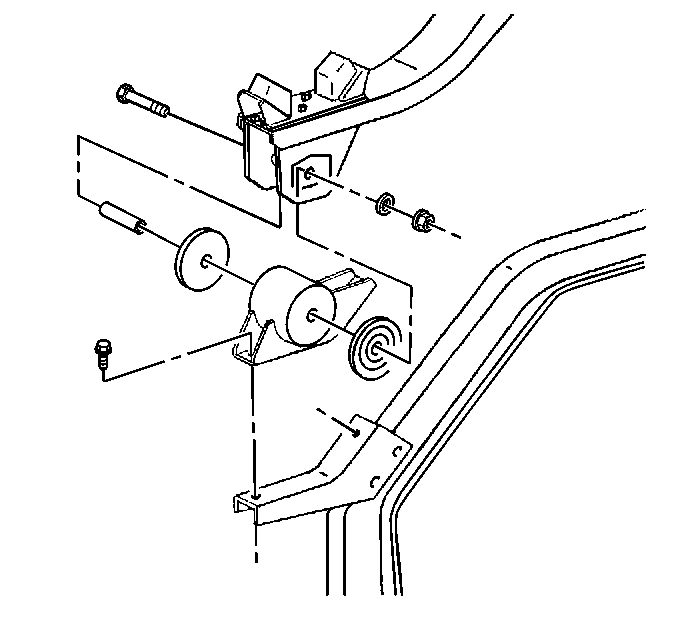
- Remove the mount from
the upper bracket.
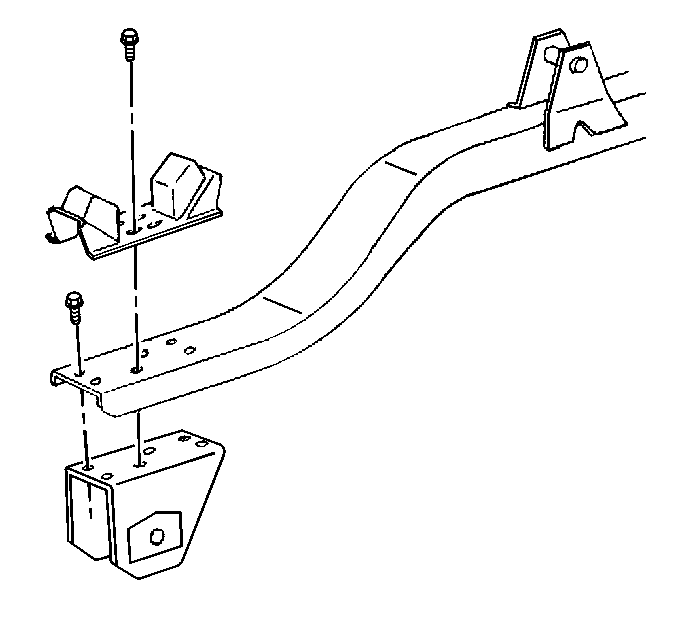
- Remove the following components:
- Remove the upper bracket.
- Remove lower bracket.
- Remove the rear body mount
from the frame.
Installation Procedure
Notice: The cab must be properly supported and the weight of the cab evenly
distributed during cab mount replacement. Failure to provide proper support
could result in damage to the vehicle.
Notice: Use the correct fastener in the correct location. Replacement fasteners
must be the correct part number for that application. Fasteners requiring
replacement or fasteners requiring the use of thread locking compound or sealant
are identified in the service procedure. Do not use paints, lubricants, or
corrosion inhibitors on fasteners or fastener joint surfaces unless specified.
These coatings affect fastener torque and joint clamping force and may damage
the fastener. Use the correct tightening sequence and specifications when
installing fasteners in order to avoid damage to parts and systems.
- Install the rear
body mount to the frame.
Tighten
Tighten the bolt to 240 N·m (177 lb ft).
- Install the lower bracket.
Tighten
Tighten the bolts to 93 N·m (69 lb ft).
- Install the upper bracket.
Tighten
Tighten the bolt to 215 N·m (159 lb ft).
- Install the following components:
- Install the mount to the
upper bracket.
- Lower the cab.
Body Mount Replacement Bracket
Removal Procedure
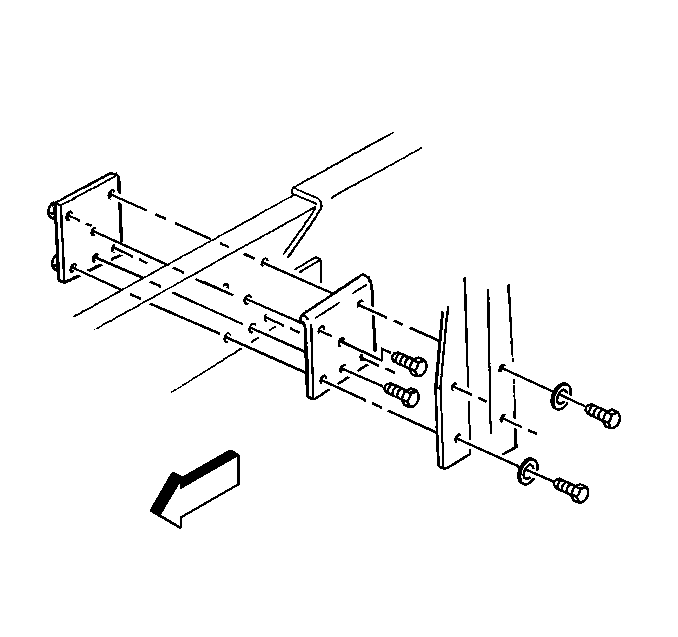
- Release the cab lock.
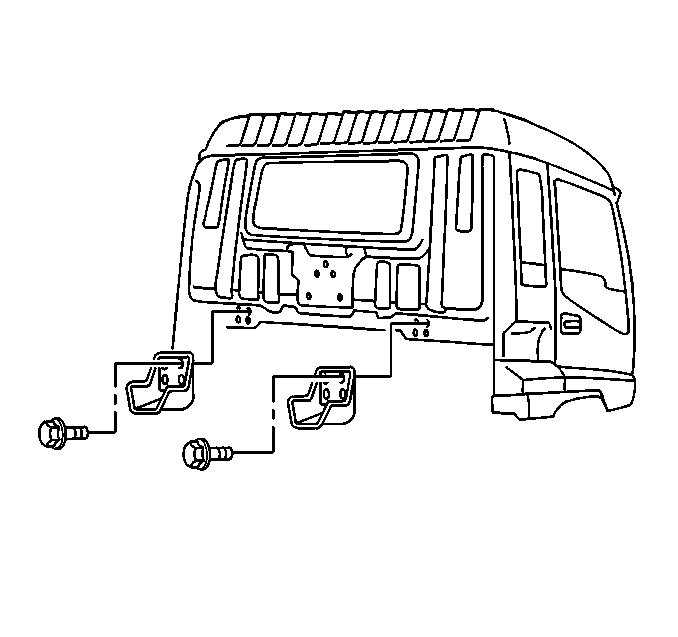
- Remove the bolts from
the bracket.
- Remove the bracket from the cab.
Installation Procedure
Notice: Use the correct fastener in the correct location. Replacement fasteners
must be the correct part number for that application. Fasteners requiring
replacement or fasteners requiring the use of thread locking compound or sealant
are identified in the service procedure. Do not use paints, lubricants, or
corrosion inhibitors on fasteners or fastener joint surfaces unless specified.
These coatings affect fastener torque and joint clamping force and may damage
the fastener. Use the correct tightening sequence and specifications when
installing fasteners in order to avoid damage to parts and systems.
- Install the bracket
to the cab.
Tighten
Tighten the bolts to 15 N·m (11 lb ft).
- Latch the cab lock.
