- Connect the Tech 2 to
the 16 pin data link connector (DLC).
- Turn the ignition ON.
- Record the broadcast code.
- Select the Special Function option.
- Select the Capture and Restore Fuel Rate Data option.
- Select the Capture Fuel Rate Data option then press Enter.
- Follow the display screen, then push Done.
- Turn the ignition OFF.
Notice: Use the correct fastener in the correct location. Replacement fasteners
must be the correct part number for that application. Fasteners requiring
replacement or fasteners requiring the use of thread locking compound or sealant
are identified in the service procedure. Do not use paints, lubricants, or
corrosion inhibitors on fasteners or fastener joint surfaces unless specified.
These coatings affect fastener torque and joint clamping force and may damage
the fastener. Use the correct tightening sequence and specifications when
installing fasteners in order to avoid damage to parts and systems.
- If replacing the
ECM, complete the following procedure:
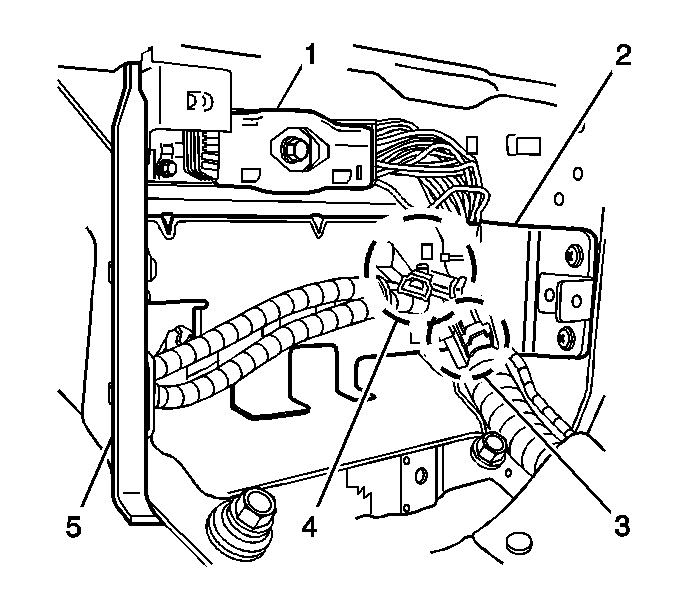
| 9.2. | Remove the four screws connecting the ECM bracket to the right
seat stand. |
| 9.3. | Pull the ECM (1) and the bracket (2) straight out. |
| 9.4. | Loosen the bracket retaining screws at the ECM. |
| 9.5. | Remove the bracket from the ECM. |
| 9.6. | Loosen the electrical connector retaining bolt. |
| 9.7. | Disconnect the electrical connector from the ECM. |
| 9.8. | Connect the electrical connector at the new ECM. |
| 9.9. | Tighten the electrical connector retaining bolt. |
Tighten
Tight the bolt to 2 N·m (17 lb in).
| 9.10. | Install the bracket at the new ECM. |
| 9.11. | Install the new ECM. |
- Turn the ignition ON.
- Select the Restore Fuel Rate Data option then press Enter.
- Follow the display screen then push Done.
- Confirm the recorded ECM broadcast code.
- Start the vehicle.
- Inspect for a proper running condition and no DTCs.
