Cleaning Procedure
| • | Clean the piston and rings in cleaning solvent. Do not use a wire brush on the piston. Damage may occur. |
| • | Clean the piston ring grooves with a ring groove cleaning tool. |
Inspection Procedure
| • | Inspect the pistons for cracks and scoring. |
| • | Inspect the liner for scratches, cracks, and scoring. |
Measurement Procedure
- Measure the piston ring groove clearance as follows:
| • | First groove: 0.067-0.105 mm (0.0026- 0.0041 in) |
| • | Service Limit: 0.2 mm (0.0787 in) |
| • | Second and third grooves: 0.03-0.07 mm (0.0012-0.0020 in) |
| • | Service Limit: 0.15 mm (0.0059 in) |
| • | Oil control ring: 0.030-0.07 mm (0.0012-0.0028 in) |
| • | Service Limit: 0.15 mm (0.0059 in) |
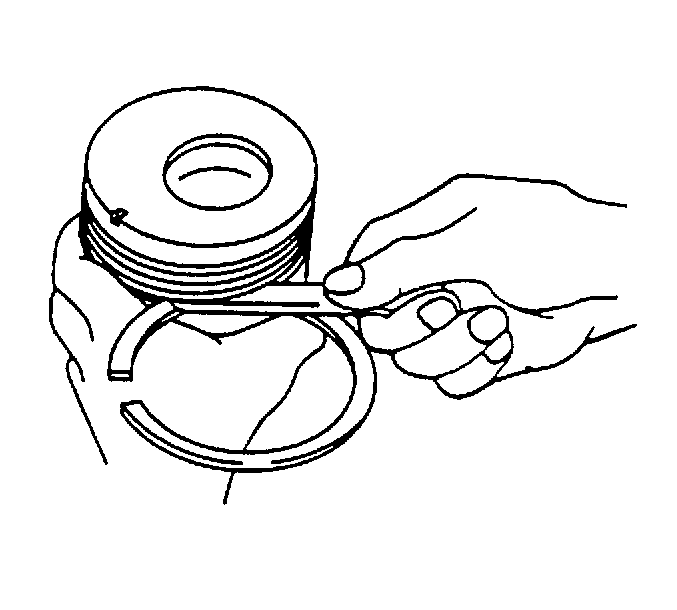
- Measure the piston ring end gap.
- Insert the piston assembly into the cylinder liner, 195 mm (7.67 in) below the top of the cylinder liner.
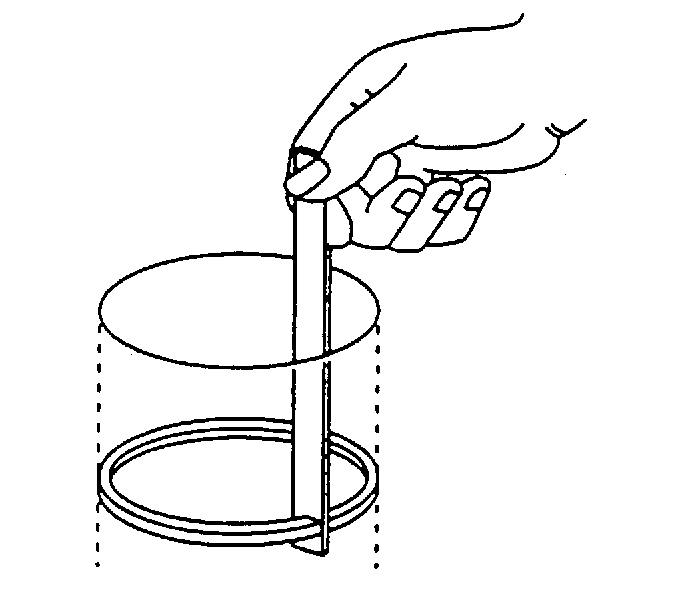
- Measure the piston ring gap as follows:
| • | First compression ring: 0.20-0.30 mm (0.0079-0.0118 in) |
| • | Service Limit: 1.2 mm (0.0472 in) |
| • | Second and third compression rings: 0.30-0.45 mm (0.0118-0.0177 in) |
| • | Service Limit: 1.2 mm (0.0472 in) |
| • | Oil control ring: 0.20-0.40 mm (0.079-0.0157 in) |
| • | Service Limit: 1.2 mm (0.0472 in) |
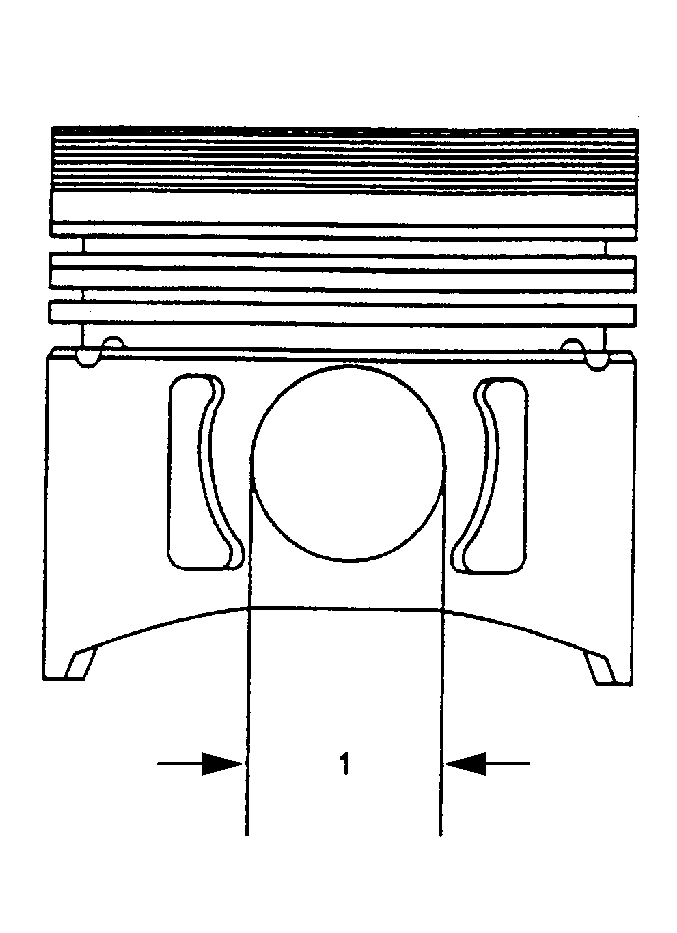
- Measure the piston pin bore inside diameter. Measurement should be 40.004-40.012 mm (1.5750-1.5752 in) (1).
Service limit: 40.05
Important: Replace the piston pin if it is less than the specification.
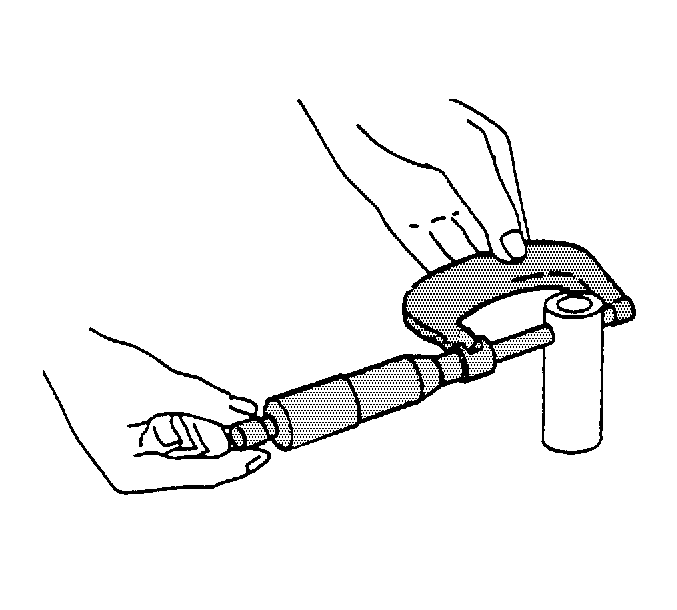
- Measure the piston pin to the piston clearance. The measurement should be taken at 3 different points. The measurement should not be less than 39.95 mm (1.5728 in).
- Subtract the piston pin diameter from the piston pin bore reading. Proper clearance is 0.004-0.017 mm (0.0002-0.0007 in).
- Apply a piece of plastic gage the width of the connecting rod bearing journal.
Important: Apply a small amount of molybdenum grease to the bolts.
- Install the connecting rod bearing inserts to the connecting rod and the connecting rod cap.
- Install the connecting rod bolts.
Tighten
Tighten the connecting rod bolts to 39 N·m (29 lb ft). Then tighten an additional 60 degrees, and then 30 degrees.
- Remove the connecting rod cap from the crankshaft.
Important: Do not remove the plastic gage from the crankshaft journal until the clearance measurement is finished.
- Measure the plastic gage.
- The measurements should be 0.037-0.076 mm (0.00146-0.00299 in). If the clearances are within factory specifications, the connecting rod bearings are satisfactory.
- Remove the plastic gage.
- If the clearances are not within the factory specifications, replace the connecting rod bearing inserts as a set (upper and lower inserts).
- Repeat the procedure.
- If the connecting rod bearings still are not within the specifications, replace the crankshaft.
