Improper Shifting: Leaking Shift Solenoid

| Subject: | NPR EFI 4L80-E Improper Shifting: Leaking Shift Solenoid |
| Models: | 1996-1997 NPR EFI models equipped with 4L80-E automatic transmission. |
| Attention: | This Service Bulletin is intended for use by professional, qualified technicians. Attempting repairs or service without the appropriate training, tools, and equipment could cause injury to you or others and damage to your vehicle that may cause it not to operate properly. |
Service Information
Condition
Some owners may comment about a loss of 4th gear, slipping in 4th gear, busy 3-4 shifting or Torque Converter Clutch (TCC) cycling without triggering any Diagnostic Trouble Codes (DTC).
Possible Cause
A shift solenoid may be leaking hydraulically. This condition may be a result of an improperly functioning cooling system of either the engine or transmission, or both. The above listed conditions occur mainly on high duty cycle applications and/or when the transmission is operated under high temperature conditions.
Correction
If normal diagnosis does not provide a correction, follow the solenoid test procedure listed below. Replace the shift solenoid if it fails the test. Also, verify that the transmission and engine cooling systems are operating properly.
Important: As of June 23, 1997 (Julian date 174), all HYDRA-MATIC 4L80-E transmissions are being built with the new solenoid assemblies. The new solenoids will service all 1993 through 1997 4L80-E applications.
Service Procedure
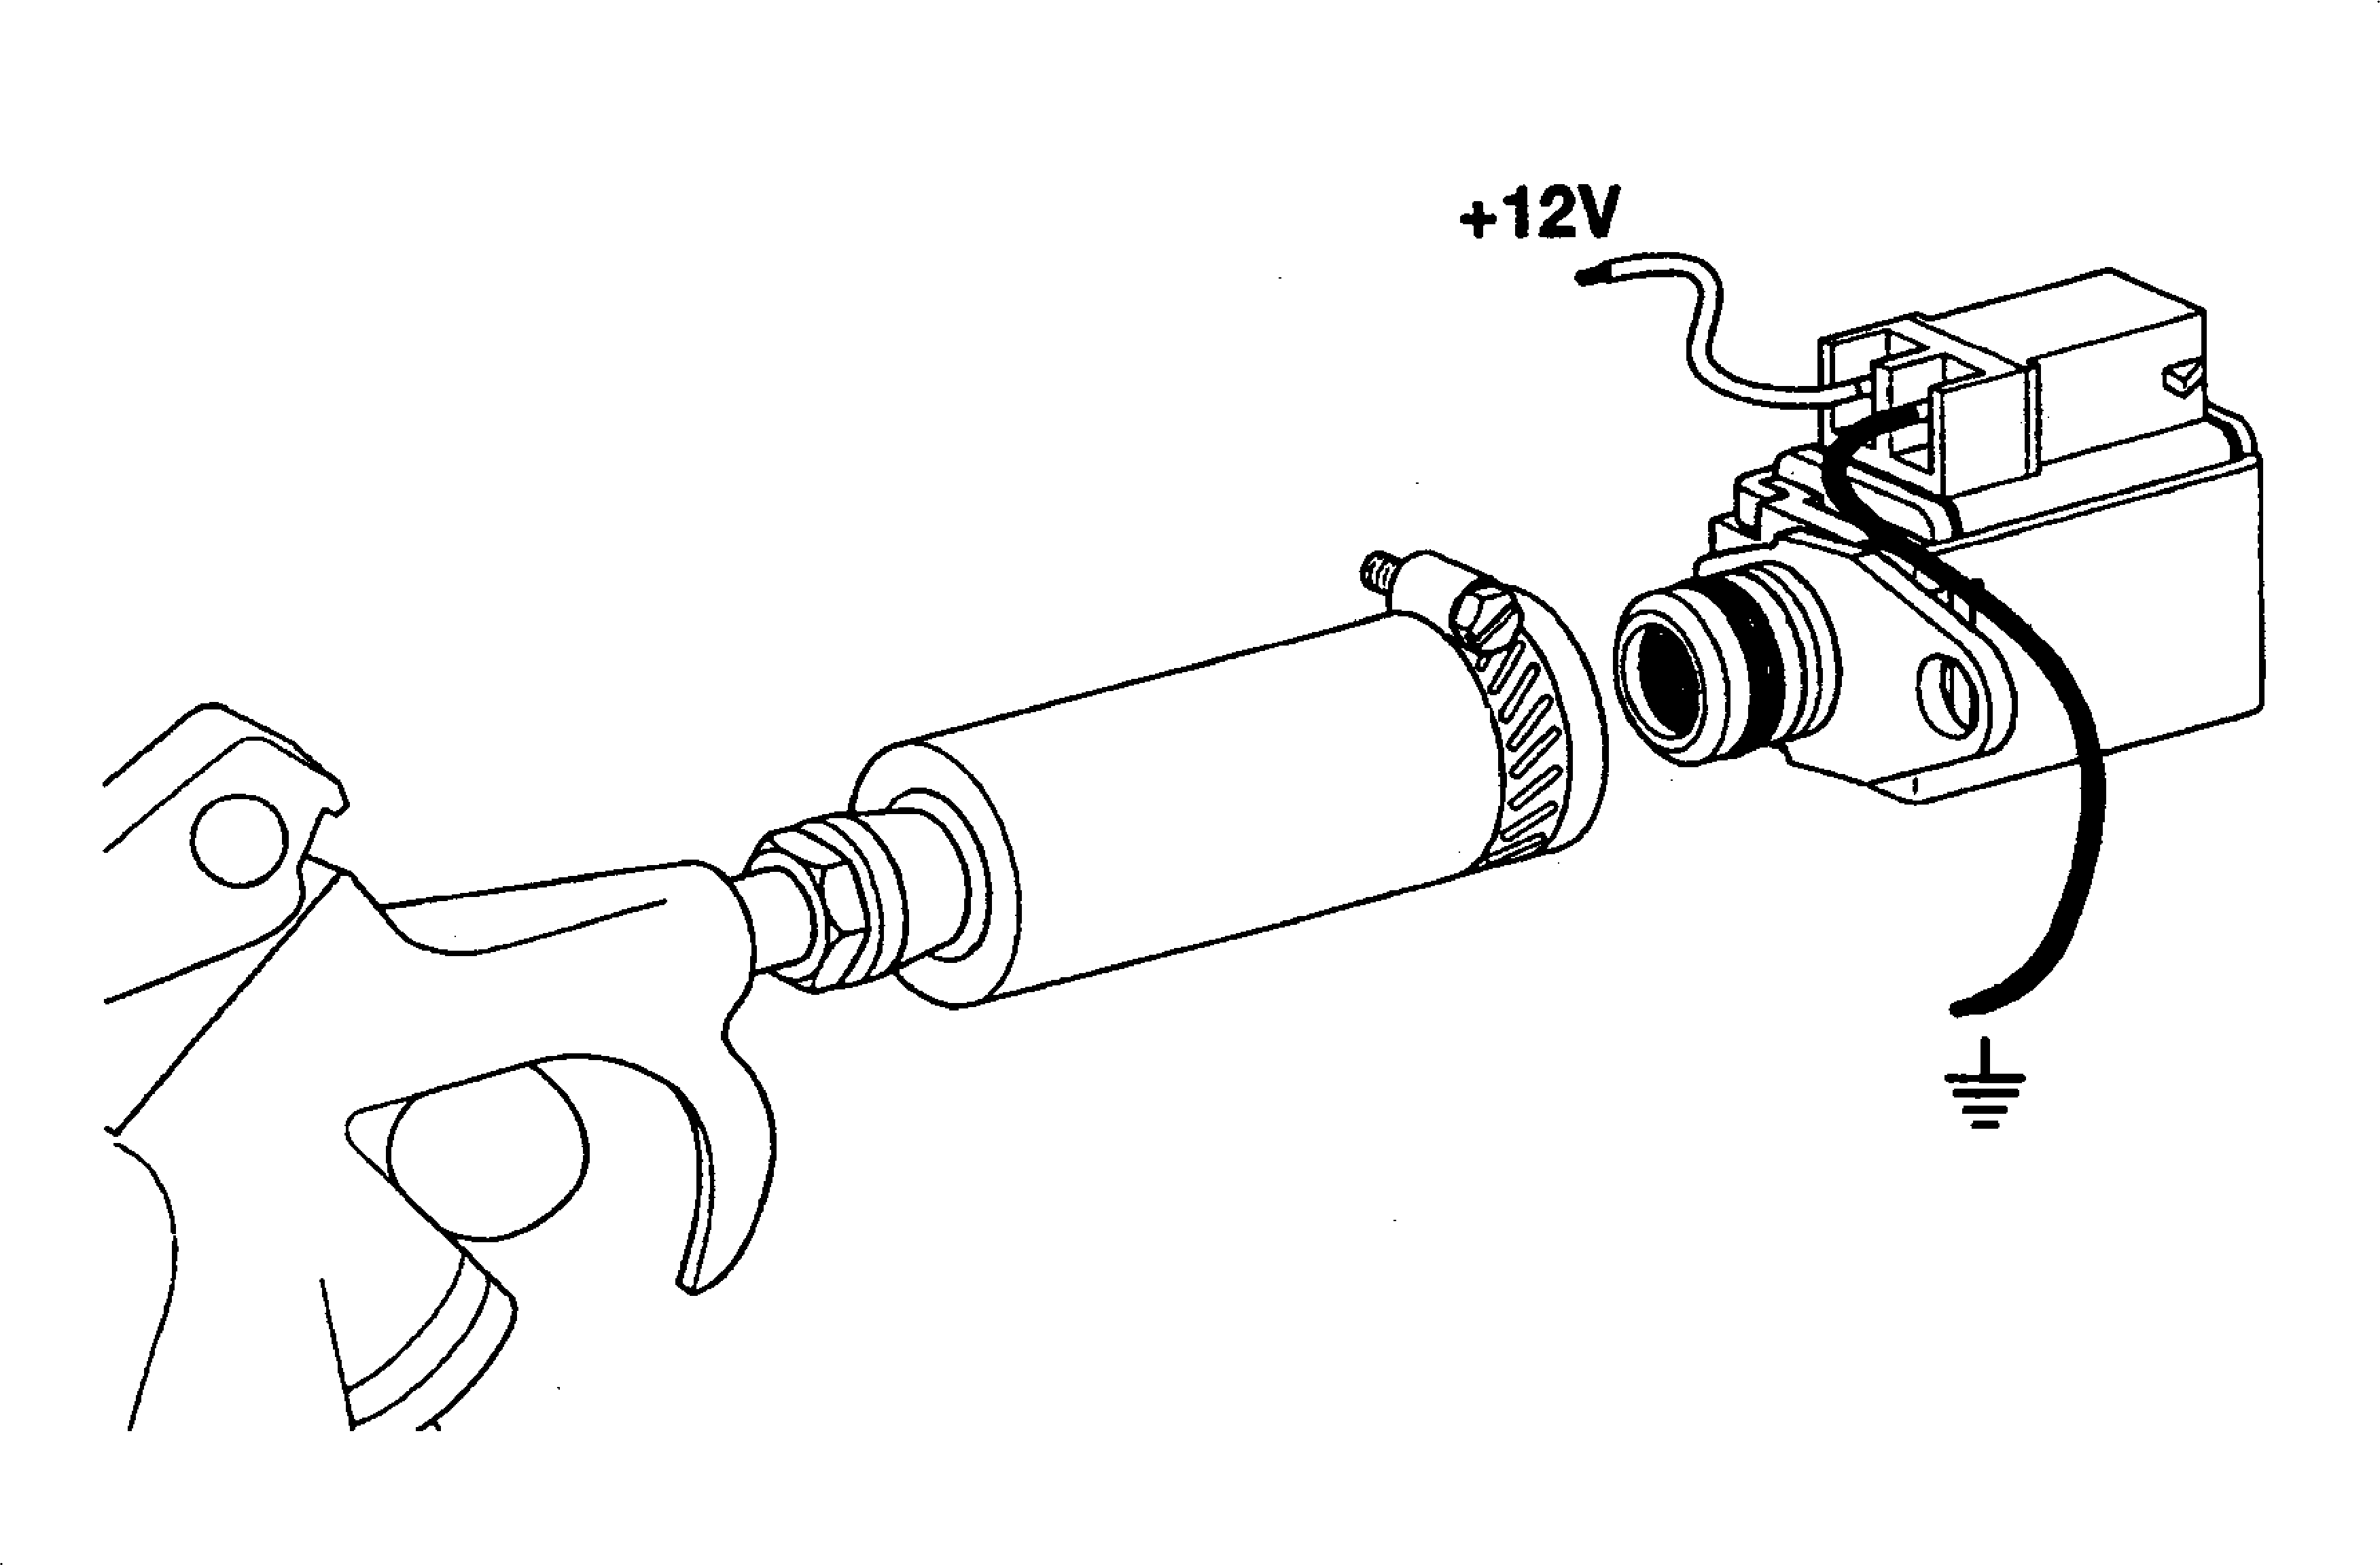
Each solenoid may be tested for leaking, using the following test:

- Remove the solenoid from the control valve body. Refer to the service manual for the proper procedure.
- Clamp a piece of ½ inch I.D. rubber hose over the fluid inlet end of the solenoid.
- Connect a wire from one of the solenoid terminals to the negative terminal (ground) of a battery.
- Apply compressed air to the rubber hose. Do not use air pressure in excess of 120 PSI. Excessive pressure will not allow the check-ball to seat properly.
- Connect a wire from the other solenoid terminal to the positive terminal (12 volts) of the battery.
- Observe the airflow through the solenoid. Replace the solenoid if there is an air leak when the solenoid is energized.
Important: When removing the pan harness/solenoid connector(s), take caution to prevent breakage.
Parts Information
Part Number | Description | Qty |
|---|---|---|
8-10478-140-0 | 1-2 & 3-4 Shift Solenoid | *1 |
8-10478-141-0 | 2-3 Shift Solenoid | *1 |
* Replace only failed units.
Warranty Information
Use the following revised labor operation:
Operation | Oper. Number | Task | Time |
|---|---|---|---|
(1-2 & 3-4 Shift) | K6555 | A Solenoid Remove & Replace | 1.0 |
(2-3 Shift) | K6556 | B Solenoid Remove & Replace | 1.0 |
Labor Time includes administrative time allowance.
