Front Housing Assemble NV3500
Front Housing Assembly
Tools Required
| • | Hydraulic Press |
| • | J 36183 Input Shaft Press Tube with Cap |
| • | J 36184 Adapter Press Tube Reducer |
| • | J 36510 Clutch Fork Pivot Remover/Installer |
| • | J 36507 Detent Bushing Remove/Installer |
| • | J 36511 Oil Fill Plug Hex Bit (17 mm) |
| • | J 36798 Shift Shaft Bushing Installing Tool |
| • | J 36190 Driver Handle |
- Install the input shaft bearing.
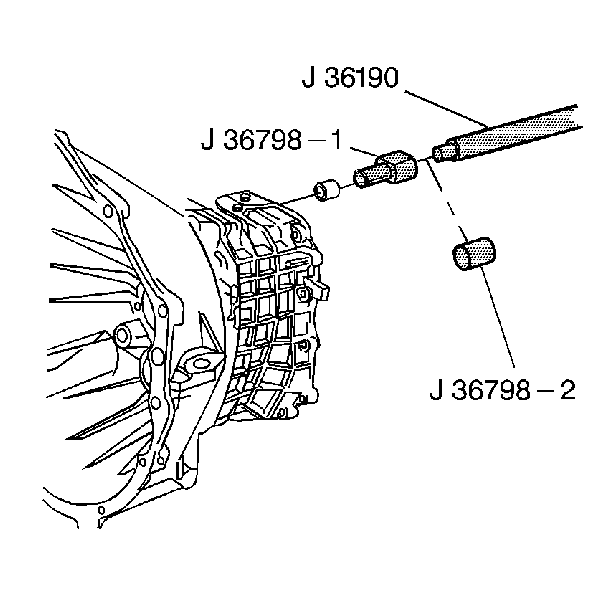
- Install the shift shaft front housing bushings. Use J 36798 and J 36190 .
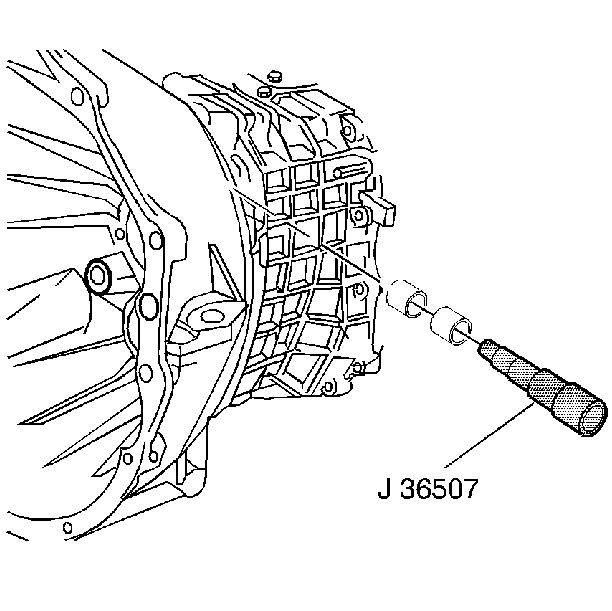
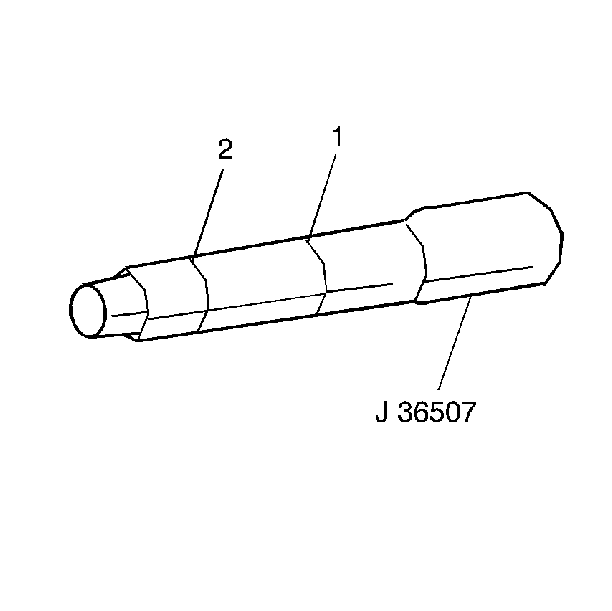
- Install the two detent plunger bushings. Use tool J 36507 .
- Install the first bushing until the second scribe mark on the tool is aligned with the housing.
- Install the second bushing until the first scribe mark on the tool is aligned with the housing.
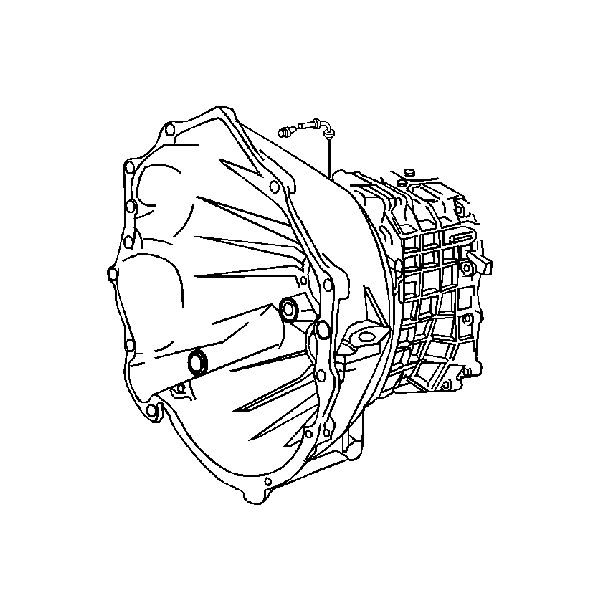
- Install the transmission housing vent assembly.
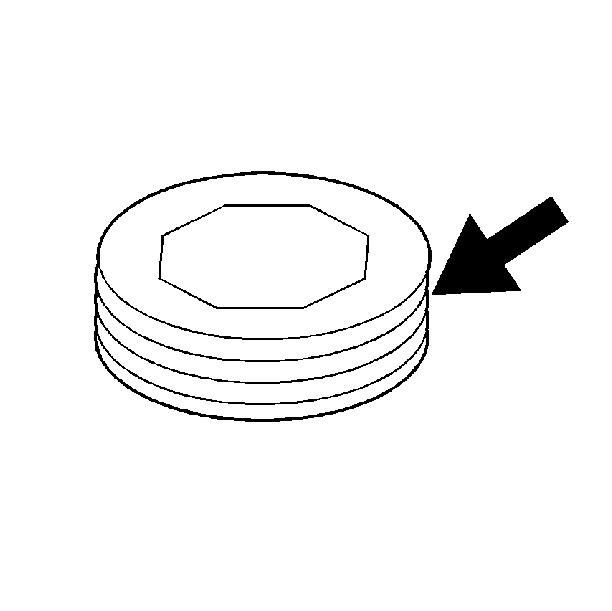
- Apply pipe sealant with Teflon™ GM P/N 1052080 or equivalent on the fill plug threads.
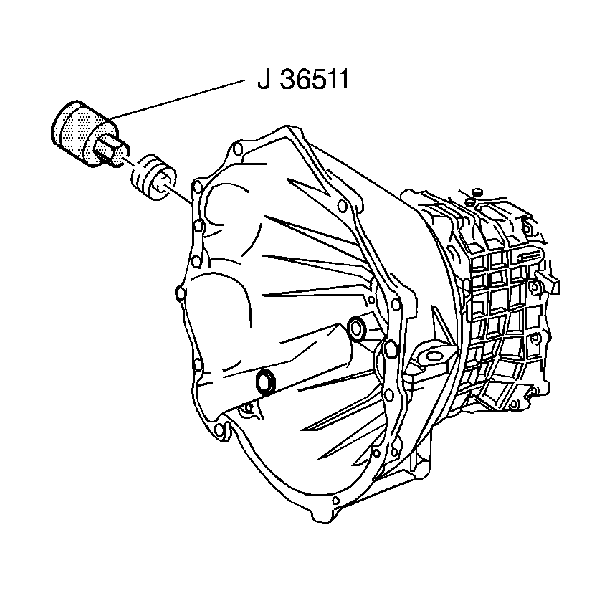
- Install the oil fill plug. Use J 36511 .
- Apply pipe sealant with Teflon™ GM P/N 1052080 or equivalent to the drain plug threads.
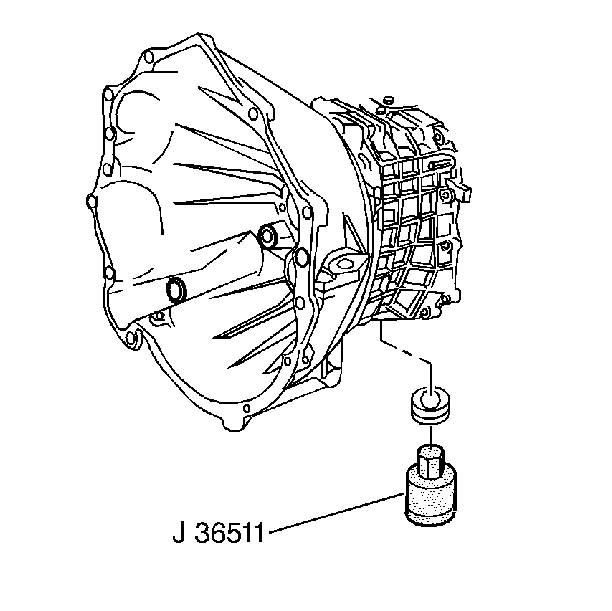
- Install the oil drain plug. Use tool J 36511 .
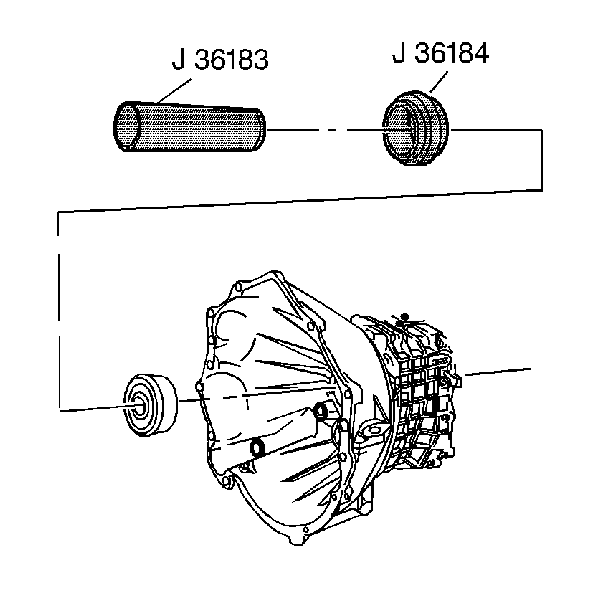
| • | Press in the bearing until the snap ring is seated. |
| • | Use a hydraulic press. |

Tighten
Tighten the fill plug to 60 N·m (44 lb ft).
Notice: Use the correct fastener in the correct location. Replacement fasteners must be the correct part number for that application. Fasteners requiring replacement or fasteners requiring the use of thread locking compound or sealant are identified in the service procedure. Do not use paints, lubricants, or corrosion inhibitors on fasteners or fastener joint surfaces unless specified. These coatings affect fastener torque and joint clamping force and may damage the fastener. Use the correct tightening sequence and specifications when installing fasteners in order to avoid damage to parts and systems.

Tighten
Tighten the drain plug to 60 N·m (44 lb ft).
Front Housing Assemble Four Wheel Drive
Front Housing Assembly
Tools Required
| • | Hydraulic Press |
| • | J 36183 Input Shaft Press Tube with Cap |
| • | J 36184 Adapter Press Tube Reducer |
| • | J 36510 Clutch Fork Pivot Remover/Installer |
| • | J 36507 Detent Preshing Remover/Installer |
| • | J 36511 Oil Fill Plug Hex Bit (17 mm) |
| • | J 36798 Shift Shaft Bushing Installing Tool |
| • | J 36190 Diver Handle |
- Install the input shaft bearing.
- Install the shift shaft front housing bushings. Use J 36798 and J 36190 .
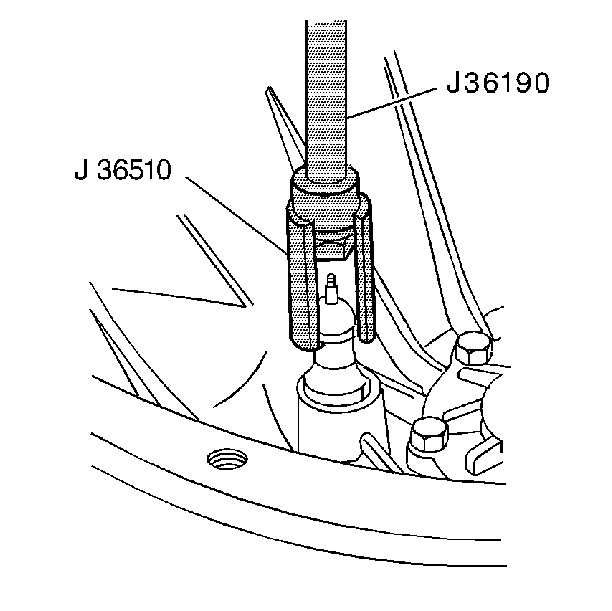
- Install the clutch fork pivot assembly. Use J 36510 and J 36190 .
- Install the two detent plunger bushings. Use J 36507 .
- Install the first bushing until the second scribe mark on the tool aligns with the housing.
- Install the second bushing until the first scribe mark on the tool aligns with the housing.
- Install the transmission housing vent assembly.
- Apply pipe sealant with Teflon™ or equivalent on the fill plug threads.
- Install the oil fill plug. Use J 36511 .
- Apply pipe sealant with Teflon™ or equivalent to the drain plug threads.
- Install the oil drain plug. Use tool J 36511 .

| • | Press in the bearing until the snap ring is seated. |
| • | Use a hydraulic press. |



Notice: Use the correct fastener in the correct location. Replacement fasteners must be the correct part number for that application. Fasteners requiring replacement or fasteners requiring the use of thread locking compound or sealant are identified in the service procedure. Do not use paints, lubricants, or corrosion inhibitors on fasteners or fastener joint surfaces unless specified. These coatings affect fastener torque and joint clamping force and may damage the fastener. Use the correct tightening sequence and specifications when installing fasteners in order to avoid damage to parts and systems.
Tighten
Tighten the fill plug to 60 N·m (44 lb ft).


Tighten
Tighten the drain plug to 60 N·m (44 lb ft).
Front Housing Assemble Rear Wheel Drive
Front Housing Assembly
Tools Required
| • | Hydraulic Press |
| • | J 36183 Input Shaft Press Tube with Cap |
| • | J 36184 Adapter Press Tube Reducer |
| • | J 36510 Clutch Fork Pivot Remover/Installer |
| • | J 36507 Detent Bushing Remove/Installer |
| • | J 36511 Oil Fill Plug Hex Bit (17 mm) |
| • | J 36798 Shift Shaft Bushing Installing Tool |
| • | J 36190 Driver Handle |
- Install the input shaft bearing.
- Install the shift shaft front housing bushings. Use J 36798 and J 36190 .
- Install the two detent plunger bushings. Use tool J 36507 .
- Install the first bushing until the second scribe mark on the tool is aligned with the housing.
- Install the second bushing until the first scribe mark on the tool is aligned with the housing.
- Install the transmission housing vent assembly.
- Apply pipe sealant on the fill plug threads.
- Install the oil fill plug. Use J 36511 .
- Apply pipe sealant to the drain plug threads.
- Install the oil drain plug. Use tool J 36511 .

| • | Press in the bearing until the snap ring is seated. |
| • | Use a hydraulic press. |


Notice: Use the correct fastener in the correct location. Replacement fasteners must be the correct part number for that application. Fasteners requiring replacement or fasteners requiring the use of thread locking compound or sealant are identified in the service procedure. Do not use paints, lubricants, or corrosion inhibitors on fasteners or fastener joint surfaces unless specified. These coatings affect fastener torque and joint clamping force and may damage the fastener. Use the correct tightening sequence and specifications when installing fasteners in order to avoid damage to parts and systems.
Tighten
Tighten the fill plug to 60 N·m (44 lb ft).


Tighten
Tighten the drain plug to 60 N·m (44 lb ft).
