For 1990-2009 cars only
Removal Procedure
Notice: Allowing the drive belt tensioner to snap into the free position may result in damage to the tensioner.
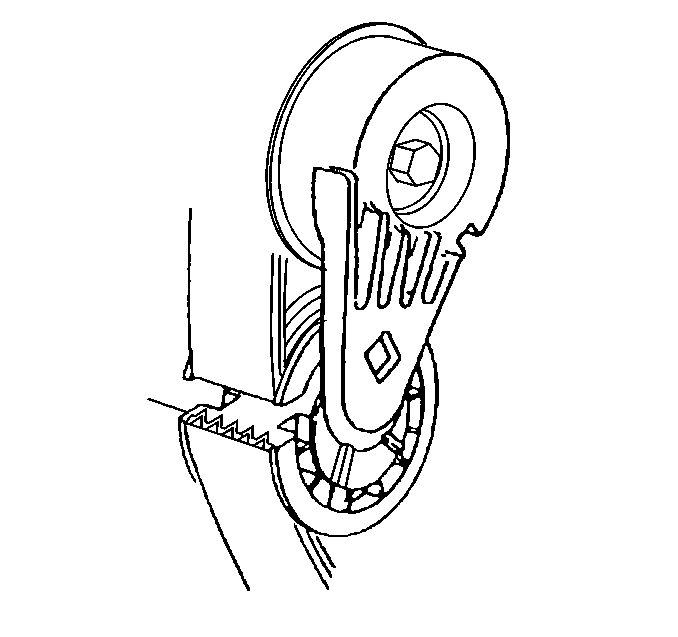
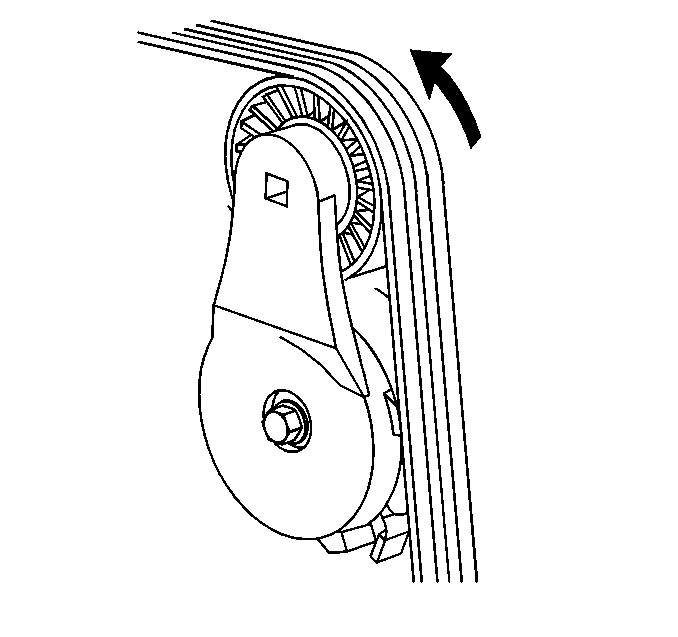
- From under the vehicle, install a 3/8 inch drive wrench on the drive belt tensioner arm.
- Rotate the arm counter clockwise.
- Remove the drive belt.
- Slowly release the tension.
Installation Procedure
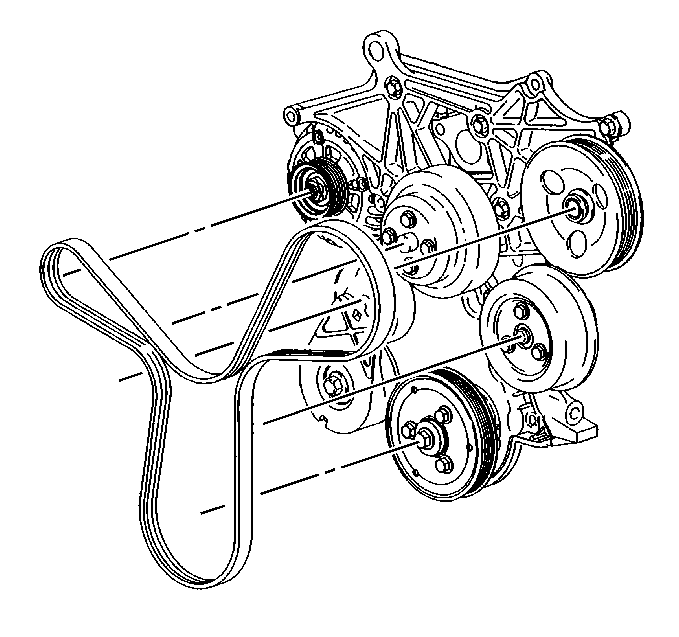
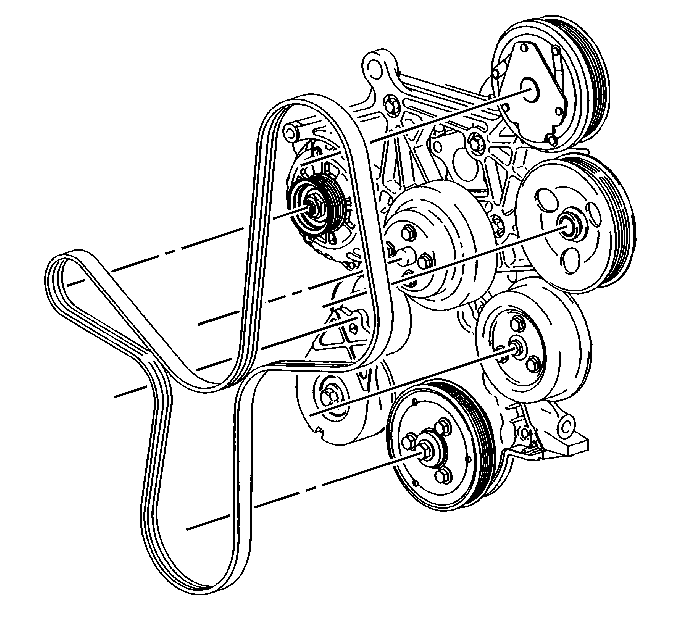
- Route the drive belt over all the pulleys except the tensioner arm.
- Observe drive belt routing for vehicles without air conditioning.
- Observe drive belt routing for vehicles with air conditioning.
- From under the vehicle, install a 3/8 inch drive wrench on the drive belt tensioner arm and rotate the arm counterclockwise.
- Install the drive belt over the tensioner arm pulley.
- Slowly release the tension.
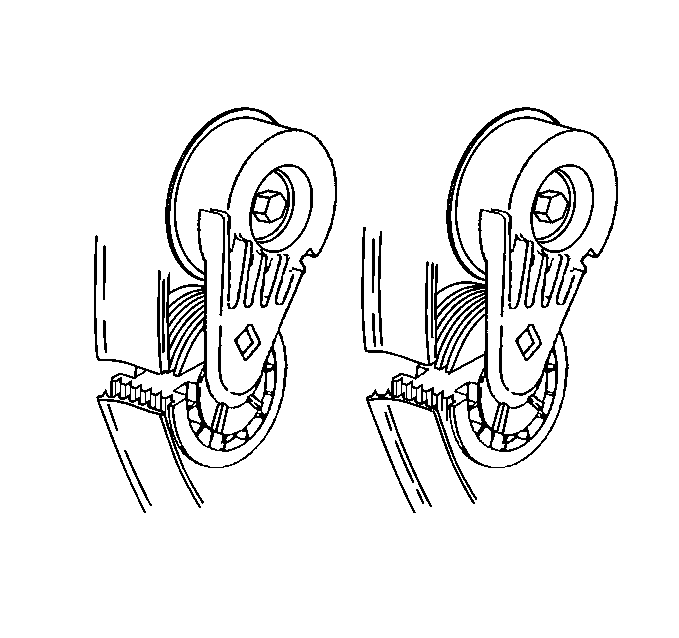
- Confirm that the drive belt is properly routed.
- Inspect for the drive belt being properly installed on the pulleys.
- Each groove on the drive belt rests inside a matching groove in the pulley.
- Avoid mis-positioning the belt by one or more grooves.
