- Apply a 5 mm (0.196 in) bead of adhesive 25 mm (1.0 in) long to the engine front cover to engine block junction.
- Apply a 5 mm (0.196 in) bead of adhesive 25 mm (1.0 in) long to the crankshaft rear oil seal housing to engine block junction.
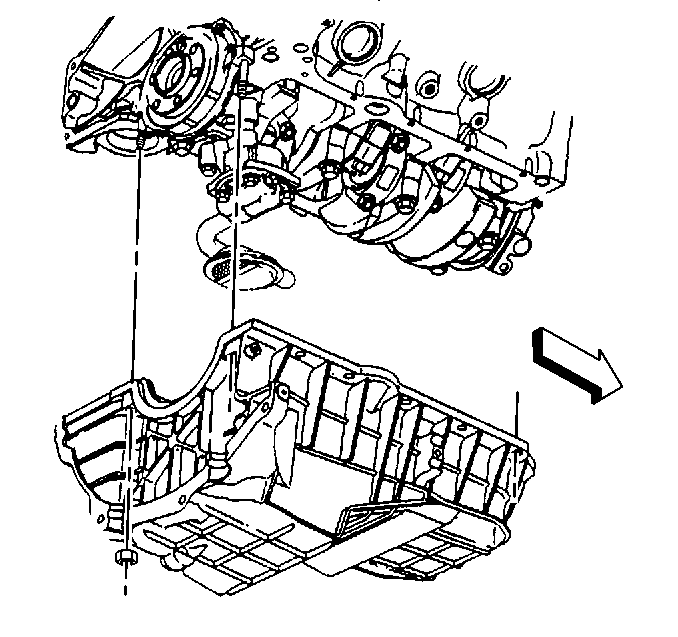
- Install the oil pan gasket.
- Install the oil pan against to engine block.
- Slide the oil pan back against a suitable straight edge.
- Install oil pan bolts and nuts. Do not tighten.
- Recheck the oil pan alignment.
- Again measure the clearance between the three oil pan-to-transmission bell housing contact points to verify proper alignment.
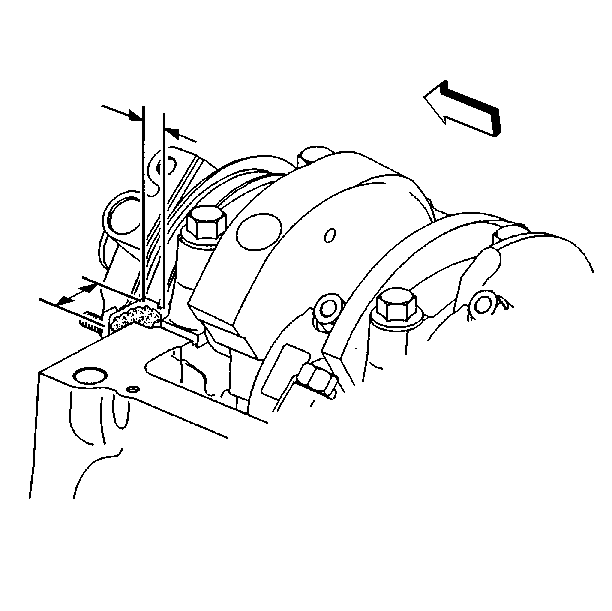
Important: Apply the proper amount of adhesive 25 mm (1.0 in) into the areas where the front cover and rear housing meet the engine block oil pan surface.
Important: Always install a new oil pan gasket.
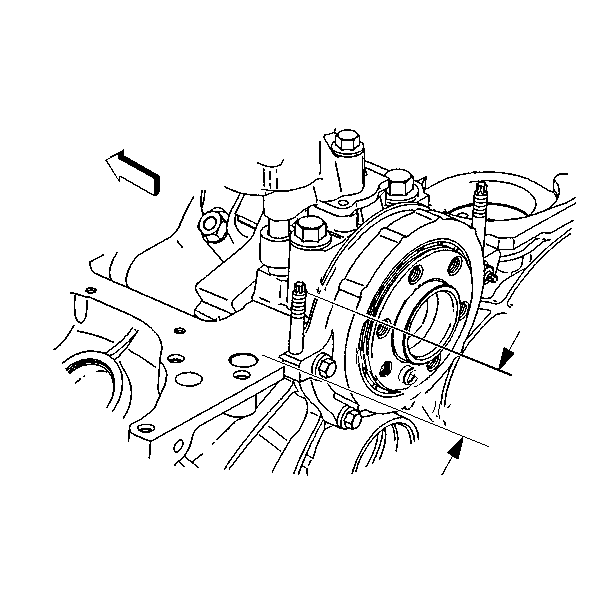
The oil pan gasket and oil pan must be installed and the fasteners tightened while the adhesive is still wet to the touch.Important: The oil pan alignment must always be flush or forward of the rear face of the engine block.
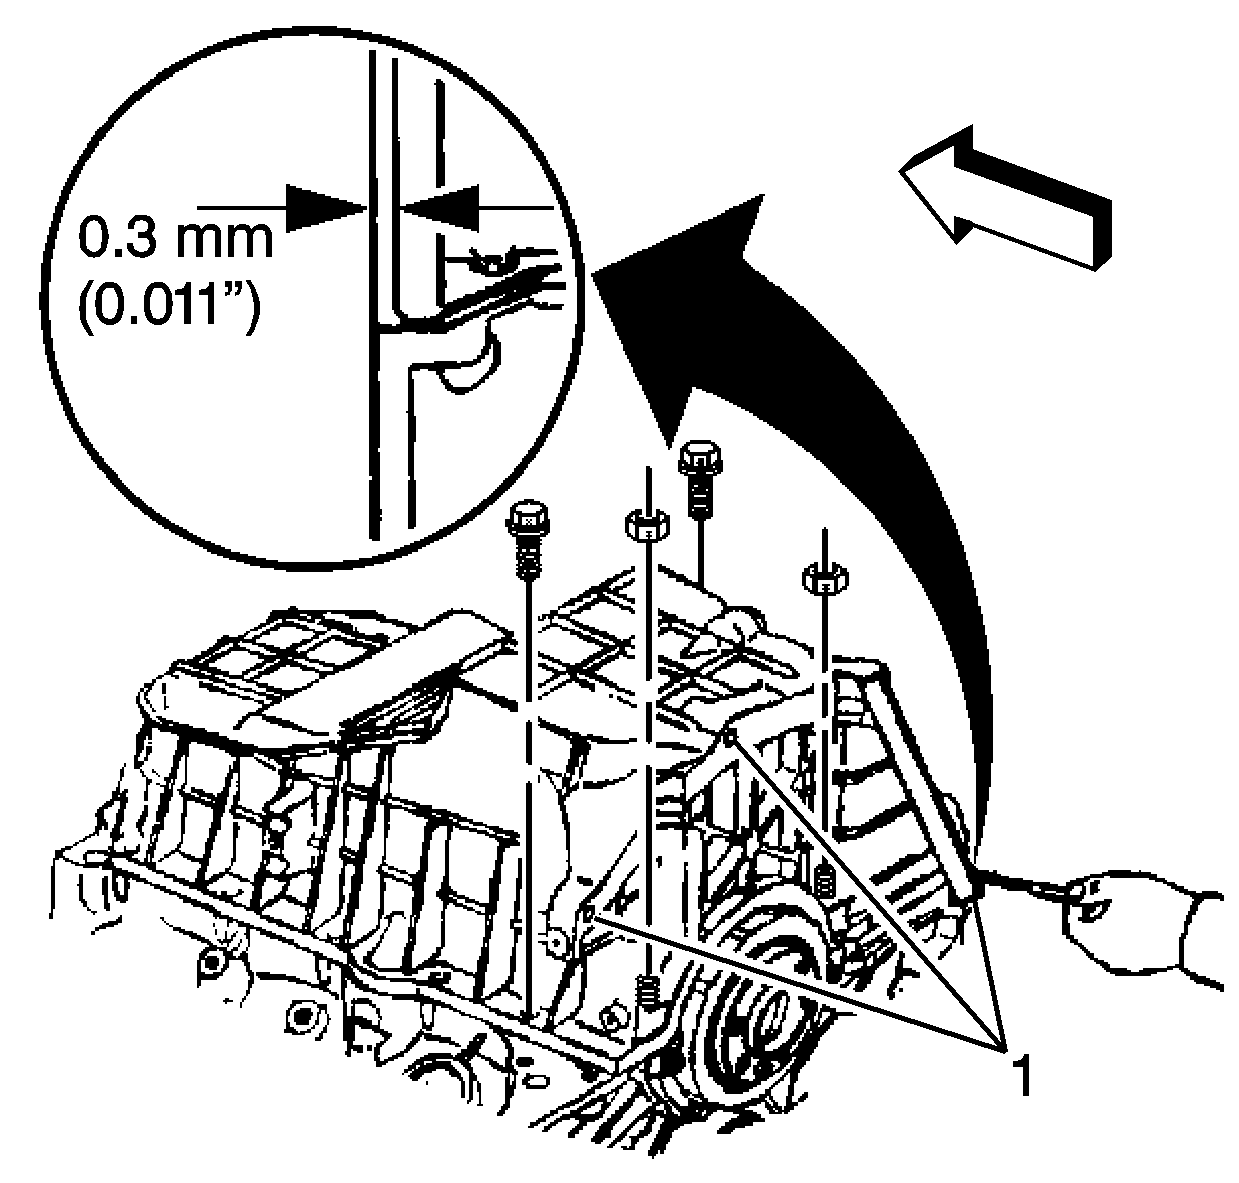
Important: Use a feeler gauge to check the clearance between the three oil pan-to-transmission bell housing contact points. If clearance exceeds 0.3 mm (0.011 in) at any of the three points repeat steps until the clearance is within specification.
Notice: Use the correct fastener in the correct location. Replacement fasteners must be the correct part number for that application. Fasteners requiring replacement or fasteners requiring the use of thread locking compound or sealant are identified in the service procedure. Do not use paints, lubricants, or corrosion inhibitors on fasteners or fastener joint surfaces unless specified. These coatings affect fastener torque and joint clamping force and may damage the fastener. Use the correct tightening sequence and specifications when installing fasteners in order to avoid damage to parts and systems.
Notice: The alignment of the mating components is crucial. An offset greater than 0.30 mm (0.011 in) between the rear faces of the oil pan and block is not acceptable. Offsets greater than 0.30 mm (0.011 in) will affect the alignment between the engine assembly and the transmission. Mis-alignment of the engine assembly to the transmission can lead to internal and external damage to the engine assembly and/or transmission.
Tighten
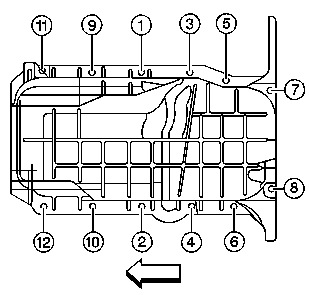
Tighten the bolts and nuts in sequence (1-12) to 25 N·m
(18 lb ft).
