Intake Manifold Replacement Upper
Removal Procedure

- Remove the air cleaner assembly.
- Remove the canister purge solenoid.
- Remove the following electrical connectors:
| • | The A/C pressure switch, if equipped |
| • | The throttle position (TP) sensor |
| • | The idle air control (IAC) motor |
| • | The SCPI injector harness connector |
| • | The manifold absolute pressure (MAP) sensor |
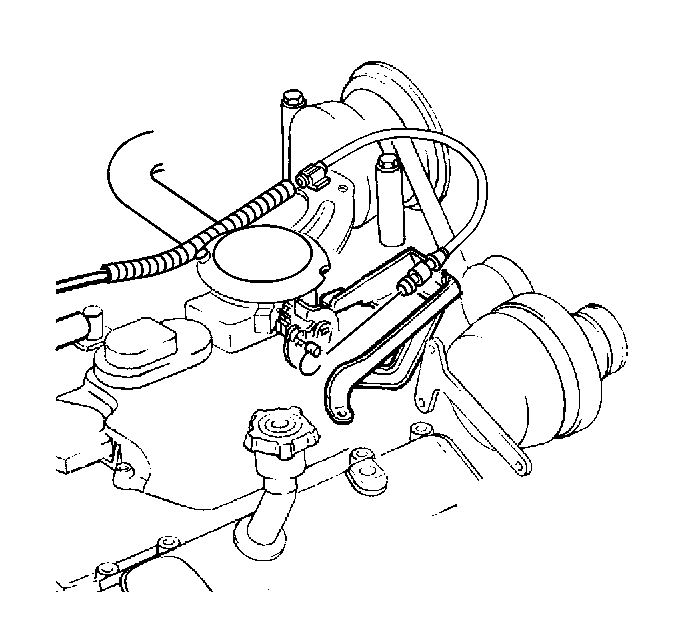
- Disconnect the accelerator cable from
the throttle shaft.
Refer to Accelerator Controls Cable Replacement in Engine Controls.
- Disconnect the cruise control cable, if equipped.
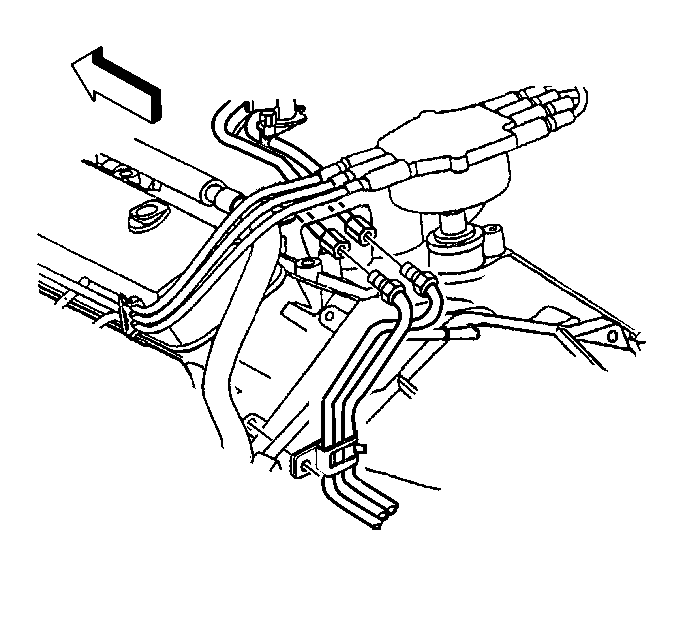
- Disconnect the fuel pipes.
Refer to Fuel Pipe/Hoses Replacement in Engine Controls.
- Remove the brake booster vacuum hose.
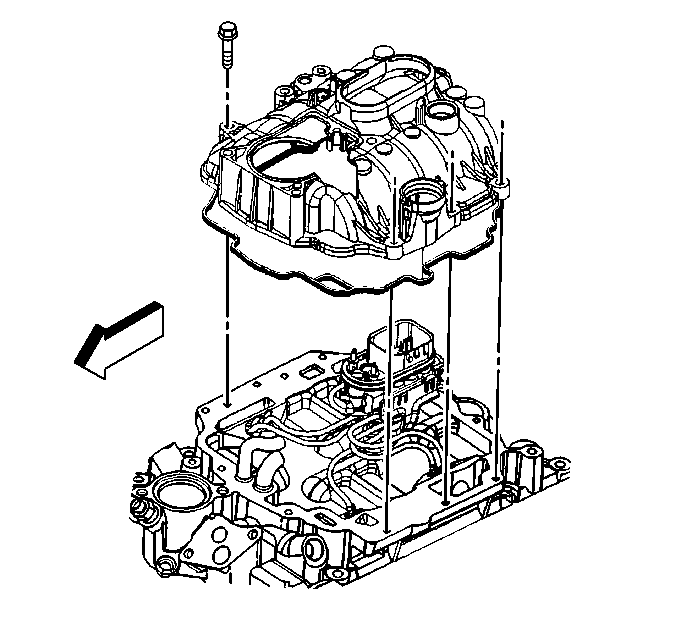
- Remove the upper intake manifold.
Refer to
Intake Manifold Disassemble
.
- Clean all sealing surfaces.
Refer to
Intake Manifold Cleaning and Inspection
.
Installation Procedure
- Install the upper intake manifold.
Refer to
Intake Manifold Assemble
.
- Install the brake booster vacuum hose.
Notice: Use the correct fastener in the correct location. Replacement fasteners
must be the correct part number for that application. Fasteners requiring
replacement or fasteners requiring the use of thread locking compound or sealant
are identified in the service procedure. Do not use paints, lubricants, or
corrosion inhibitors on fasteners or fastener joint surfaces unless specified.
These coatings affect fastener torque and joint clamping force and may damage
the fastener. Use the correct tightening sequence and specifications when
installing fasteners in order to avoid damage to parts and systems.
- Connect the fuel pipes.
Tighten
Tighten the nuts to 30 N·m (22 lb ft).
- Install the accelerator cable to the throttle shaft.
Refer to Accelerator Controls Cable Replacement in Engine Controls.
- Install the cruise control cable, if equipped.
- Install the following electrical connectors:
| • | The A/C pressure switch, if equipped |
| • | The throttle position (TP) sensor |
| • | The idle air control (IAC) motor |
| • | The SCPI injector harness connector |
| • | The manifold absolute pressure (MAP) sensor |
- Install the canister purge solenoid.
- Install the air cleaner assembly.
Intake Manifold Replacement Lower
Removal Procedure
Caution: Before servicing any electrical component, the ignition and start switch must be in the OFF or LOCK position and all electrical loads
must be OFF, unless instructed otherwise in these procedures. If a tool or equipment could easily come in contact with a live exposed electrical terminal, also disconnect the negative battery cable. Failure to follow these precautions may cause personal injury
and/or damage to the vehicle or its components.
- Disconnect the battery negative cable.
- Drain the cooling system.
Refer to Draining and Filling Cooling System in Engine Cooling.
- Remove the air cleaner assembly.

- Remove the distributor.
Refer to
Distributor Replacement
in Engine Electrical.
- Remove the upper radiator hose at the thermostat housing.
Refer to Radiator Hose Replacement and Thermostat Replacement in Engine
Cooling.
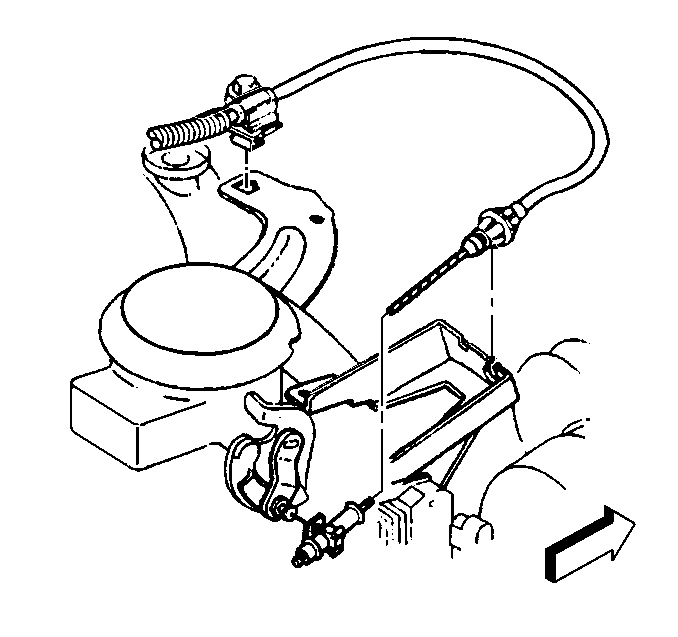
- Remove the accelerator cable and the bracket
from the throttle body and set them aside.
Refer to Accelerator Cable Replacement in Engine Controls.
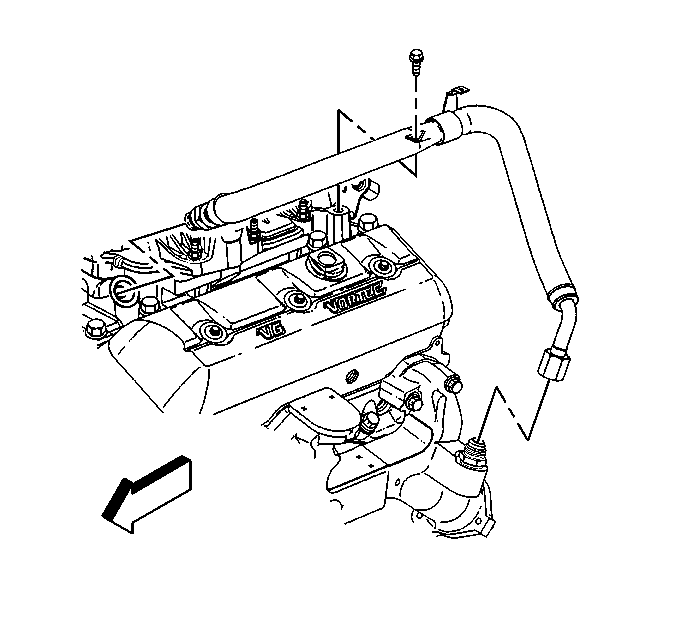
- Remove the heater hoses on the lower intake manifold.
| 7.1. | Unsnap the retainer. |
| 7.2. | Lay the top hose aside. |
| 7.3. | Remove the lower hose. |
- Remove the exhaust gas recirculation
(EGR) tube, clamp, and bolt.
- Disconnect the fuel supply and return
pipes at the rear of the intake manifold.
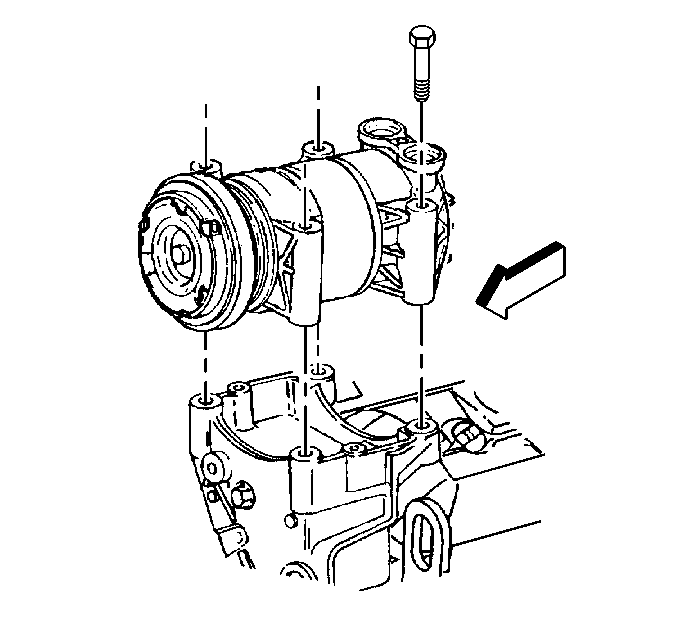
- Remove the air conditioning compressor,
if equipped, and set it aside.
Refer to Compressor Replacement in HVAC.
- Remove the following electrical connectors:
| • | The SCPI injector harness connector |
| • | The canister purge solenoid |
| • | The ignition control module (ICM) |
| • | The idle air control (IAC) motor |
| • | The throttle position (TP) sensor |
| • | The exhaust gas recirculation (EGR) valve |
| • | The engine coolant temperature (ECT) sensor |
- Remove the PCV valve.
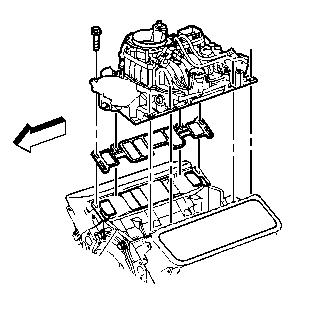
- Remove the lower intake manifold.
Refer to Intake Manifold Removal
.
- Clean all sealing surfaces.
Refer to
Intake Manifold Cleaning and Inspection
.
Installation Procedure
- Install the lower intake manifold.
Refer to
Intake Manifold Installation
.
- Install the oxygen sensor wire support bracket and nut.
- Install the exhaust gas recirculation
(EGR) inlet tube, clamp, and bolt.
Refer to EGR Inlet Pipe Replacement in Engine Controls.
- Install the following electrical connectors:
| • | The SCPI injector harness connector |
| • | The canister purge solenoid |
| • | The ignition control module (ICM) |
| • | The idle air control (IAC) motor |
| • | The throttle position (TP) sensor |
| • | The exhaust gas recirculation (EGR) valve |
| • | The engine coolant temperature (ECT) sensor |
- Install the air conditioning compressor,
if equipped.
Refer to Compressor Replacement in HVAC.
- Inspect the O-rings on the fuel pipe nuts.
Replace if necessary.
- Install the fuel supply and return pipes
to the rear of the intake manifold.
Refer to Fuel Hose/Pipes Replacement in Engine Controls.
- Install the accelerator cable and the
bracket to the throttle shaft.
- Install the heater hoses.
| 9.1. | Install the lower hose into the retainer. |
| 9.2. | Install the upper hose into the retainer. |
| 9.3. | Snap the retainer closed. |
- Install the upper radiator hose to the thermostat housing.
Refer to Radiator Hose Replacement in Engine Cooling.
- Install the distributor.
Refer to
Distributor Replacement
in Engine Electrical.
- Install the air cleaner assembly.
- Refill the cooling system.
Refer to Draining and Filling Cooling System in Engine Cooling.
- Connect the battery negative cable.
- Change the engine oil and the engine oil filter.
Refer to Engine Oil and Oil Filter Replacement
.
