Removal Procedure
Tools Required
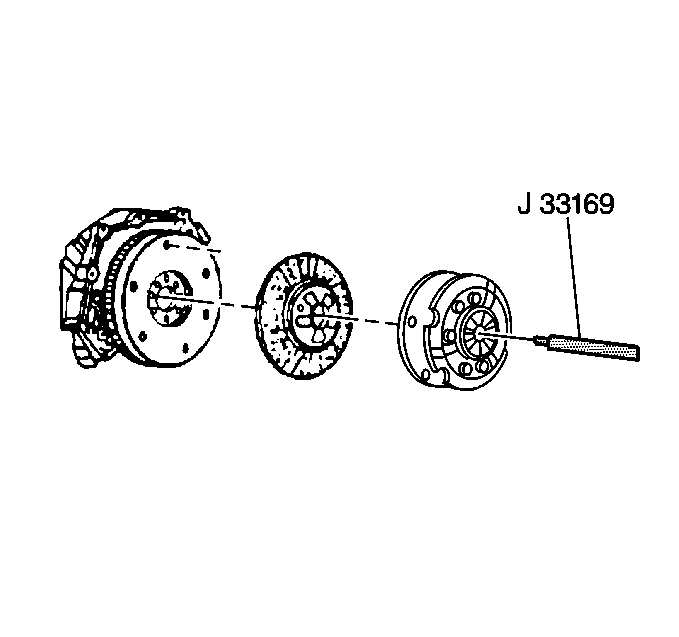
J 33169 Clutch Alignment
Tool
- Raise and support the vehicle.
- Remove the transmission. Refer to
Transmission Replacement
.
- Mark the flywheel, cover plate, and pressure plate for installation
alignment.

- Install J 33169 through
the cover plate, pressure plate, and into the flywheel for support during
plate removal.

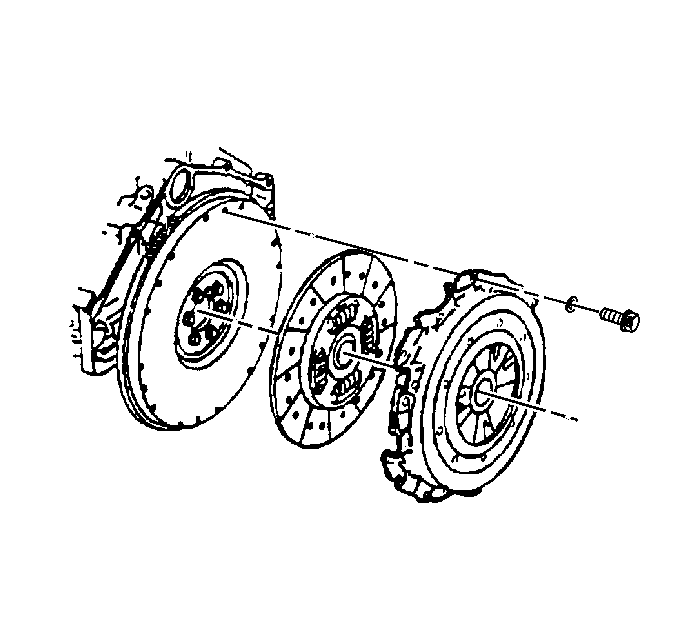
- Remove the bolts and washers
securing the clutch pressure plate and cover plate to the flywheel.
- Remove J 33169 from the plates.
- Clean all the clutch parts with a clean, water dampened cloth
in order to remove any fibers.
- Inspect all of the clutch parts for the following conditions:
| • | Scoring and flatness with a straight edge. |
| • | Driven plate runout. The runout must not be more than 0.508 mm
(0.020 inch). |
| • | Scoring, gouges, and loose rivets on the friction pads. |
| • | Oil soaked friction pads. |
| • | Nicks, burrs, and sliding fit on all splines. |
| • | Bending and breaks in the clutch pressure plate cover spring. |
Installation Procedure
Tools Required
J 33169 Clutch Alignment
Tool

- Using J 33169 for installation
alignment, position the pressure plate and cover plate to the flywheel.

- Secure the plates to the
flywheel with bolts and washers.
| • | Use the marks made during removal to align the plates. |
| • | Tighten each bolt one turn at a time in order to avoid warping
the clutch pressure plate cover. Use a criss-cross pattern for tightening
the bolts. |
Tighten
| • | Tighten the pressure and cover plate bolts for the NV1500 transmission
to 45 N·m (33 lb ft).
|
| • | Tighten the pressure and cover plate bolts for the NV3500 to 40 N·m
(29 lb ft).
|
- Remove J 33169 from the clutch plates.
- Install the transmission. Refer to Transmission Replacement
.
- Lower the vehicle.
- Test the transmission and clutch system for proper operation.


