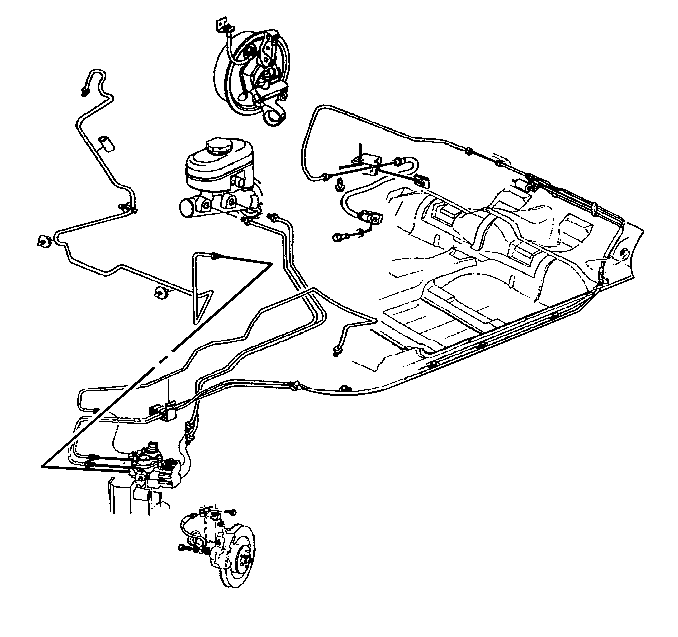
For 1990-2009 cars only
Tools Required
J 29803-A ISO Flaring Kit
- Obtain the recommended pipe and steel fitting nuts of the correct size.
- Cut the pipe at a 90 degree angle, to the correct length using a hacksaw.
- Measure the old pipe in order to determine the correct length of the pipe. Use a string in order to measure, and add 3.2 mm (1/8 in) for each ISO flare.
- Install the fittings before starting the flare.
- Chamfer the inside and the outside diameter of the pipe using a de-burring tool.
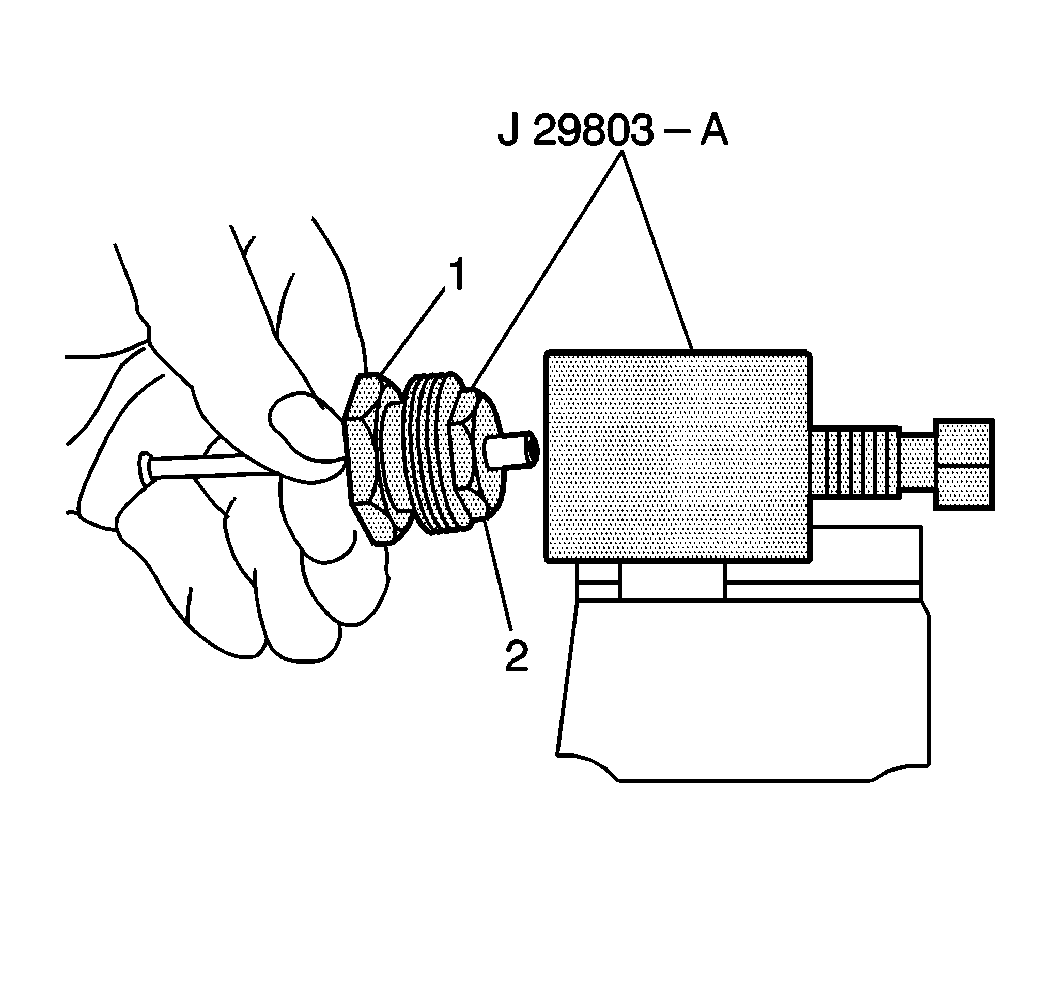
- Remove all traces of lubricant from the brake pipe and the J 29803-A .
- Clamp the J 29803-A in a vise.
- Select the correct size collet (2) and forming mandrel for the pipe size used.
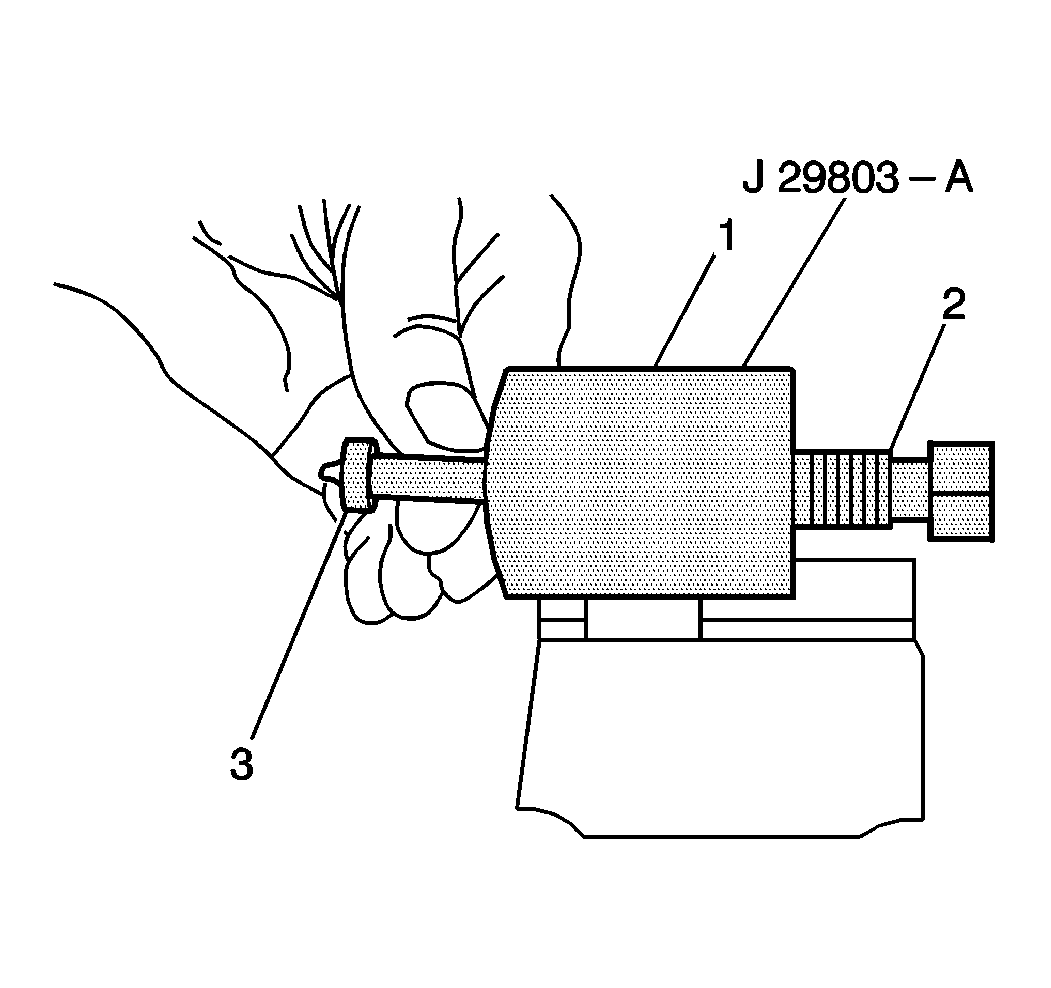
- Insert the properly formed mandrel (3) into the J 29803-A .
- Hold the forming mandrel (3) in place using your finger.
- Thread in the forcing screw (2) until contact is made and the screw begins to move the forming mandrel (3).
- Turn the forcing screw back one complete turn.
- Slide the clamping nut over the brake pipe.
- Insert the prepared brake pipe into the correct collet (2).
- Tighten the clamping nut (1) into the J 29803-A body tightly in order to ensure that the pipe will not push out.
- Wrench tighten the forcing screw until the screw bottoms. Do not over tighten the forcing screw or the flare may become oversized.
- Back the clamping nut (1) out of the J 29803-A .
- Disassemble the clamping nut (1) and the collet assembly.
- The flare is now ready for use.
- Bend the pipe assembly in order to match the old pipe.
- Maintain a clearance of 19 mm (0.0750 in) to all moving or vibrating parts.
Notice: Do not use a single lap flaring tools. Double lap flaring tools must be used to produce a flare strong enough to hold the system pressure. Using lap single flaring tools could cause system damage.
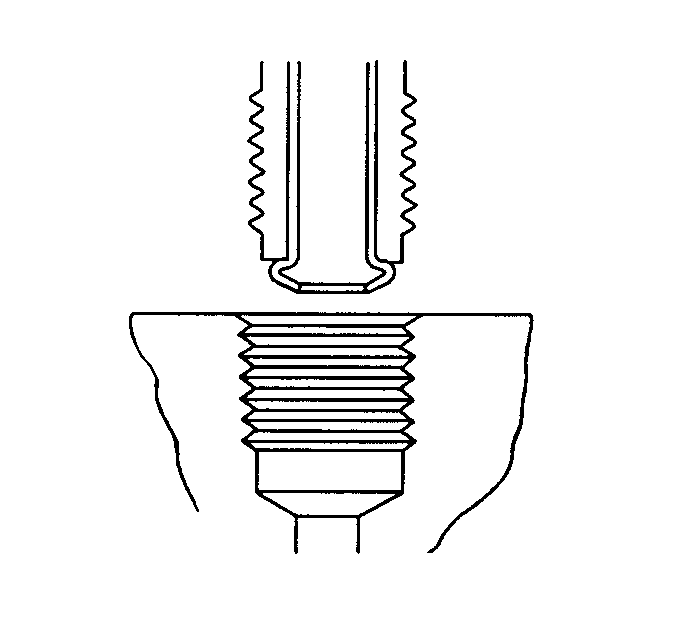
Use the outside diameter of the pipe in order to specify the size.
Advance the tool only a small amount per turn of the tool. Do not force the cutter.
Leave approximately 19 mm (0.750 in) of tubing extending out of the collet.
Insert the assembly into the J 29803-A .
Ensure that the brake pipe end contacts the face of the forming mandrel.