Removal Procedure
- Remove the battery tray. Refer to Battery Tray Replacement in Body Front End.
- Remove the air cleaner assembly. Refer to Air Cleaner Assembly Replacement -2.4L, or Air Cleaner Assembly Replacement -3.4L in Engine Controls.
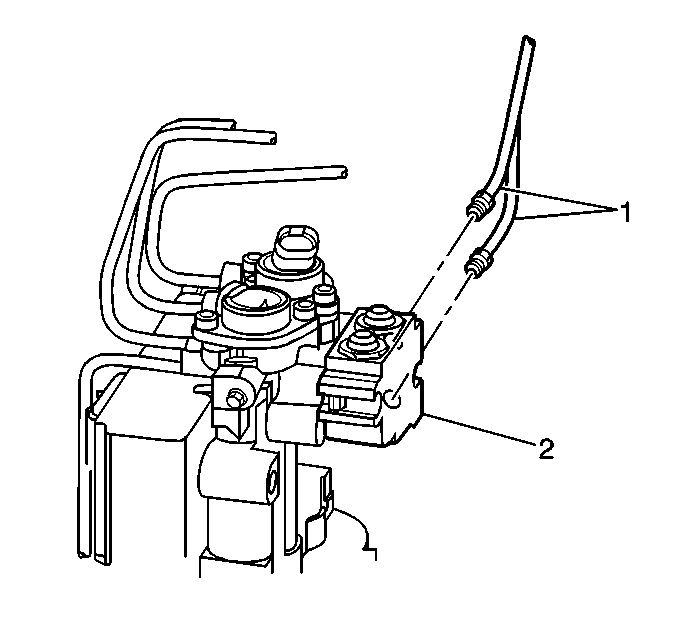
- Disconnect the brake pipes (1) from the brake modulator assembly (2).
- Remove the underhood junction block and position aside. Refer to Underhood Fuse Block Replacement in Engine Electrical.
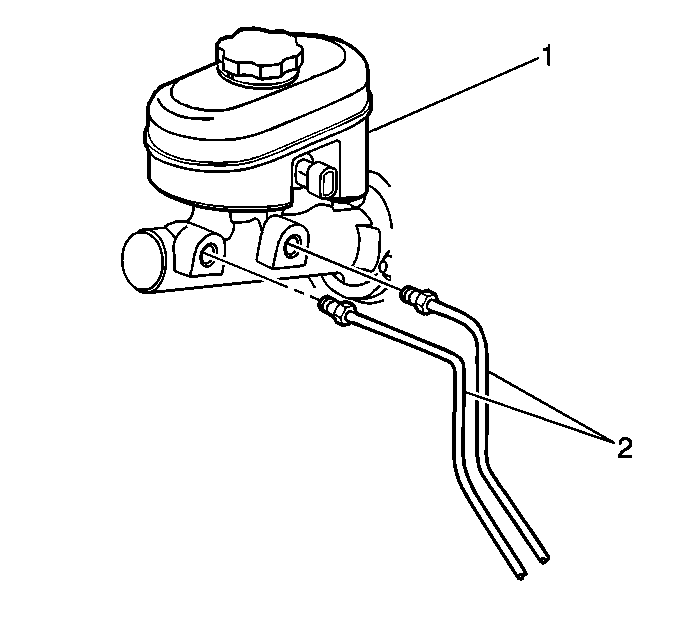
- Disconnect the brake pipes (2) from the master cylinder (1).
- Disconnect the retainers as needed.
- Remove the brake pipes from the vehicle.
Caution: Brake fluid may irritate eyes and skin. In case of contact, take the
following actions:
• Eye contact--rinse thoroughly with water. • Skin contact--wash with soap and water. • If ingested--consult a physician immediately.
Notice: Brake fluid will damage electrical connections and painted surfaces. Use shop cloths, suitable containers, and fender covers to prevent brake fluid from contacting these areas. Always re-seal and wipe off brake fluid containers to prevent spills.
Installation Procedure
Caution: Always use double-walled steel brake pipe when replacing brake pipes. The use of any other pipe is not recommended and may cause brake system failure. Carefully route and retain replacement brake pipes. Always use the correct fasteners and in the original location for replacement brake pipes. Failure to properly route and retain brake pipes may cause damage to the brake pipes and brake system resulting in personal injury.
- Fabricate a new brake pipe. Refer to ISO Flares Replacement .
- Install the brake pipes (2) to the vehicle.
- Loosely install the brake pipe nut to the master cylinder (1).
- Loosely install the brake pipe nut to the brake modulator assembly (2).
- Install the underhood junction block. Refer to Underhood Fuse Block Replacement in Engine Electrical.
- Install the battery tray. Refer to Battery Tray Replacement in Body Front End.
- Install the air cleaner assembly. Refer to Air Cleaner Assembly Replacement -2.4L, or Air Cleaner Assembly Replacement -3.4L in Engine Controls.
- Bleed the brake system. Refer to Hydraulic Brake System Bleeding .
Notice: Use the correct fastener in the correct location. Replacement fasteners must be the correct part number for that application. Fasteners requiring replacement or fasteners requiring the use of thread locking compound or sealant are identified in the service procedure. Do not use paints, lubricants, or corrosion inhibitors on fasteners or fastener joint surfaces unless specified. These coatings affect fastener torque and joint clamping force and may damage the fastener. Use the correct tightening sequence and specifications when installing fasteners in order to avoid damage to parts and systems.
Tighten
Tighten the brake pipe nuts to 27 N·m (20 lb ft).
