Engine Coolant Fan Shroud Replacement 3.4L
Removal Procedure
Caution: To help avoid personal injury or damage to the vehicle, a bent, cracked, or damaged fan blade or housing should always be replaced.
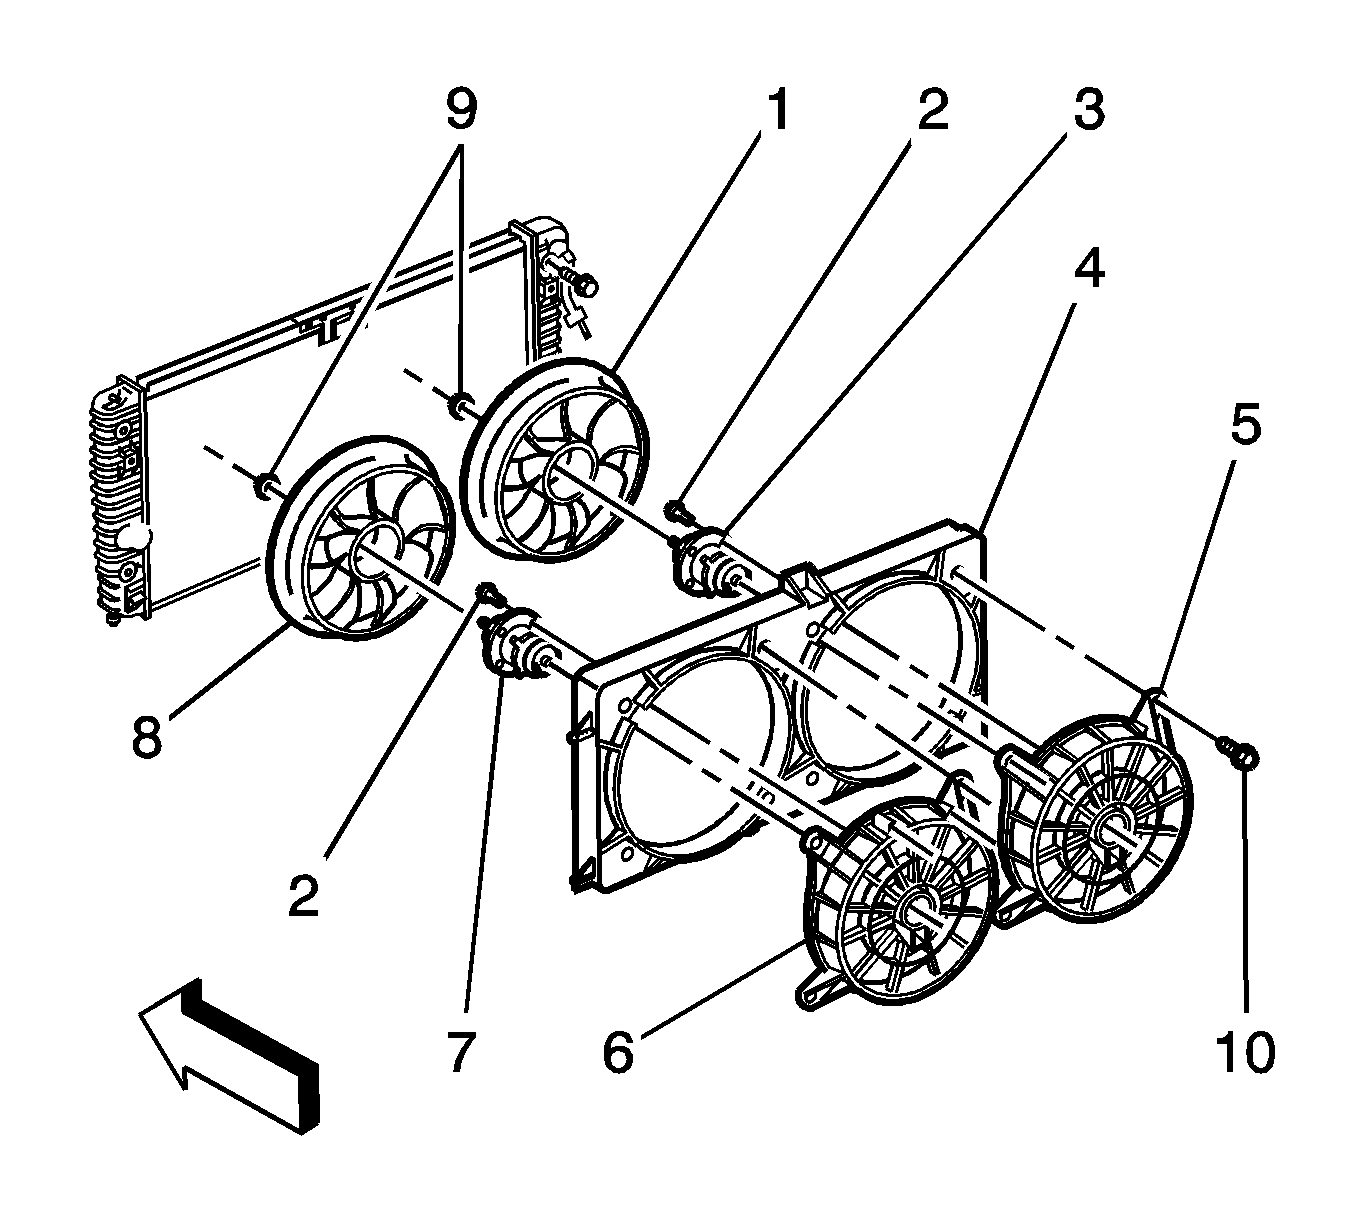
- Remove the cooling fan. Refer to Engine Cooling Fan Replacement .
- Remove the fan nuts (9) from the fans (1, 8).
- Remove the fans (1, 8) from the fan motors (3, 7).
- Remove the cooling fan motor bolts (2) from the cooling fan motors (3, 7).
- Remove the bolts (10) from the cooling fan brackets (5, 6).
- Remove the cooling fan brackets (5, 6) from the fan shroud.
Installation Procedure
- Install the cooling fan brackets (5, 6) to the fan shroud.
- Install the cooling fan bracket bolts (10).
- Install the cooling fan motor bolts (2) to the cooling fan motors (3, 7).
- Install the fans (1, 8) to the fan motors (3, 7).
- Install the fan nuts (9) to the fans (1, 8).
- Install the cooling fan. Refer to Engine Cooling Fan Replacement .

Notice: Refer to Fastener Notice in the Preface section.
Tighten
Tighten the bolts to 10 N·m (89 lb in).
Tighten
Tighten the bolts to 6 N·m (53 lb in).
Tighten
Tighten the nut to 6 N·m (53 lb in).
Engine Coolant Fan Shroud Replacement 2.2L
Tools Required
| • | J 38185 Hose Clamp Pliers |
| • | J 39400-A Halogen Leak Detector |
Removal Procedure
- Remove the battery. Refer to Battery Replacement.
- Remove the battery tray.
- Recover the air conditioning (A/C) system. Refer to Refrigerant Recovery and Recharging.
- Drain the cooling system. Refer to Cooling System Draining and Filling .
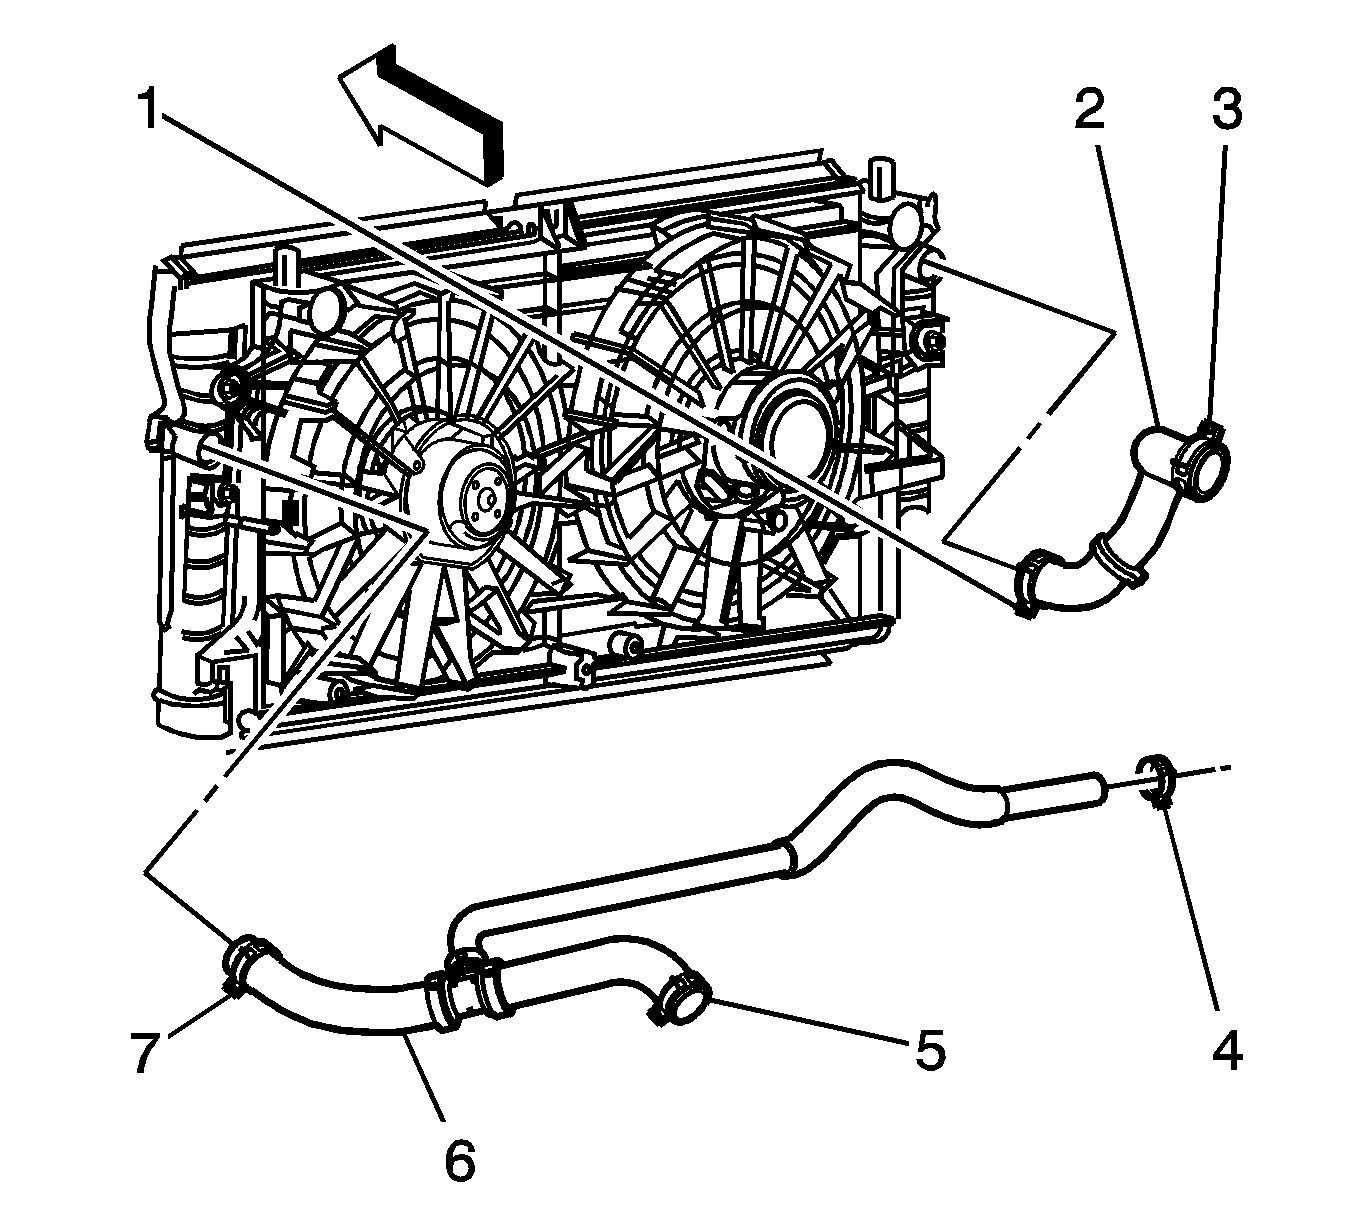
- Use the J 38185 in order to reposition the radiator inlet hose clamp (1).
- Remove the radiator inlet hose (2) from the radiator.
- Use the J 38185 in order to reposition the surge tank outlet/radiator outlet hose clamp (4) from the surge tank.
- Remove the surge tank outlet/radiator outlet hose (6) from the surge tank.
- Remove the radiator vent hose from the radiator.
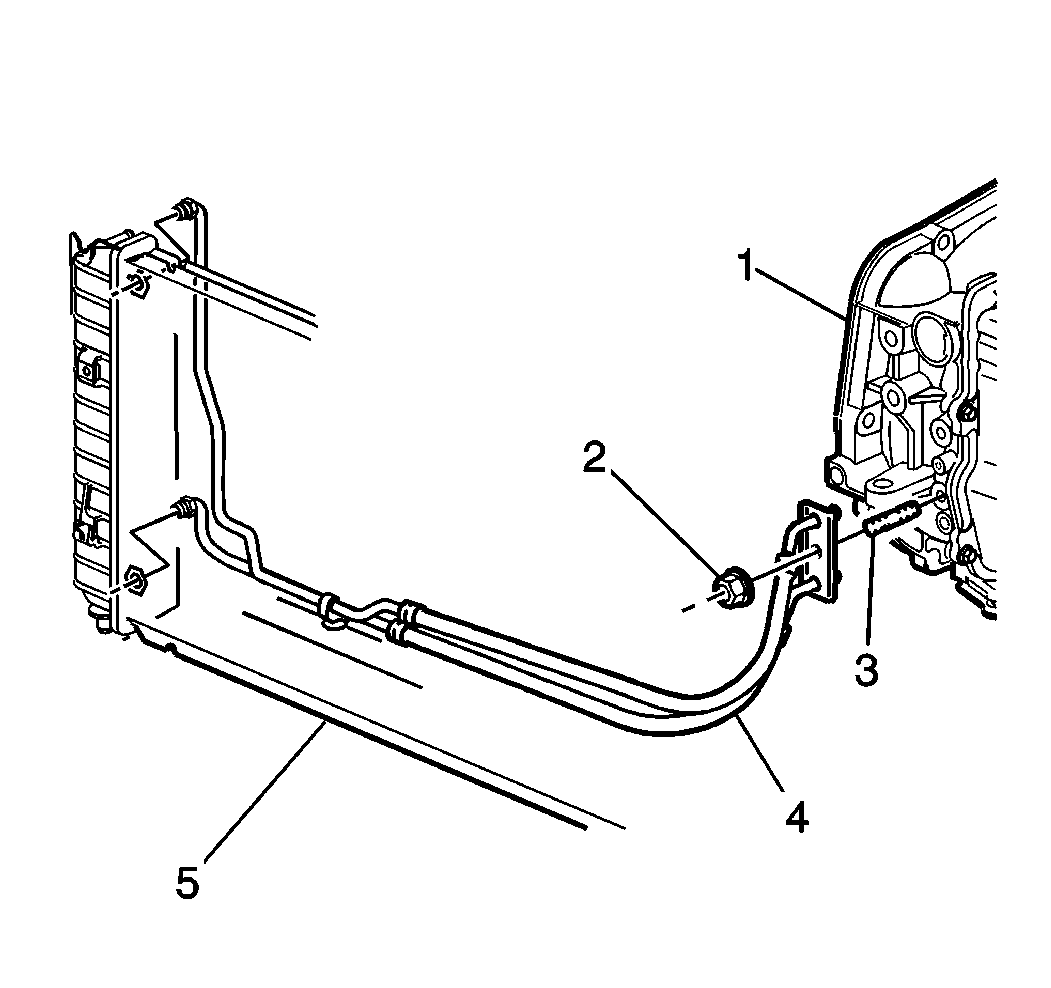
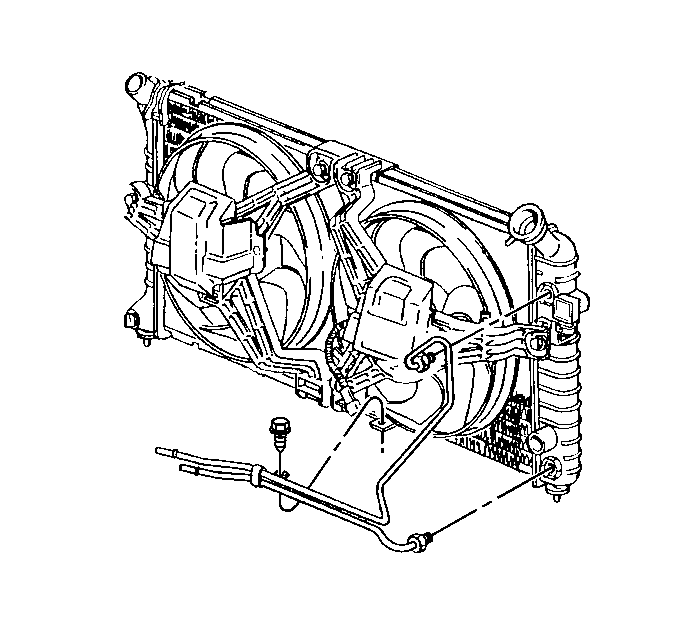
- Remove the upper transaxle cooler line from the radiator.
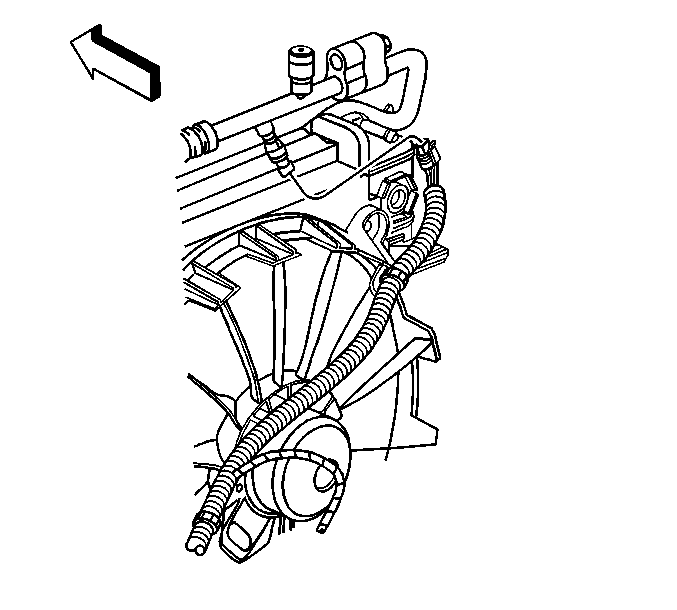
- Disconnect the refrigerant pressure sensor electrical connector
- Remove the condenser inlet fitting from the discharge hose.
- Remove and discard the sealing washer.
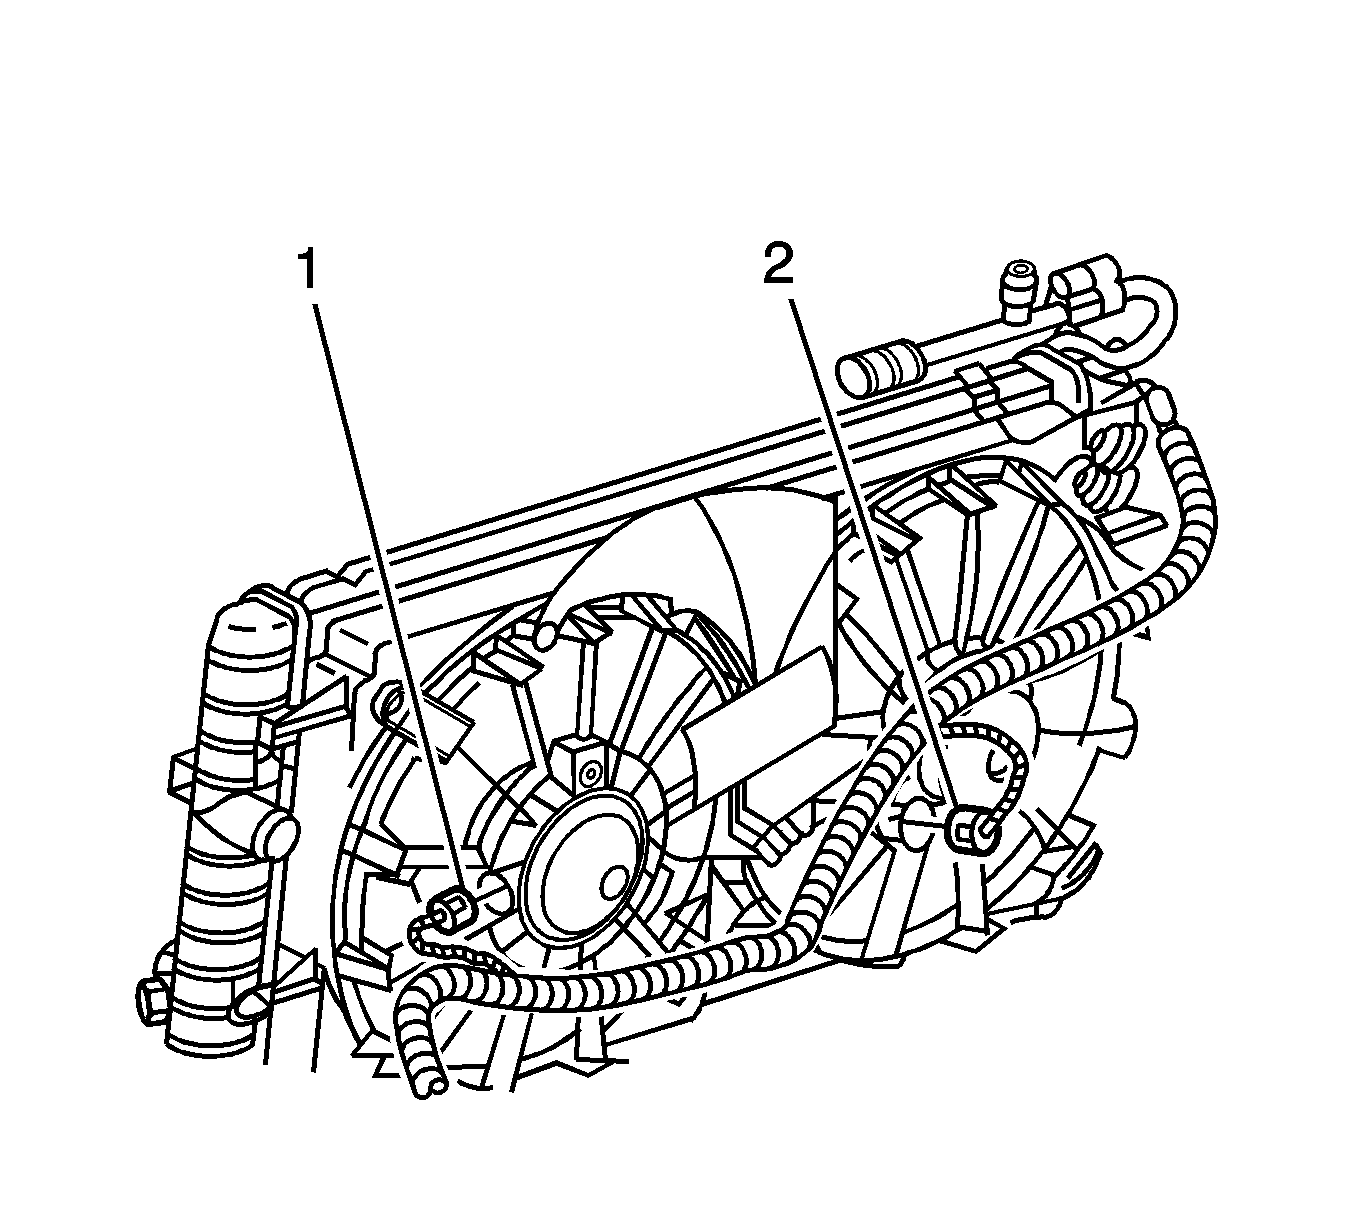
- Disconnect the cooling fan electrical connectors.
- Remove the surge tank outlet/radiator outlet hose bolt from the intake manifold.
- Raise the vehicle. Refer to Lifting and Jacking the Vehicle.
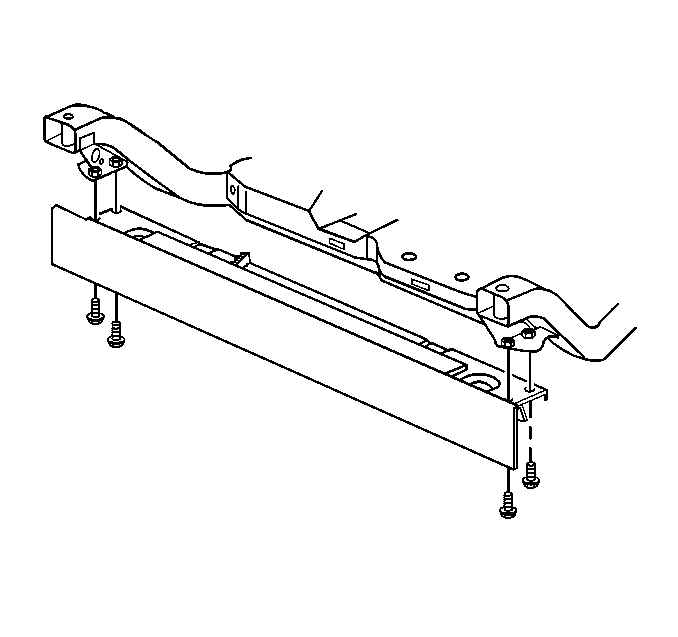
- Remove the lower closeout panel.
- Use the J 38185 in order to reposition the surge tank outlet/radiator outlet hose clamp (7) from the radiator.
- Remove the surge tank outlet/radiator outlet hose (6) from the radiator
- Remove the lower transaxle cooler line from the radiator.
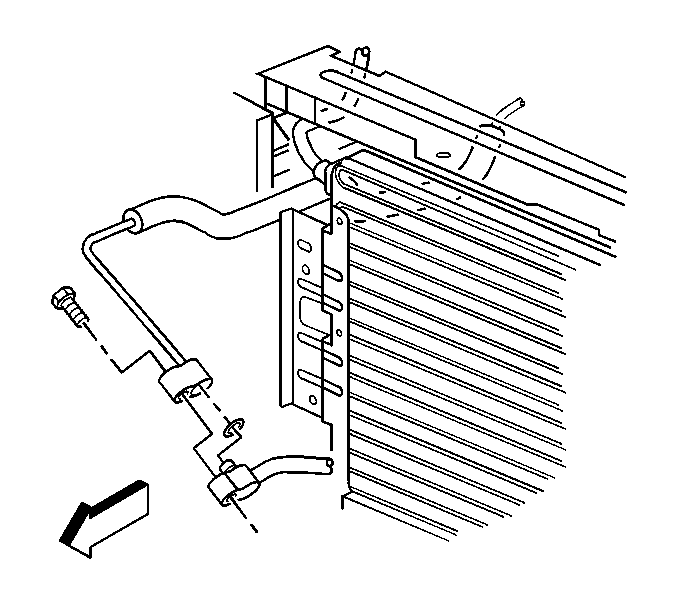
- Remove the bolt from the evaporator hose to the condenser.
- Remove the evaporator hose from the condenser.
- Remove and discard the sealing washer.
- Remove the lower radiator support mounting panel.
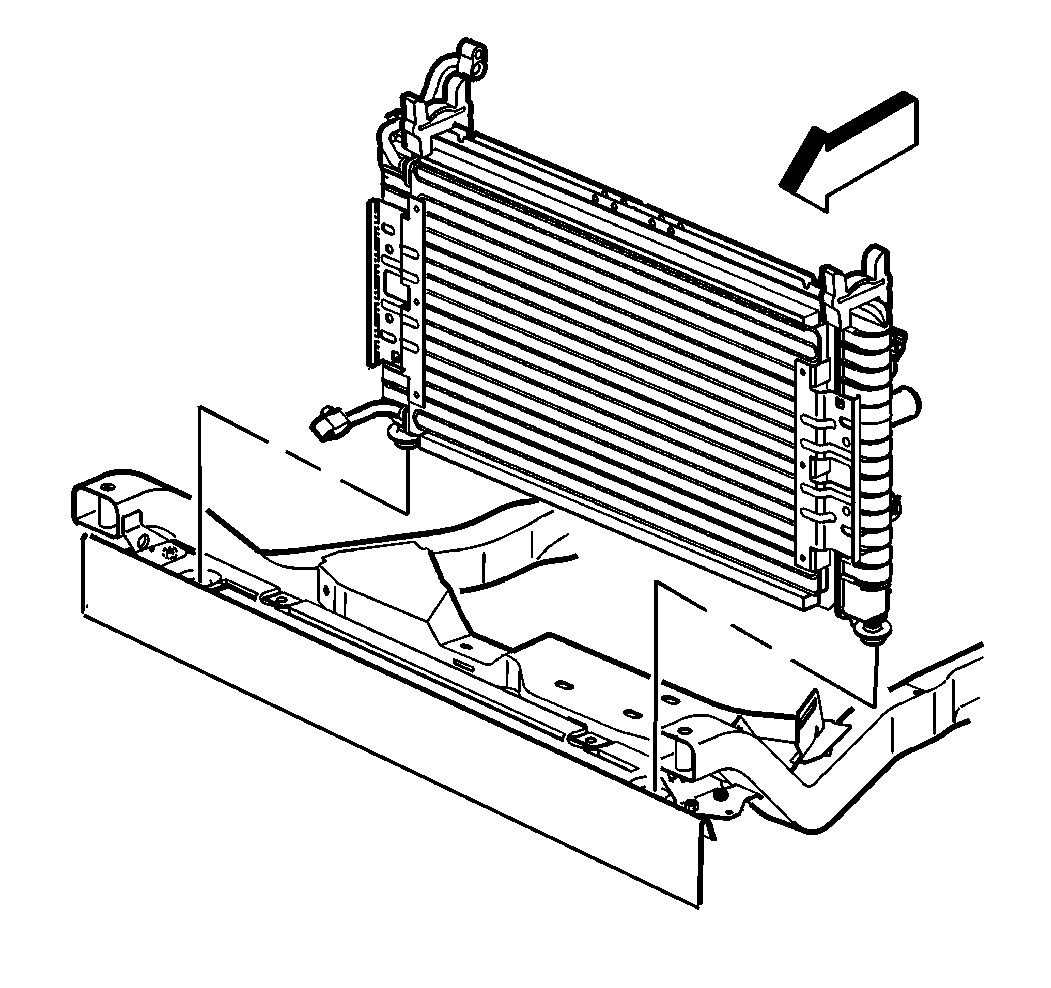
- Remove the radiator, fan and condenser as an assembly from the vehicle.
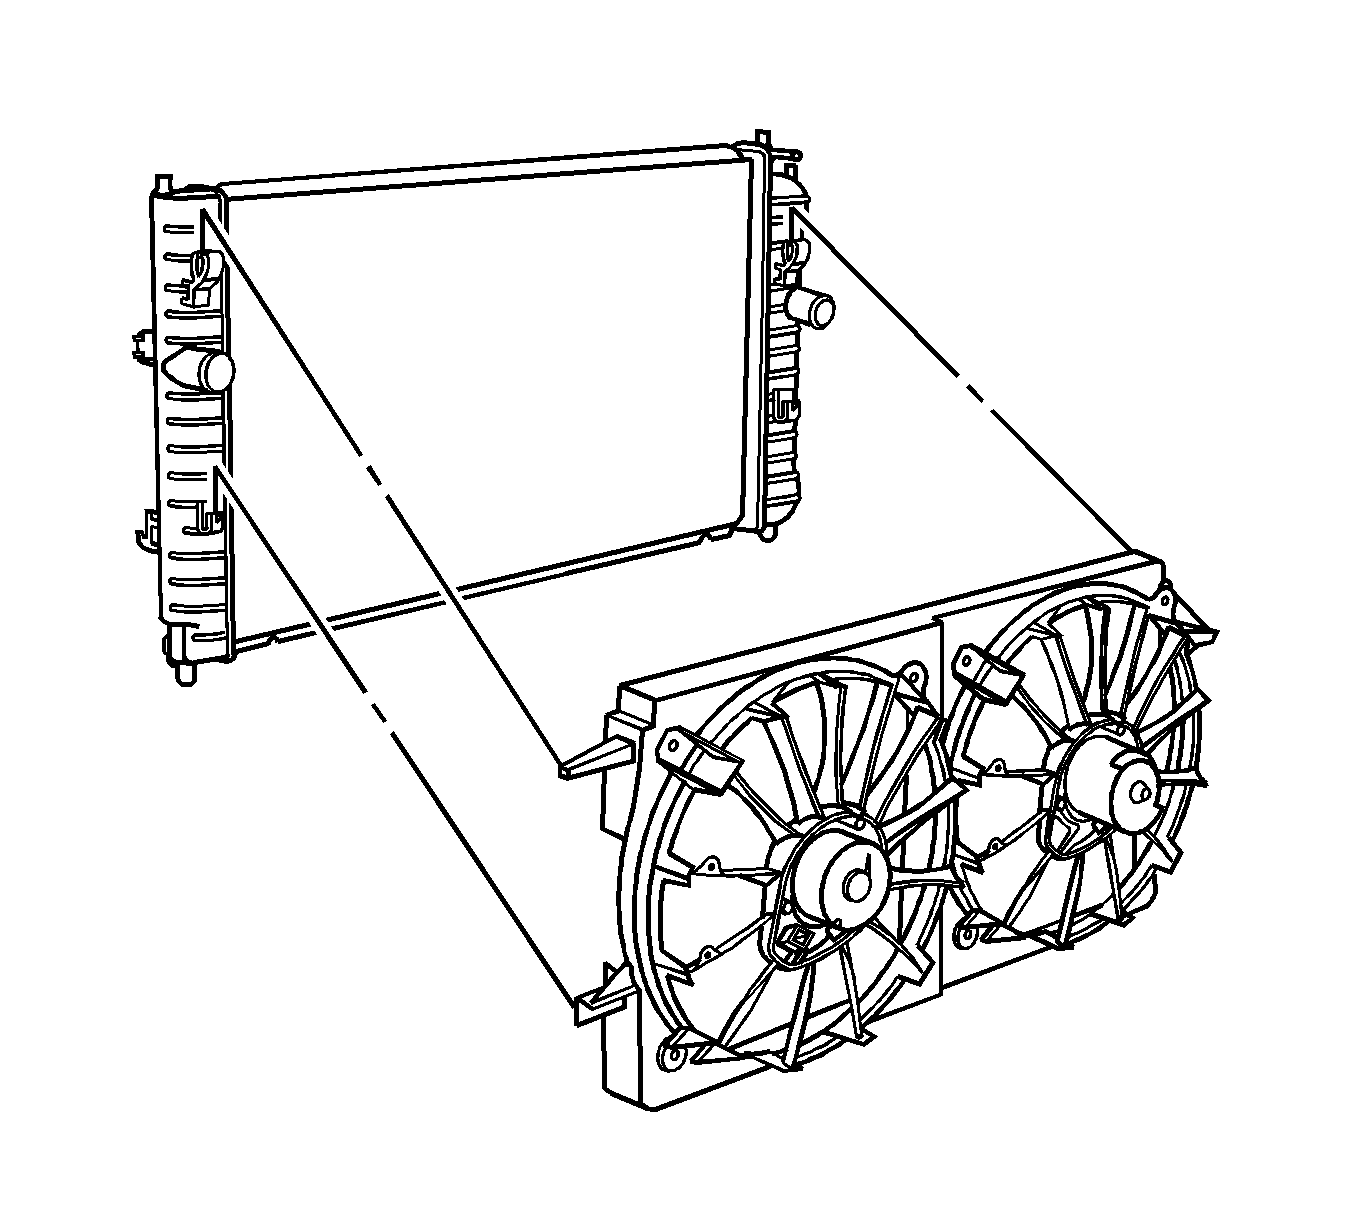
- Remove the cooling fan shroud from the radiator
- Remove the fan nuts (9) from the fans (1, 8).
- Remove the fans (1, 8) from the fan motors (7, 3).
- Remove the cooling fan motor bolts (2) from the cooling fan motors (3,7).
- Remove the bolts (10) from the cooling fan brackets (5, 6).
- Remove the cooling fan brackets (5, 6) from the fan shroud.
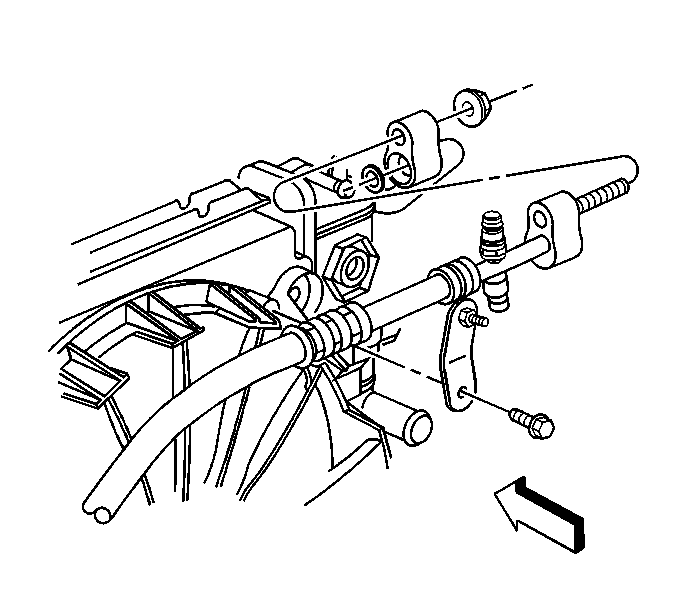
Important: Cap or tape off the open A/C hose to prevent system contamination.


Installation Procedure
- Install the cooling fan brackets (5, 6) to the fan shroud.
- Install the cooling fan bracket bolts (10).
- Install the cooling fan motor bolts (2) to the cooling fan motors (3, 7).
- Install the fans (1, 8) to the fan motors (7, 3).
- Install the fan nuts (9) to the fans (1, 8).
- Install the cooling fan shroud to the radiator.
- Install the radiator, fan, and condenser as an assembly to the vehicle.
- Install the lower radiator support mounting panel.
- Remove the cap or tape from the evaporator hose.
- Install a new seal washer to the condenser end of the evaporator hose assembly. Refer to Sealing Washer Replacement.
- Install the evaporator hose to the condenser outlet.
- Install the condenser outlet to the evaporator line bolt.
- Install the lower transaxle cooler line to the radiator.
- Install the surge tank outlet/radiator outlet hose (6) to the radiator.
- Use the J 38185 in order to reposition the surge tank outlet/radiator outlet hose clamp (7) to the radiator.
- Connect the cooling fan electrical connector.
- Install the lower close out panel.
- Lower the vehicle. Refer to Lifting and Jacking the Vehicle.
- Install the surge tank outlet/radiator outlet hose bolt from the intake manifold.
- Remove the cap or tape from the discharge hose.
- Install a new seal washer to the discharge hose. Refer to Sealing Washer Replacement.
- Install the condenser inlet fitting to the discharge hose.
- Install the refrigerant pressure sensor electrical connector.
- Install the upper transaxle oil cooler line.
- Install the radiator vent hose to the radiator.
- Install the surge tank outlet radiator outlet hose (6) to the surge tank.
- Use the J 38185 in order to reposition the surge tank outlet/radiator outlet hose clamp (4) from the surge tank.
- Install the radiator inlet hose (2) to the radiator.
- Use the J 38185 in order to reposition the radiator inlet hose clamp (1).
- Refill the cooling system. Refer to Cooling System Draining and Filling .
- Recharge the A/C system. Refer to Refrigerant Recovery and Recharging.
- Leak test the fittings of the reinstalled components using the J 39400-A .
- Install the battery tray.
- Install the battery. Refer to Battery Replacement.

Notice: Refer to Fastener Notice in the Preface section.
Tighten
Tighten the bolts to 10 N·m (89 lb in).
Tighten
Tighten the bolts to 6 N·m (53 lb in).
Tighten
Tighten the nut to 6 N·m (53 lb in).


Tighten
Tighten the bolts to 10 N·m (89 lb in).

Tighten
Tighten the bolt to 25 N·m (18 lb ft).

Tighten
Tighten the fitting to 30 N·m (22 lb ft).


Tighten
Tighten the fitting to 25 N·m (18 lb ft).

Tighten
Tighten the fitting to 30 N·m (22 lb ft).

