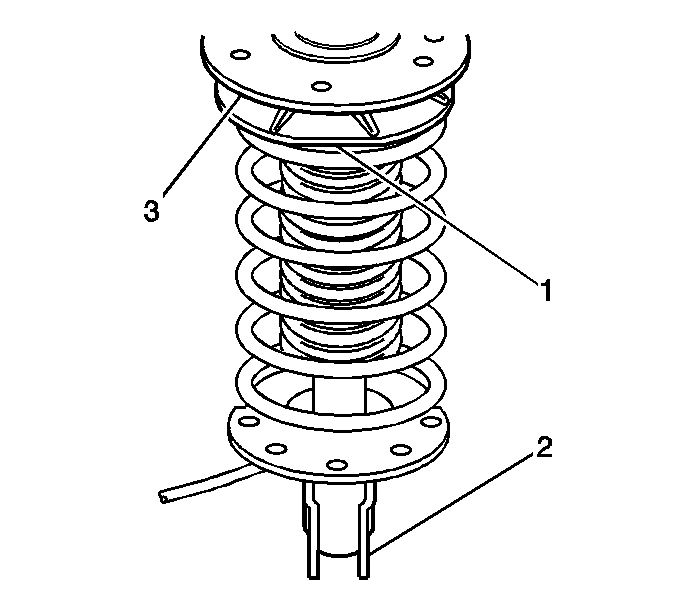
Important: Make sure that the spring seat "flat spot" faces outboard
toward the strut mounting bracket, while the strut mount "flat spot"
faces inboard away from the mounting bracket, when assembling the unit.
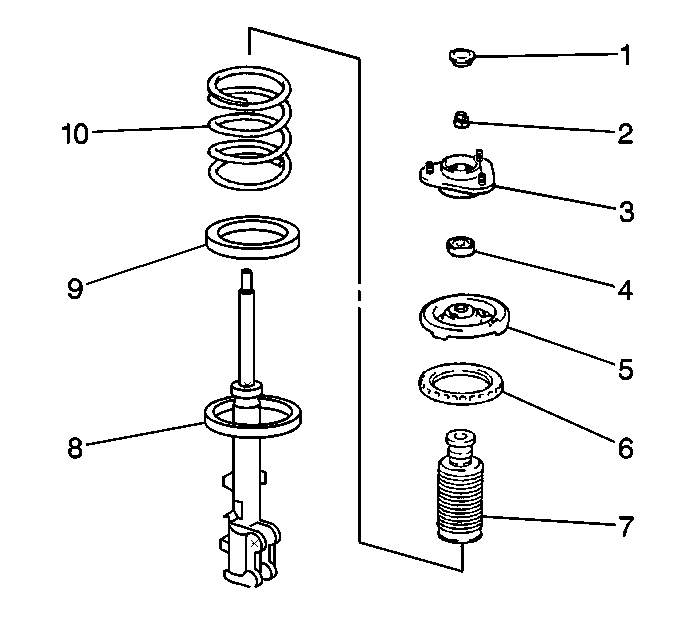
- Install the following components to the strut:
| • | The lower insulator (9) |
| • | The upper insulator (6) |

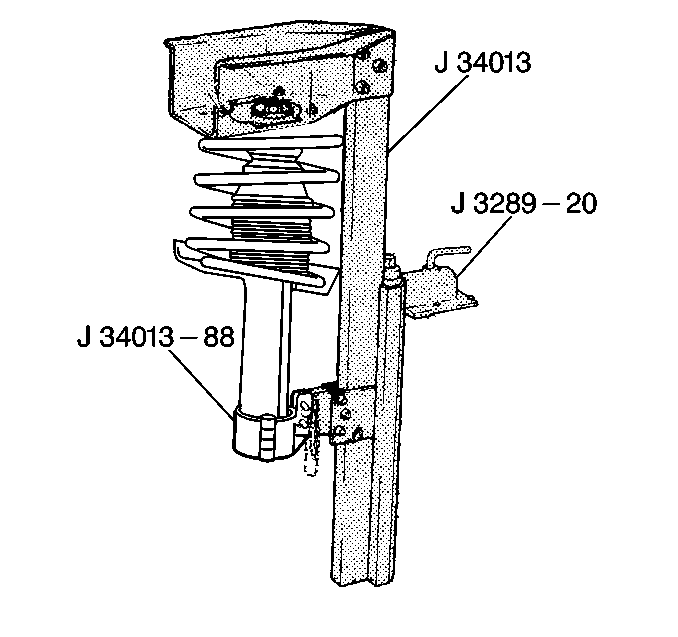
- Mount the strut assembly
into the J 34013-B
using the J 34013-88
.

- Identify the orientation
of the spring seat (1) , the strut mount (3) then compress
the coil spring.
Notice: Use the correct fastener in the correct location. Replacement fasteners
must be the correct part number for that application. Fasteners requiring
replacement or fasteners requiring the use of thread locking compound or sealant
are identified in the service procedure. Do not use paints, lubricants, or
corrosion inhibitors on fasteners or fastener joint surfaces unless specified.
These coatings affect fastener torque and joint clamping force and may damage
the fastener. Use the correct tightening sequence and specifications when
installing fasteners in order to avoid damage to parts and systems.
- Install the strut rod piston nut and hold the strut rod, at the top,
from turning.
Tighten
Tighten the strut rod piston nut (2) to 75 N·m (55 lb ft).
- Install the dust cap (1).
- Release the compressed coil spring (10).

- Remove the strut from
the J 34013-B
.
- Install the strut assembly. Refer to
Strut Assembly Replacement
.


