Removal Procedure
Important: Recliners shown below are equipped with EZ Entry, other recliners similar.
- Remove the front bucket seat. Refer to Front Seat Replacement - Bucket .
- Adjust the seat back cushion cover to gain access for the upper recliner bolts. Refer to Front Seat Back Cushion Cover Replacement .
- Remove the seat back recliner handle. Refer to Driver Seat and Passenger Seat Recliner Handle Replacement .
- Adjust the seat cushion cover to gain access for the lower recliner bolts. Refer to Front Seat Cushion Cover Replacement .
- On the outer recliner perform the following steps:
- On the inner recliner perform the following steps:
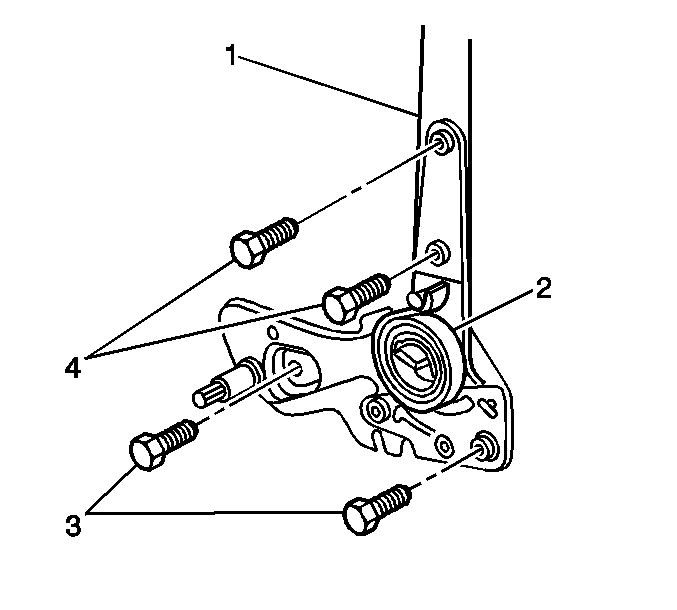
- Remove the bolts (3, 4) from the recliner (2).
- Remove the recliner (2) from the seat cushion frame and the seat back frame (1).
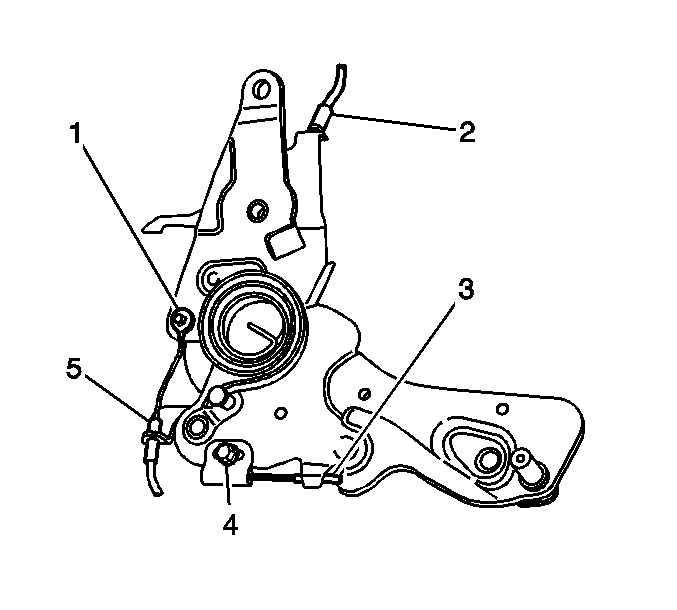
- On the front side of the recliner, if equipped with EZ Entry actuator cables perform the following steps:
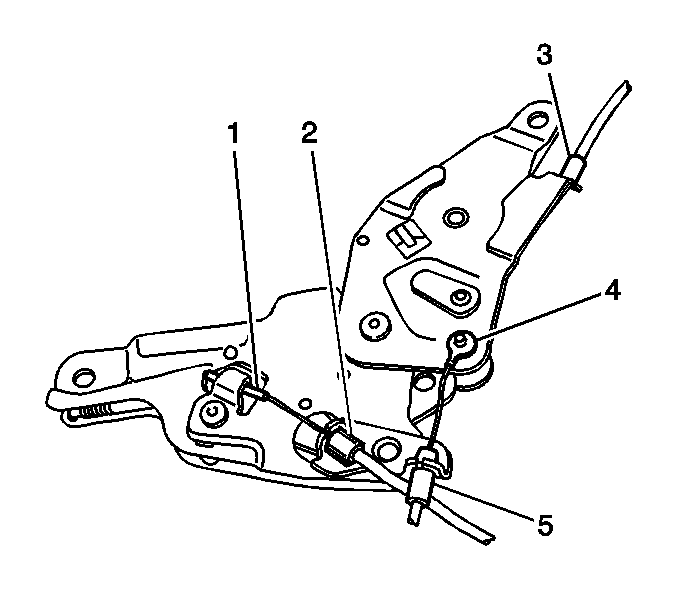
- On the back side of the recliner, if equipped with EZ Entry actuator cables perform the following steps:

| 5.1. | Remove the cable conduit bracket bolt (4). |
| 5.2. | Rotate the cable conduit 90 degrees. |
| 5.3. | Remove the cable end (3) from the recliner. |

| 6.1. | Release the locking tabs on the cable conduit (2). |
| 6.2. | Remove the cable conduit (2) from the opening in the recliner. |
| 6.3. | Rotate the cable (1) 90 degrees. |
| 6.4. | Remove the cable end (1) from the recliner. |
| 6.5. | Route the cable end (1) through the opening in the recliner. |


| 9.1. | Pry the fastener from the cable end (1). |
| 9.2. | Remove the cable end (1) from the recliner. |
| 9.3. | Release the locking tabs on the cable conduit (5). |
| 9.4. | Remove the cable conduit (5) from the opening on the recliner. |
| 9.5. | Route the cable end (1) through the recliner opening. |

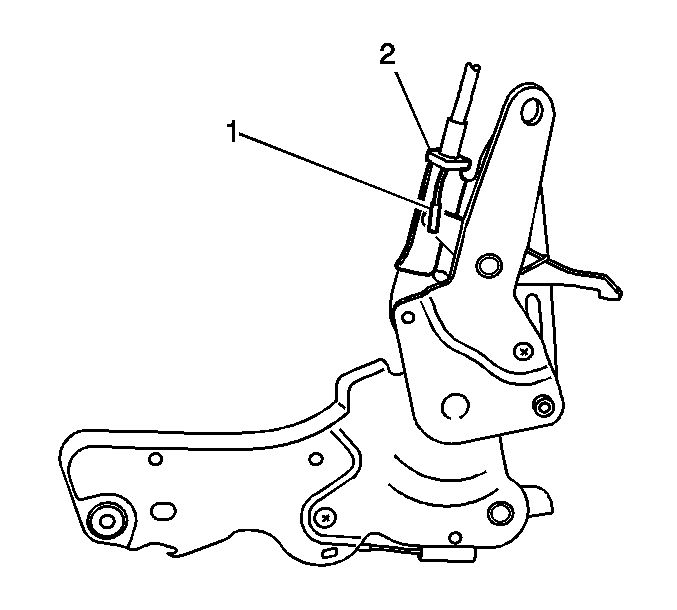
| 10.1. | Pry the cable conduit (2) out from the recliner. |
| 10.2. | Rotate the cable conduit (2) 90 degrees. |
| 10.3. | Remove the cable end (1) from the recliner. |
Installation Procedure
- On the back side of the recliner, if equipped with EZ Entry actuator cables perform the following steps:
- On the front side of the recliner, if equipped with EZ Entry actuator cables perform the following steps:
- Position the recliner (2) to the seat cushion frame and the seat back frame (1).
- Install the lower recliner bolts (3) to the seat cushion frame.
- Install the upper recliner bolts (4) to the seat back frame (1).
- On the inner recliner perform the following steps:
- On the outer recliner perform the following steps:
- Adjust the front seat cushion cover to a desired appearance. Refer to Front Seat Cushion Cover Replacement .
- Install the seat back recliner handle. Refer to Driver Seat and Passenger Seat Recliner Handle Replacement .
- Adjust the seat back cover to a desired appearance. Refer to Front Seat Back Cushion Cover Replacement .
- Install the front bucket seat. Refer to Front Seat Replacement - Bucket .

| 1.1. | Install the cable end (1) to the recliner. |
| 1.2. | Rotate the cable conduit (2) 90 degrees. |
| 1.3. | Align the cable conduit (2) with the retainer on the recliner. |
| 1.4. | Press the cable conduit (2) into recliner until fully seated. |

| 2.1. | Route the cable end (1) through the opening on the recliner. |
| 2.2. | Install the cable end (1) to the recliner, and install the fastener. |
| 2.3. | Press the fastener until fully seated against the cable end (1). |
| 2.4. | Push the cable conduit (5) into the opening on the recliner until locking tabs are secured. |

Notice: Use the correct fastener in the correct location. Replacement fasteners must be the correct part number for that application. Fasteners requiring replacement or fasteners requiring the use of thread locking compound or sealant are identified in the service procedure. Do not use paints, lubricants, or corrosion inhibitors on fasteners or fastener joint surfaces unless specified. These coatings affect fastener torque and joint clamping force and may damage the fastener. Use the correct tightening sequence and specifications when installing fasteners in order to avoid damage to parts and systems.
Tighten
Tighten the bolts to 25 N·m (18 lb ft).
Tighten
Tighten the bolts to 18 N·m (13 lb ft).

| 6.1. | Route the cable end (1) through the opening in the recliner. |
| 6.2. | Install the cable end (1) to the recliner . |
| 6.3. | Rotate the cable 90 degrees . |
| 6.4. | Install the cable conduit (2) into the recliner opening until the locking tabs are secured. |

| 7.1. | Install the cable end (3) to the recliner. |
| 7.2. | Rotate the cable conduit 90 degrees. |
| 7.3. | Install the cable conduit bracket bolt (4). |
Tighten
Tighten the bolt to 5.5 N·m (49 lb in).
