Tools Required
J 29142 Oil Filter Wrench
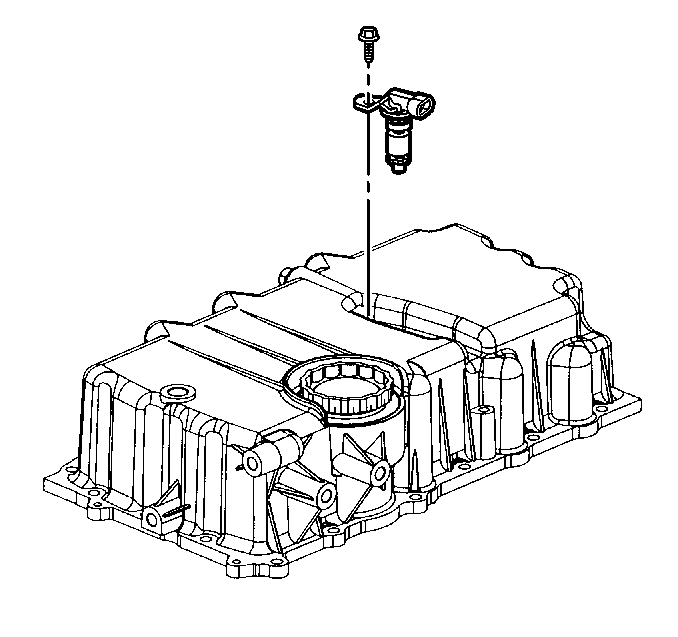
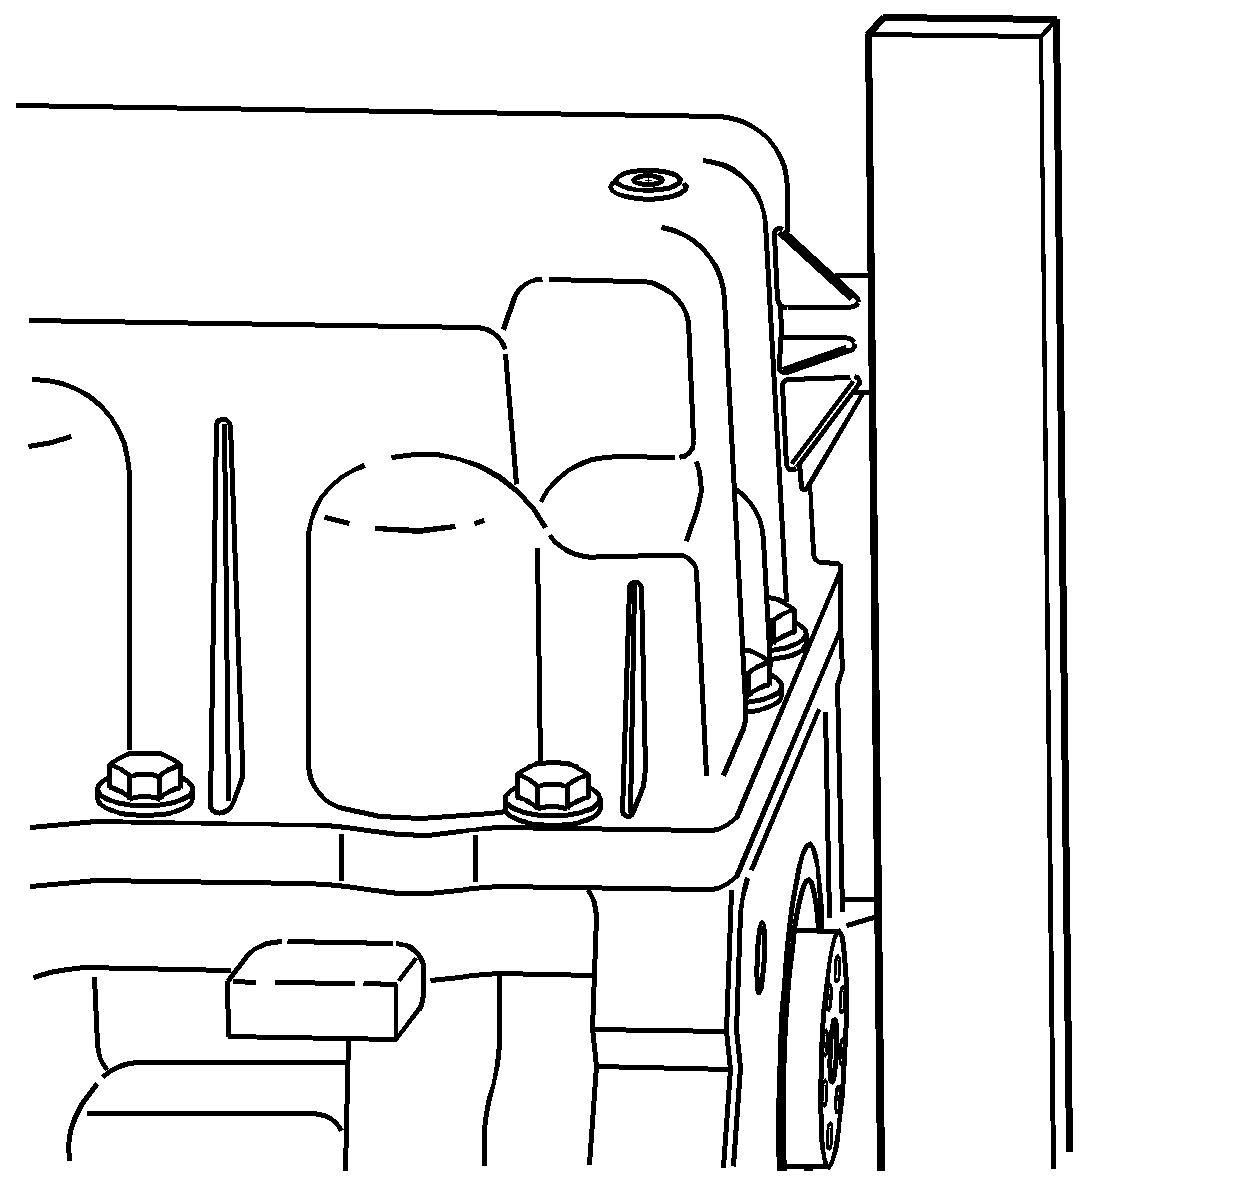
- Install a NEW O-ring on the oil level sensor.
- Lubricate the O-ring with clean engine oil.
- Install the oil level sensor.
- Install the oil level sensor bolt.
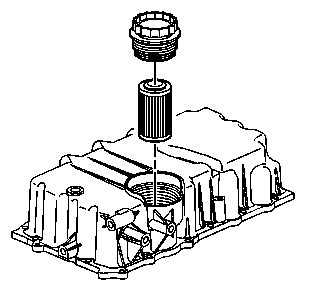
- Install a new oil filter cartridge.
- Install the oil filter cap using the J 29142 .
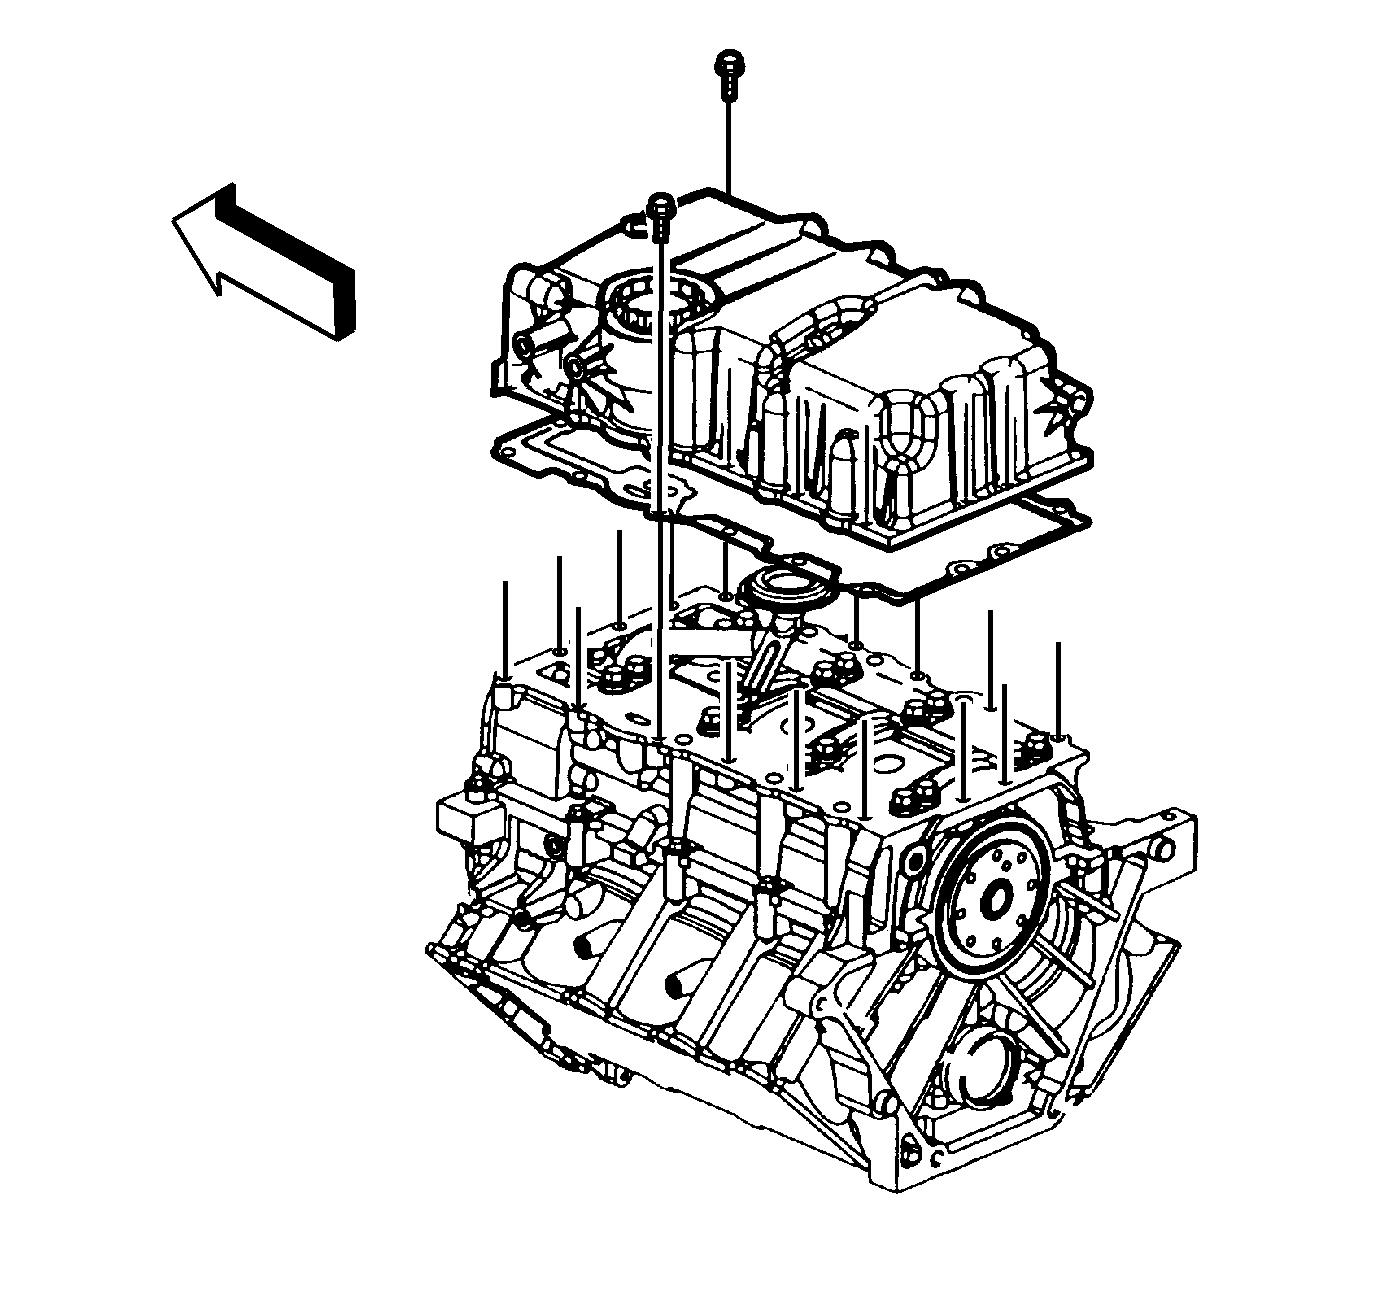
- Install a new oil pan gasket.
- Position the oil pan onto the lower crankcase.
- Loosely install the oil pan bolts.
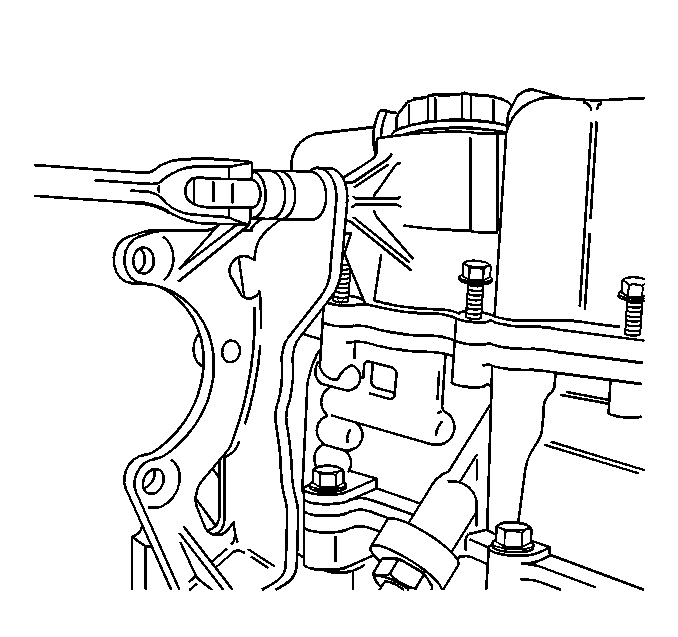
- Install the transaxle brace and the two brace-to-cylinder block bolts (1).
- Loosely install the transaxle brace-to-oil pan bolts (2).
- To ensure proper mounting of the transaxle, align the cast boss on the rear of the oil pan so it is flush with the rear face of the cylinder block using a straight edge.
- Press the forward part of the oil pan against the transaxle brace. Ensure the rear bolt boss of the oil pan is flush with the rear face of the cylinder block.
- Ensure the rear bolt boss of the oil pan is flush with the rear face of the cylinder block and tighten the oil pan bolts.
- Install the oil pan drain plug and NEW O-ring seal.
Notice: Use the correct fastener in the correct location. Replacement fasteners must be the correct part number for that application. Fasteners requiring replacement or fasteners requiring the use of thread locking compound or sealant are identified in the service procedure. Do not use paints, lubricants, or corrosion inhibitors on fasteners or fastener joint surfaces unless specified. These coatings affect fastener torque and joint clamping force and may damage the fastener. Use the correct tightening sequence and specifications when installing fasteners in order to avoid damage to parts and systems.
Tighten
Tighten the oil level sensor bolt to 9 N·m (80 lb in).
Tighten
Tighten the oil filter cap to 25 N·m (18 lb ft).
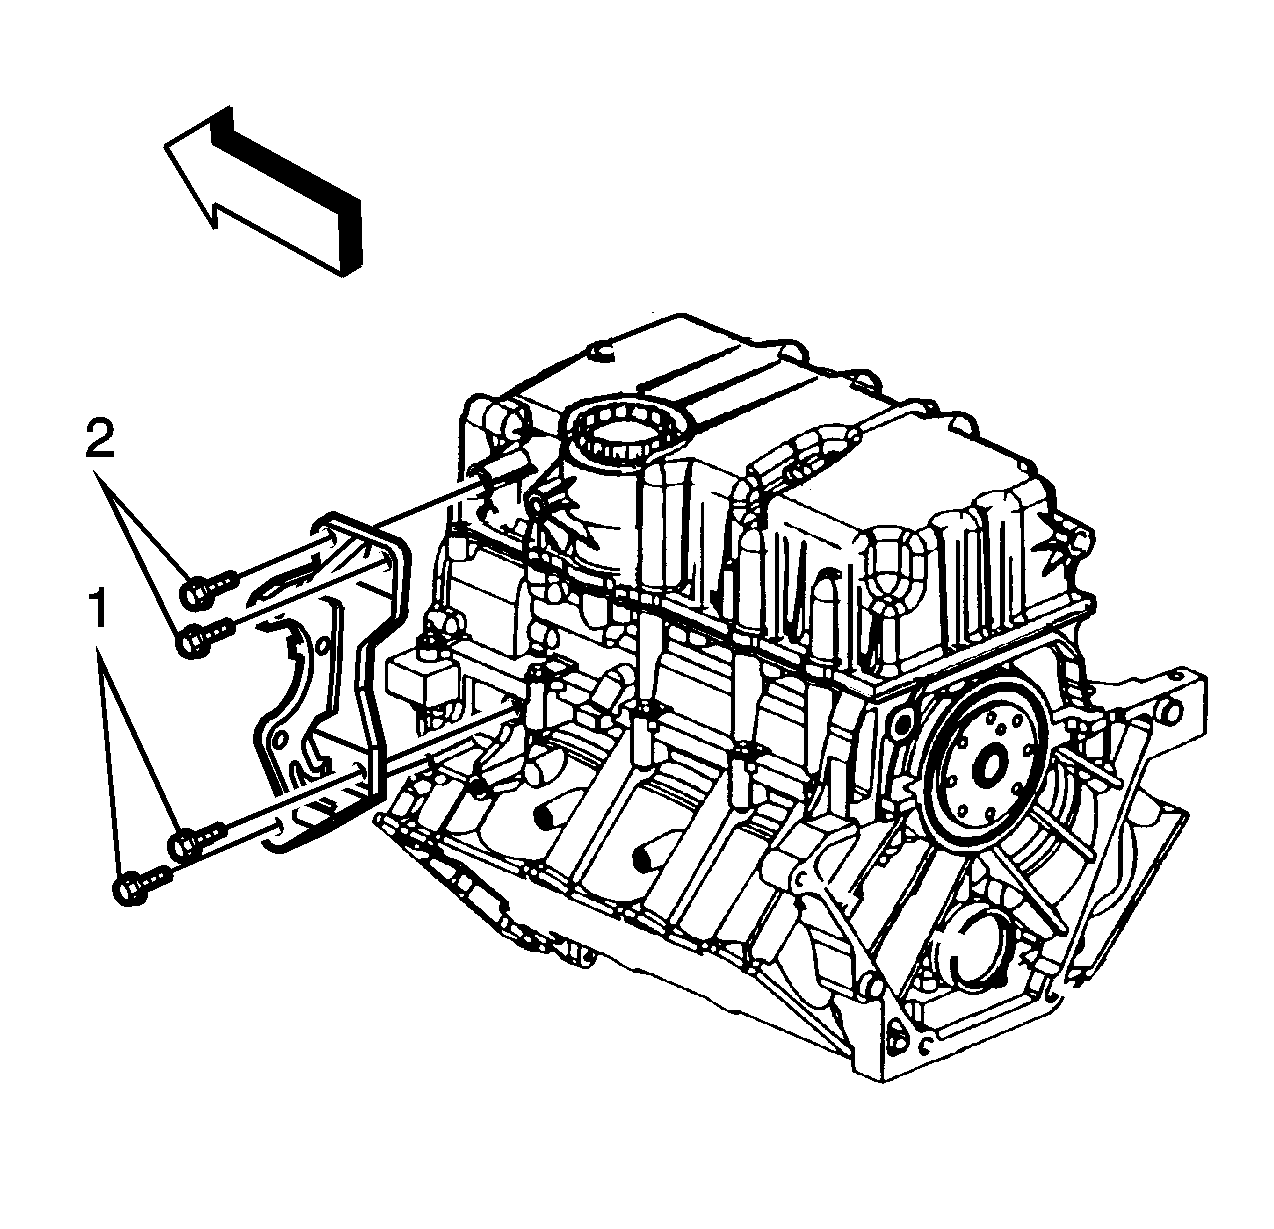
Important: DO NOT install the brace-to-oil pan bolts.
Tighten
Tighten the transaxle brace-to-cylinder block bolts (1) to 25 N·m
(18 lb ft).
Tighten
Tighten the transaxle brace-to-oil pan bolts to 25 N·m
(18 lb ft).
Tighten
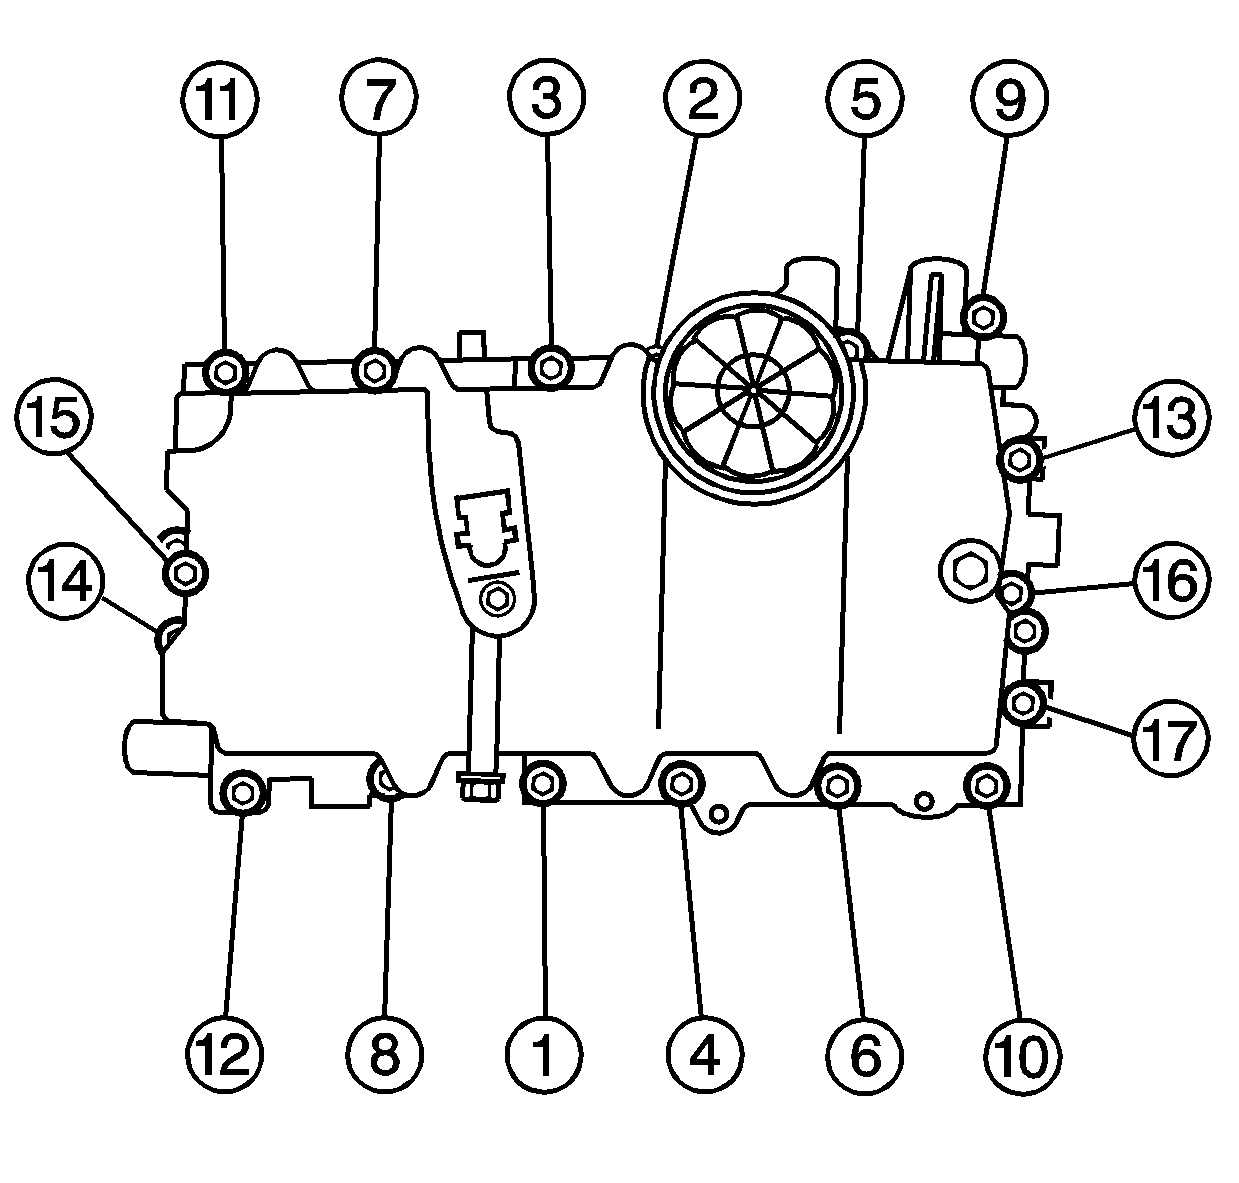
Tighten the oil pan bolts in sequence to 25 N·m (18 lb ft).

Tighten
Tighten the oil pan drain plug to 20 N·m (15 lb ft).
