Tools Required
| • | J 36660-A Torque Angle Meter |
| • | J 44221 Camshaft Holding Tool |
Removal Procedure
- Remove the camshaft cover. Refer to Camshaft Cover Replacement .
- Remove the engine front cover. Refer to Engine Front Cover Replacement .
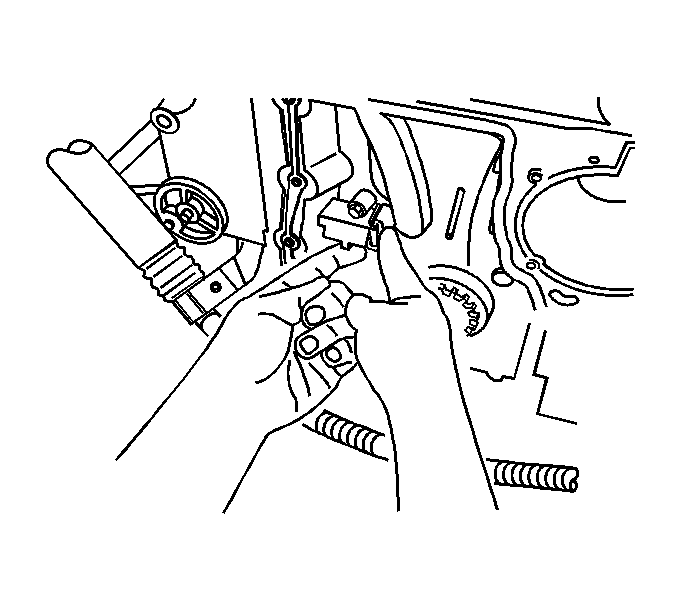
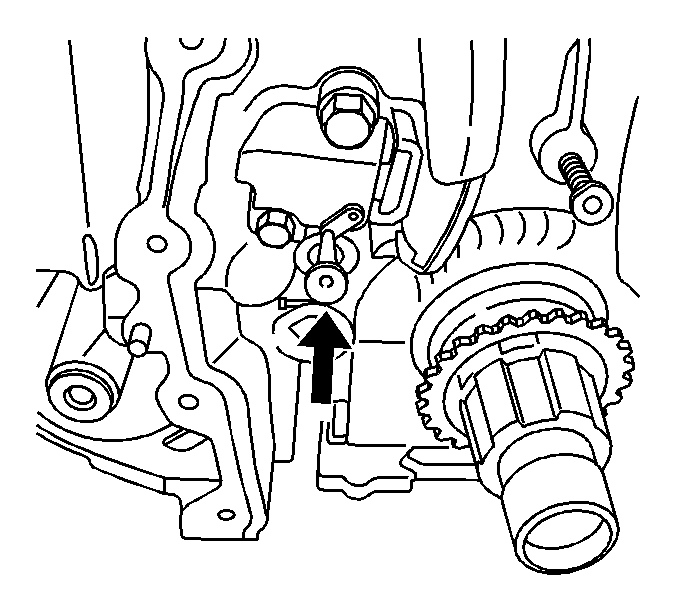
- Release the tension on the timing chain by moving the tensioner shoe in.
- Place the tee into the tensioner to hold the shoe in place.
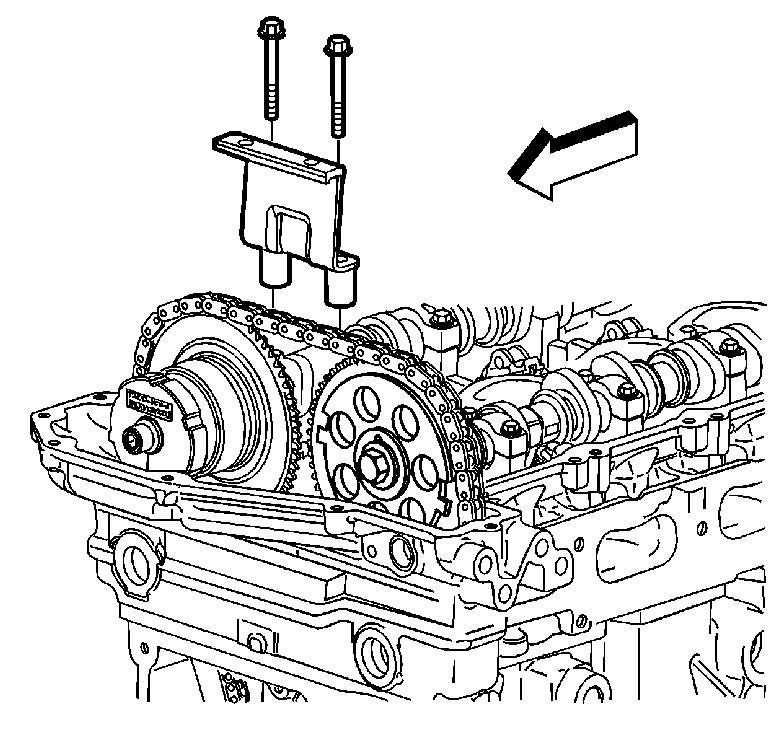
- Remove the top chain guide bolts.
- Remove the top chain guide.
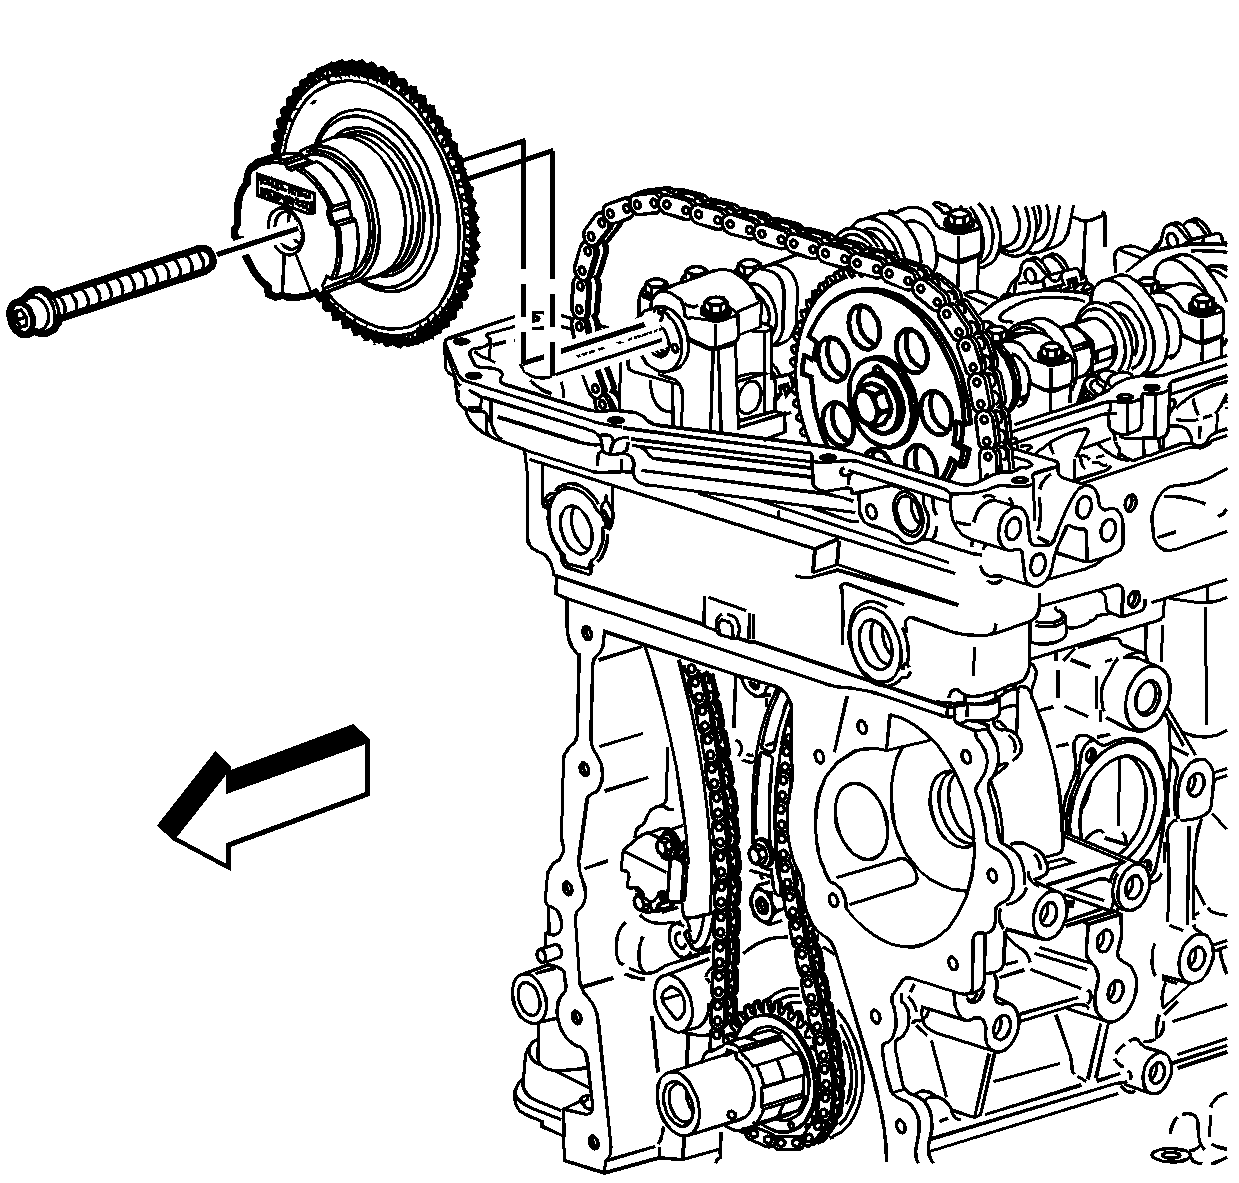
- Remove the exhaust camshaft position actuator bolt.
- Remove the exhaust camshaft position actuator.
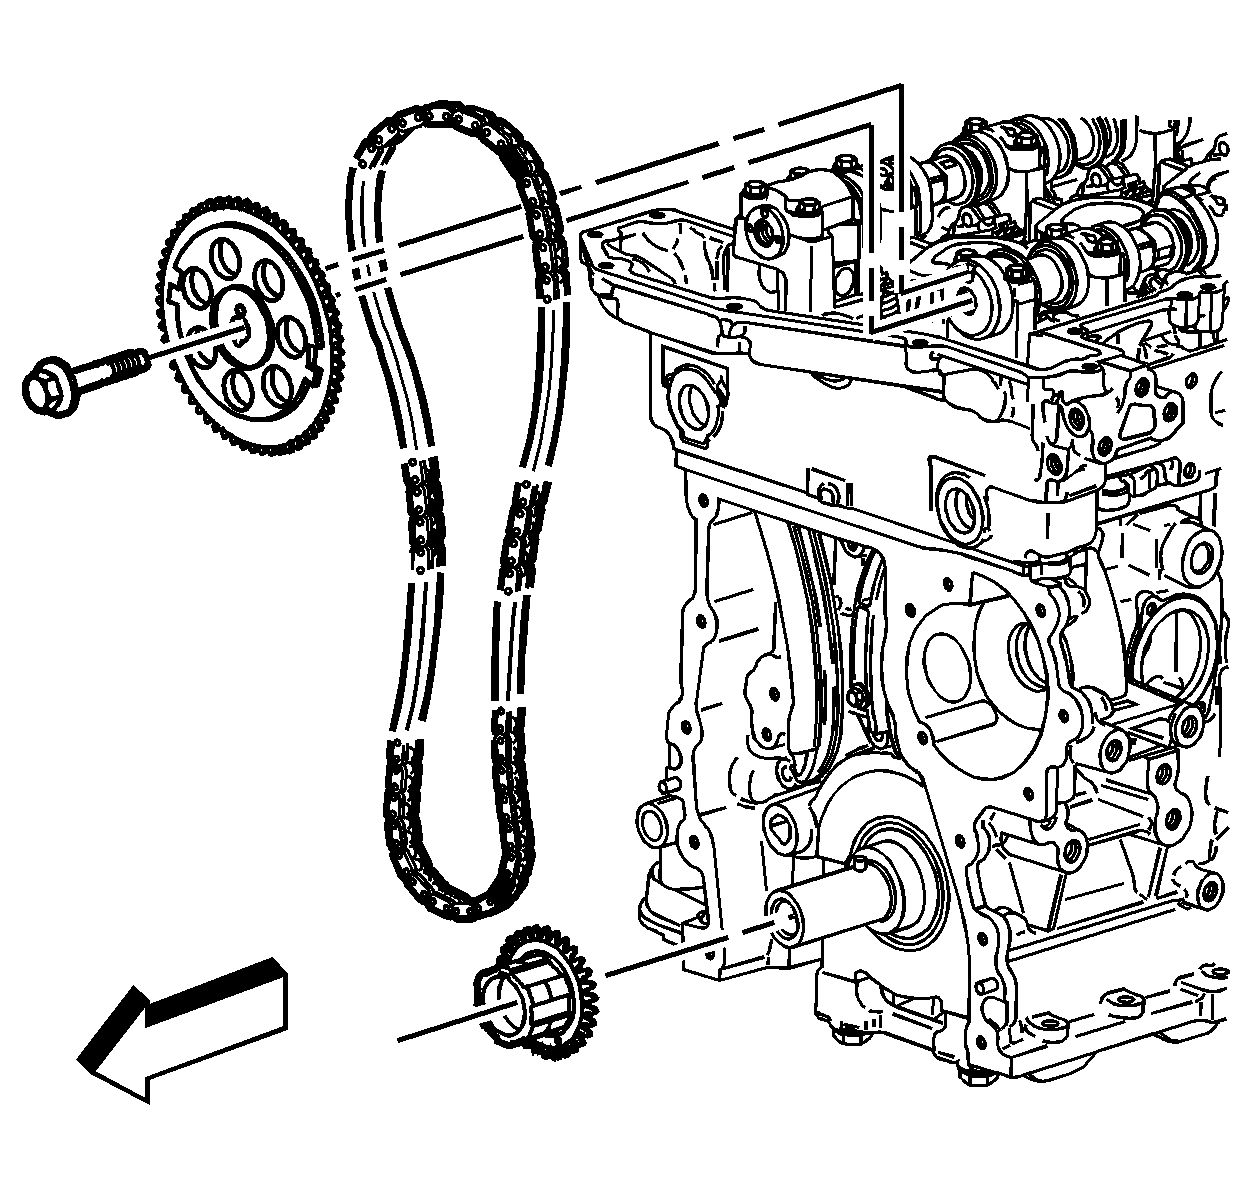
- Remove the intake camshaft sprocket bolt.
- Remove the intake camshaft sprocket.
- Remove the timing chain.
- Remove the crankshaft sprocket.
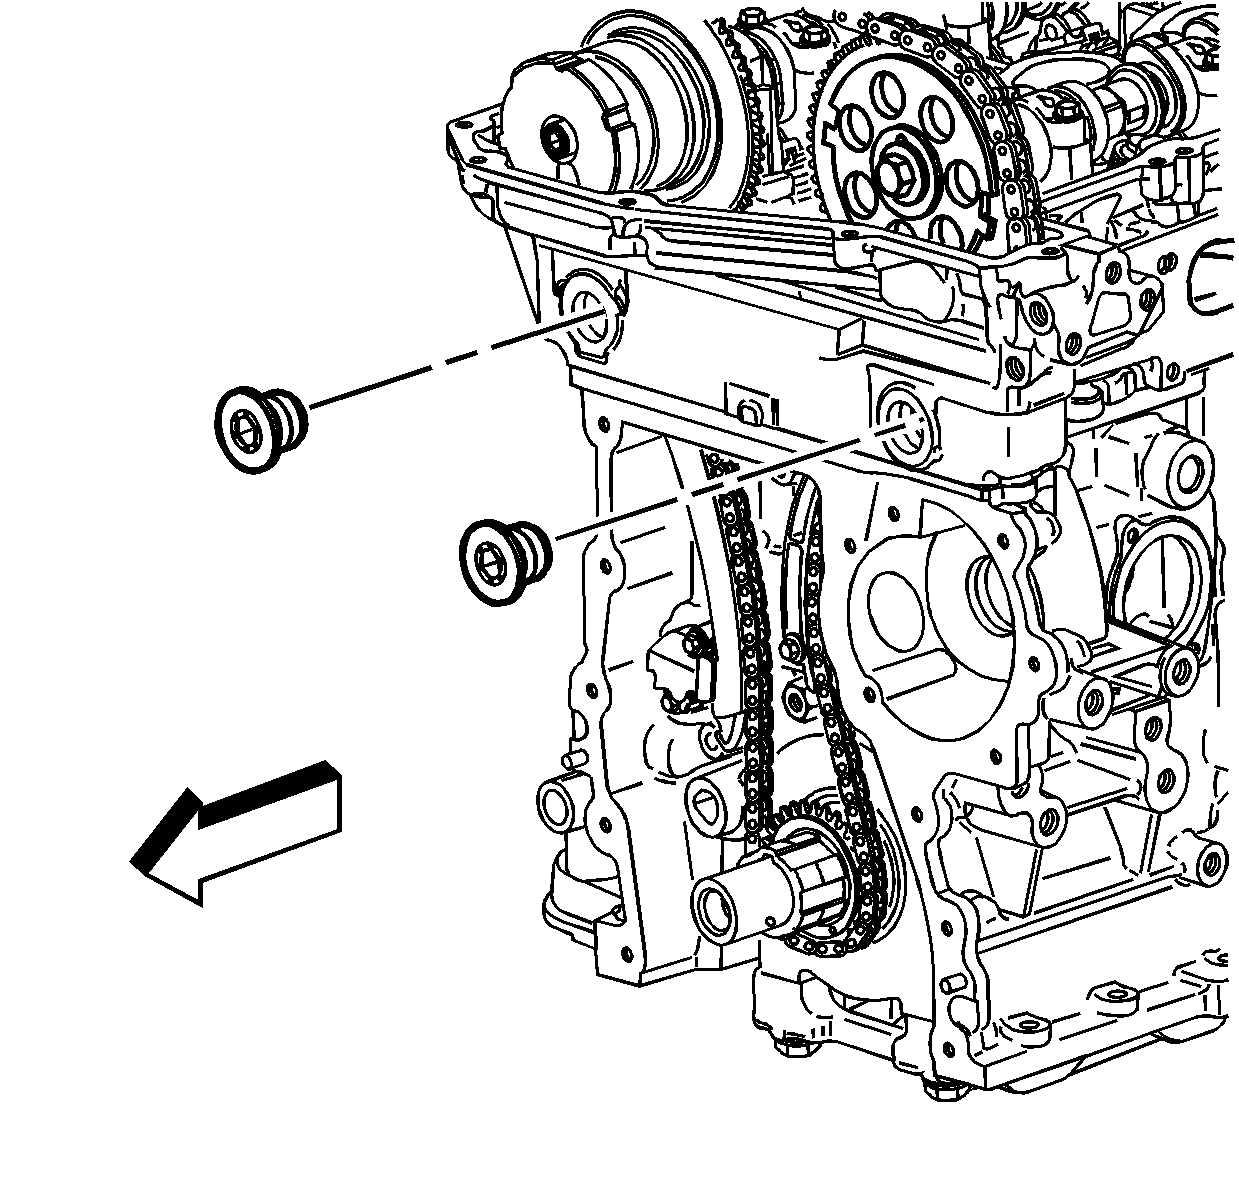
- Remove the cylinder head access hole plugs.
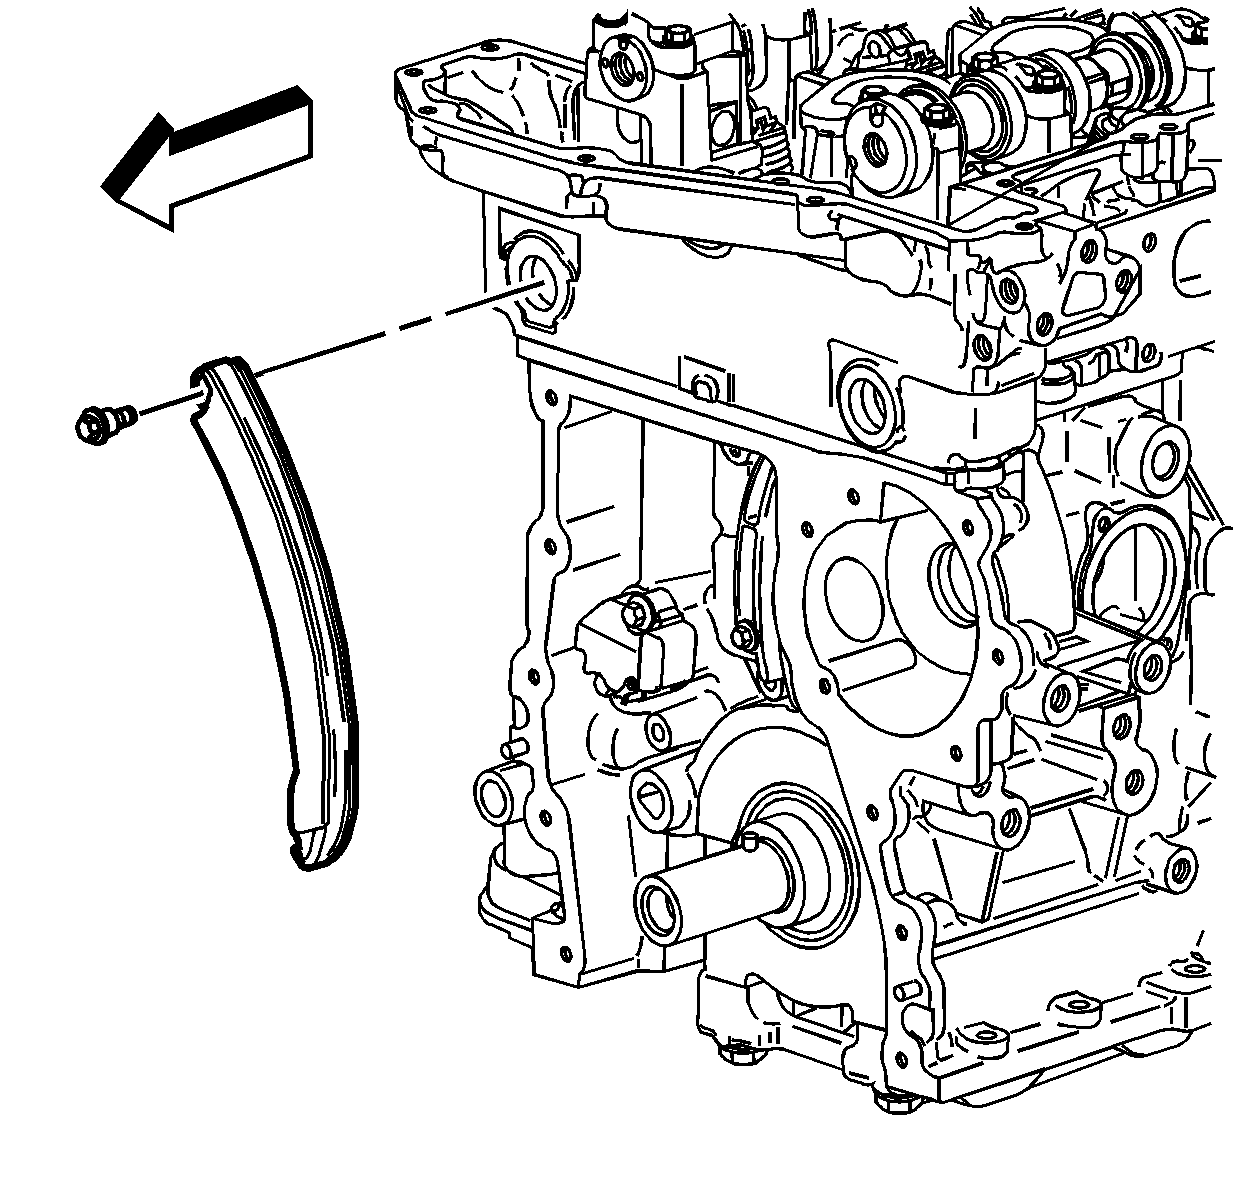
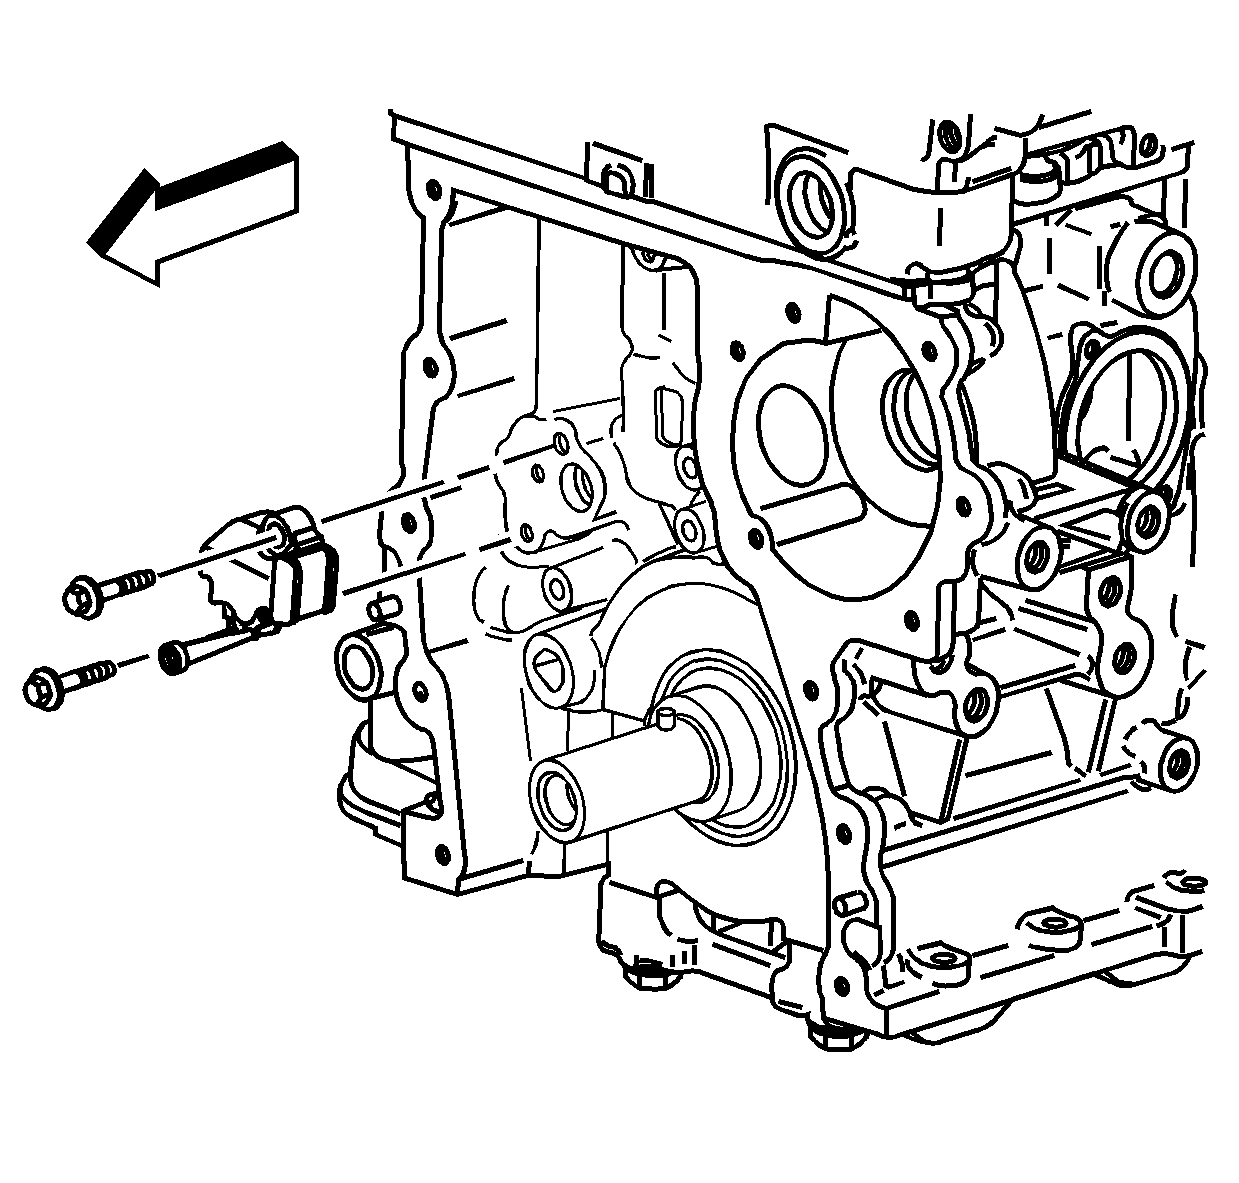
- Remove the timing chain tensioner shoe bolt.
- Remove the timing chain tensioner shoe.
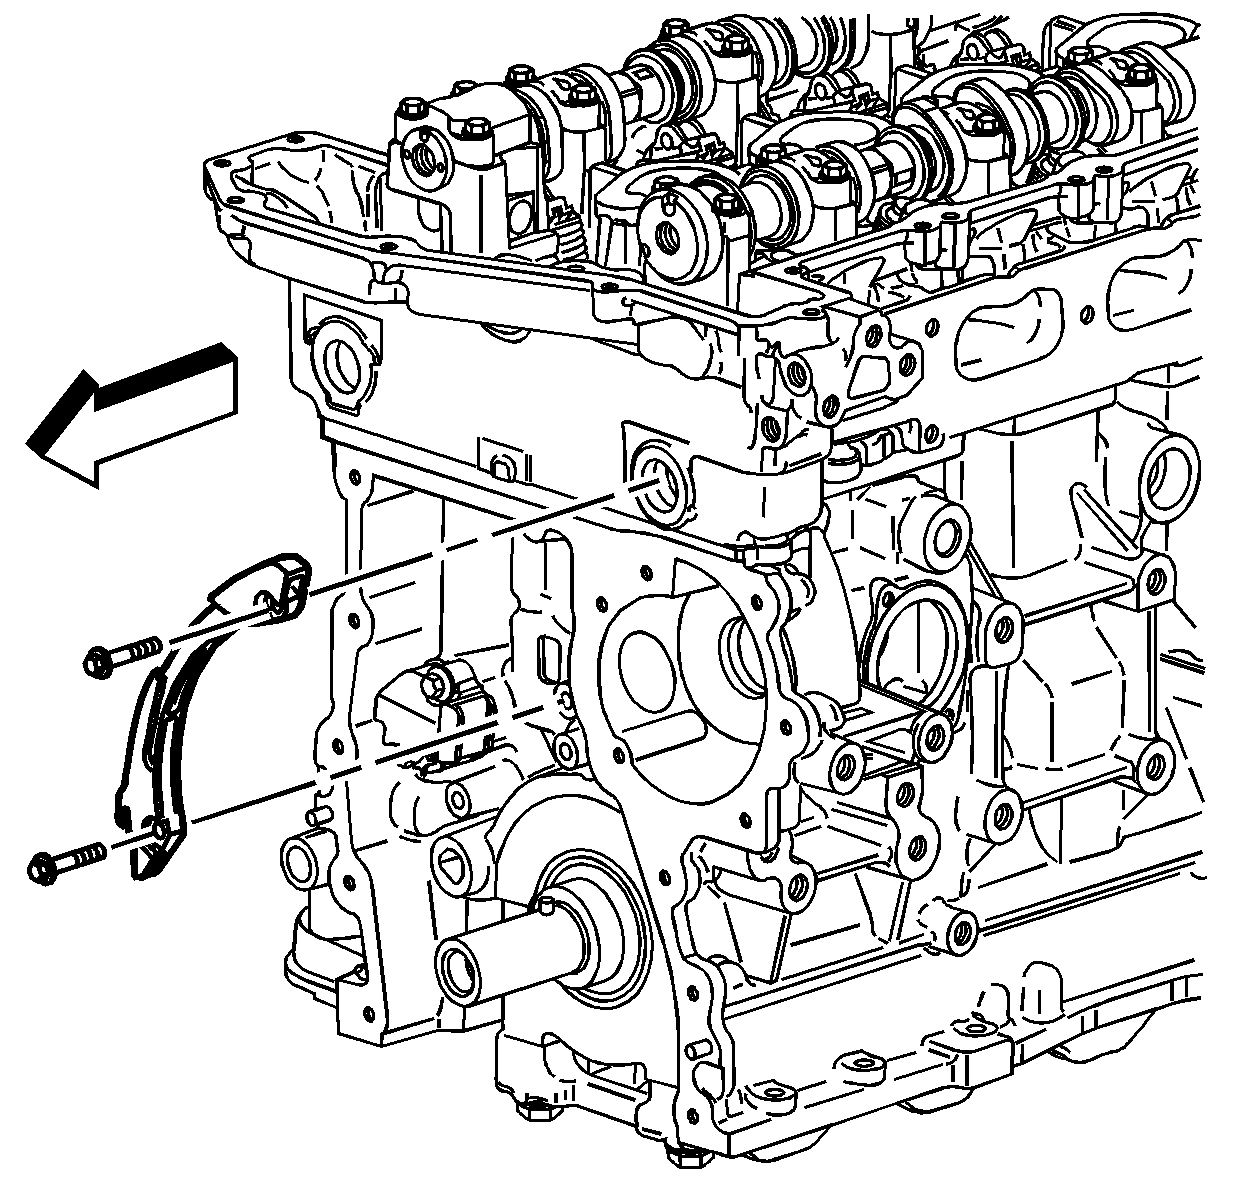
- Remove the timing chain tensioner guide bolts.
- Remove the timing chain tensioner guide.
- Remove the timing chain tensioner bolts.
- Remove the timing chain tensioner.
Installation Procedure
- Install the timing chain tensioner and secure the tensioner with the bolts.
- Install the timing chain tensioner guide and secure the guide with the bolts.
- Install the timing chain tensioner shoe and secure the shoe with the bolt.
- Install the cylinder head access hole plugs.
- Install the J 44221 with the camshaft flats up and the number 1 piston at top dead center. The crank pin will be at 12 o'clock when the number 1 piston is at top dead center.
- Install the crankshaft sprocket (1).
- Install the intake camshaft sprocket into the timing chain. Refer to Camshaft Position Actuator Diagnosis .
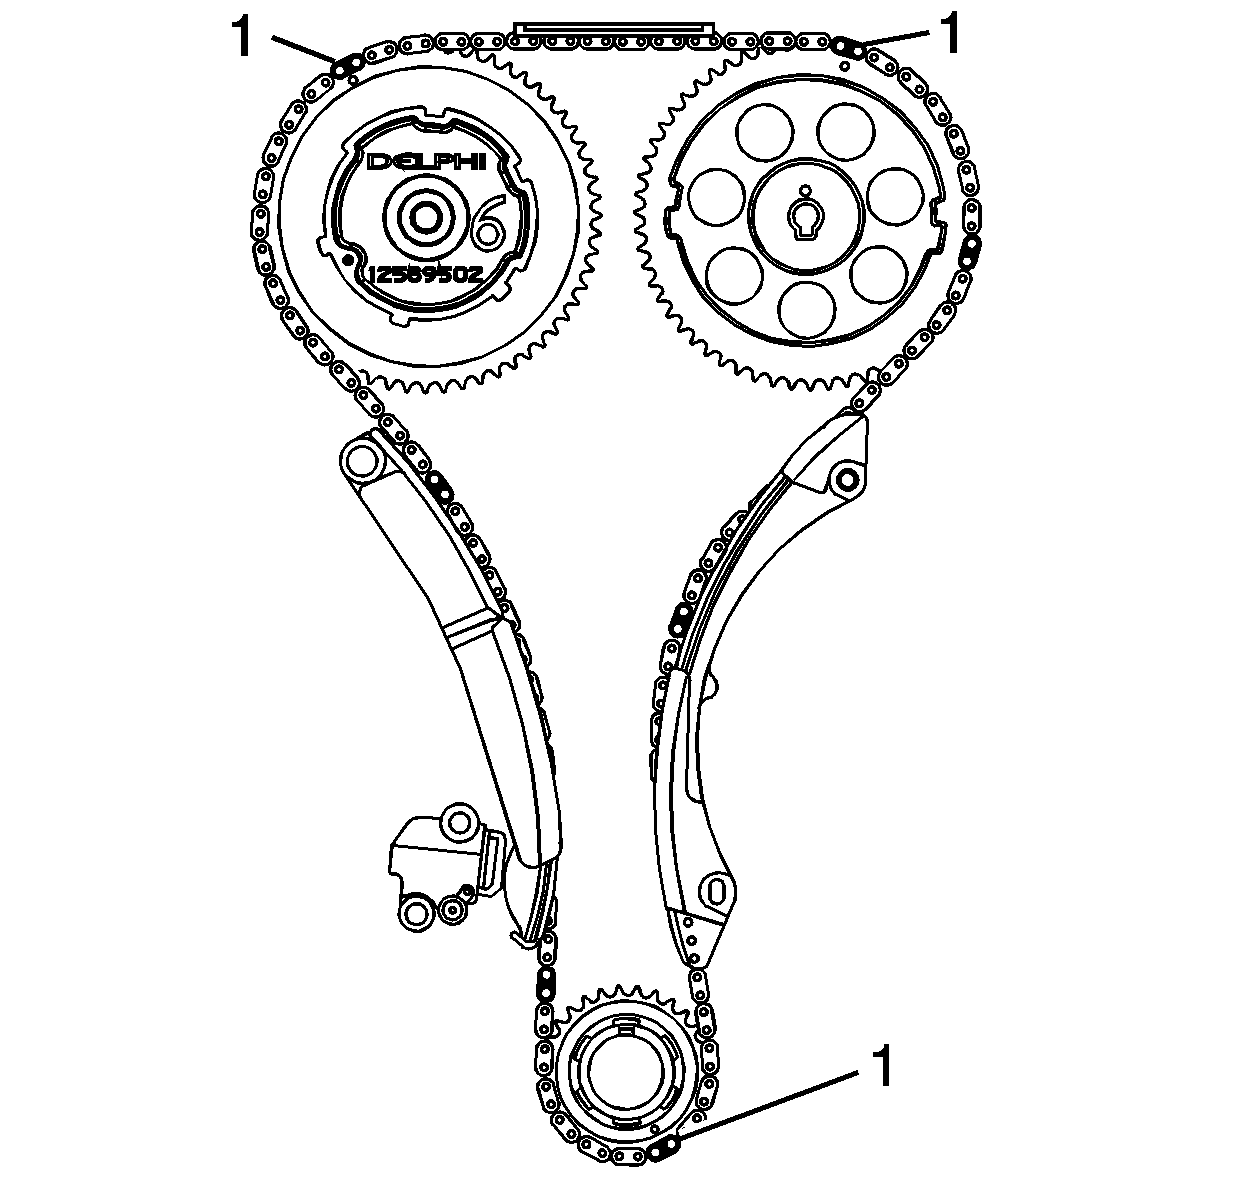
- Align the dark link of the timing chain with the timing mark on the intake camshaft sprocket (1).
- Feed the timing chain down through the opening in the head.
- Install the timing chain on the crankshaft sprocket. Align the dark link of the timing chain with the timing mark on to the crankshaft sprocket.
- Install the intake camshaft sprocket onto the intake camshaft.
- Install the intake camshaft sprocket washer and bolt.
- Install the exhaust camshaft actuator into the timing chain.
- Align the dark link of the timing chain with the timing mark on the exhaust camshaft actuator (1).
- Install the exhaust camshaft actuator onto the exhaust camshaft.
- Install the exhaust camshaft actuator bolt.
- Install the intake camshaft sprocket bolt.
- Remove the tee in the timing chain tensioner to regain tension on the timing chain.
- Remove the J 44221 .
- The dark lines (1) on the chain should be aligned with the marks on the sprockets as shown.
- Install the top chain guide.
- Add threadlock on the top chain guide bolt threads. Refer to Adhesives, Fluids, Lubricants, and Sealers for the correct part number.
- Install the top chain guide bolts.
- Install the engine front cover. Refer to Engine Front Cover Replacement .
- Install the camshaft cover. Refer to Camshaft Cover Replacement .
Notice: Refer to Fastener Notice in the Preface section.

Important: Every seventh link of the timing chain is darkened to aid in aligning the timing marks.
Tighten
Tighten the timing chain tensioner bolts to 25 N·m (18 lb ft).

Tighten
Tighten the timing chain tensioner guide to 10 N·m (89 lb in).

Tighten
Tighten the timing chain tensioner shoe bolt to 26 N·m (19 lb ft).

Tighten
Tighten the cylinder head access hole plugs to 5 N·m (44 lb in).
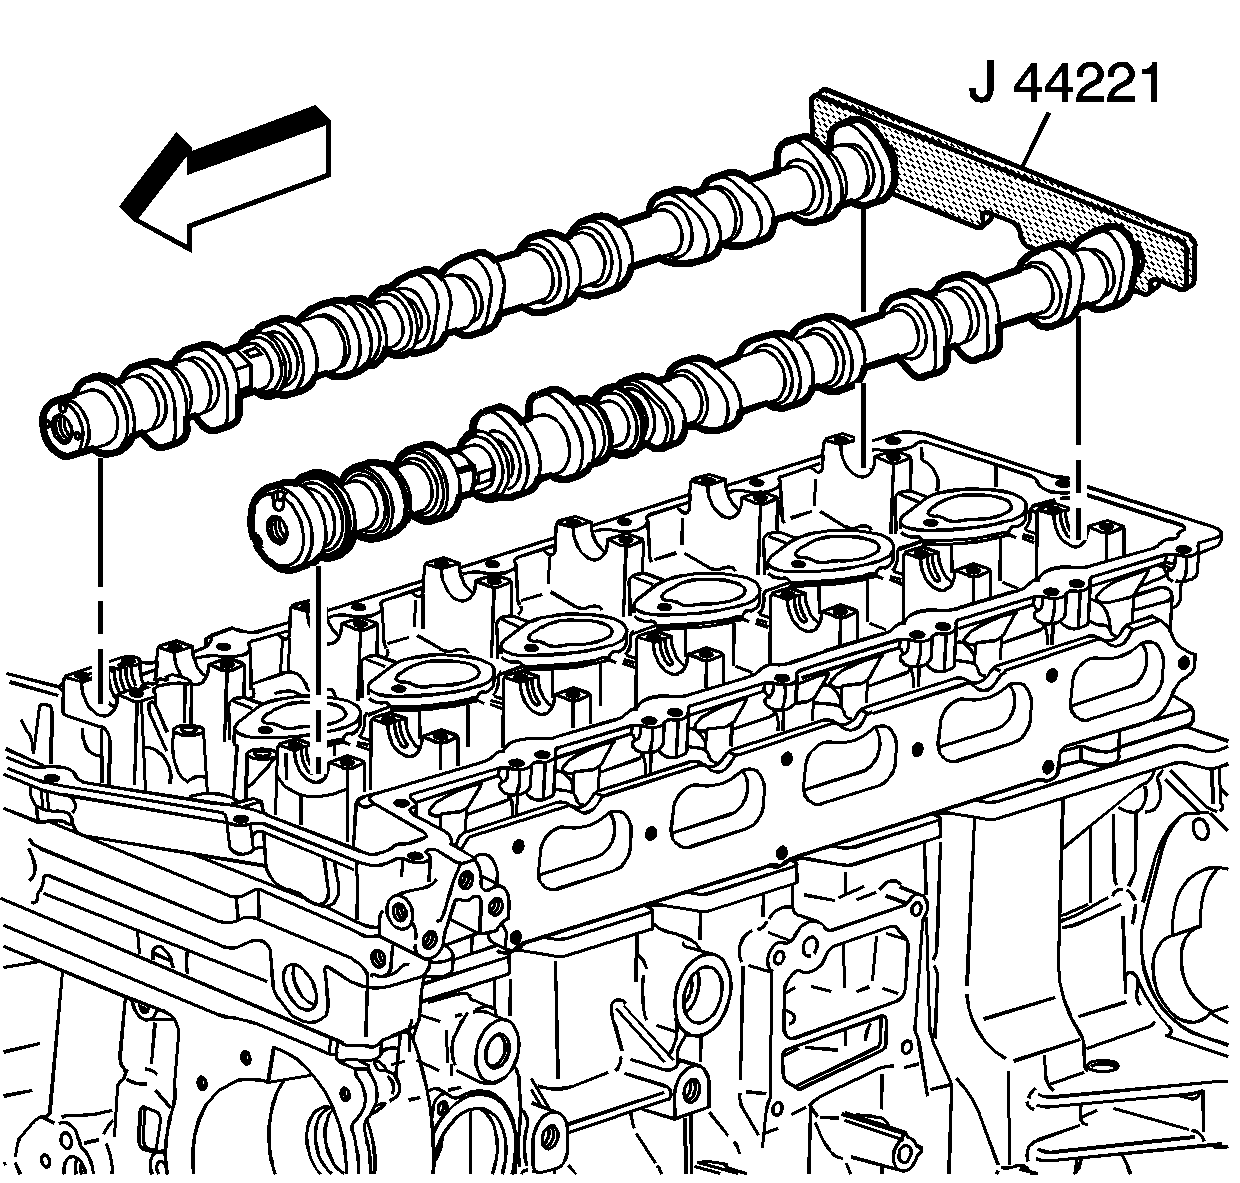
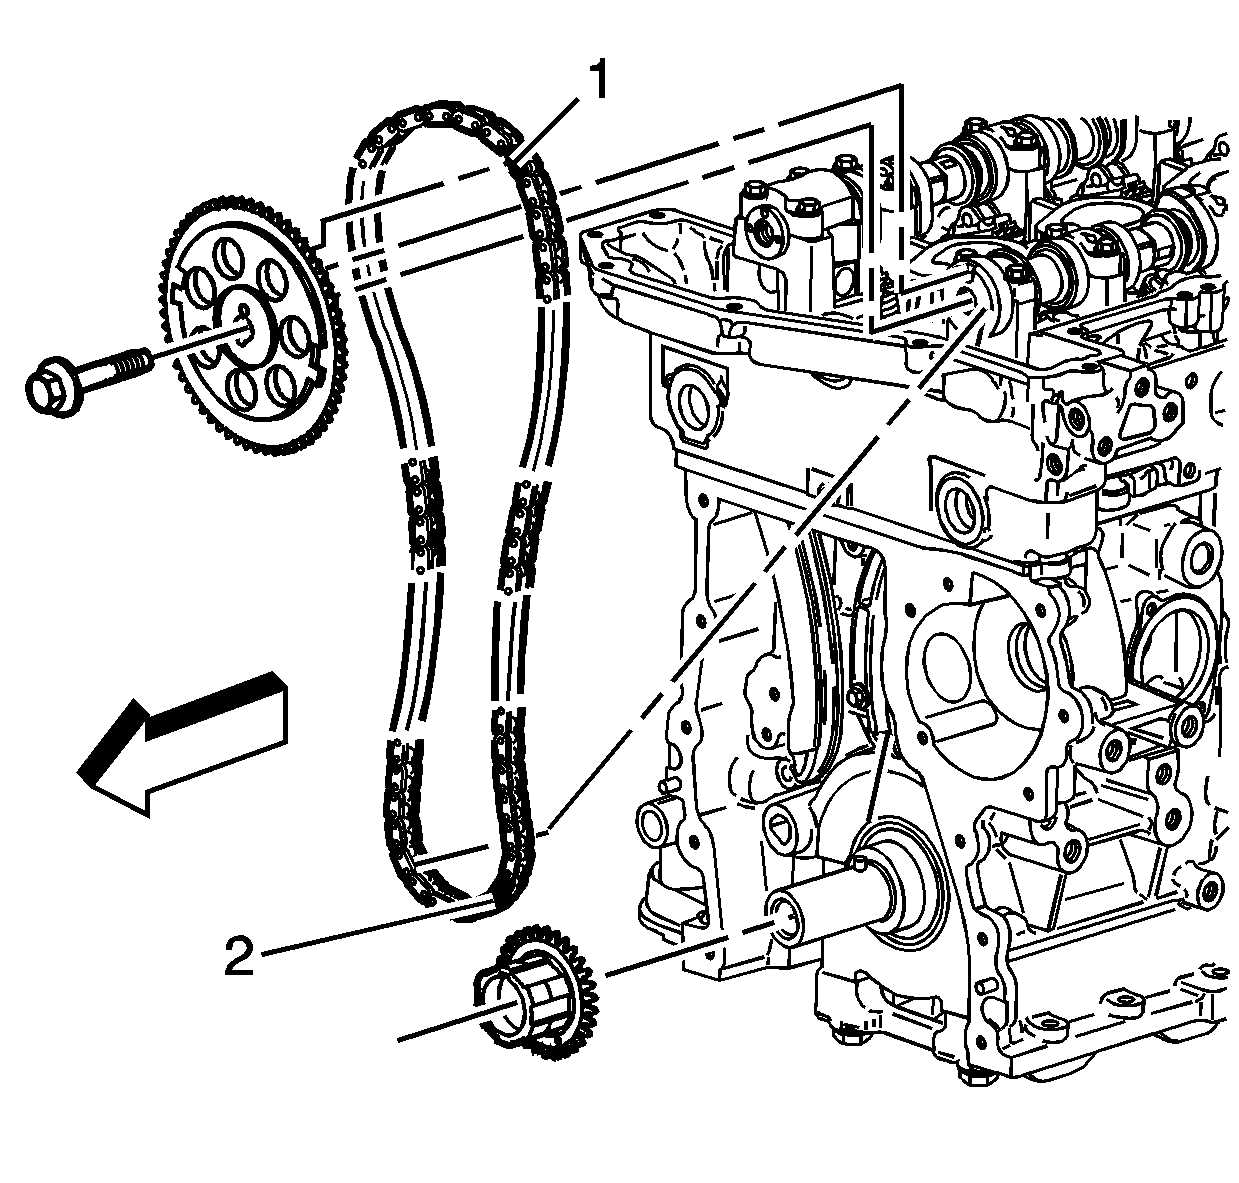
Important: It may be necessary to remove J 44221 to rotate and hold the camshaft (hex) to align the pin to the camshaft sprocket.
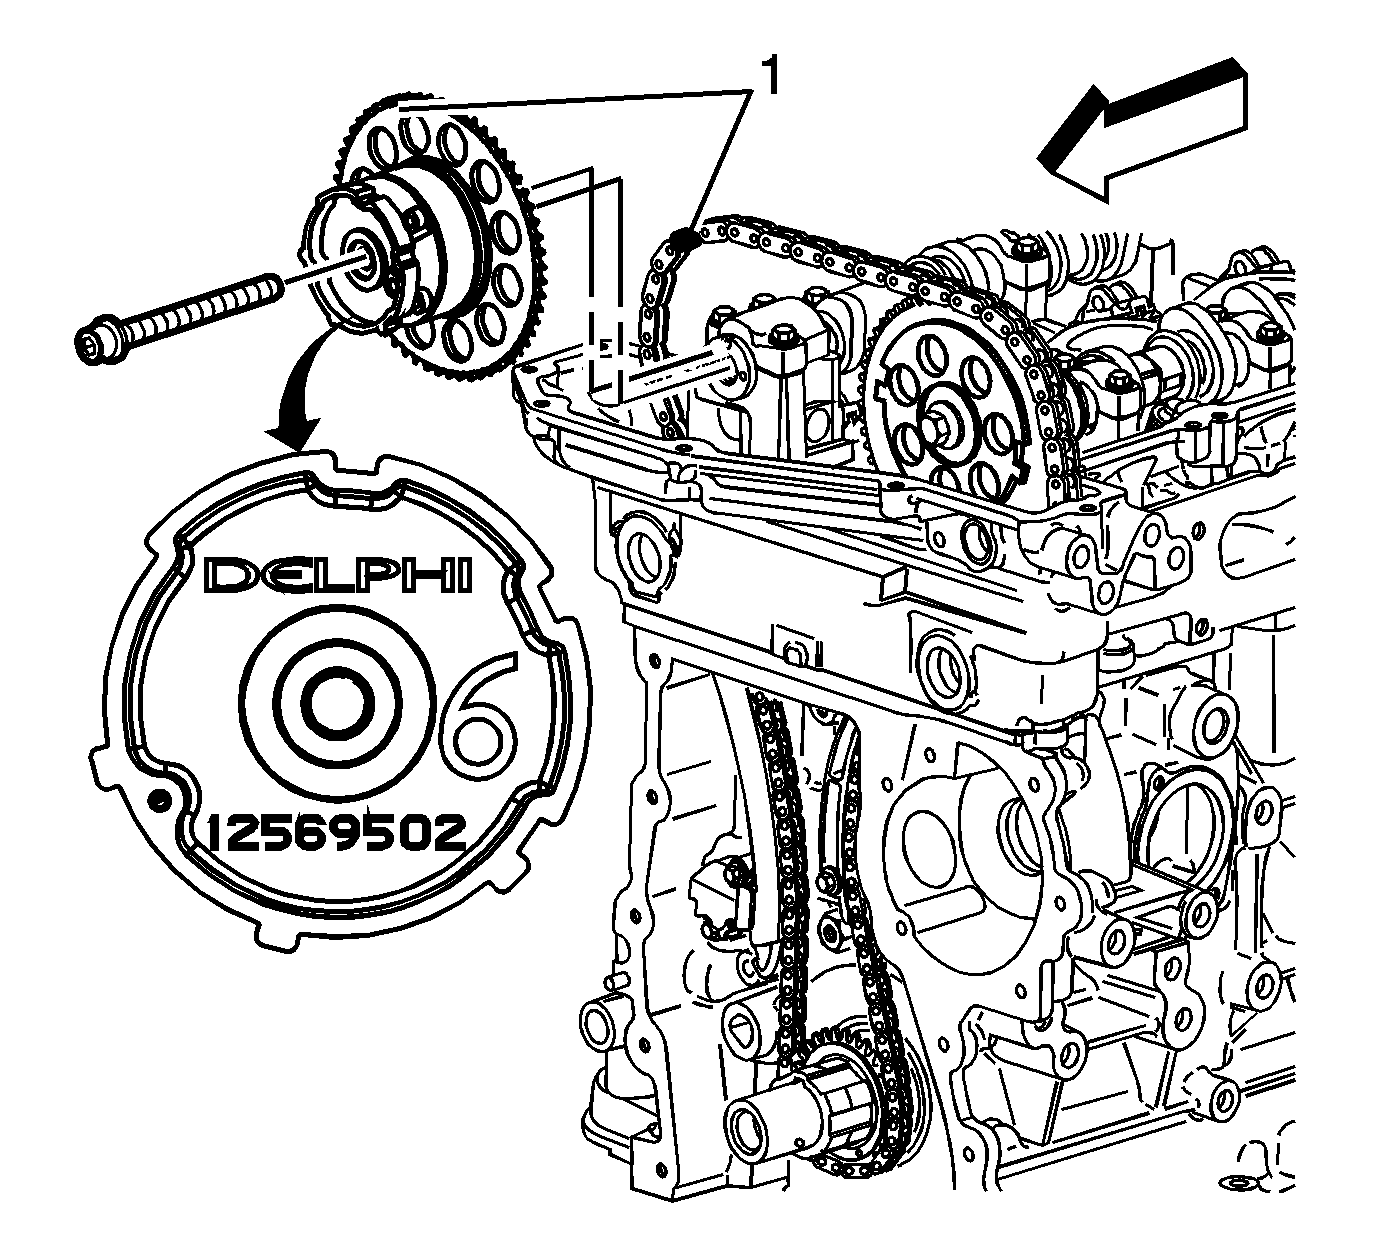
Important: It may be necessary to remove the J 44221 to rotate and hold the camshaft hex to align the pin to the camshaft sprocket.
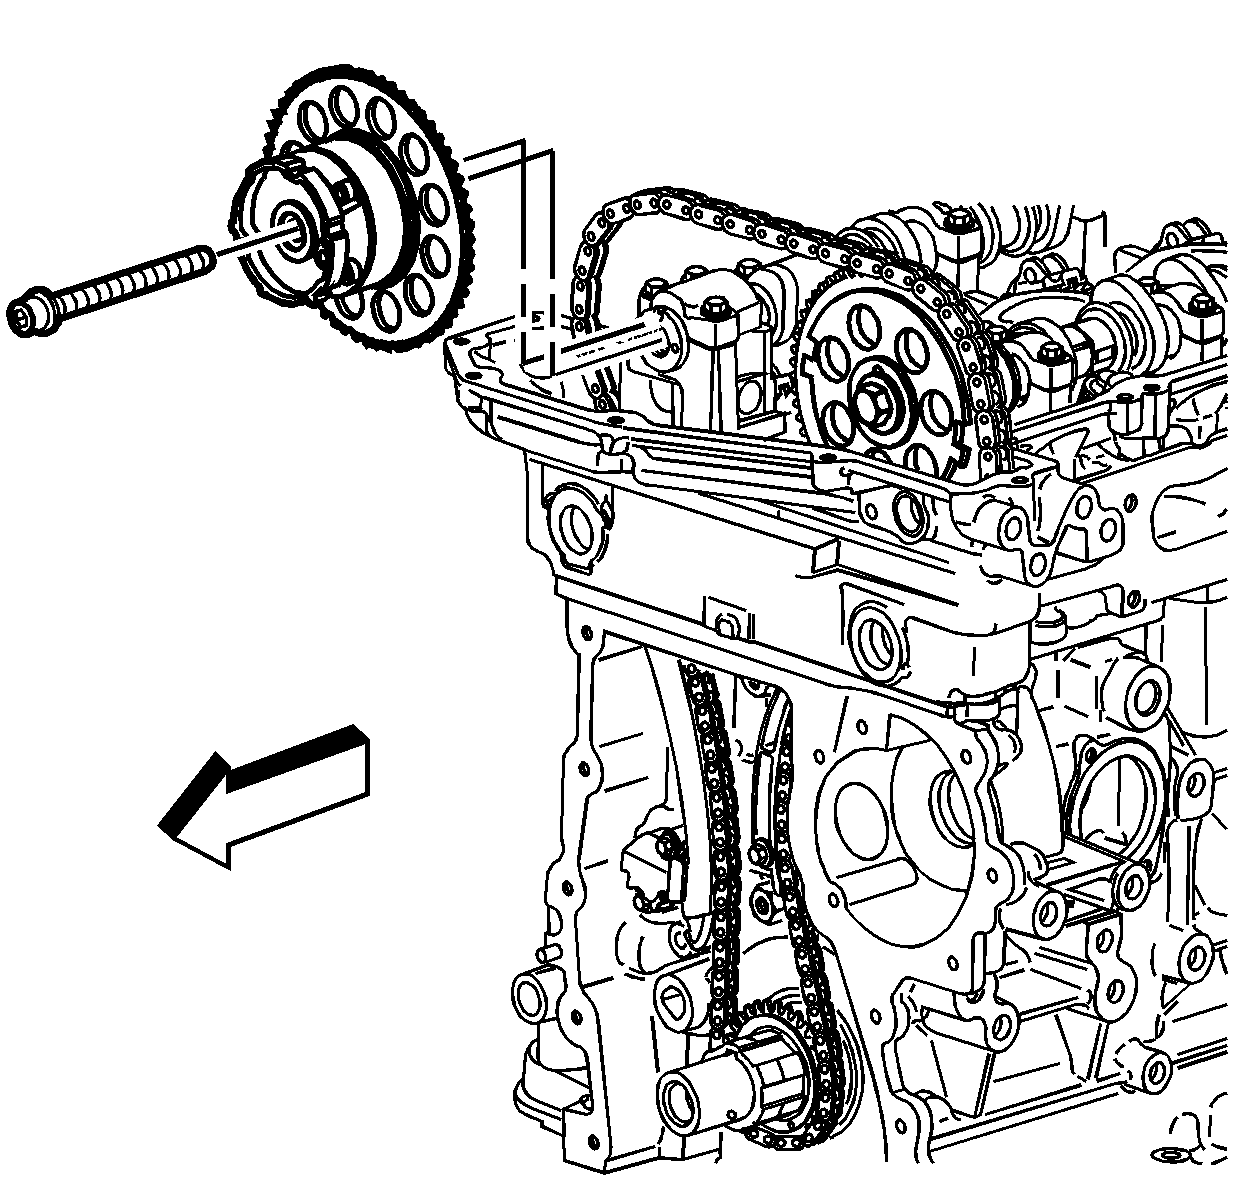
Notice: The camshaft actuator must be fully advanced during installation. Engine damage may occur if the camshaft actuator is not fully advanced.
Important: Rotate the camshaft actuator clockwise relative to the camshaft prior to tightening the bolt.
Tighten
| • | Tighten the exhaust camshaft actuator bolt the first pass to 25 N·m (18 lb ft). |
| • | Use J 36660-A to tighten the exhaust camshaft actuator bolt the final pass an additional 135 degrees. |
Tighten
| • | Tighten the intake camshaft sprocket bolt the first pass to 20 N·m (15 ft lb). |
| • | Use J 36660-A to tighten the intake camshaft sprocket bolt the final pass an additional 100 degrees. |


Tighten
Tighten the top chain guide bolts to 10 N·m (89 lb in).
