The audio system has been designed to operate easily and give years of listening pleasure. You will get the most enjoyment out of it if you acquaint yourself with it first. Find out what your audio system can do and how to operate all its features, to be sure you're getting the most out of the advanced engineering that went into it.
The ignition must be in ACC or ON for your audio system to work.
Navigation/Radio Display and Controls
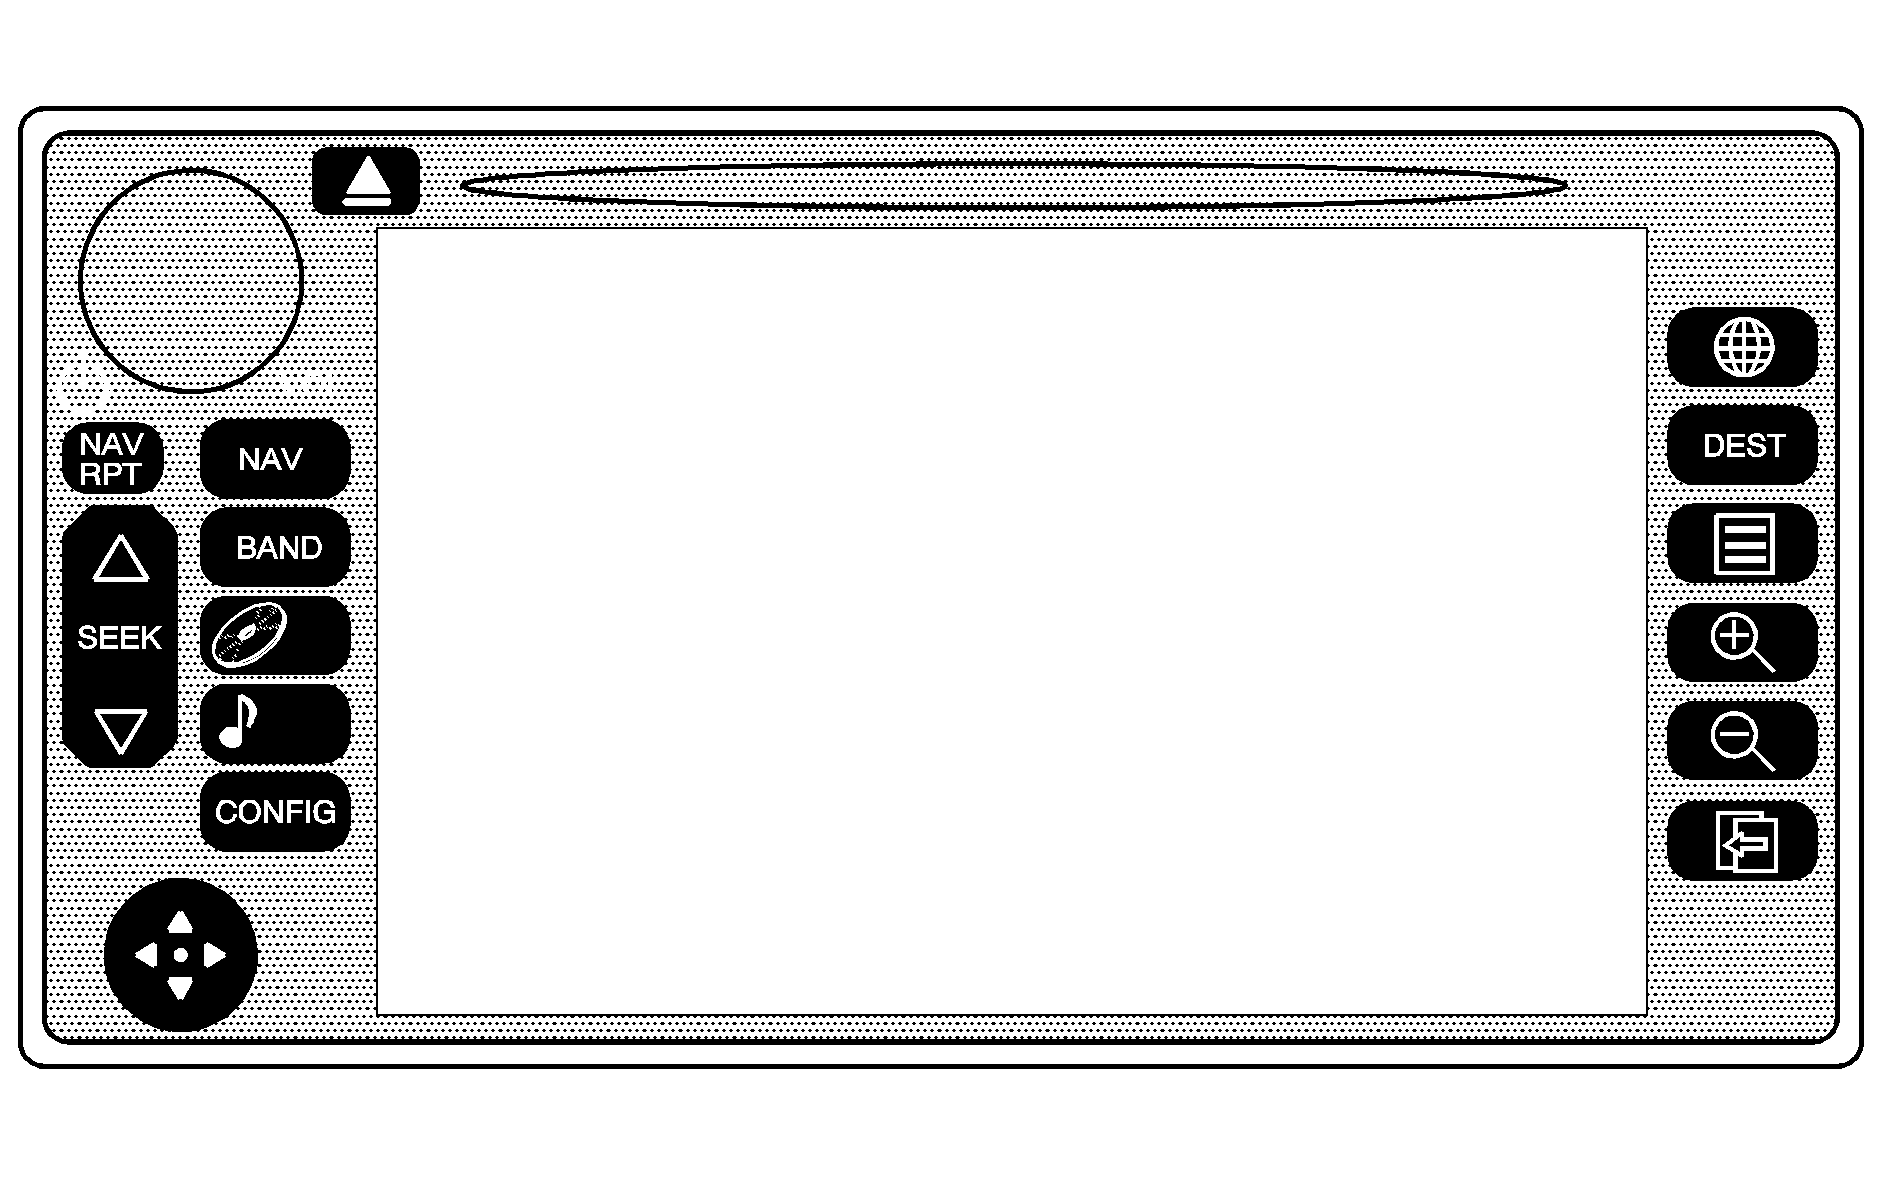
The audio system is operated using the menus located on the navigation system screen. The audio menus are explained in this section.
Playing the Radio
The audio system can be operated using the knobs and hard keys located on both sides of the navigation screen.
(Power/Volume): Press this knob to turn the audio and navigation systems on and off, and to increase or to decrease the volume.Finding a Station
BAND: Press this hard key to access the BAND screen and to switch between AM, FM1 and FM2, XM1and XM2, (if equipped). Each radio band has six station presets accessible.TUNE: Use the joystick in the lower left corner of the navigation system to select radio stations.
SEEK : Press the up or the down arrow to go to the next or the previous station and stay there.
To scan stations, press and hold the SEEK up or down arrow for two seconds until you hear a beep. The radio will go to a station, play for a few seconds, then go on to the next station. Press either SEEK arrow again to stop scanning.
To scan preset stations, press and hold the SEEK up or down arrow for more than four seconds. You will hear two beeps and PSCAN will be displayed, along with the number preset. The radio will go to the first preset station stored on your push-buttons, play for a few seconds, then go on to the next preset station. Press either SEEK arrow again to stop scanning presets.
The radio will seek and scan only to stations that are in the selected band and only to those with a strong signal.
Setting Preset Stations
The six multi-function keys, located to the right of the navigation screen, allow you to store your favorite stations. You can store up to 30 stations (6 AM, 6 FM1, 6 FM2, 6 XM1, and 6 XM2, if equipped). To set preset stations, do the following:
- Turn the audio system on.
- Press the BAND hard key to select the desired band (AM, FM1, FM2, XM1 or XM2, if equipped).
- Locate the desired station using the SEEK hard key or the joystick.
- Press and hold one of the six hard keys located to the right of the navigation screen, until you hear a beep. Whenever you press that hard key while in the BAND menu, the station you set will return.
- Repeat the steps for each preset and source.
Audio Screen
The audio screen will display information on the current station as well as list the presets for the current band.
FM1 Source Shown, Other Sources Similar
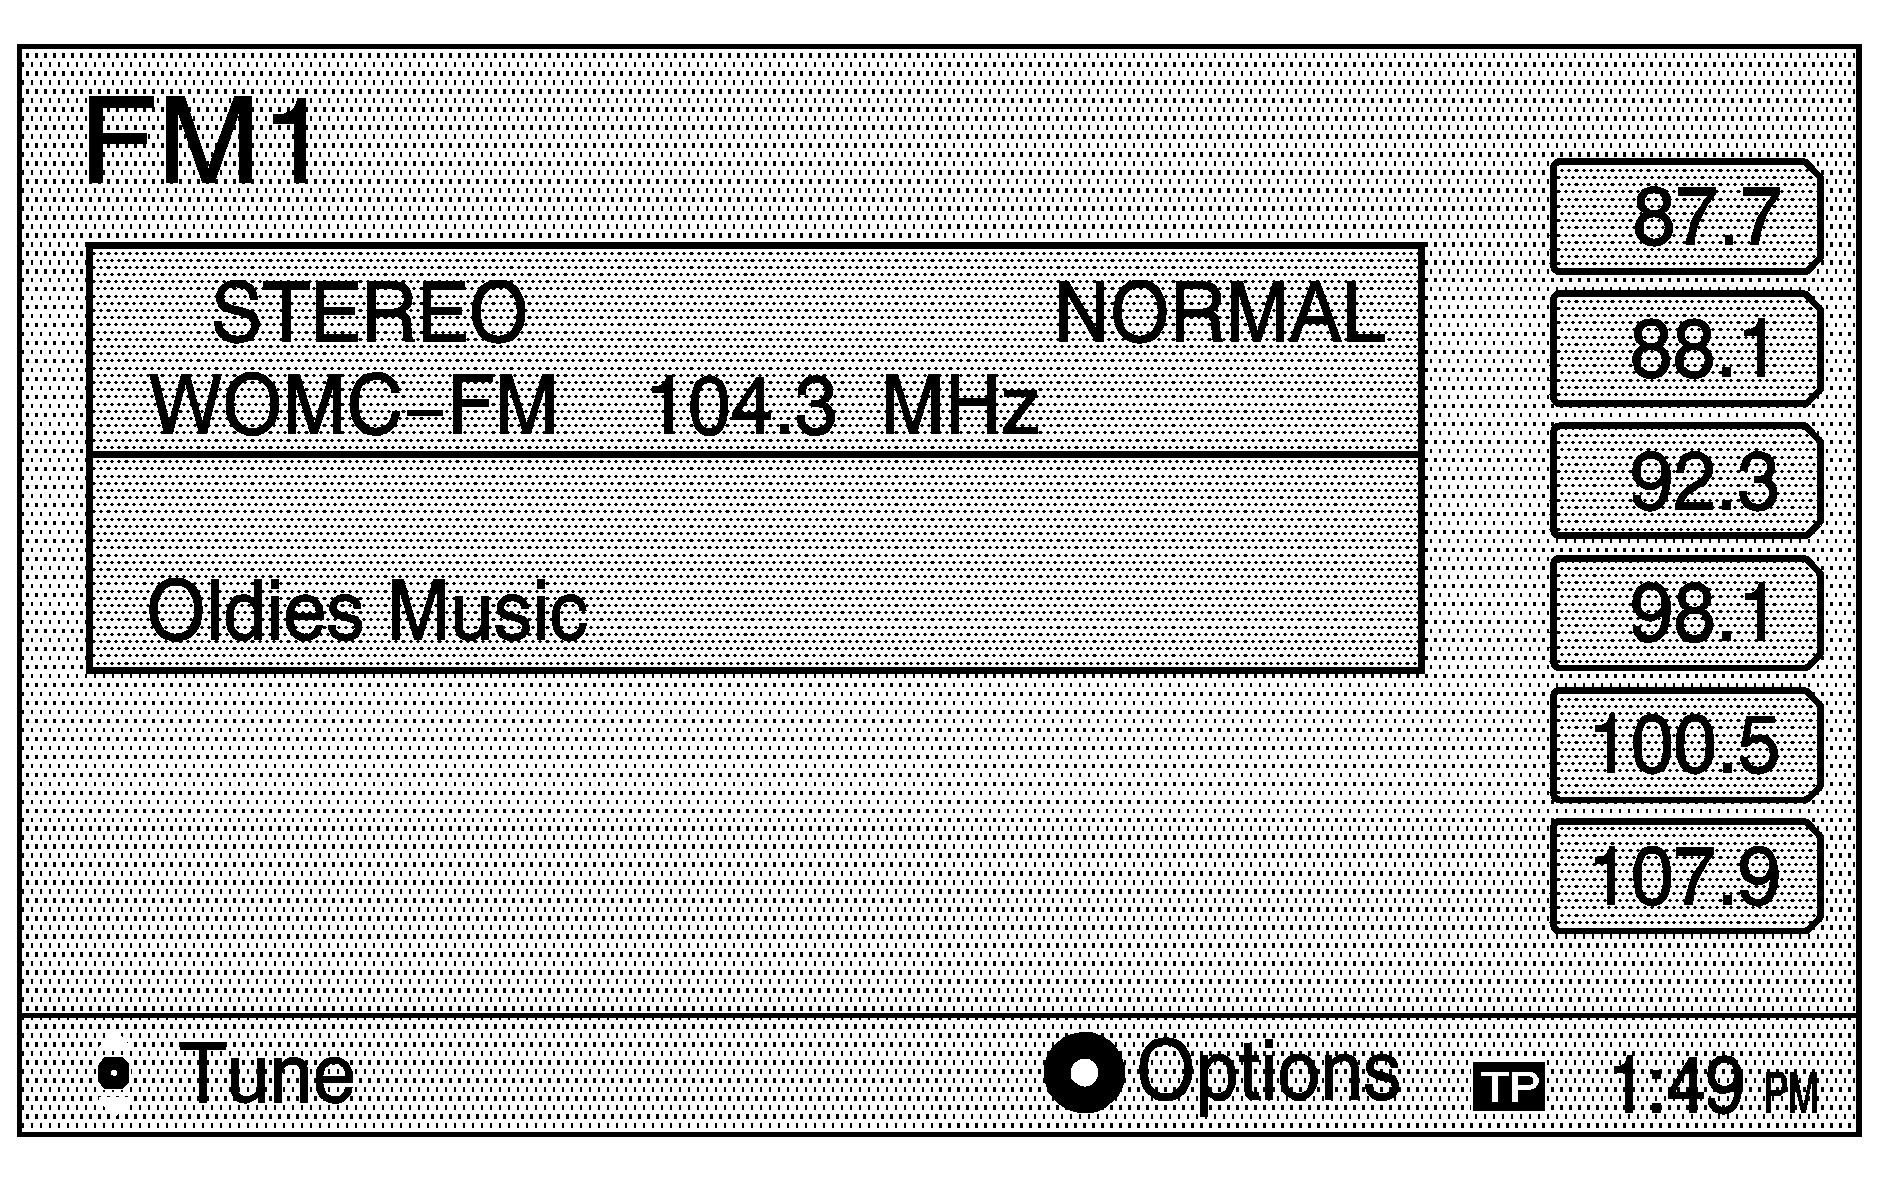
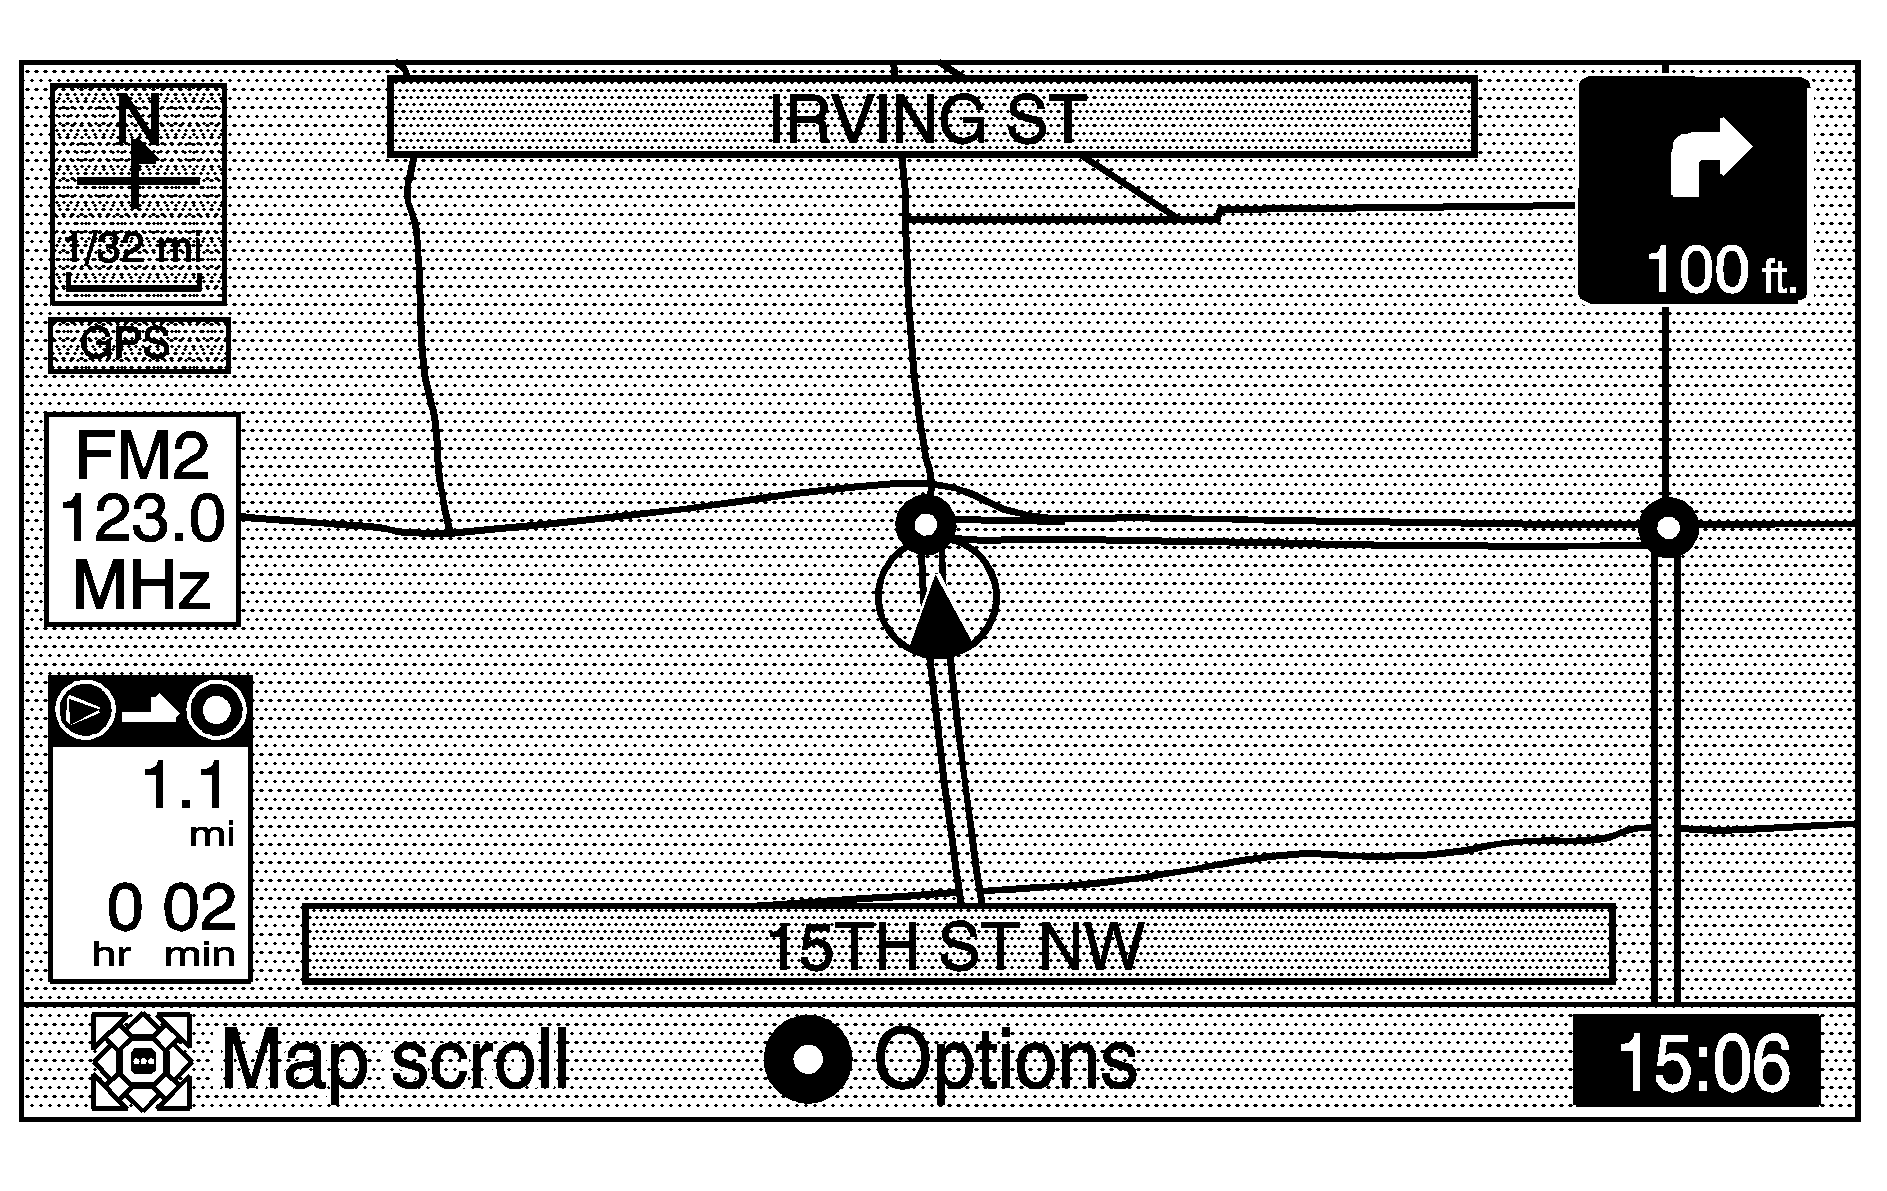
If the radio is on while the navigation system is in use, a smaller audio screen will appear, located on the left side of the map screen. This audio screen will display the current audio information, such as band and station.
FM2 Source Shown, Other Sources Similar
(Audio): Press the Audio hard key to display the audio menu. Several options are available for adjustment from this menu.
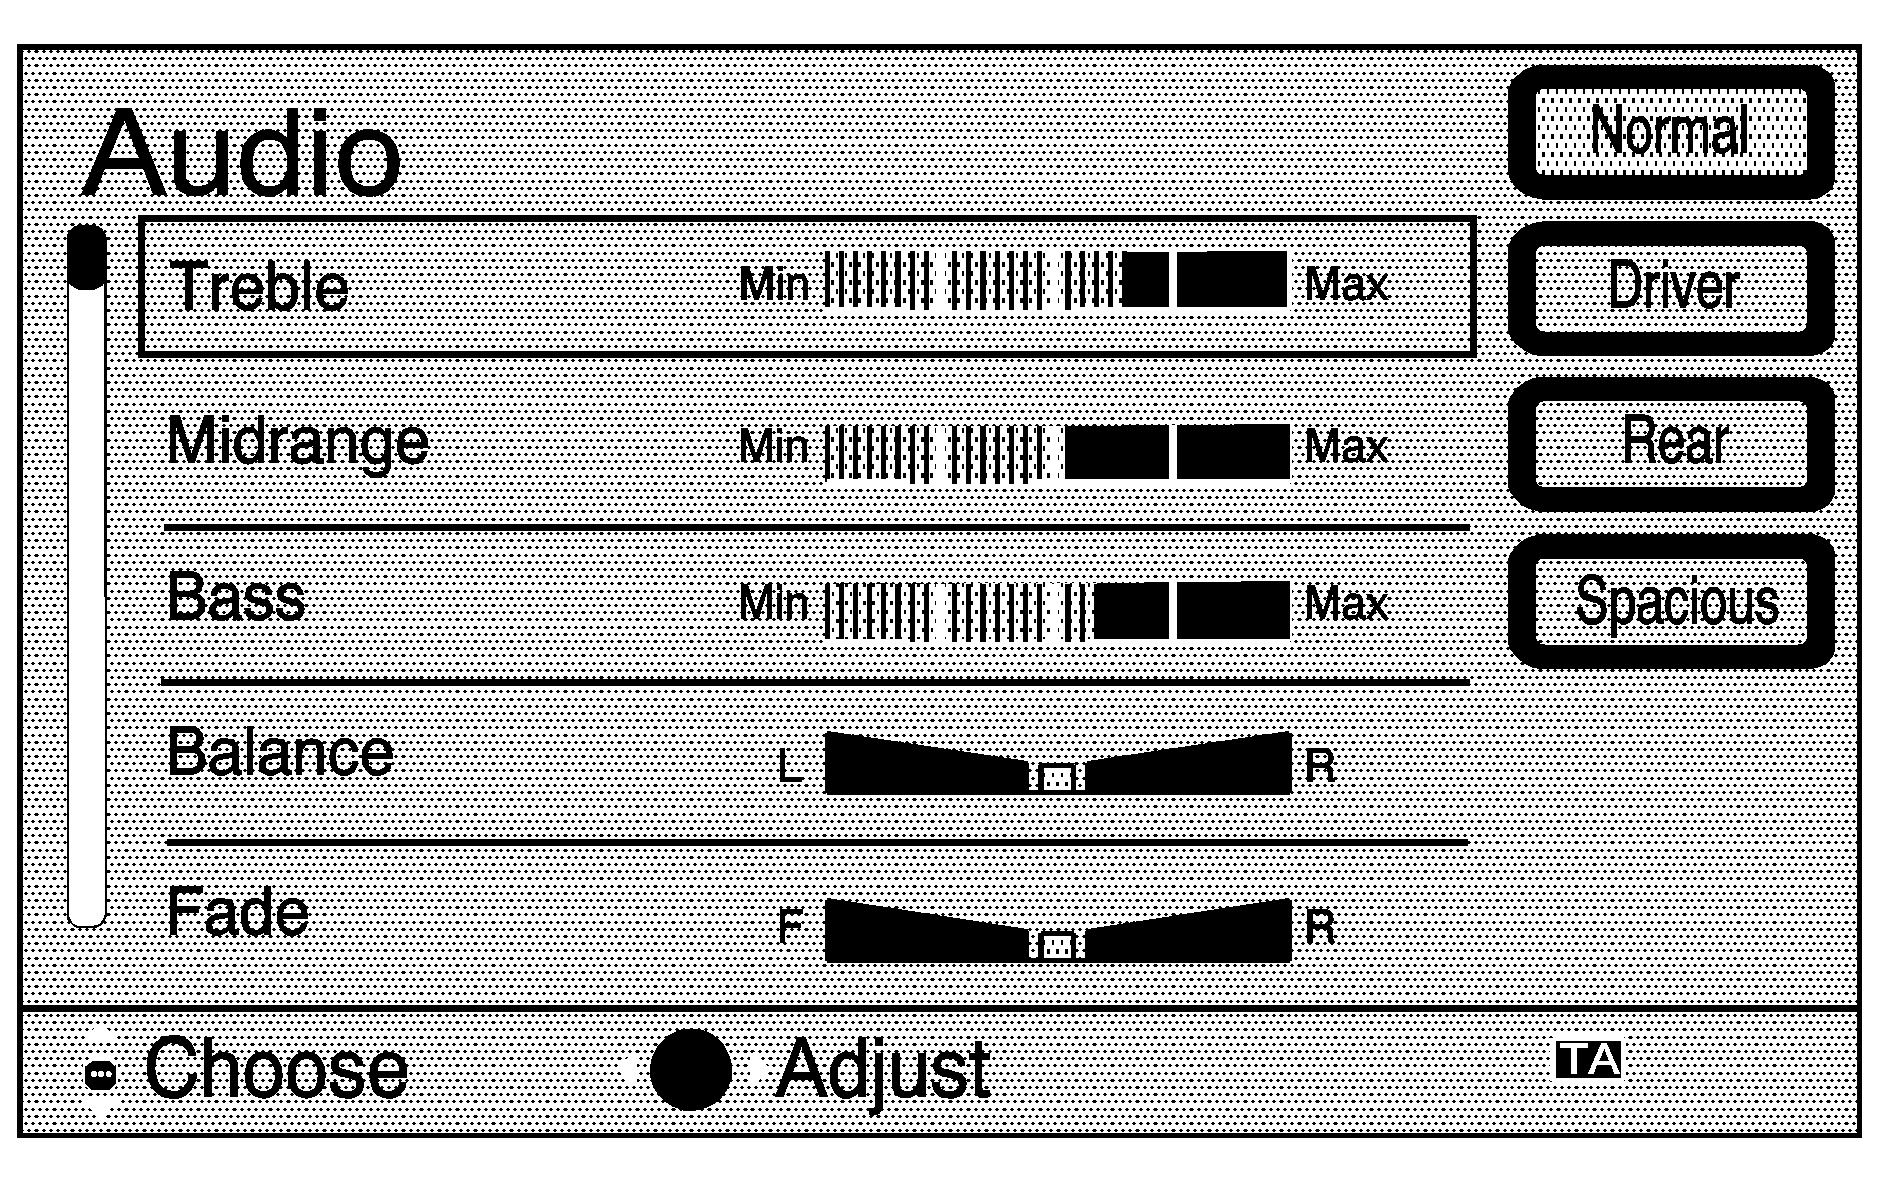
Tone: Choose from six available settings to adjust the tone of the audio system. Use the joystick to move between Treble, Midrange, Bass, Balance and Fade. Use the joystick to move each setting to the desired level.
AVC (Automatic Volume Control): With AVC, your audio system monitors the noise in the vehicle. Then, AVC automatically adjusts the volume level so that it always sounds the same to you. To use AVC, use the joystick to select on, to turn it off, select off.
From the Audio Menu, use the right side hard keys to choose from four different equalization settings:
Normal: This setting enhances the stereo effect.Driver: This setting gives the driver the best sound quality.
Rear: This setting gives the rear seat passengers the best sound quality.
Spacious: This setting makes the listening space seem larger.
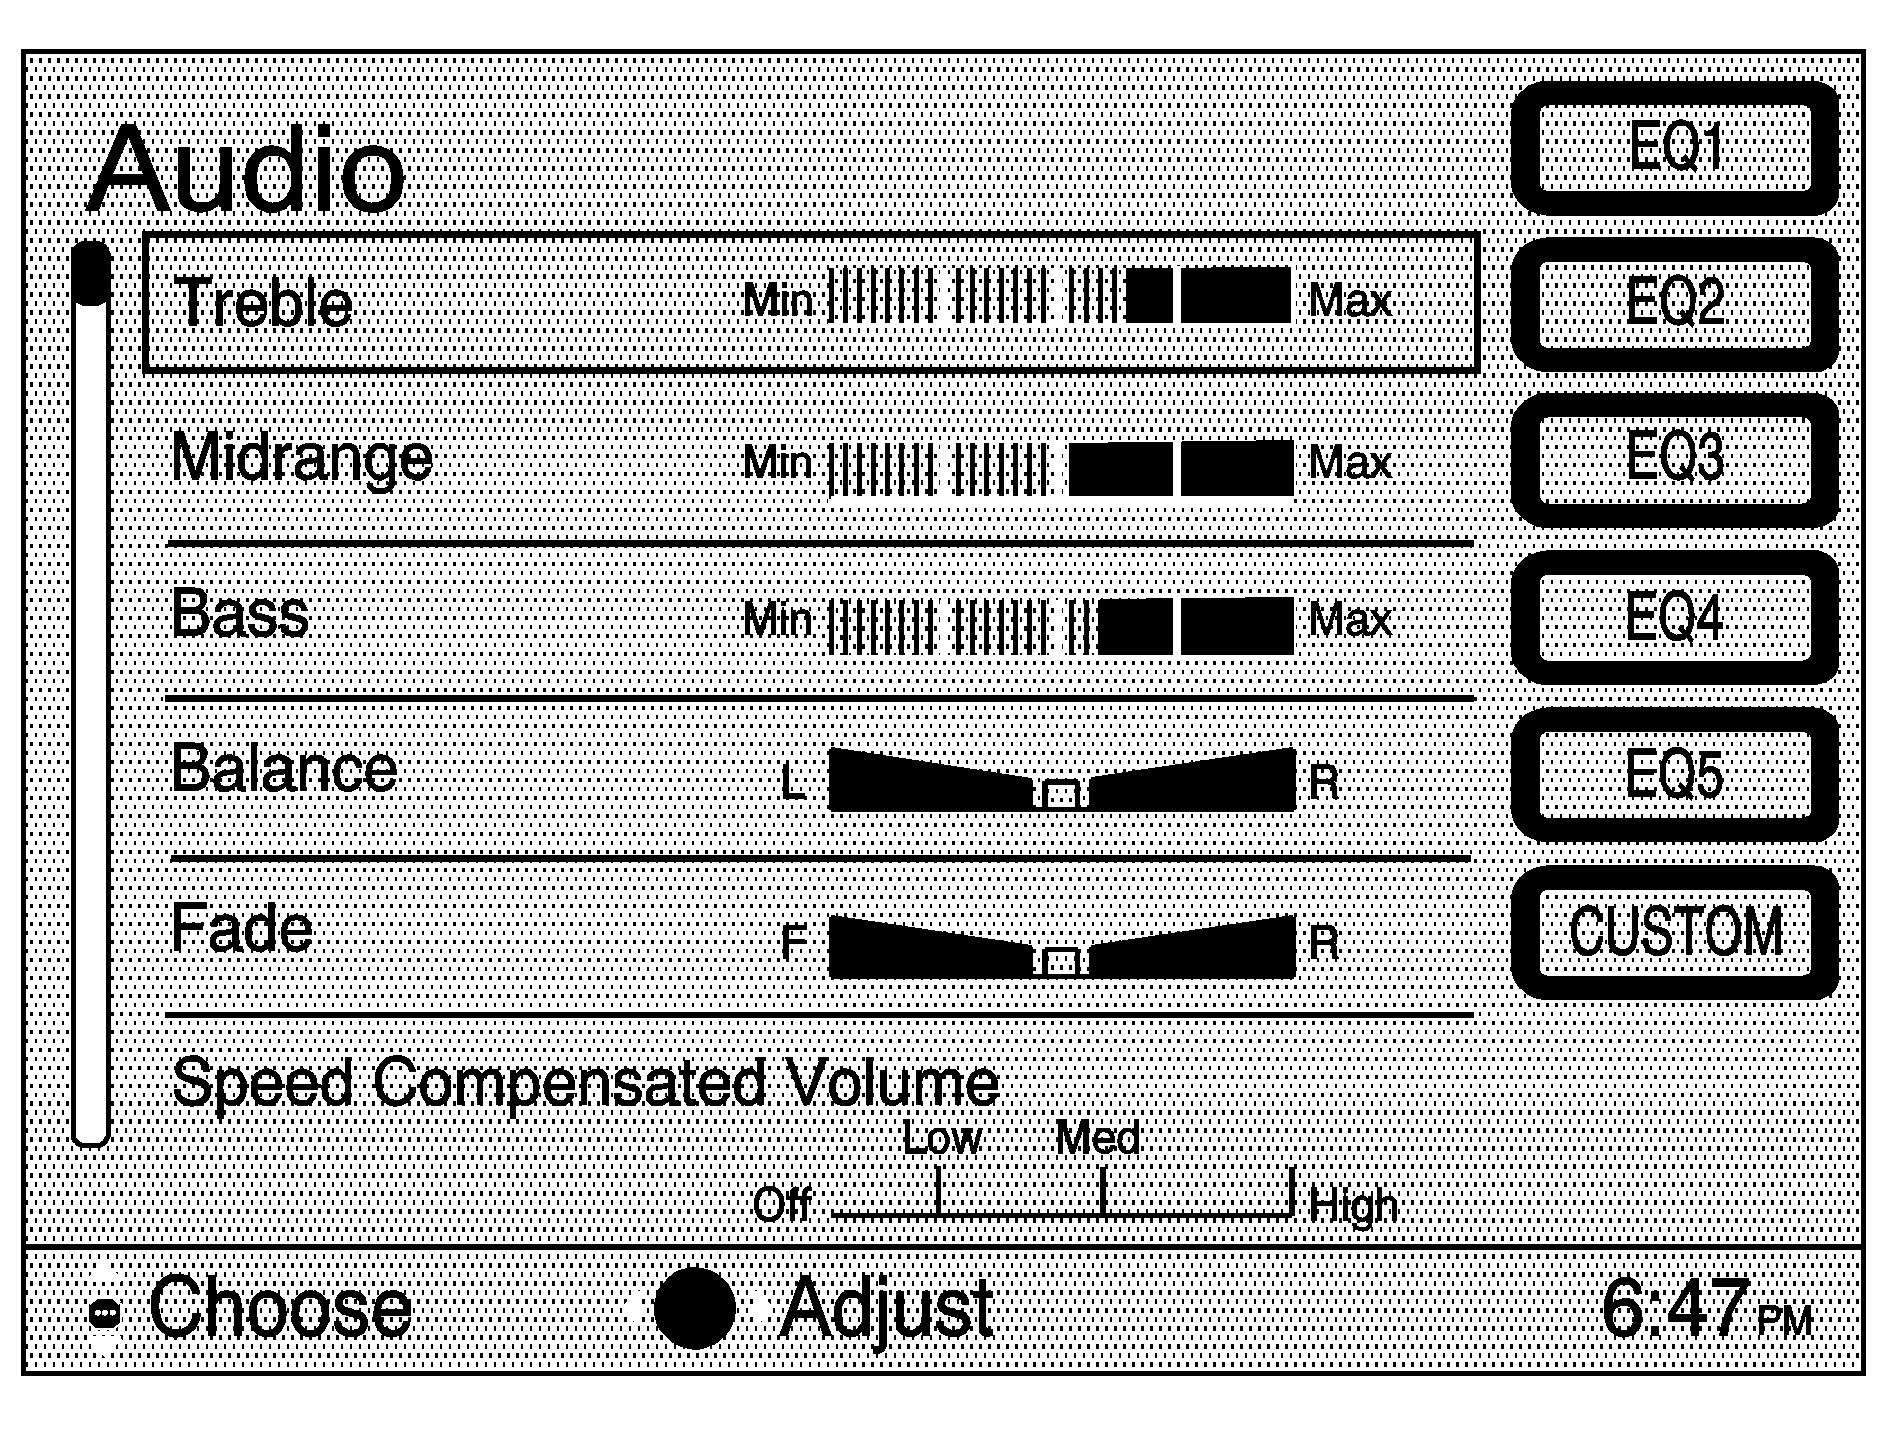
Speed Compensated Volume (SCV): With SCV, your audio system adjusts automatically to make up for road and wind noise as you drive. Set the volume at the desired level. Then, as you drive, SCV automatically increases the volume, as necessary, to overcome noise at any speed. The volume level should always sound the same to you as you drive.
EQ (Equalizer): While in the Audio menu, use the keys labeled EQ1 through EQ5 to choose preset bass, midrange, and treble equalization settings. The CUSTOM key allows you to choose and set the equalization levels you desire. Use the joystick to move between Treble, Midrange and Bass, and to adjust each setting to the desired level. To set the levels, press and hold the CUSTOM key until you hear a beep. After adjustments are made, press the BAND key to go back to the preset station menu. Now that you have preset the station and the EQ setting, you can assign the EQ to the preset station. To do this, press and hold the desired preset station key until you hear a beep. The EQ setting will now be assigned to that station unless you decide to change it. If you were at the CD screen before setting an EQ and you press the CD hard key, you will be returned to the CD screen, and the EQ will be set to that screen until you change it.
See "Rear Seat Audio (RSA)", "Theft-Deterrent Feature", "Audio Steering Wheel Controls", "Understanding Radio Reception", and "Integrated Windshield Antenna" in your vehicle's owner's manual for more information.
Radio Data Systems (RDS)
Your audio system is equipped with a Radio Data System (RDS). Using RDS, the radio can do the following:
| • | Seek only to stations broadcasting the selected type of programming, |
| • | seek to stations with traffic announcements, |
| • | receive announcements concerning local and national emergencies, and |
| • | display messages from radio stations. |
RDS features are only available on FM stations that broadcast RDS information. The RDS features on your radio rely on receiving specific RDS information from these stations. These features will only work when the RDS information is available. In rare cases, a radio station may broadcast incorrect information that will cause the radio features to work improperly. If this happens, contact the radio station.
While you are tuned to an RDS station, the station name will appear on the display. RDS stations may provide a program type (PTY) for current programming and the name of the program being broadcast.
RDS Option Menu
Once you are at the FM screen, press the center of the joystick to bring up the RDS Option Menu.
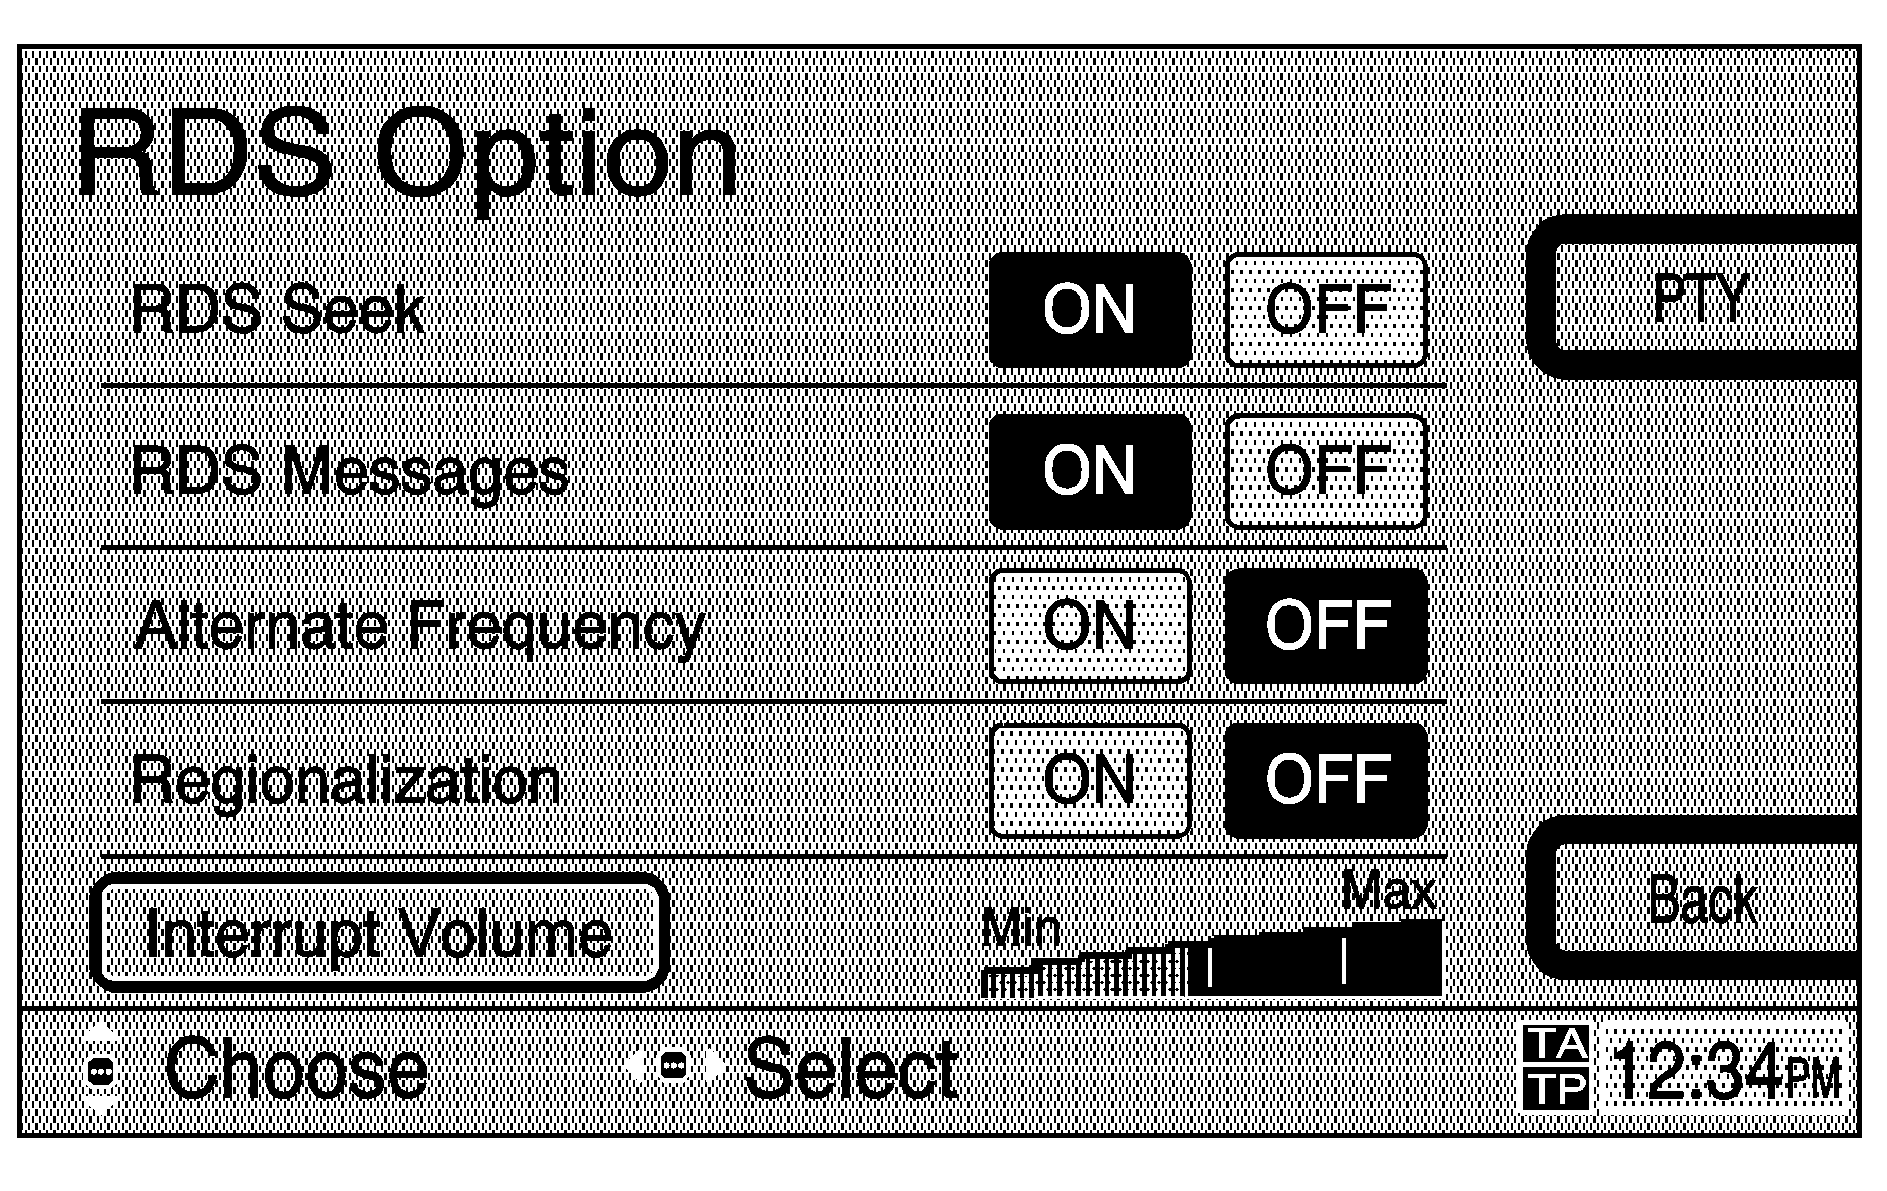
Here you will be able to choose from the following RDS options:
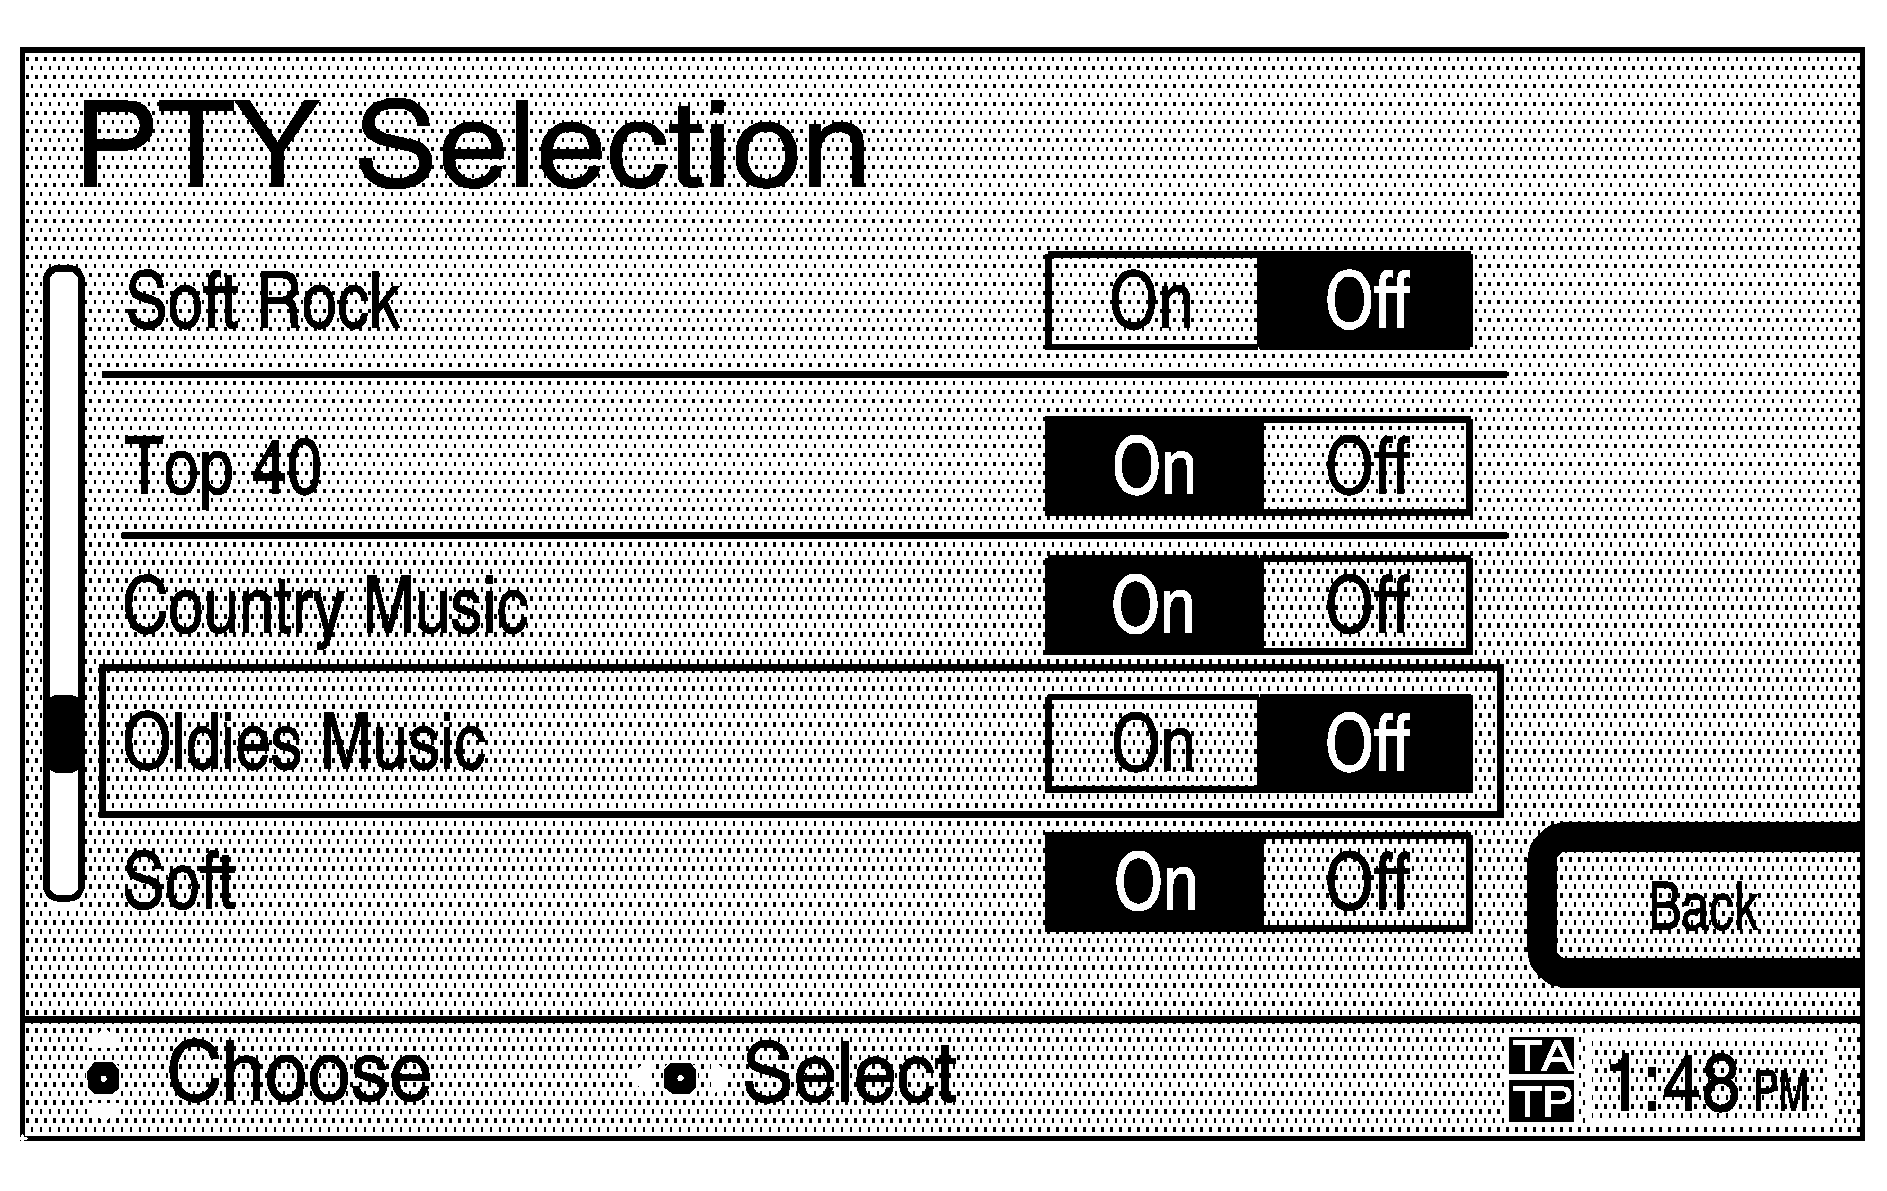
RDS Seek: When this function is selected, the system will only stop on stations which broadcast one of the program types (PTY) selected in the RDS Criteria menu. You may select "All" to allow the radio to stop on any radio station broadcasting RDS data. Press the SEEK up or down arrow to look for other stations with that criteria type. If a station with the selected criteria is not found, the radio will return to the original station.PTY Selection: The program types (PTY) you can select from includes: Adult Hits, Classical, Classical Rock, College, Country, Information, Jazz, Language, News, Nostalgia, Oldies, Personality, Public, Rhythm and Blues, Religious Music, Religious Talk, Rock Music, Soft, Soft Rock, Soft R & B, Sports, Talk, Top 40 and Weather. When you select Any, all program types are selected. When you select None, selected program types are canceled.
To select PTY preferences, do the following:
- From the RDS Option menu, press the PTY key to view the available PTYs.
- Use the joystick to select as many program types as desired. You may also select None to cancel selected PTYs, or Any to select all PTYs.
Alternate Frequency: This function allows the radio to automatically switch to a stronger station in an RDS network that is playing the same network broadcast. While the frequency may change, the station call letters should stay the same, as they are in the same RDS network.
Regionalization: This feature allows the tuner to remain on the current RDS station even if it departs from RDS network broadcast in favor of broadcasting local or regional content.
Traffic: This option allows you to hear traffic announcements. With this feature ON, if a traffic announcement is available, it will interrupt what you are currently listening to. When the traffic announcement is over, the previous audio selection will resume. When the Traffic feature is ON, TA will appear next to the clock on the bottom right corner of the screen. The radio will continue to search for stations with the capability to broadcast traffic information. When a traffic announcement has been found, TP will appear below TA. If you are in the main audio screen when a traffic announcement begins, TRAFFIC will be displayed.
Interrupt Volume: This feature allows you to set the volume level at which the audio system will play a traffic announcement. Use the joystick to choose this option and to move the volume to the desired level.
XM™ Radio Satellite Service (USA Only)
Your vehicle may be equipped with this feature. XM™ is a continental U.S. based satellite radio service that offers 100 coast to coast channels including music, news, sports, talk and children's programming. XM™ provides digital quality audio and text information, including song title and artist name. A service fee is required in order to receive the XM™ service. For more information, contact XM™ at www.xmradio.com or call 1-800-852-XMXM (9696).
XM™ Options
When XM™ is active, the channel name and number, song title and artist will be displayed on the screen.
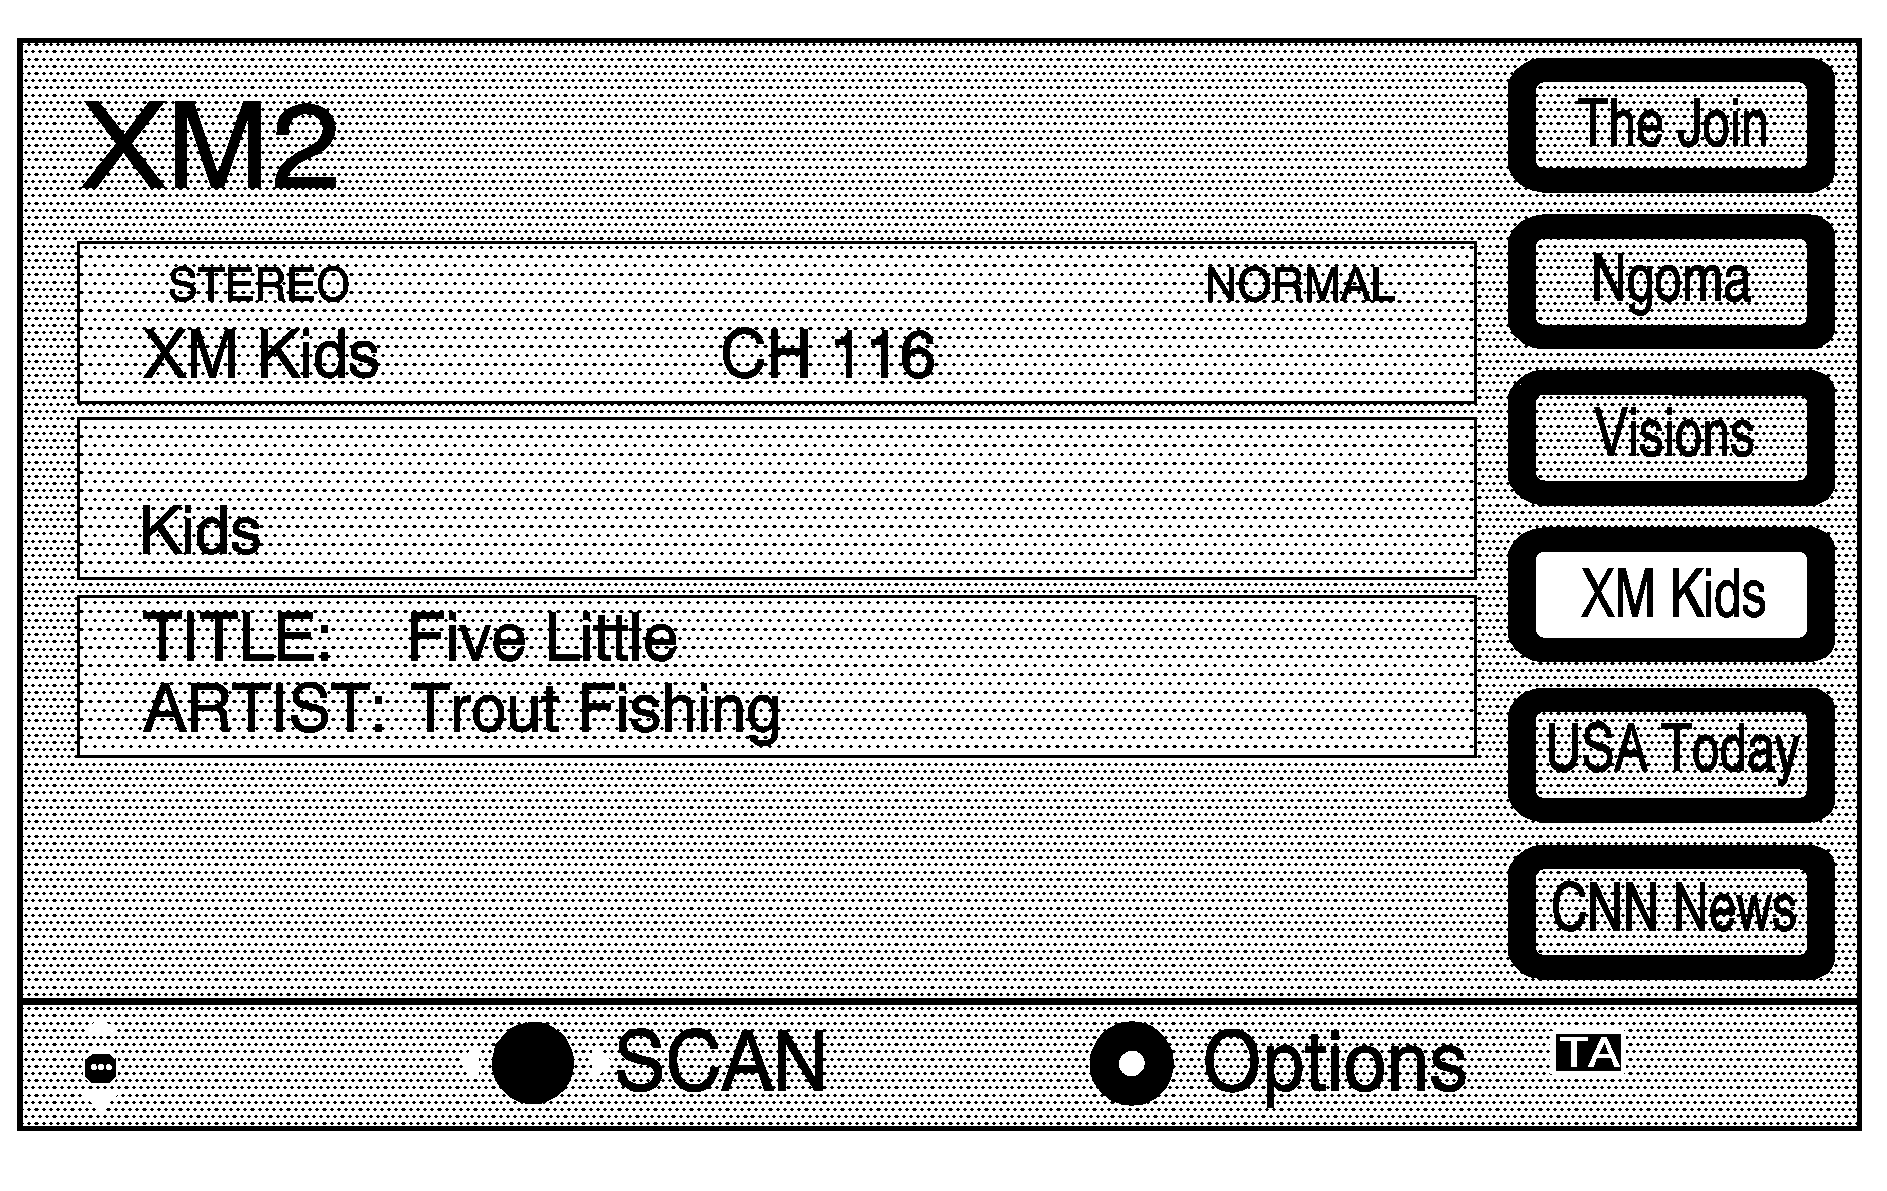
To access the XM™ Options you must be in the Radio screen with the XM1 or XM2 band active. Select Options button to access the XM™ Menu.
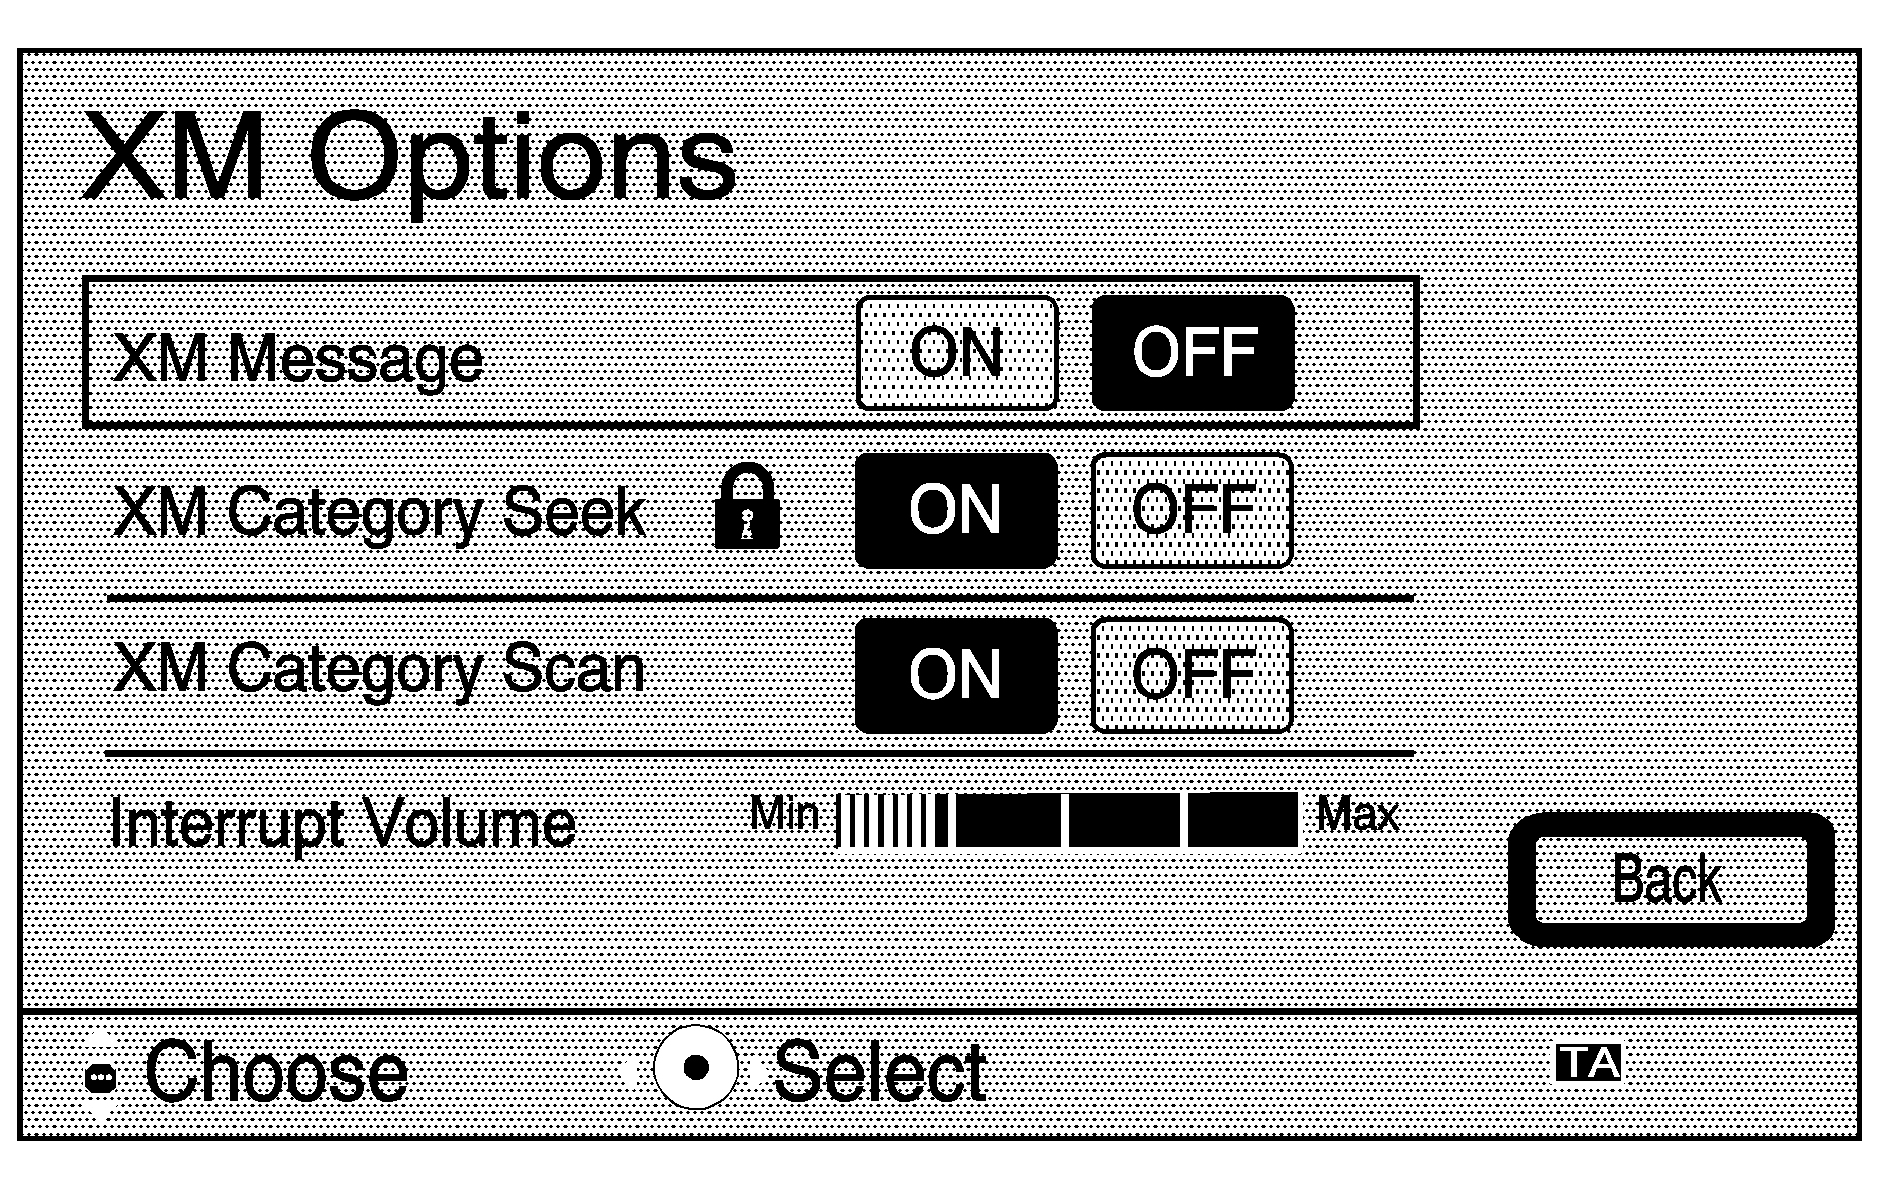
This menu allows you to seek or scan for stations based on their category. While in this menu you can use the joystick to scroll through the categories you want to seek to. Use the SCAN option at the bottom of the screen to go to the first available channel in that category.
Radio Display Message | Condition | Action Required |
|---|---|---|
XL (Explicit Language Channels) | XL on the radio display, after the channel name, indicates content with explicit language. | These channels, or any others, can be blocked at a customer's request, by calling 1-800-852-XMXM (9696). |
XM Updating | Updating encryption code | The encryption code in your receiver is being updated, and no action is required. This process should take no longer than 30 seconds. |
No XM signal | Loss of signal | Your system is functioning correctly, but you are in a location that is blocking the XM signal. When you move into an open area, the signal should return. |
Loading XM | Acquiring channel audio (after 4 second delay) | Your radio system is acquiring and processing audio and text data. No action is needed. This message should disappear shortly. |
Channel Off Air | Channel not in service | This channel is not currently in service. Tune in to another channel. |
Channel Unavail | Channel no longer available | This previously assigned channel is no longer assigned. Tune to another station. If this station was one of your presets, you may need to choose another station for that preset button. |
No Artist Info | Artist Name/Feature not available | No artist information is available at this time on this channel. Your system is working properly. |
No Title Info | Song/Program Title not available | No song title information is available at this time on this channel. Your system is working properly. |
No CAT Info | Category Name not available | No category information is available at this time on this channel. Your system is working properly. |
Not Found | No channel available for the chosen category | There are no channels available for the category you selected. Your system is working properly. |
No Information | No Text/Informational message available | No text or informational messages are available at this time on this channel. Your system is working properly. |
XM Theftlocked | Theft lock active | The XM receiver in your vehicle may have previously been in another vehicle. For security purposes, XM receivers cannot be swapped between vehicles. If you receive this message after having your vehicle serviced, check with the servicing facility. |
XM Radio ID | Radio ID label (channel 0) | If you tune to channel 0, you will see this message alternating with your XM Radio 8 digit radio ID label. This label is needed to activate your service. |
Unknown | Radio ID not known (should only be if hardware failure) | If you receive this message when you tune to channel 0, you may have a receiver fault. Consult with your dealer. |
Check XM Receiver | Hardware failure | If this message does not clear within a short period of time, your receiver may have a fault. Consult with your retail location. |
Playing CDs
If your vehicle is equipped with this feature, you can play a single CD by sliding a CD into the slot above the navigation screen. This feature is explained further in this supplement.
(Compact Disc): Press this hard key to change the source to CD, if an audio disc is loaded in the single disc slot above the navigation screen. To use the player as a single music CD player, you must first remove the navigation map DVD. While playing a CD in the CD player, the navigation system is not available. A message will display if the NAV key is pressed.To remove the navigation map DVD and load a music CD, do the following:
- Turn the ignition to ACC or ON.
- Press the eject button.
- Gently remove the navigation map DVD from the slot and return it to its case.
- Insert the music CD into the slot. The system will pull the CD into the player.
There may be a delay of about 12 to 15 seconds before the CD starts playing. This is normal.
While playing a CD in the single disc slot above the navigation screen, the navigation system is not available. A message will display if the NAV screen is pressed. If your vehicle is equipped with Rear Seat Entertainment (RSE), you can play an audio CD while using the navigation system. See Rear Seat Entertainment System later in this section for more information.
Playing a Single Compact Disc
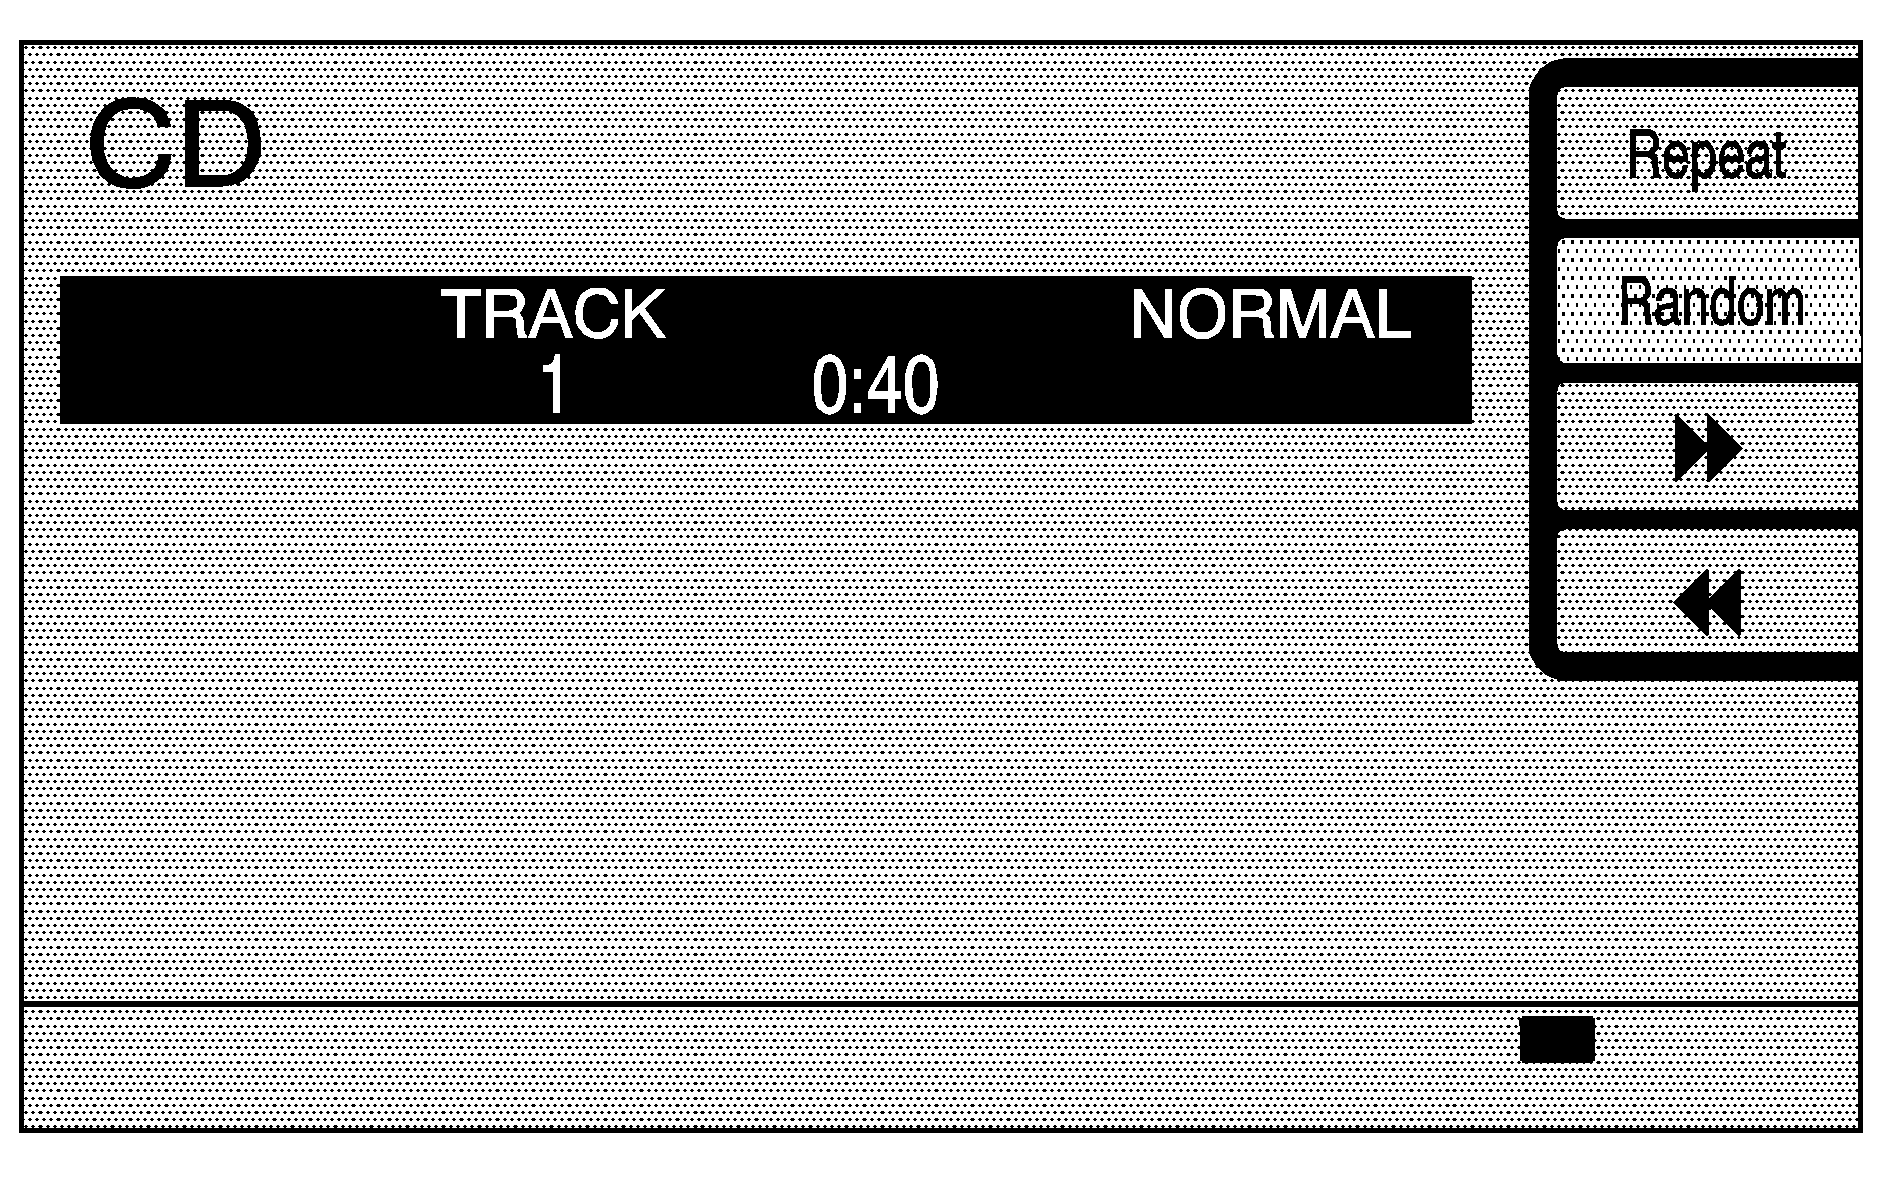
Repeat: Press and release this button to repeat the track that is currently being played. Press Repeat again to turn this feature off.
Random: Press this button to play the tracks on the disc in random, rather than sequential, order. Press it again to turn off Random play and to return to normal operation.
(Forward): Press and hold this button to quickly advance within a track. As the CD advances, elapsed time will be displayed to help you find the correct passage.
(Reverse): Press and hold this button to quickly reverse within a track. As the CD reverses, elapsed time will be displayed to help you find the correct passage.
Track Seek: The SEEK key will move the CD to the next track and previous track when pressed and released within two seconds.
Track Scan: This function is performed by pressing and holding the SEEK key for two seconds or more, at which time a chime is played to alert you that the CD player has entered CD TRACK SCAN mode. While TRACK SCAN is active, the first 10 seconds of each track on the disc will be played before advancing to the next track. Pressing the SEEK key again will stop the scan at the track currently being played. To switch between tracks on a disc, use the arrows on the SEEK key. Press the up arrow to advance to the next track on the disc. Press the down arrow to return to the previous track on the disc.
BAND: Press this hard key to switch to the radio when a CD is playing.
See "Playing a Compact Disc" in Section 3 of your owner's manual for more information.
Rear Seat Entertainment (RSE)
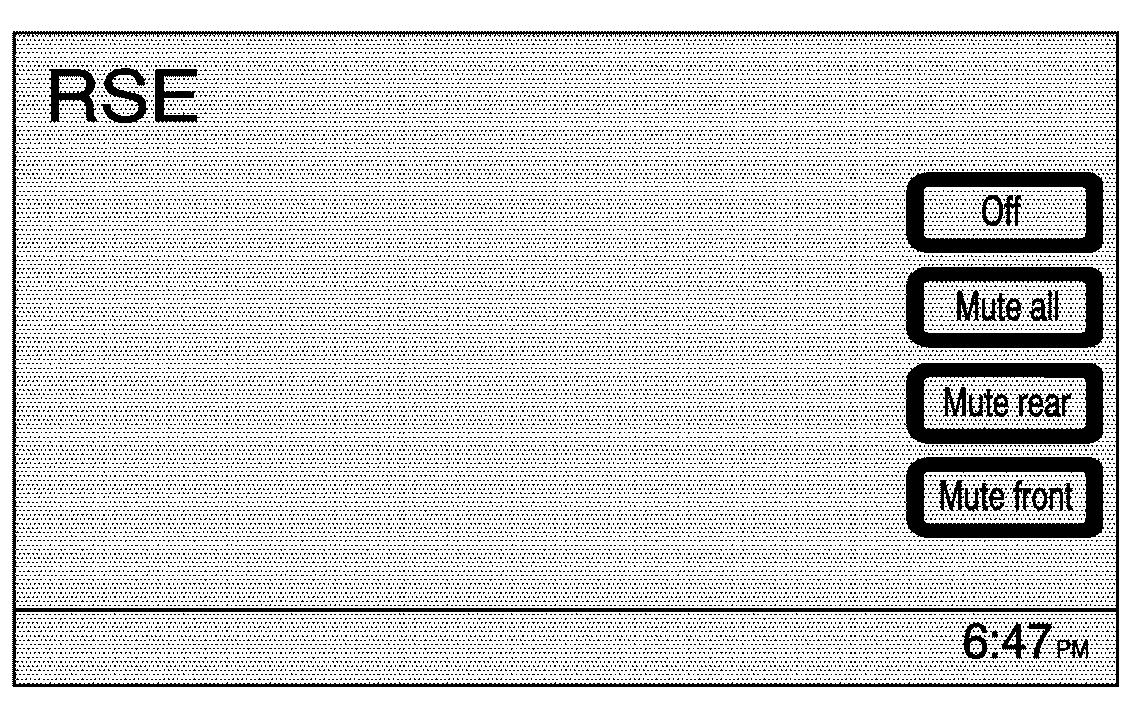
Your vehicle may have Rear Seat Entertainment (RSE). While playing a DVD or audio CD in the RSE, press the CD button to view the RSE screen and to switch to RSE as your main audio source. At this point, you will hear what is being played in the RSE through all of the vehicle's speakers. From the RSE screen, you can mute, or turn off the RSE.
RSE Messages
CD ERROR: If this message appears on the navigation screen, the DVD or CD is not being read by the system. The DVD or CD could be dirty, scratched, wet, or upside down. You may also be driving on a very rough road. When the road becomes smoother, the DVD or CD should play.RSE ERROR: If this message appears on the navigation screen, the RSE system is not working properly. See DVD Messages under Rear Seat Entertainment System in your vehicle's owner's manual for more information.
NO DISC: If this message appears on the navigation screen, the DVD slot is empty. Insert a DVD or CD. The DVD or CD should play.
See Rear Seat Entertainment System, Rear Seat Audio (RSA), DVD Distortion, Care of Your CDs and DVDs, Care of Your CD and DVD Player, Cleaning Your DVD player, and Cleaning the Video Screen in your vehicle's owner's manual for more information.
