Camshaft Timing Chain and Sprocket Replacement for Oldsmobile Cutlass 1998
Removal Procedure
Tool Required
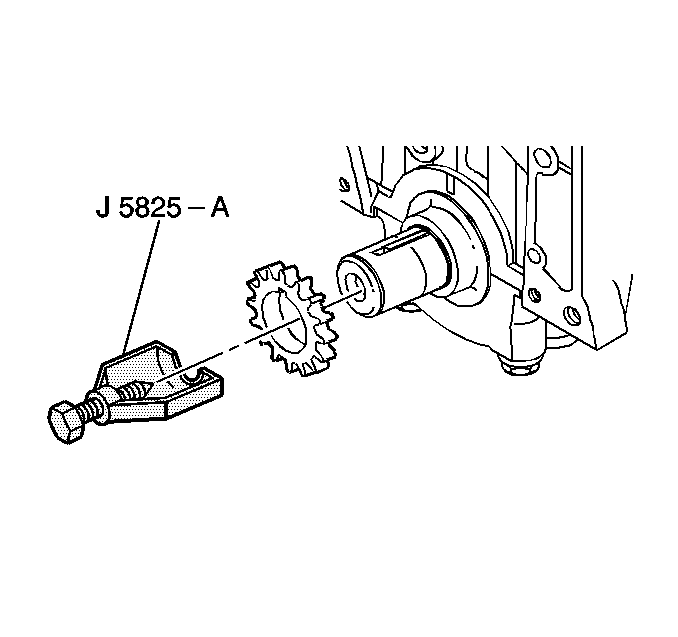
J 5825-A Crankshaft Gear Puller

- Disconnect the negative battery cable.
- Drain the coolant. Recover the coolant. Refer to Cooling System Draining and Filling and Flushing in Engine Cooling.
- Remove the crankcase front cover. Refer to Engine Front Cover Replacement .
- Place the #1 piston at top dead center (#4 firing position).
- Remove the camshaft sprocket bolt.
- Remove the camshaft sprocket.
- Remove the timing chain.
- Remove the crankshaft sprocket. Use the J 5825-A .
Caution: Unless directed otherwise, the ignition and start switch must be in the OFF or LOCK position, and all electrical loads must be OFF before servicing any electrical component. Disconnect the negative battery cable to prevent an electrical spark should a tool or equipment come in contact with an exposed electrical terminal. Failure to follow these precautions may result in personal injury and/or damage to the vehicle or its components.
Align the mark on the camshaft sprocket with the timing mark on the bottom of the timing chain dampener.
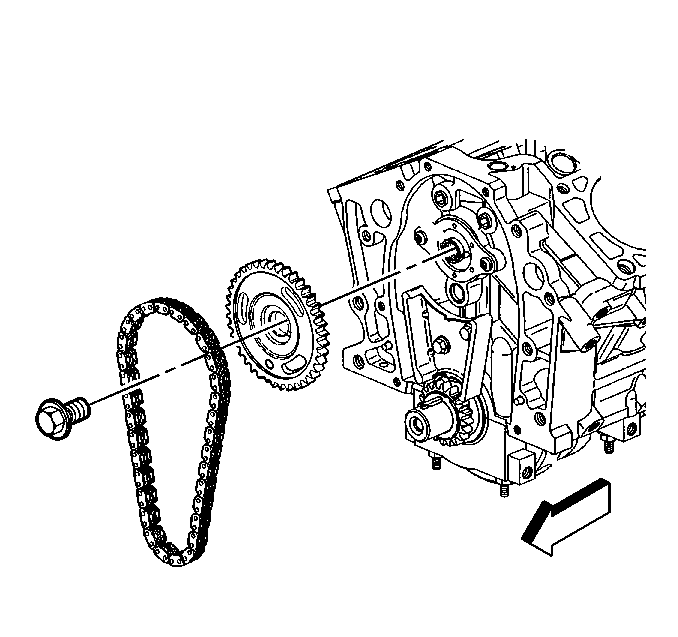
Important: If the sprocket does not come off easily, a light blow on the lower edge of the sprocket (with a plastic mallet) should dislodge the sprocket.
Installation Procedure
Tools Required
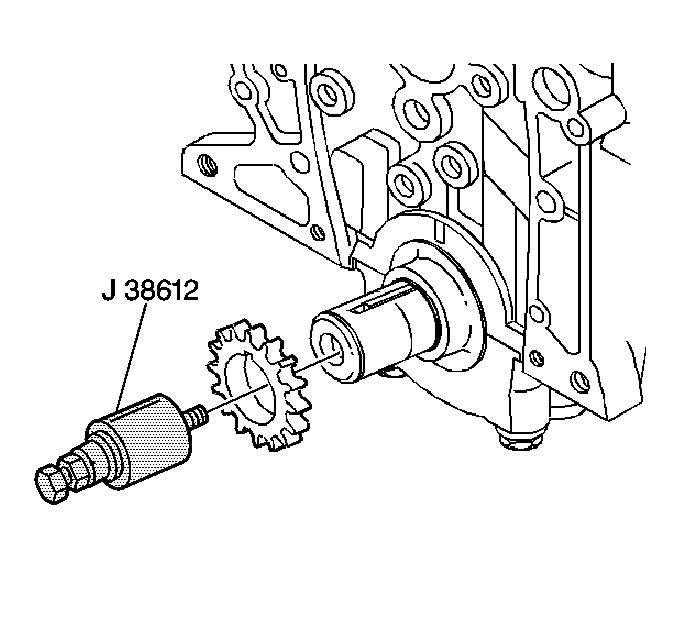
J 38612 Crankshaft Sprocket Installer

- Install the crankshaft sprocket. Use the J 38612 .
- Apply GM EOS P/N 1052367 or its equivalent to the sprocket thrust surface.
- Install the chain dampener to the cylinder block.
- Align the timing mark on the crankshaft sprocket to the mark on the bottom of the chain dampener.
- Hold the sprocket with the chain hanging down.
- Install the timing chain to the crankshaft gear.
- Align the centerline of the locator hole, on the camshaft gear, with the timing mark on the top of the timing chain dampener.
- Align the dowel in the camshaft with the dowel hole in the camshaft sprocket.
- Use the mounting bolts in order to draw the camshaft sprocket onto the camshaft.
- Lubricate the timing chain with engine oil.
- Install the crankcase front cover. Refer to Engine Front Cover Replacement .
- Fill the cooling system. Refer to Cooling System Draining and Filling and Flushing in Engine Cooling.
- Connect the negative battery cable.
Notice: Use the correct fastener in the correct location. Replacement fasteners must be the correct part number for that application. Fasteners requiring replacement or fasteners requiring the use of thread locking compound or sealant are identified in the service procedure. Do not use paints, lubricants, or corrosion inhibitors on fasteners or fastener joint surfaces unless specified. These coatings affect fastener torque and joint clamping force and may damage the fastener. Use the correct tightening sequence and specifications when installing fasteners in order to avoid damage to parts and systems.
Tighten
Tighten the mounting bolts to 100 N·m (74 lb ft).
