For 1990-2009 cars only
Solenoids and Wiring Harness Replacement for Oldsmobile Intrigue 1999
Solenoids and Wiring Harness Replacement 3.5L Twin Cam V6 LX5
Removal Procedure
- Remove the case side cover. Refer to Control Valve Body Cover Replacement .
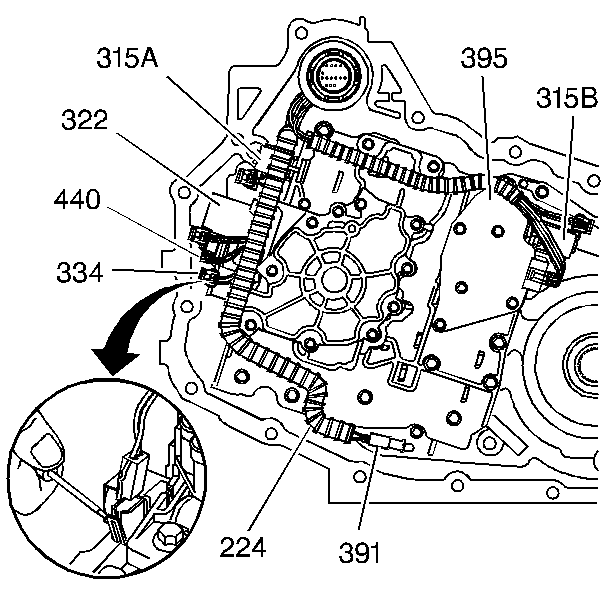
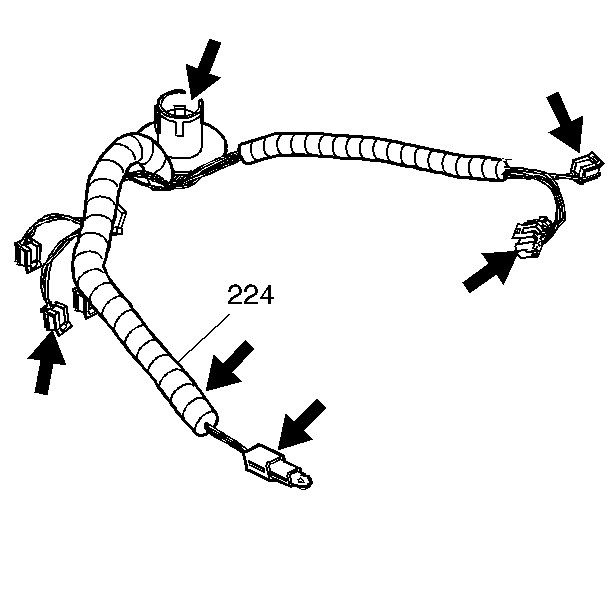
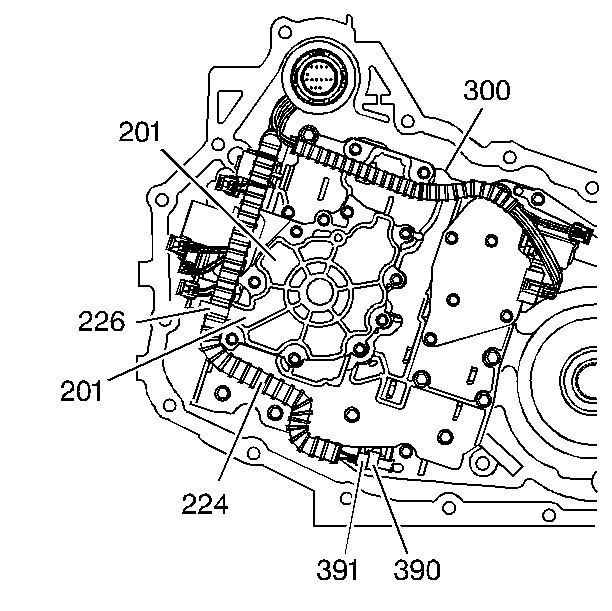
- Use a small flat-bladed tool in order to remove the wiring harness from the solenoid valve(s) (315A, 315B, 322, 334 and/or 440), TFP manual valve position switch (395) and/or the temperature sensor (391).
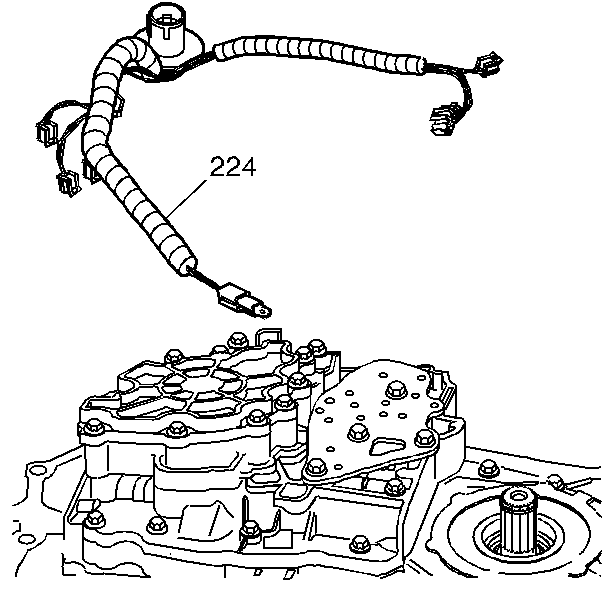
- Remove the wiring harness (224).
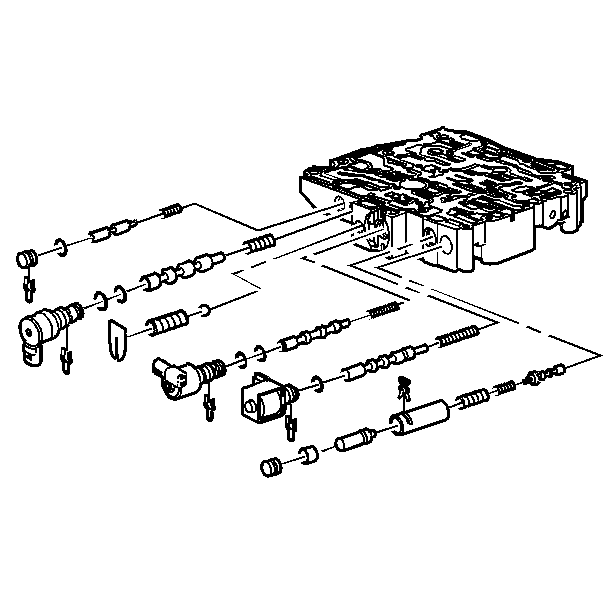
- Remove the clips retaining the solenoid(s).
- Remove the solenoid(s).
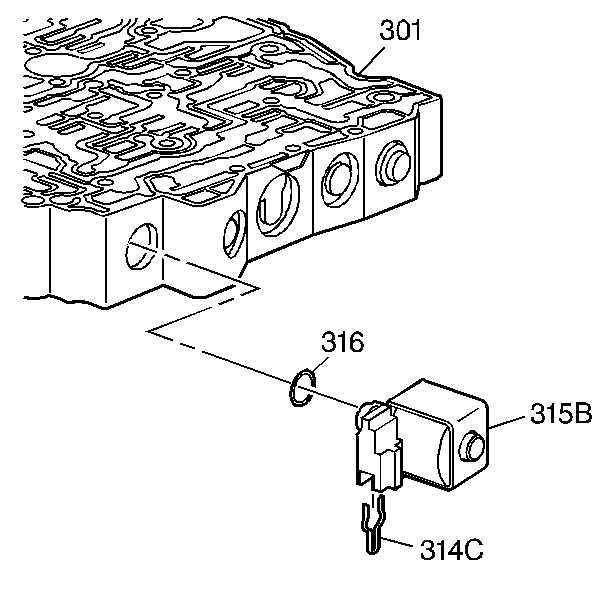
- Remove the 2-3 shift solenoid (315B).
- Inspect the wiring harness (224).
Installation Procedure
- Install the 2-3 shift solenoid (315B).
- Install the solenoid(s).
- Install the retaining clips.
- Install the wiring harness (224).
- Install the wiring harness to the solenoid valve(s) (315A, 315B, 322, 334 and/or 440), TFP manual valve position switch (395) and/or the temperature sensor (391).
- Install the case side cover. Refer to Control Valve Body Cover Replacement .
Solenoids and Wiring Harness Replacement 3800 L36
Removal Procedure
- Remove the case side cover. Refer to Control Valve Body Cover Replacement .
- Use a small flat-bladed tool in order to remove the wiring harness from the solenoid valve(s) (315A, 315B, 322, 334 and/or 440), TFP manual valve position switch (395) and/or the temperature sensor (391).
- Remove the wiring harness (224).
- Remove the clips retaining the solenoid(s).
- Remove the solenoid(s).
- Remove the 2-3 shift solenoid (315B).
- Inspect the wiring harness (224).
Installation Procedure
- Install the 2-3 shift solenoid (315B).
- Install the solenoid(s).
- Install the retaining clips.
- Install the wiring harness (224).
- Install the wiring harness to the solenoid valve(s) (315A, 315B, 322, 334 and/or 440), TFP manual valve position switch (395) and/or the temperature sensor (391).
- Install the case side cover. Refer to Control Valve Body Cover Replacement .
