Door Outside Handle Replacement Buick
Removal Procedure
- Disconnect the negative battery cable.
- Remove the door trim panel. Refer to one of the following procedures:
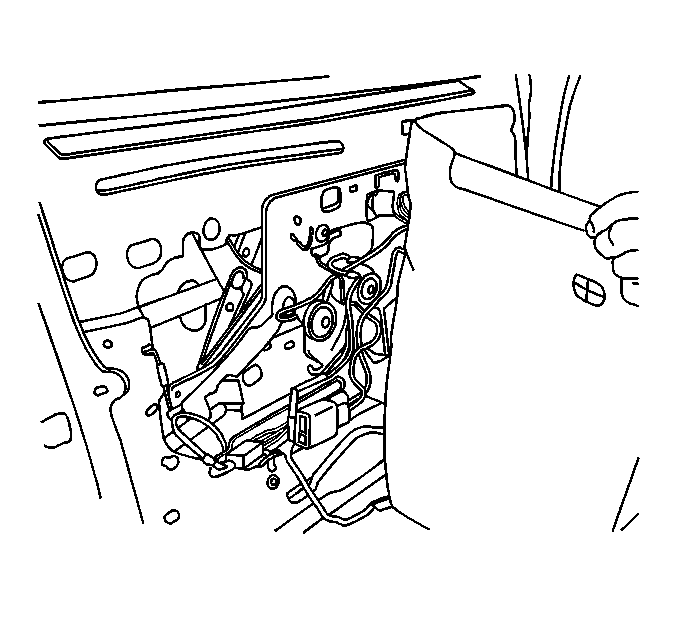
- Remove the water deflector. Refer to Door Water Deflector Replacement .
- Loosen the two bolts from the door handle.
- Cover the exterior painted surface to avoid scratching the painted surface.
- Note the amount of threads showing above the lock rod clips.
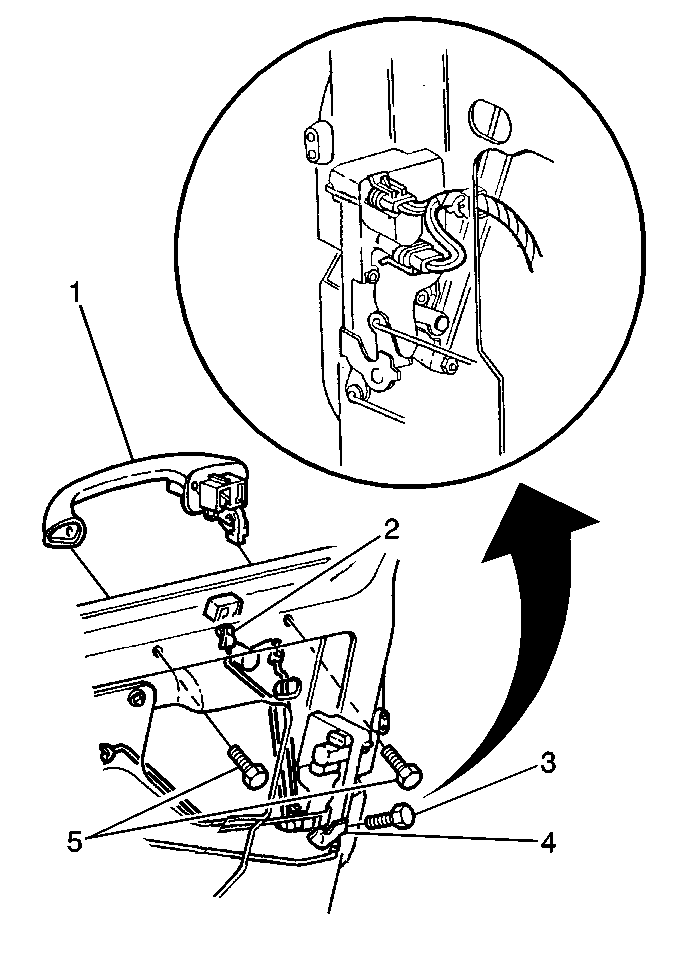
- Remove the linkage (2).
- Discard the lock rod clips.
- Remove the fasteners (5).
- Remove the door handle (1).
Caution: Disconnect the power window switch when working inside the driver door. When operated, the Express Up/Down Feature allows the door window to move very quickly, without stopping, which could cause personal injury.

Caution: Unless directed otherwise, the ignition and start switch must be in the OFF or LOCK position, and all electrical loads must be OFF before servicing any electrical component. Disconnect the negative battery cable to prevent an electrical spark should a tool or equipment come in contact with an exposed electrical terminal. Failure to follow these precautions may result in personal injury and/or damage to the vehicle or its components.
Important: Ensure that the window is in the full up position.
Important: Be careful when removing the door handle.
Installation Procedure
- Install the fasteners (5).
- If necessary, thread the lock rod into or out of the barrel on the lock rod clip at the lock assembly in order to ensure the correct amount of threaded area is visible.
- Install the lock rods to the handle.
- Install the handle (1).
- Install the two door handle bolts (5).
- Apply slight downward pressure on the lock lever. Apply upward pressure on the lock rod.
- Hold the lever up. Rotate the barrel nut until the end of the nut aligns with the hole in the attaching clip.
- Install the water deflector. Refer to Door Water Deflector Replacement .
- Install the door trim panel. Refer to one of the following procedures:
- Connect the negative battery cable.

Door Outside Handle Replacement Oldsmobile/Pontiac
Removal Procedure
Caution: Unless directed otherwise, the ignition and start switch must be in the OFF or LOCK position, and all electrical loads must be OFF before servicing any electrical component. Disconnect the negative battery cable to prevent an electrical spark should a tool or equipment come in contact with an exposed electrical terminal. Failure to follow these precautions may result in personal injury and/or damage to the vehicle or its components.
Important: Ensure that the window is in the full up position.
- Disconnect the negative battery cable.
- Remove the door trim panel. Refer to the following procedures:
- Remove the water deflector. Refer to Door Water Deflector Replacement .
- Disconnect the electrical connector for the illuminated entry switch (if applicable).
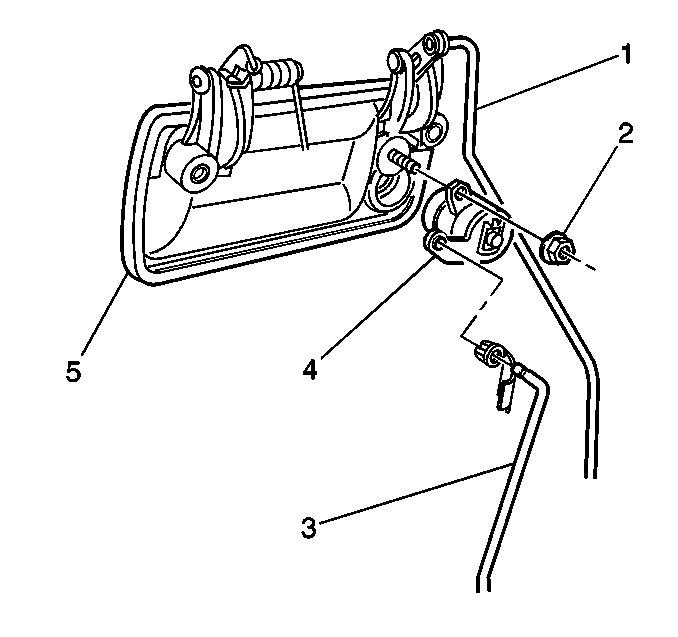
- Remove the door handle fasteners.
- Protect the outside of the painted surface.
- Carefully remove the door handle (5).
- Remove the lock rod from the door handle (1).


Installation Procedure
- Install the lock rods (1,3).
- Install the fasteners (2).
- Carefully install the door handle (5).
- Guide the illuminated entry switch wiring, outboard of the lock rods (if applicable).
- Connect the electrical connector to the illuminated entry switch.
- Apply slight downward pressure on the lock lever.
- Apply upward pressure on the lock rod.
- Hold the lever upward.
- Rotate the barrel nut until the end of the nut aligns with the hole in the attaching clip.
- Remove the protective covering from the door.
- Install the water deflector. Refer to Door Water Deflector Replacement .
- Install the door trim panel. Refer to the following procedures:
- Connect the negative battery cable.

