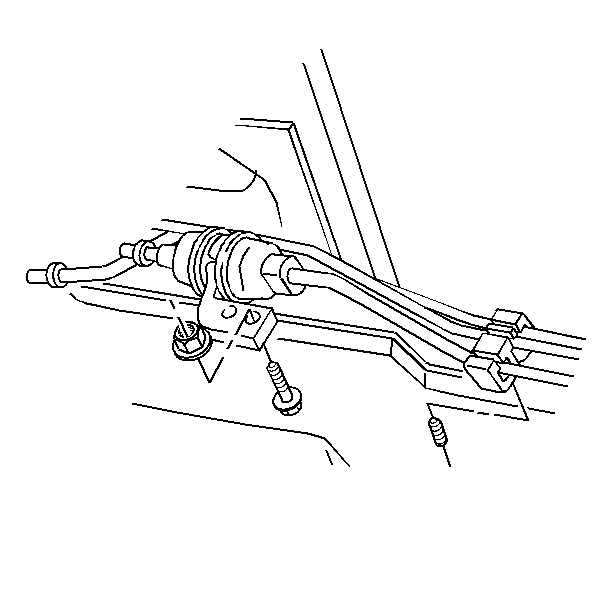
For 1990-2009 cars only
Removal Procedure
Important: There is no service interval for in-pipe fuel filter replacement. Only replace the in-pipe fuel filter if it is restricted.
- Relieve the fuel system pressure. Refer to Fuel Pressure Relief.
- Raise the vehicle. Refer to Lifting and Jacking the Vehicle.
- Remove the quick-connect fitting at the inlet of the in-pipe fuel filter. Refer Plastic Collar Quick Connect Fitting Service.
- Remove the quick-connect fitting at the outlet of the in-pipe fuel filter. Refer to Plastic Collar Quick Connect Fitting Service.
- Drain any remaining fuel into an approved gasoline container.
- Remove the in-pipe fuel filter mounting bracket attaching nut.
- Remove the in-pipe fuel filter and mounting bracket.
- Remove the in-pipe fuel filter from the in-pipe fuel filter mounting bracket.
- Remove the original fuel feed pipe and discard.

Installation Procedure

- Install the supplied fuel feed pipe from the fuel filter kit in the same orientation as the original.
- Remove the protective caps from the new in-pipe fuel filter.
- Install the in-pipe fuel filter into the in-pipe fuel filter mounting bracket so the flow indicator arrow points towards the front of the vehicle.
- Install the in-pipe fuel filter and mounting bracket.
- Reinstall the in-pipe fuel filter mounting bracket attaching nut.
- Connect the quick-connect fitting at the inlet of the in-pipe fuel filter. Refer to Plastic Collar Quick Connect Fitting Service.
- Connect the quick-connect fitting at the outlet of the in-pipe fuel filter. Refer to Plastic Collar Quick Connect Fitting Service.
- Lower the vehicle.
- Tighten the fuel fill cap.
- Reconnect the negative battery cable.
- Inspect for fuel leaks.
Notice: Refer to Fastener Notice in the Preface section.
Tighten
Tighten the nut to 10 N·m (89 lb in).
| 11.1. | Turn the ignition switch ON for 2 seconds. |
| 11.2. | Turn the ignition switch OFF for 10 seconds. |
| 11.3. | Turn the ignition switch ON. |
| 11.4. | Check for fuel leaks. |
