Removal Procedure
- Relieve the fuel system fuel pressure. Refer to
Fuel Pressure Relief
.
- Raise the vehicle. Refer to
Lifting and Jacking the Vehicle
in general information.
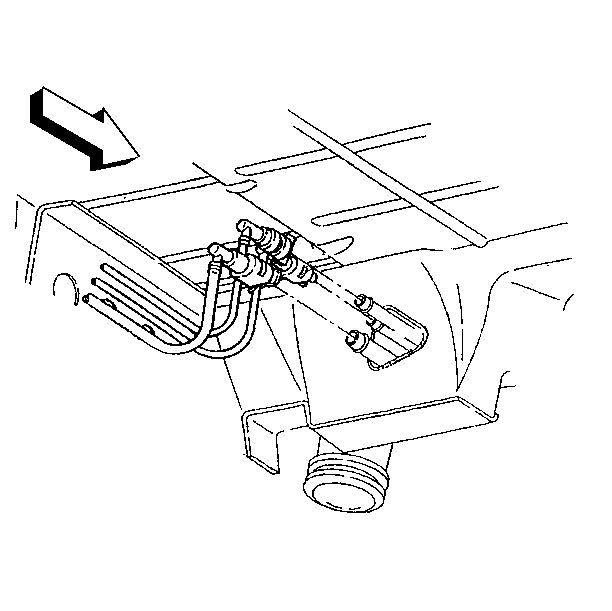
- Remove the fuel feed and
return pipe quick-connect fittings at the front frame rail. Refer to
Metal Collar Quick Connect Fitting Service
.
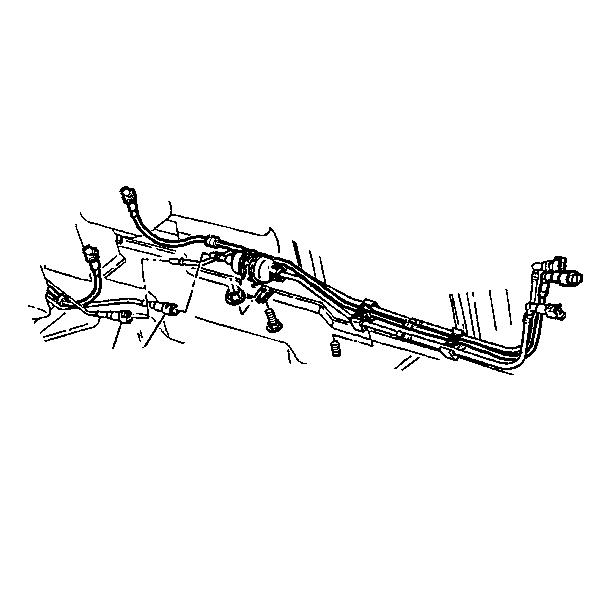
- Remove the fuel feed and
return pipe quick-connect fittings at the out let side of the fuel filter.
Refer to
Plastic Collar Quick Connect Fitting Service
.
- Cap the in-pipe fuel filter pipes, and the engine fuel feed pipe,
and engine fuel return pipe as needed to stop any fuel leakage.
- Remove the fuel feed and return pipes.
- Note the position of the fuel pipes for installation.
Installation Procedure
- Install the fuel feed and return pipes as noted on removal.
- Remove the caps from the in-pipe fuel filter pipes, the engine
fuel feed pipe, and the engine fuel return pipe.
- Install new plastic connector retainers on the in-pipe fuel filter,
the fuel feed pipe, and the return pipe.
- Connect the fuel feed
and return pipe quick-connect fittings at the outlet side of the fuel filter.
Refer to
Plastic Collar Quick Connect Fitting Service
.
- Connect the fuel feed
and return pipe quick-connect fittings at the front frame rail. Refer to
Metal Collar Quick Connect Fitting Service
.
- Lower the vehicle.
- Tighten the fuel fill cap.
- Reconnect the negative battery cable. Refer to
Battery Negative Cable Disconnection and Connection
in
engine electrical.
- Inspect for fuel leaks.
| 9.1. | Turn the ignition switch ON for 2 seconds. |
| 9.2. | Turn the ignition switch OFF for 10 seconds. |
| 9.3. | Turn the ignition switch ON. |
| 9.4. | Check for fuel leaks. |
