For 1990-2009 cars only
Tools Required
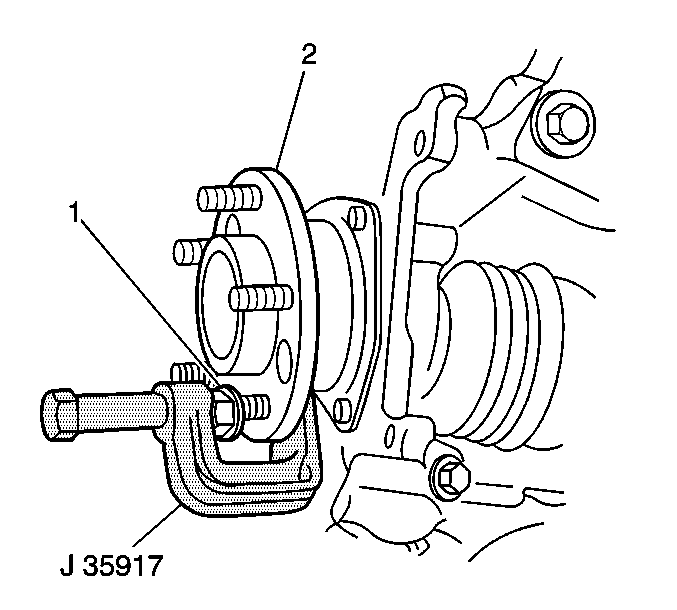
J 35917 Wheel Stud Remover
Removal Procedure
Caution: If you are replacing the wheel(s), the wheel stud(s), the wheel nut(s) or the wheel bolt(s), install only new GM original equipment parts. Installation of used parts or non-GM original equipment parts may cause the wheel to loosen, loss of tire air pressure, poor vehicle handling and loss of vehicle control resulting in personal injury.
- Raise and support the vehicle. Refer to Lifting and Jacking the Vehicle in General Information.
- Remove the tire and wheel. Refer to Tire and Wheel Removal and Installation in Tires and Wheels.
- For domestic vehicles, remove the brake drum. Refer to Brake Drum Replacement in Drum Brakes.
- Use the J 35917 in order to press the wheel stud (1) from the wheel bearing/hub (2).
For export vehicles, remove the rear brake rotor. Refer to Rear Brake Rotor Replacement in Disc Brakes.

Installation Procedure
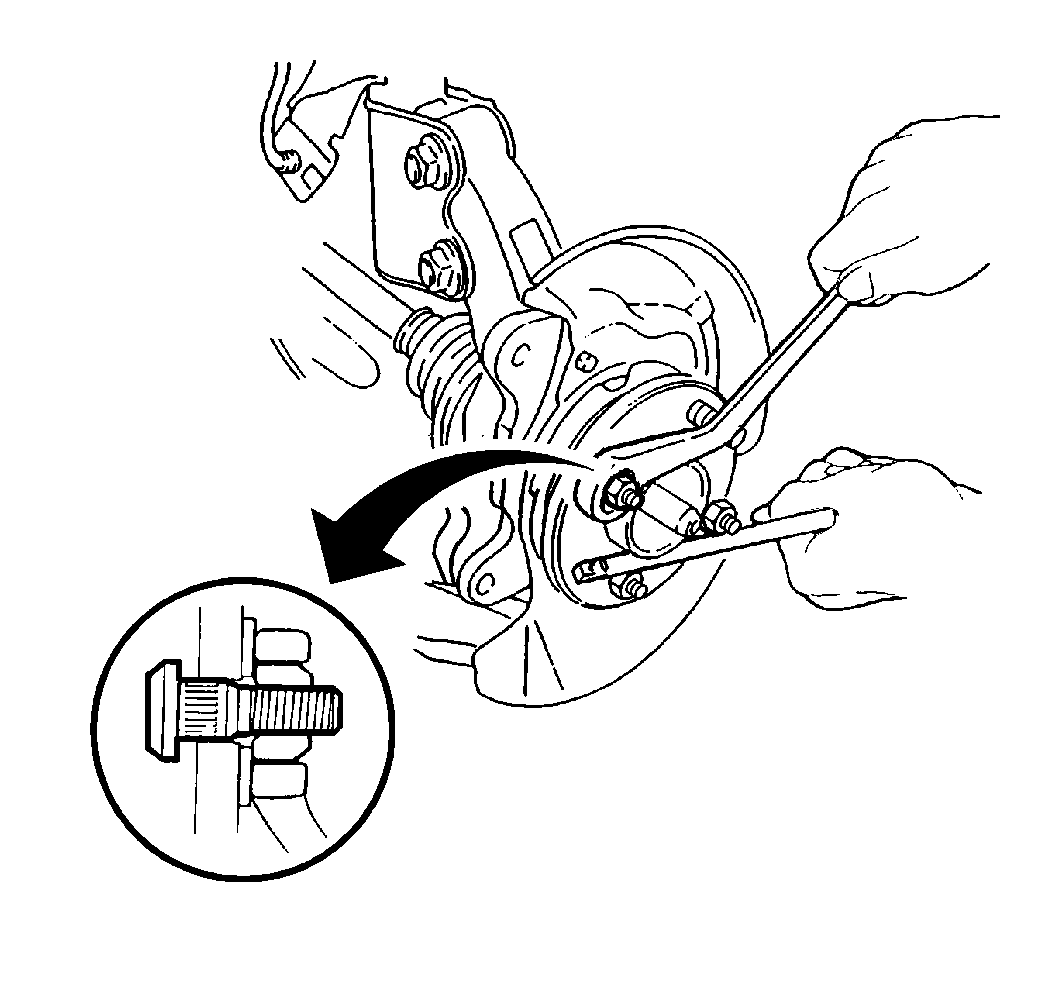
- Install a new wheel stud from the back side of the wheel bearing/hub.
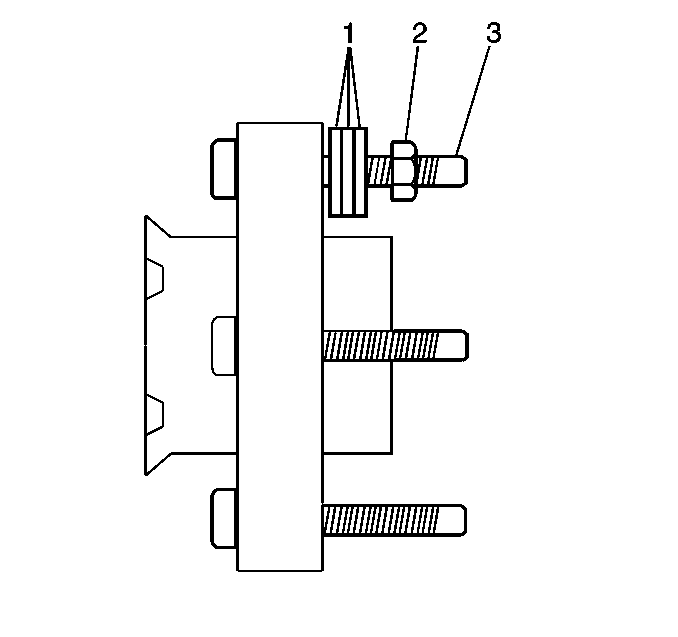
- Install 3 flat washers (1) to the wheel stud (3).
- Install a hex nut (2) to the wheel stud (3).
- Tighten the hex nut until the stud head is fully seated in the wheel bearing/hub flange.
- Remove the hex nut and the washers from the wheel stud.
- For domestic vehicles, install the brake drum. Refer to Brake Drum Replacement in Drum Brakes.
- Install the tire and wheel. Refer to Tire and Wheel Removal and Installation in Tires and Wheels.
- Lower the vehicle.


For export vehicles, install the rear brake rotor. Refer to Rear Brake Rotor Replacement in Disc Brakes.
