DEALER INSTALLED ANCHOR CHILD SEAT WITH TOP STRAP

MODELS/YEARS ALL 1984 MODELS
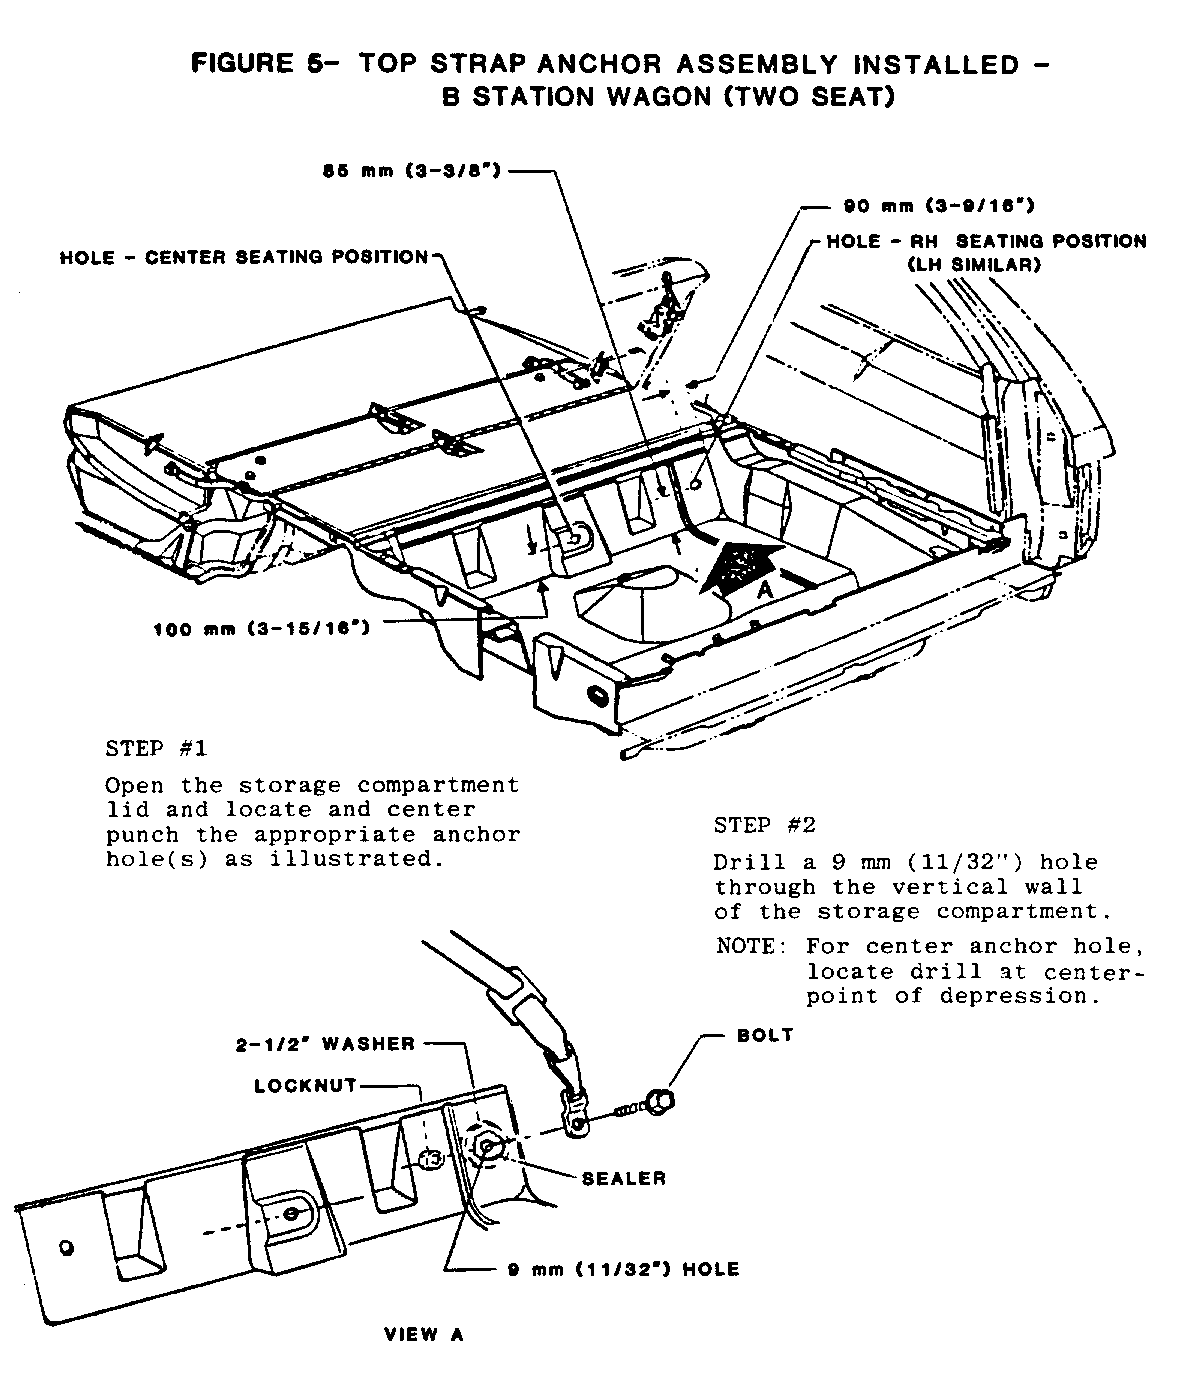
This information is a supplement to Dealer Technical Bulletin 84-T-3 issued December 19, 1983. The general instructions for installation of the child seat top strap are covered in the original bulletin. The Figures listed below cover the specific instructions for the following body styles:
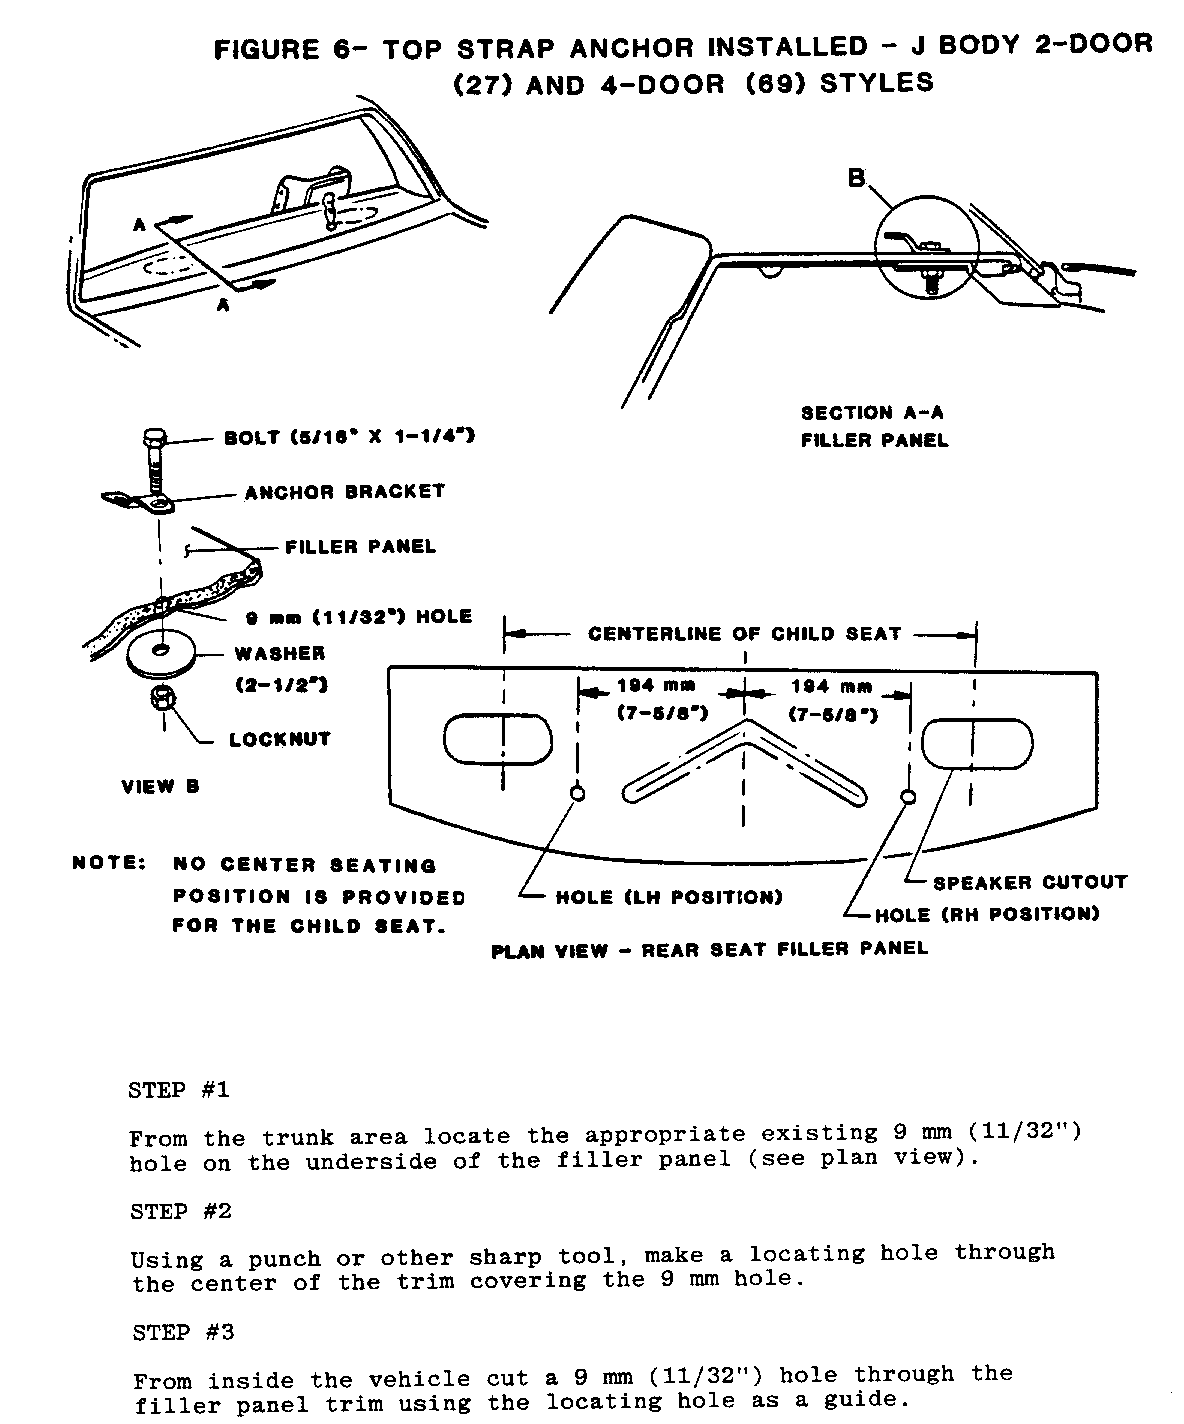
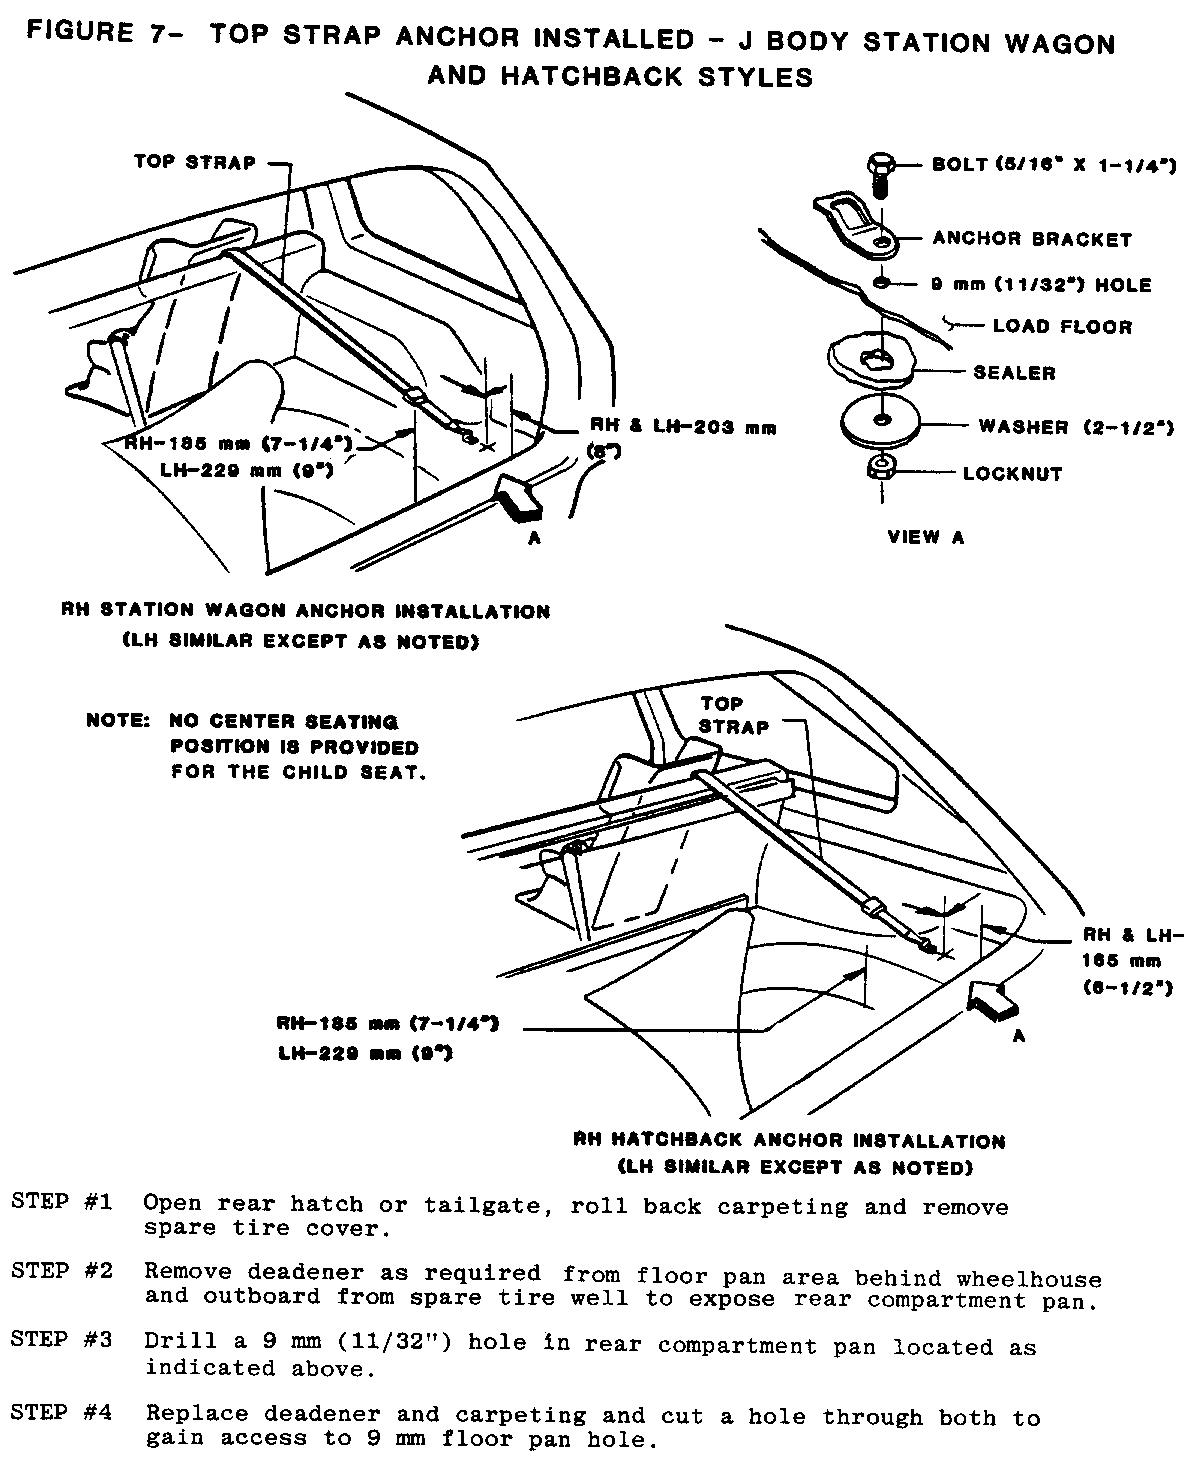
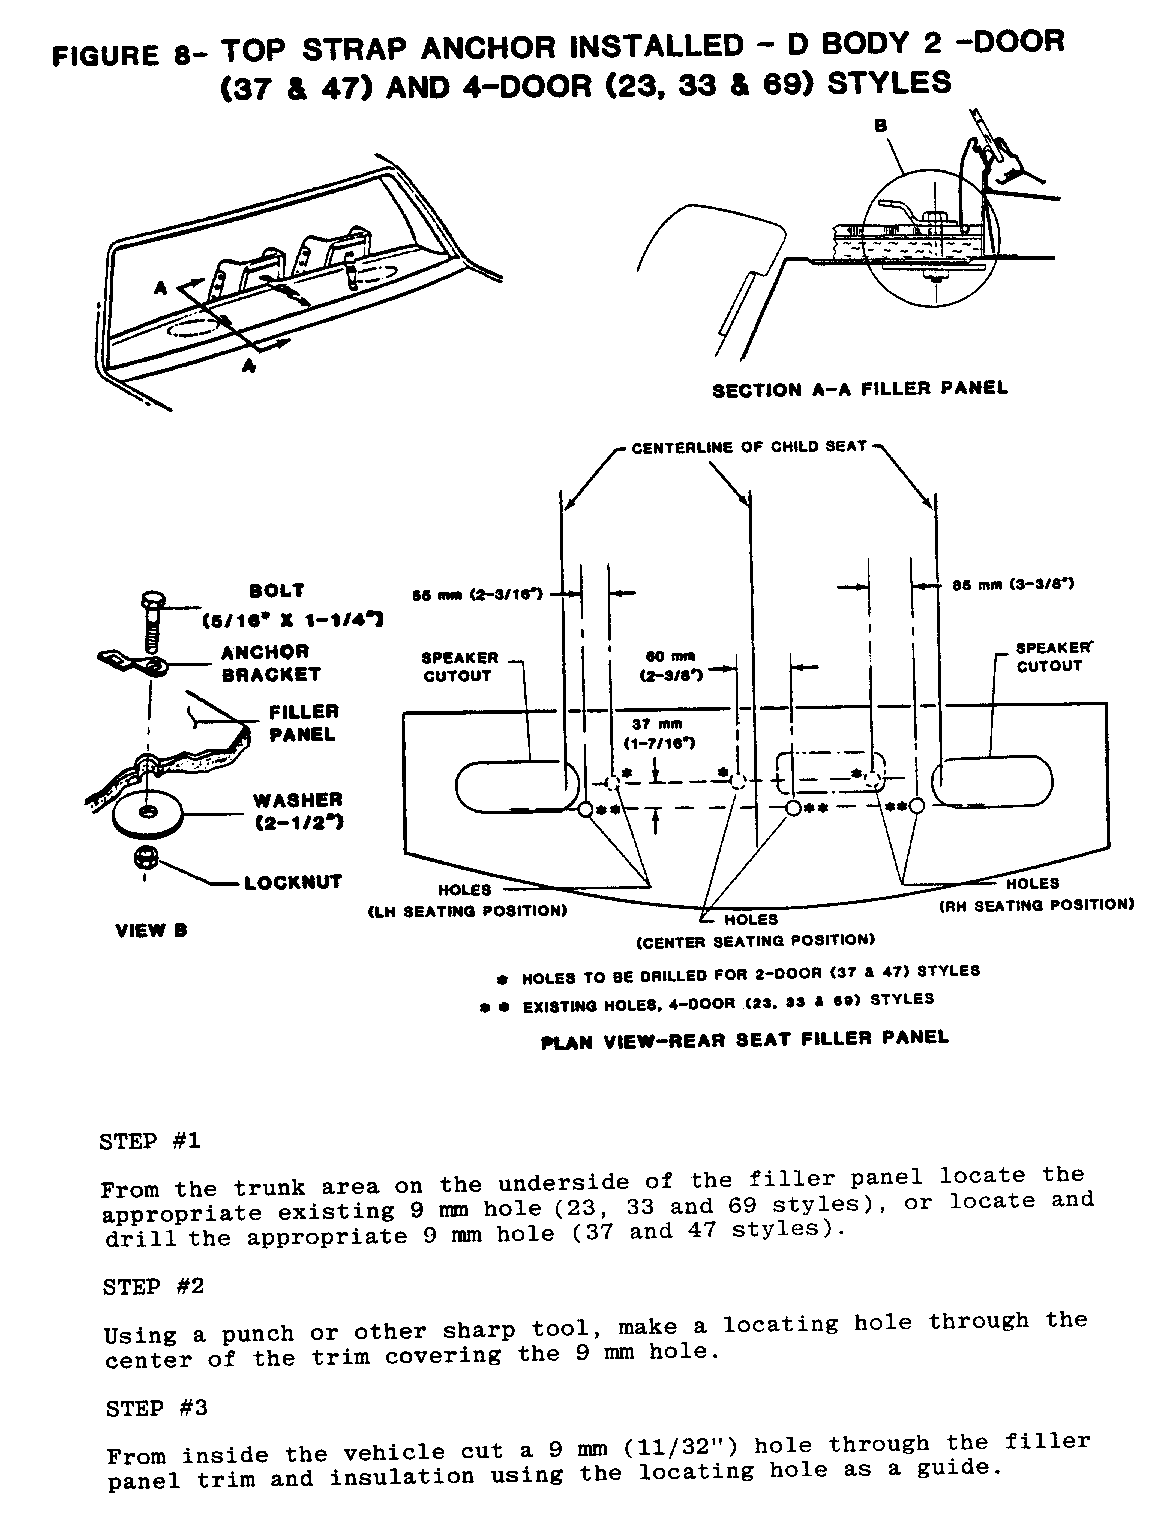
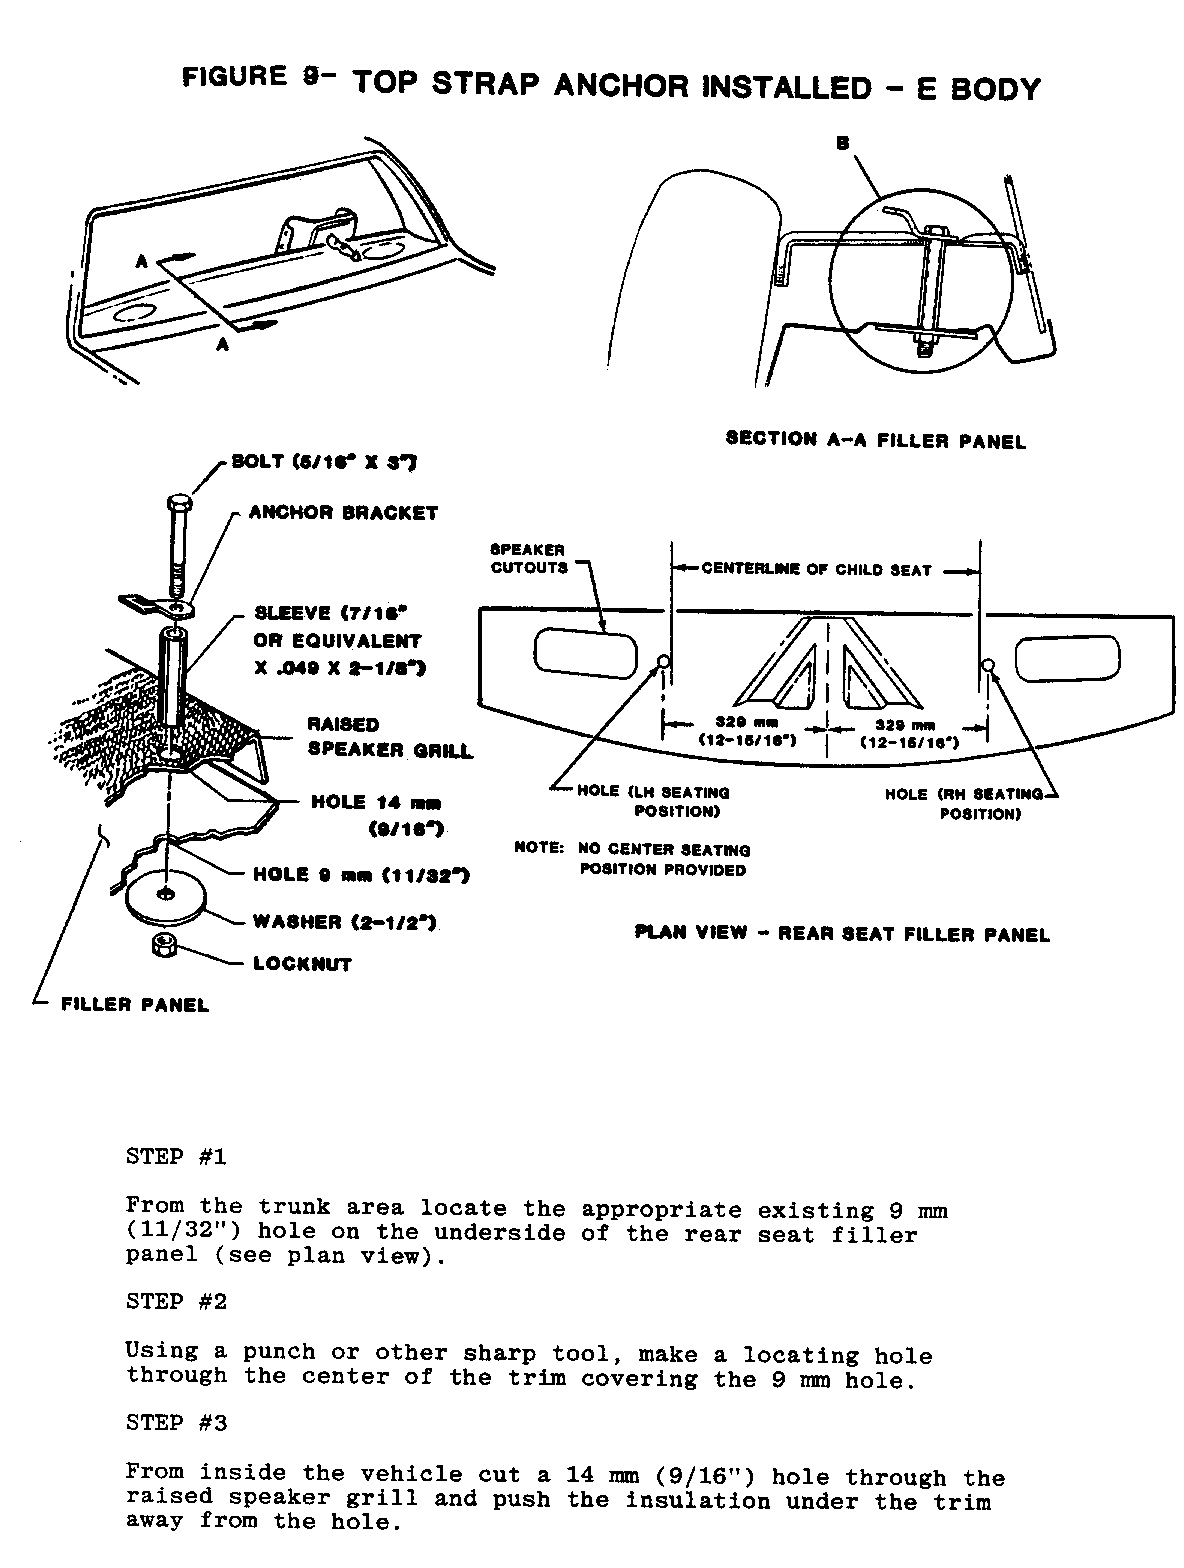
Figures 6 and 7 Firenza Figure 8 Ninety-Eight Figure 9 Toronado Figure 10 Omega
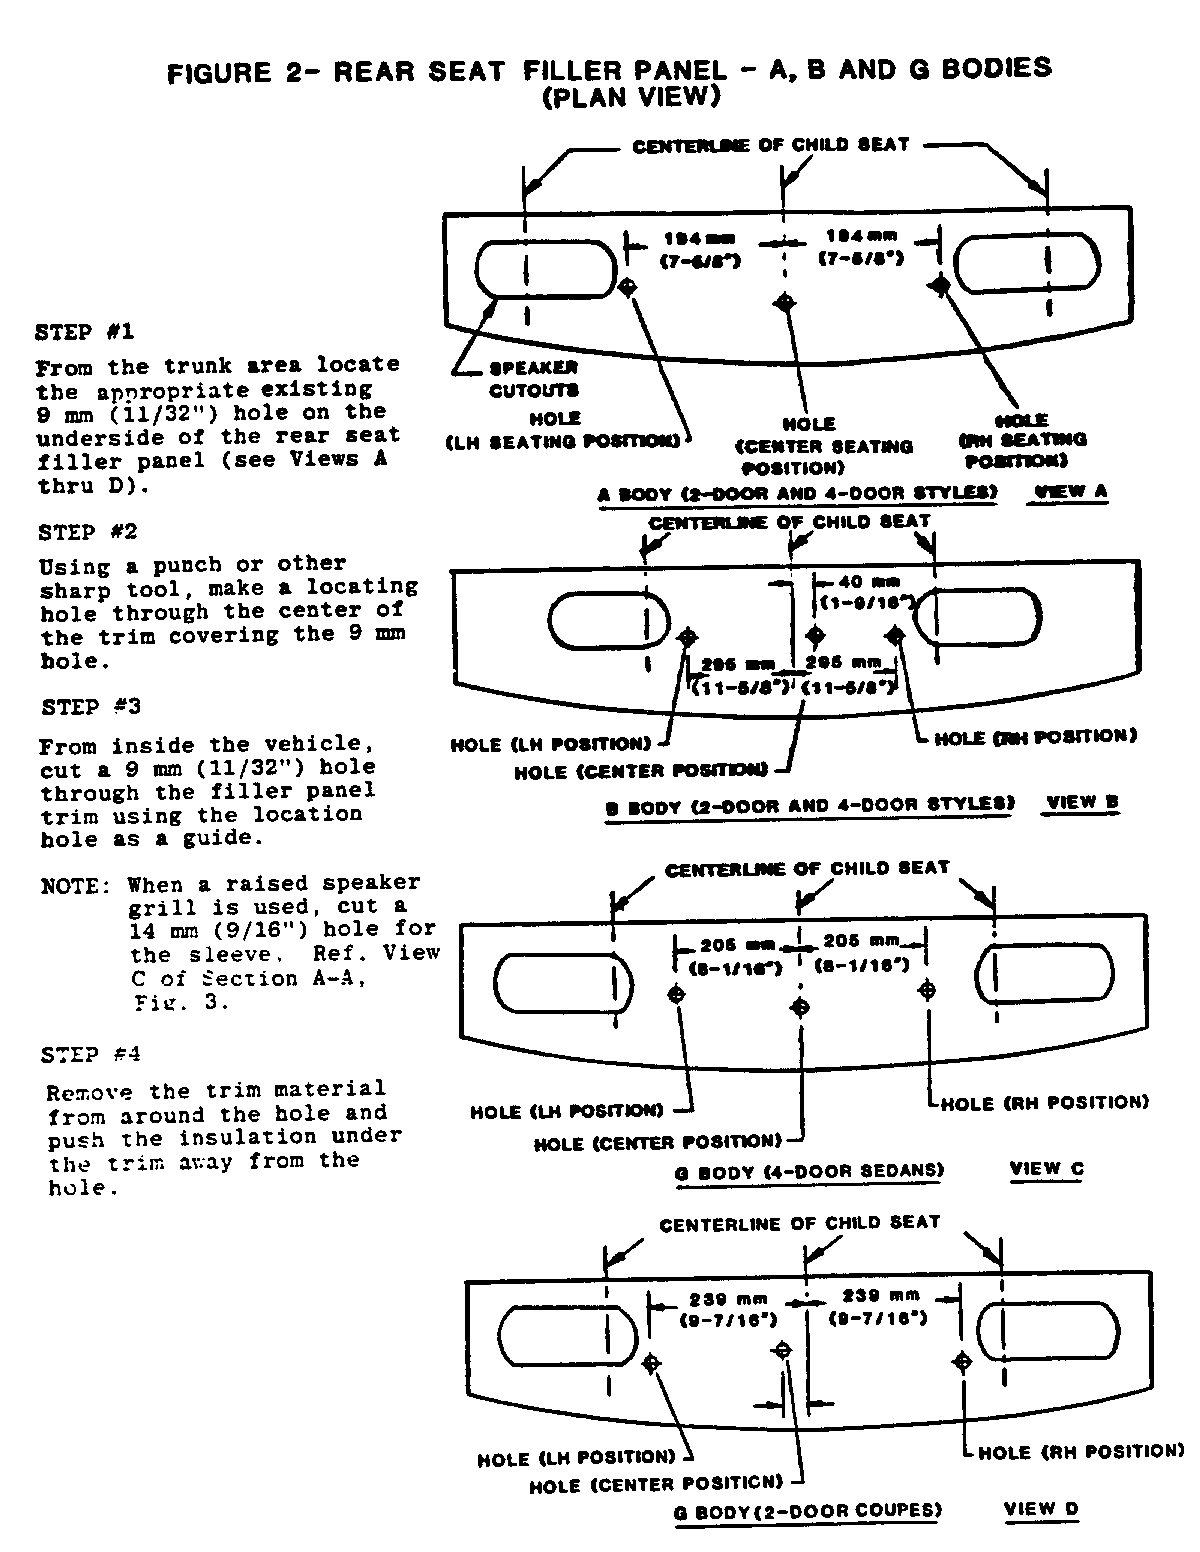
STEP #1 ------- From the trunk area locate the appropriate existing 9mm (11/32") hole on the underside of the filler panel (see plan view).
STEP #2 ------- Using a punch or other sharp tool, make a locating hole through the center of the trim covering the 9 mm hole.
STEP #3 ------- From inside the vehicle cut a 9 mm (11/32") hole through the filler panel trim using the locating hole as a guide.
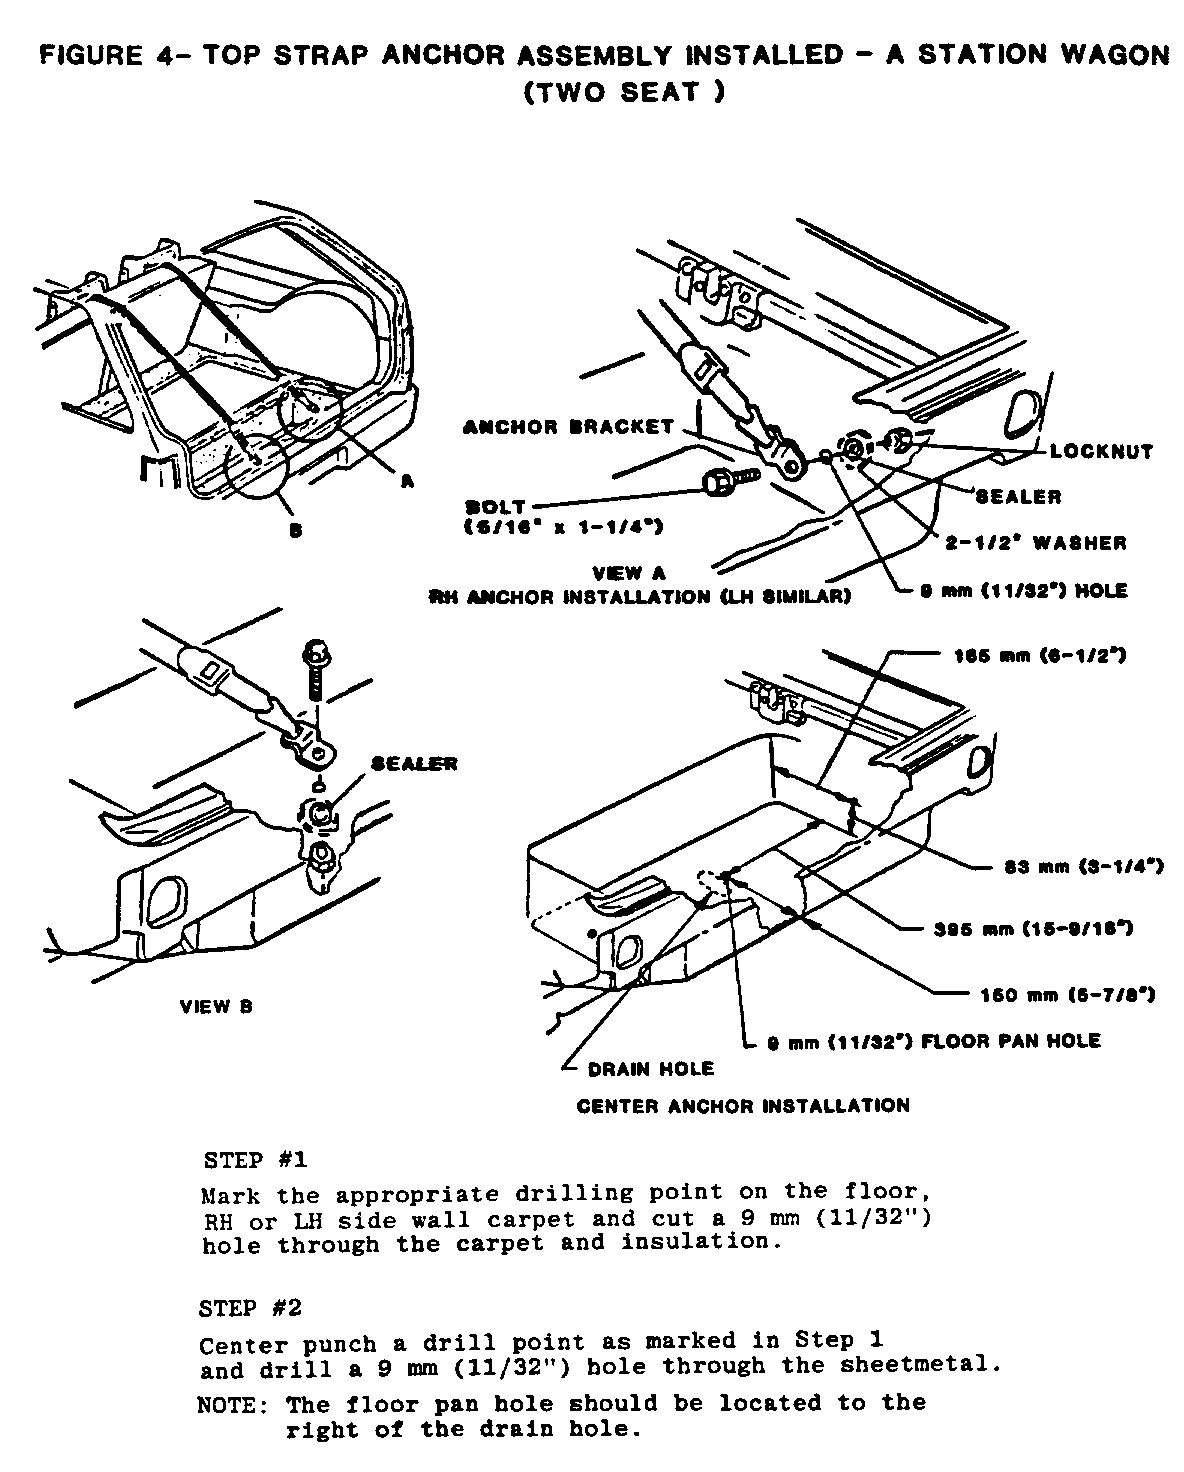
STEP # 1 -------- Open rear hatch or tailgate, roll back carpeting and remove spare tire cover.
STEP #2 -------
Remove deadener as required from floor pan area behind wheelhouse and outboard from spare tire well to expose rear compartment pan.
STEP #3 -------
Drill a 9 mm (11/32") hole in rear compartment pan located as indicated above.
STEP #4 -------
Replace deadener and carpeting and cut a hole through both to gain access to 9 mm floor pan hole.
STEP NO. 1 -----------
From the trunk area on the underside of the filler panel locate the appropriate existing 9 mm hole (69 styles), or locate and drill the appropriate 9 mm hole (37 styles).
STEP NO. 2 ----------
Using a punch or other sharp tool, make a locating hole through the center of the trim covering the 9mm hole.
STEP NO. 3 ----------
From inside the vehicle cut a 9 mm (11/32") hole through the filler panel trim and insulation using the locating hole as a guide.
STEP #1 -------
From the trunk area locate the appropriate existing 9 mm (11/32") hole on the underside of the rear seat filler panel (see plan view).
STEP #2 -------
Using a punch or other sharp tool, make a locating hole through the center of the trim covering the 9mm hole.
STEP #3 -------
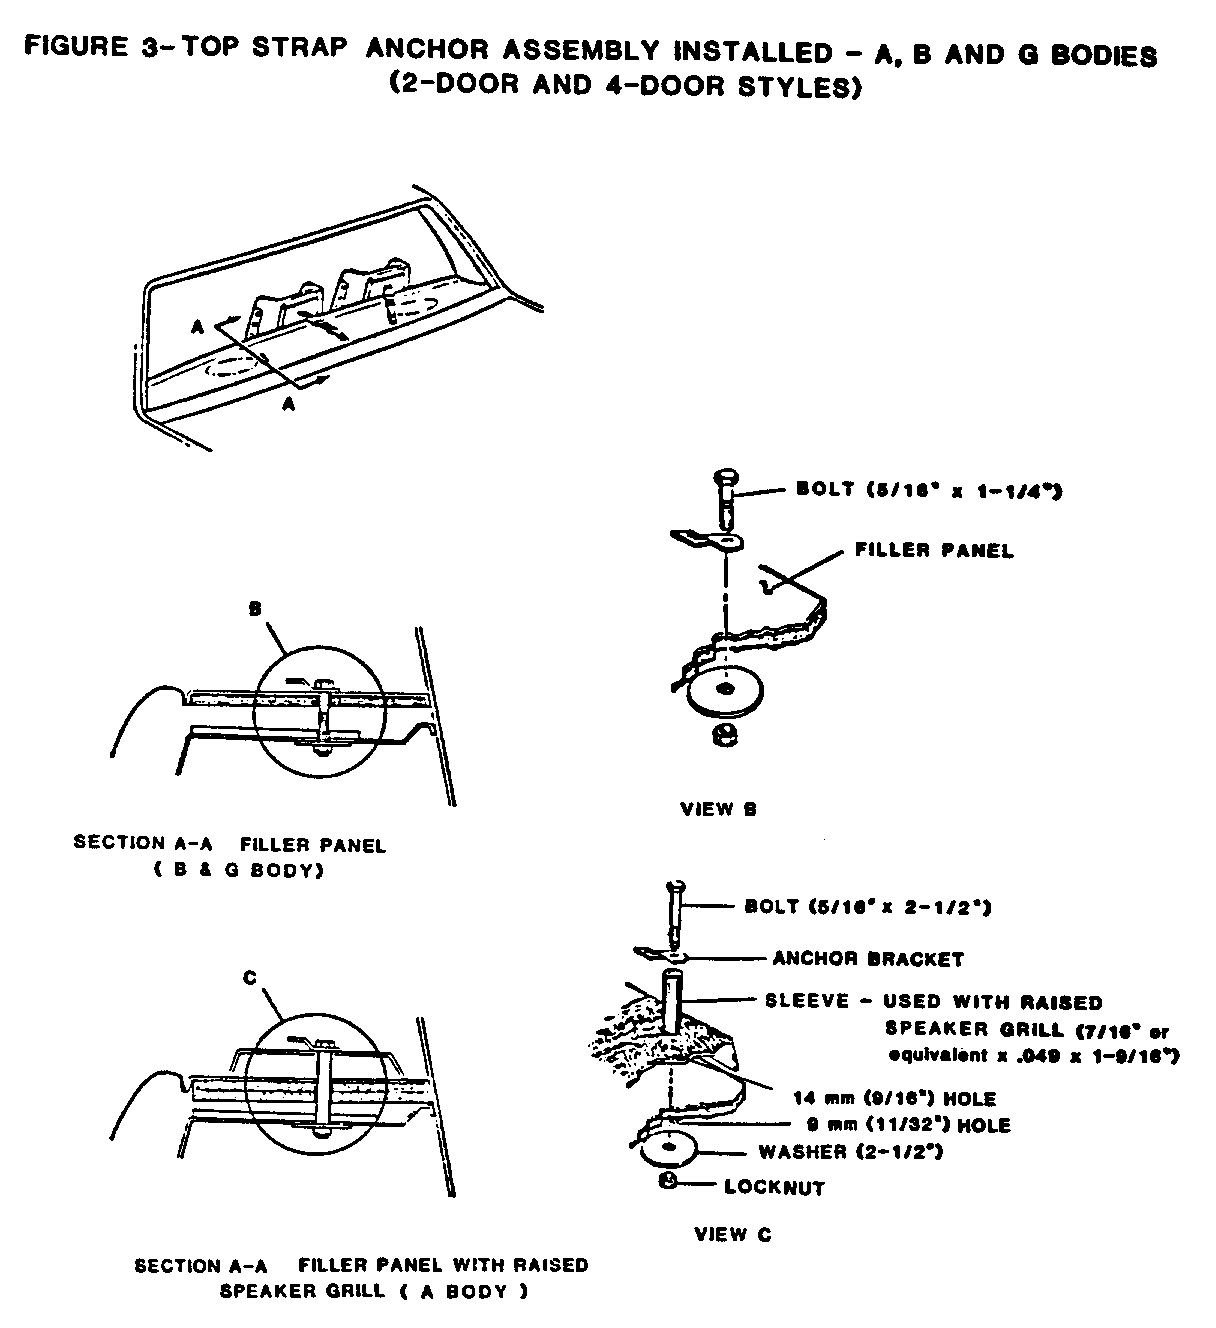
From inside the vehicle cut a 14 mm (9/16") hole through the raised speaker grill and push the insulation under the trim away from the hole.
STEP #1 -------
From the trunk area locate the appropriate 8 mm (5/16") hole on the underside of the filler panel.
STEP #2 -------
Using a punch or other sharp tool, punch a locating hole through the center of the trim covering the 8 mm hole.
STEP #3 -------
From inside the vehicle cut a 8 mm (5/16") hole through the filler panel trim using the locating hole as a guide.
General Motors bulletins are intended for use by professional technicians, not a "do-it-yourselfer". They are written to inform those technicians of conditions that may occur on some vehicles, or to provide information that could assist in the proper service of a vehicle. Properly trained technicians have the equipment, tools, safety instructions and know-how to do a job properly and safely. If a condition is described, do not assume that the bulletin applies to your vehicle, or that your vehicle will have that condition. See a General Motors dealer servicing your brand of General Motors vehicle for information on whether your vehicle may benefit from the information.
