Instrument Panel Assembly Replacement C100/Long Body
Removal Procedure
- Disconnect the negative battery cable. Refer to Battery Negative Cable Disconnection and Connection .
- Remove the instrument panel lower left trim. Refer to Instrument Panel Lower Trim Panel Replacement - Left Side .
- Remove the front, rear floor console. Refer to Console Replacement .
- Remove the ambient light sensor . Refer to Ambient Light Sensor Replacement .
- Remove the radio . Refer to Radio Replacement .
- Remove the headlamp leveling switch assembly. Refer to Headlamp Leveling Switch Replacement .
- Remove the instrument cluster trim panel.
- Remove the automatic temperature controls assembly. Refer to Heater and Air Conditioning Control Replacement .
- Remove the instrument cluster. Refer to Instrument Cluster Replacement .
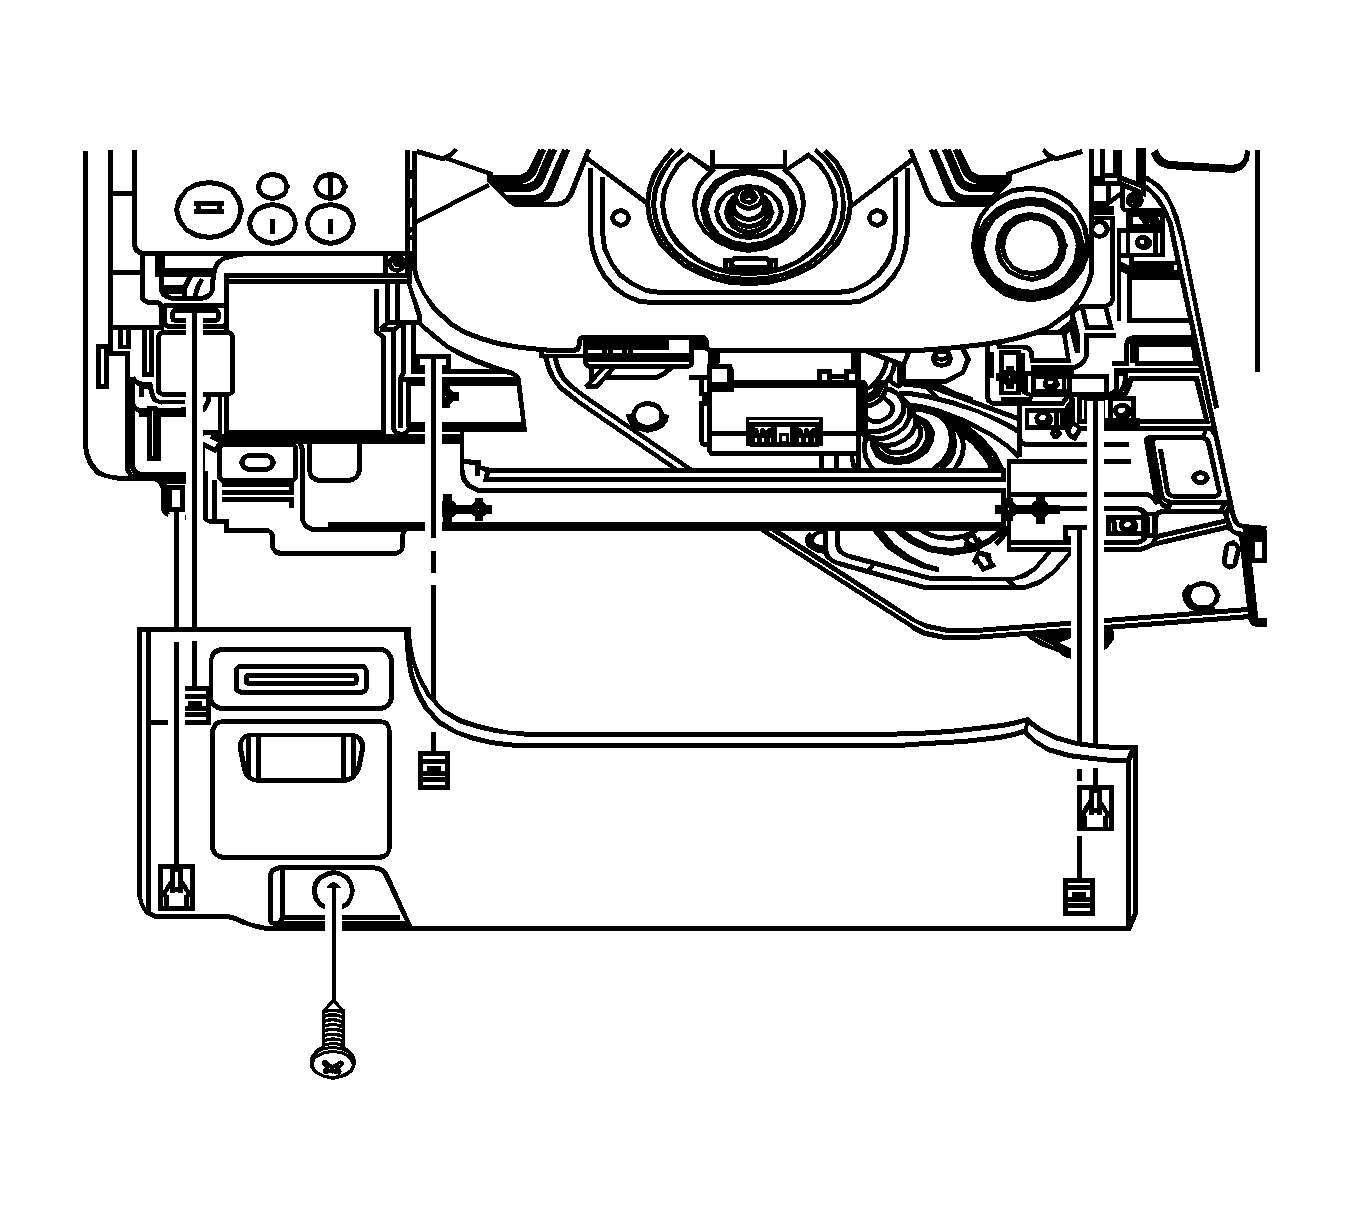
- Remove the kick panels.
- Disconnect the necessary instrument compartment electrical connectors.
- Remove the knee bolster. Refer to Knee Bolster Replacement .
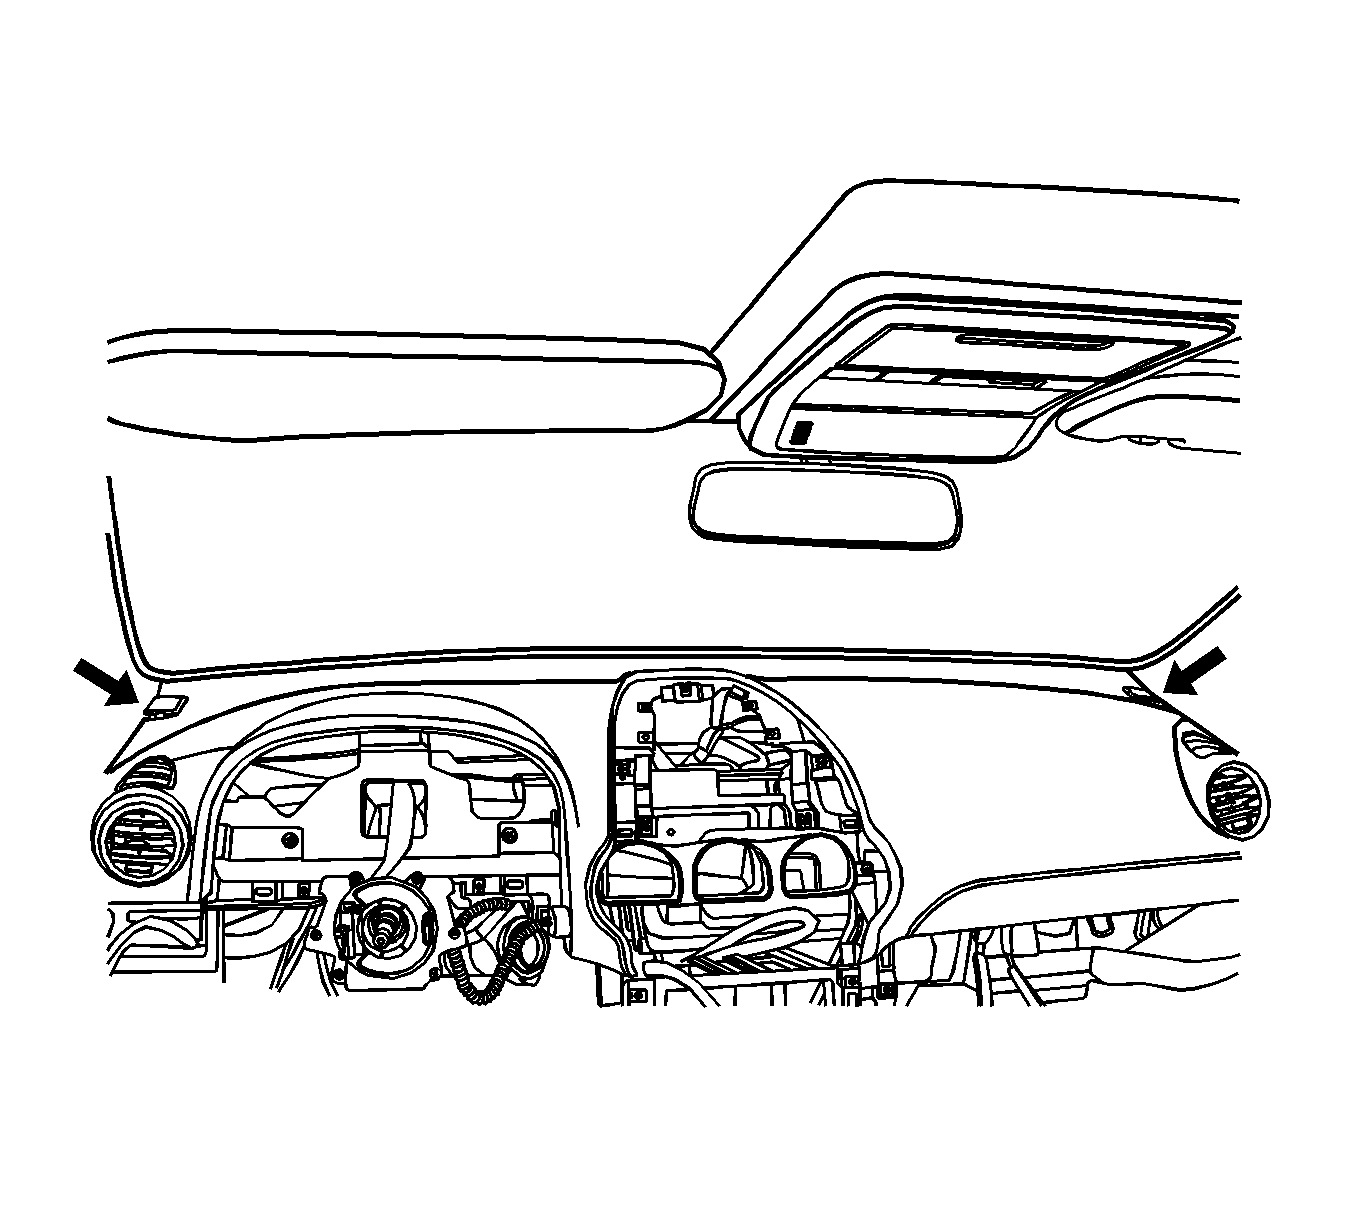
- Remove the left and right upper instrument panel bolt covers.
- Remove the body control module. Refer to Body Control Module Replacement .
- Remove the nuts and the bolts securing the steering column and lower the steering column. Refer to Steering Column Replacement
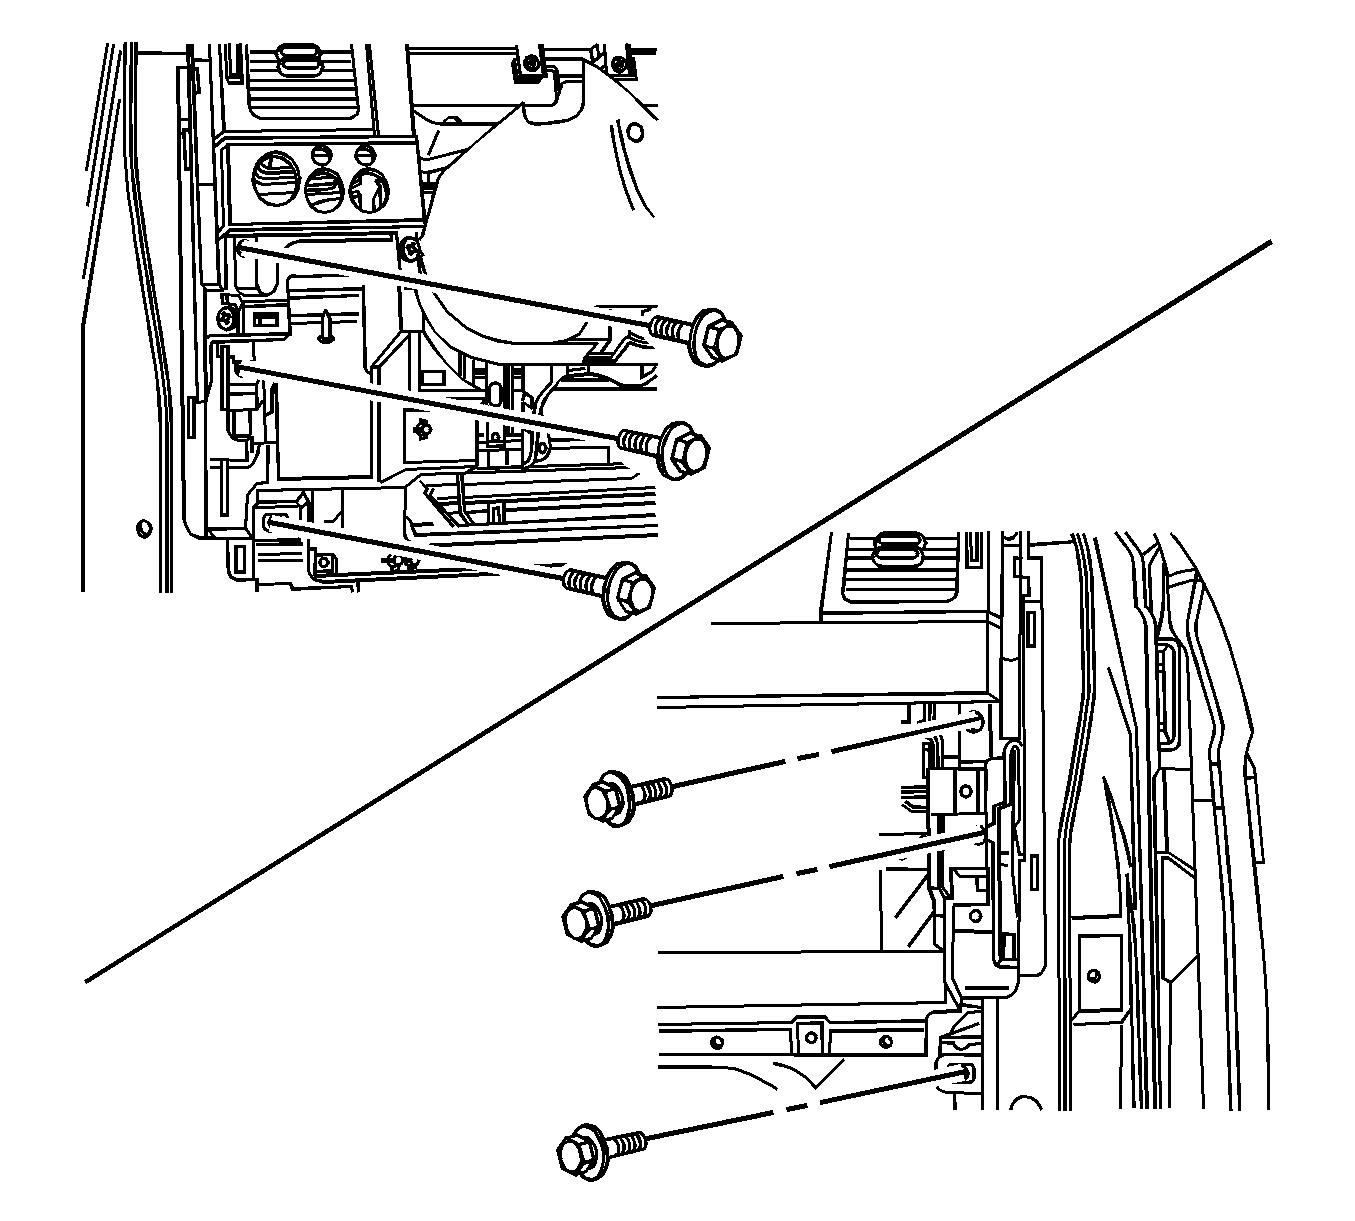
- Remove the bolts on the left and right sides of the instrument panel.
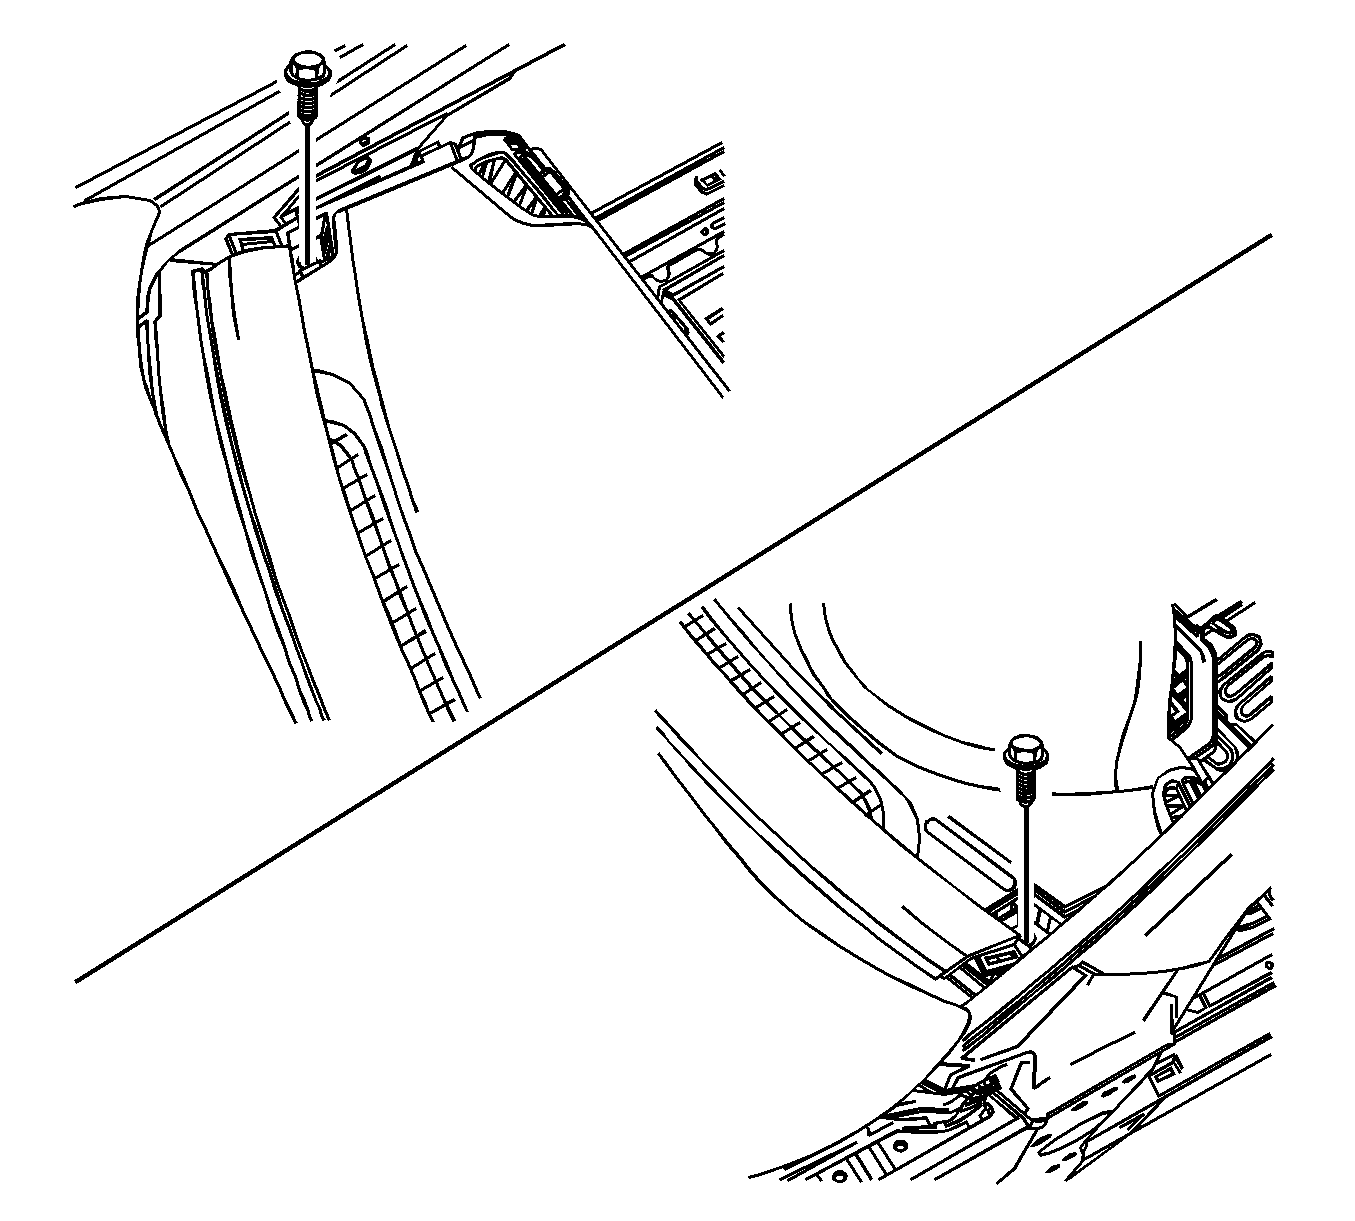
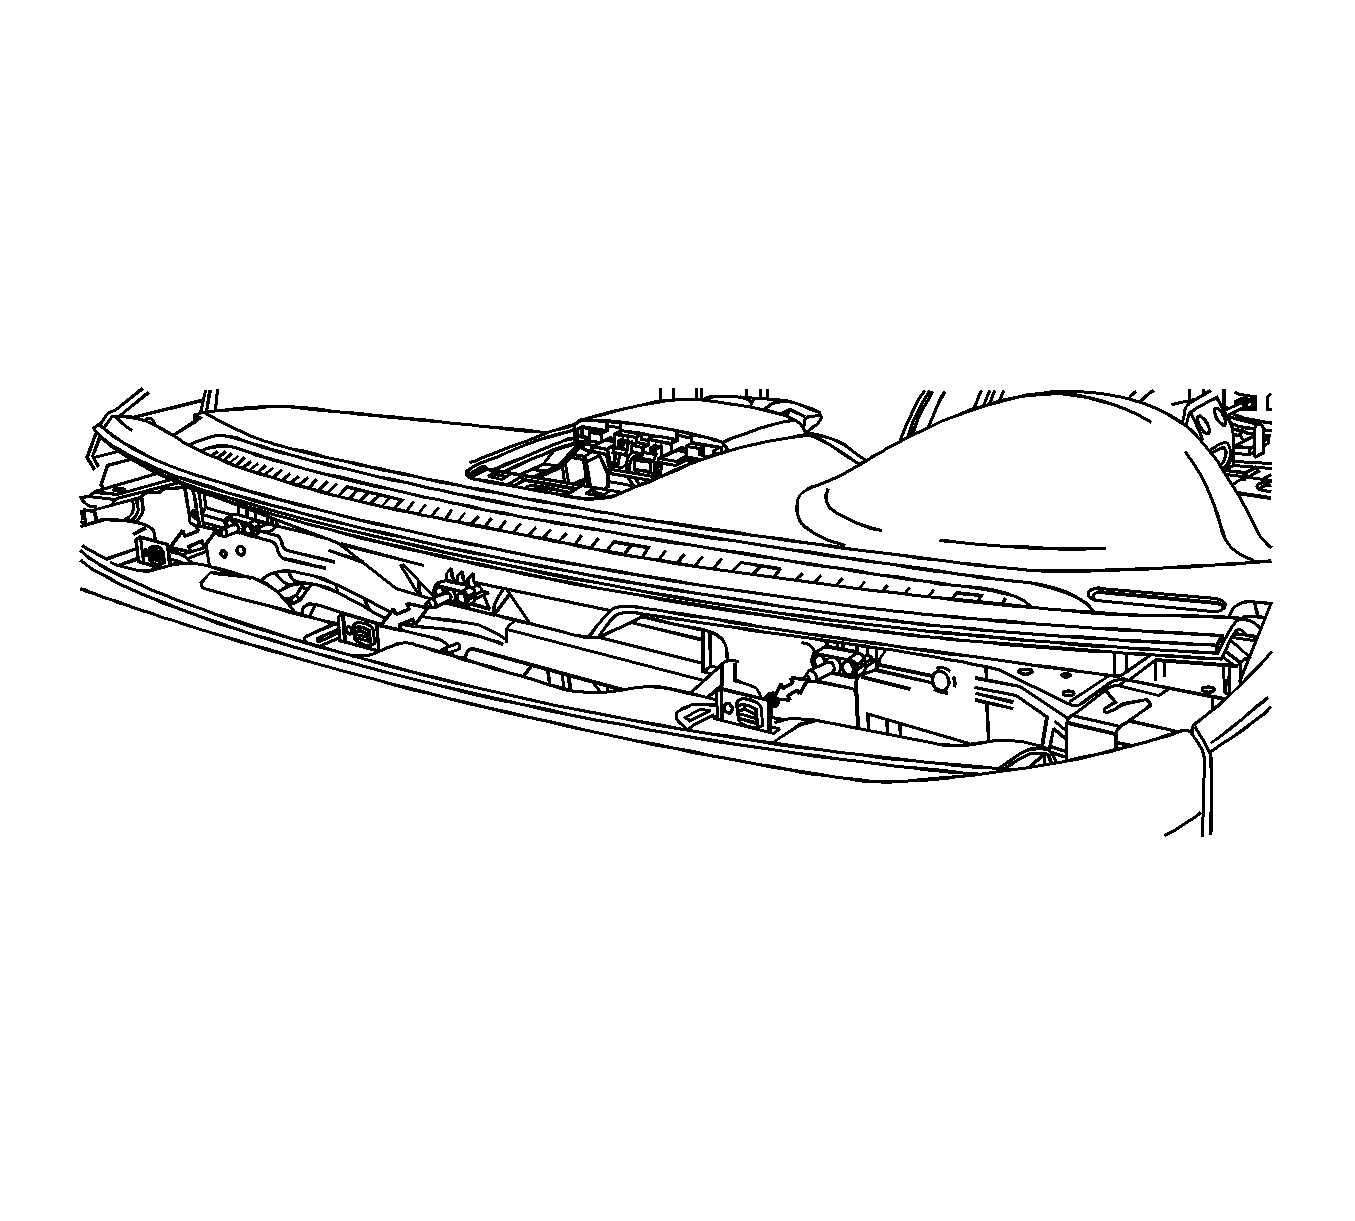
- Remove the instrument panel bolts below the windshield.
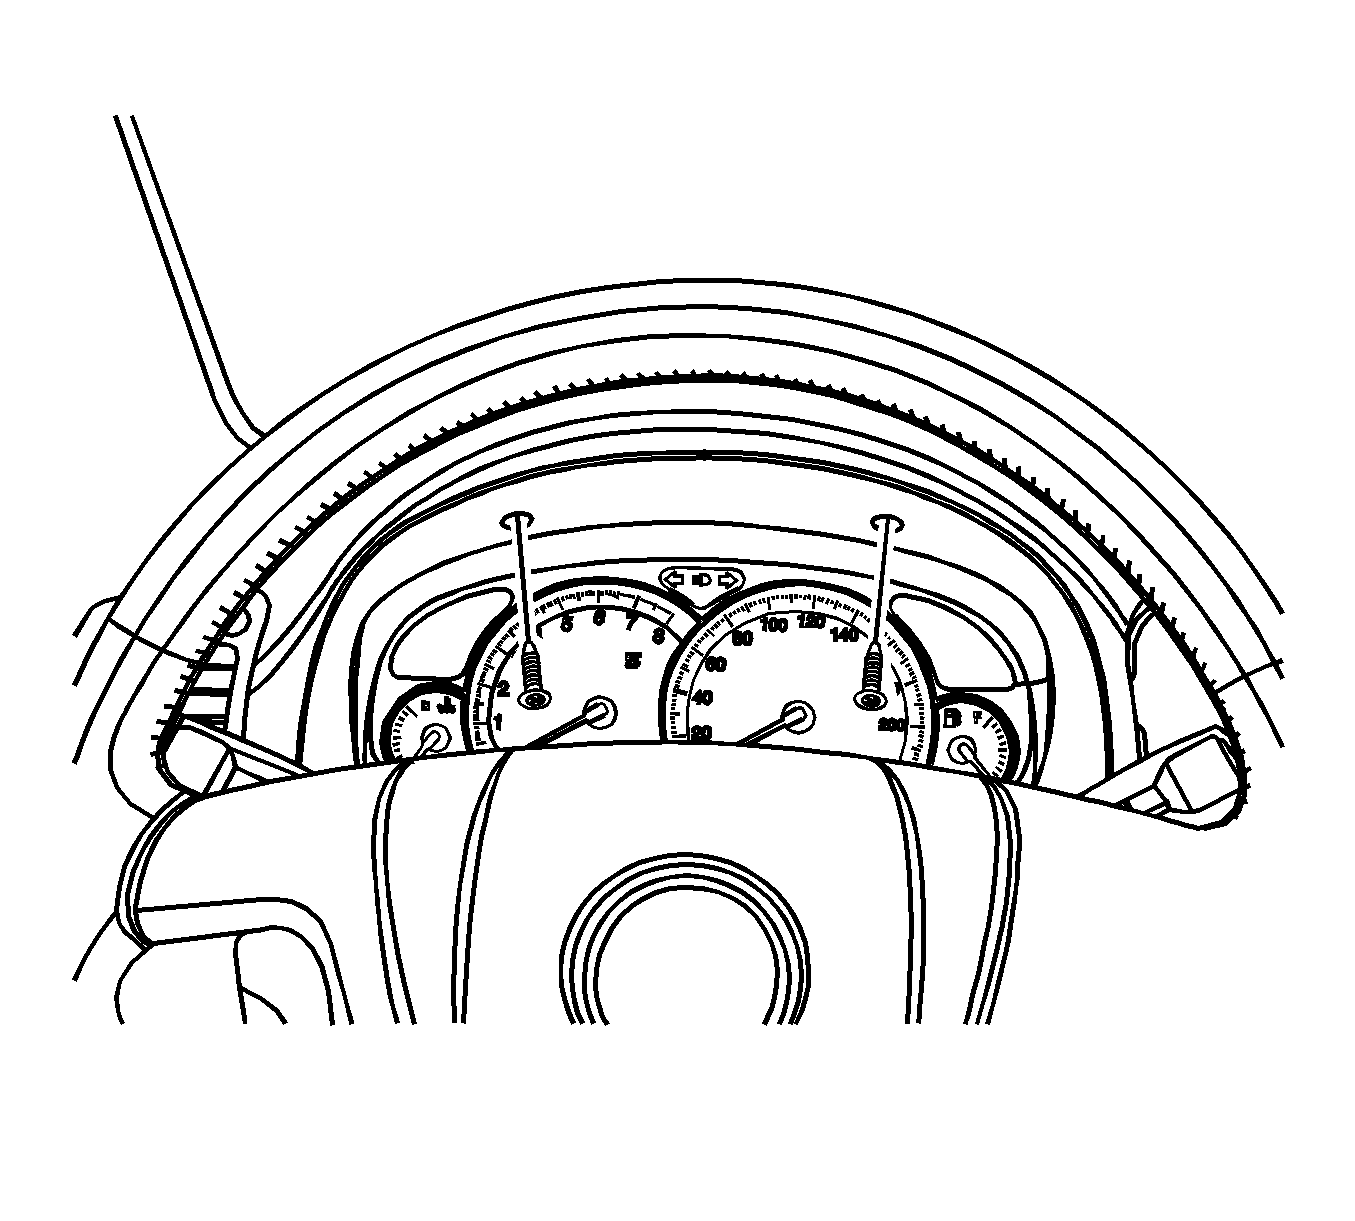
- Remove the necessary fixing screws securing the instrument panel.
- Remove the bolts securing the sides of the instrument panel to the body.
- Disconnect the necessary instrument panel electrical connectors.
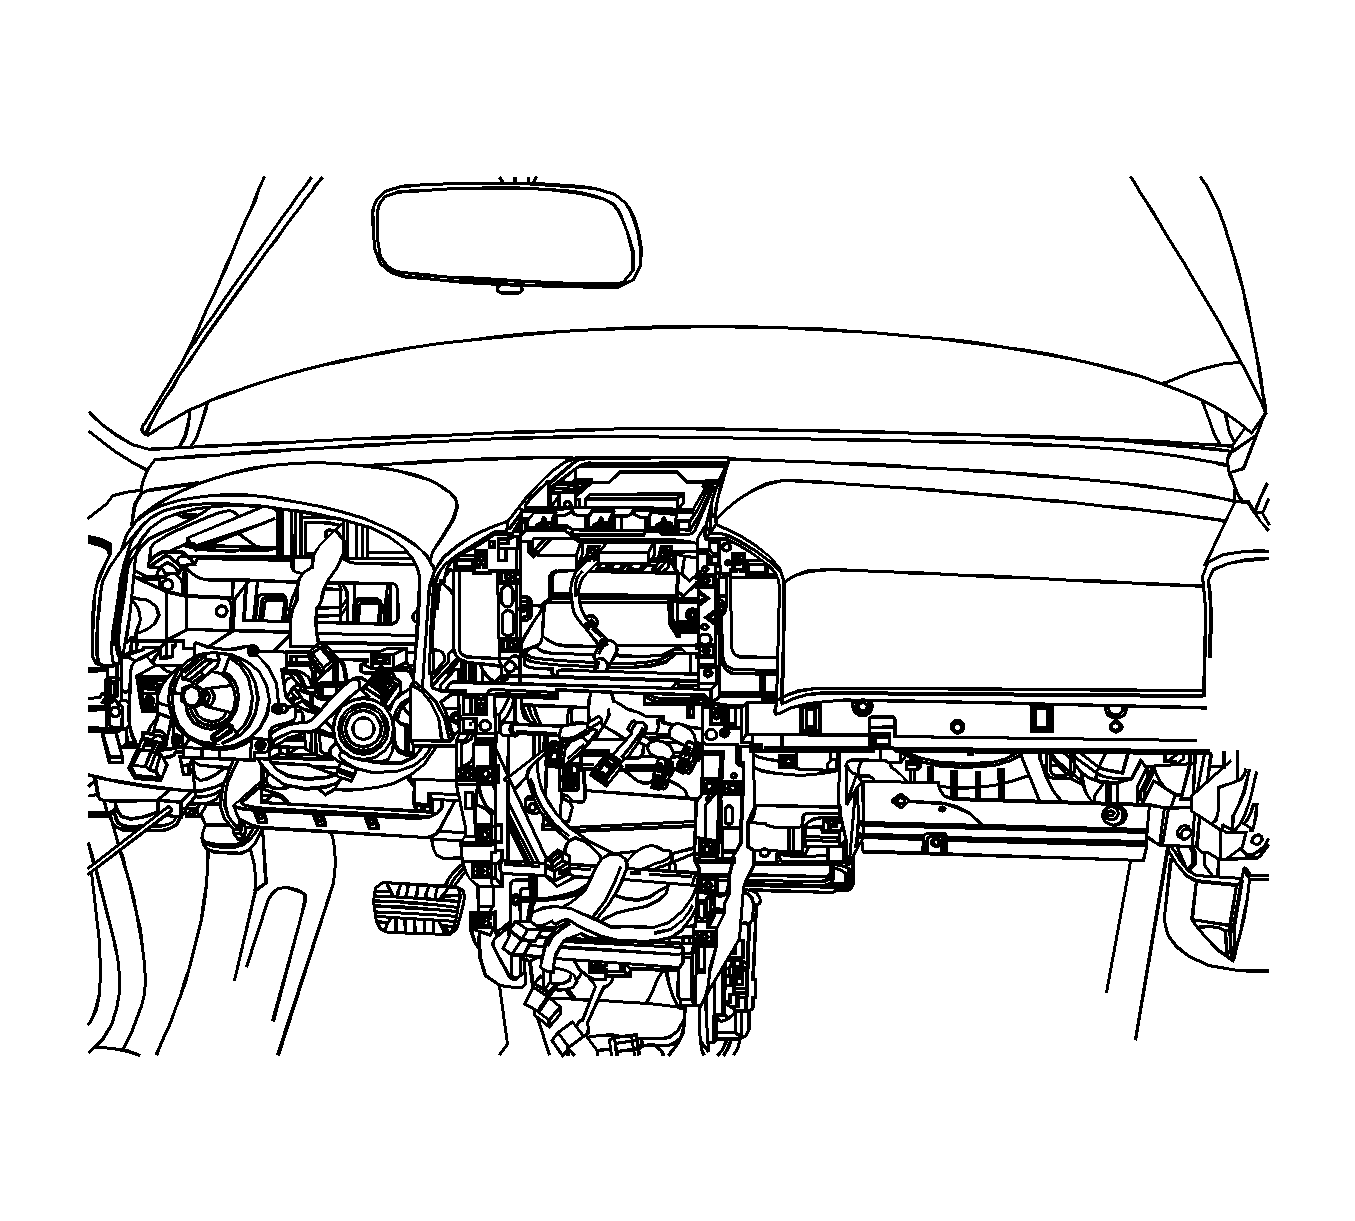
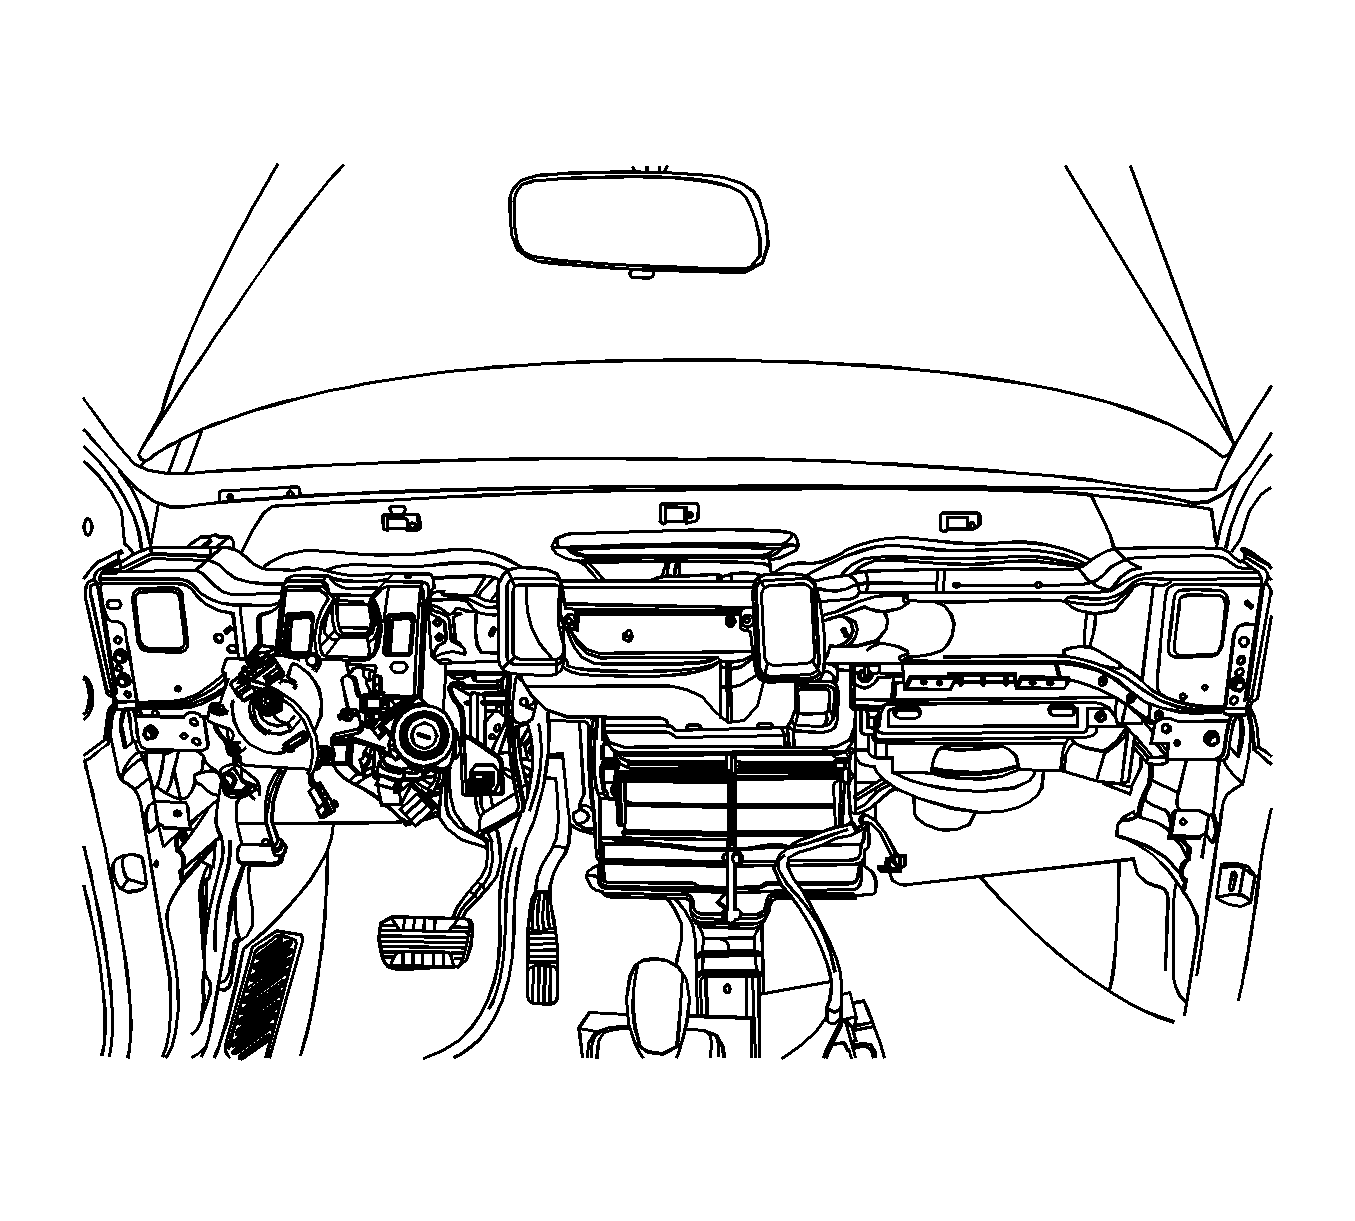
- Remove the instrument panel by pulling back to release the three upper retainers..
Caution: Refer to Battery Disconnect Caution in the Preface section.
Installation Procedure
- Position the instrument panel in the vehicle, making sure the three upper retainers are fastened.
- Connect the necessary instrument panel electrical connectors.
- Install the bolts securing the sides of the instrument panel to the body.
- Install the necessary fixing screws securing the instrument panel.
- Install the instrument panel bolts below the windshield.
- Raise the steering column and install the nuts and bolts. Refer to Steering Column Replacement .
- Install the bolts securing the left and right sides of the instrument panel.
- Install the left and right upper instrument panel bolt covers.
- Install the body control module. Refer to Body Control Module Replacement .
- Install the knee bolster. Refer to Knee Bolster Replacement .
- Install the instrument panel lower left trim. Refer to Instrument Panel Lower Trim Panel Replacement - Left Side .
- Connect the necessary instrument compartment electrical connectors.
- Install the kick panels.
- Install the instrument cluster. Refer to Instrument Cluster Replacement .
- Install the automatic temperature controls assembly. Refer to Heater and Air Conditioning Control Replacement .
- Install the instrument cluster trim panel.
- Install the headlamp leveling switch assembly. Refer to Headlamp Leveling Switch Replacement .
- Install the radio . Refer to Radio Replacement .
- Install the ambient light sensor . Refer to Ambient Light Sensor Replacement .
- Install the floor console. Refer to Console Replacement .
- Connect the negative battery cable. Refer to Battery Negative Cable Disconnection and Connection .

Notice: Refer to Fastener Notice in the Preface section.
Tighten
Tighten the instrument panel-to-body bolts to 23 N·m (17 lb ft).

Tighten
Tighten the instrument panel bolts below the windshield to 23 N·m (17 lb ft).

Tighten
Tighten the bolts on the left and right sides of the instrument panel to 10 N·m (89 lb in).


Instrument Panel Assembly Replacement C105/Short Body
Removal Procedure
- Disconnect the negative battery cable. Refer to Battery Negative Cable Disconnection and Connection .
- Remove the instrument panel lower left trim. Refer to Instrument Panel Lower Trim Panel Replacement - Left Side .
- Remove the front, rear floor console. Refer to Console Replacement .
- Remove the radio . Refer to Radio Replacement .
- Remove the headlamp leveling switch assembly. Refer to Headlamp Leveling Switch Replacement .
- Remove the instrument cluster trim panel.
- Remove the automatic temperature controls assembly. Refer to Heater and Air Conditioning Control Replacement .
- Remove the instrument cluster. Refer to Instrument Cluster Replacement .
- Remove the kick panels.
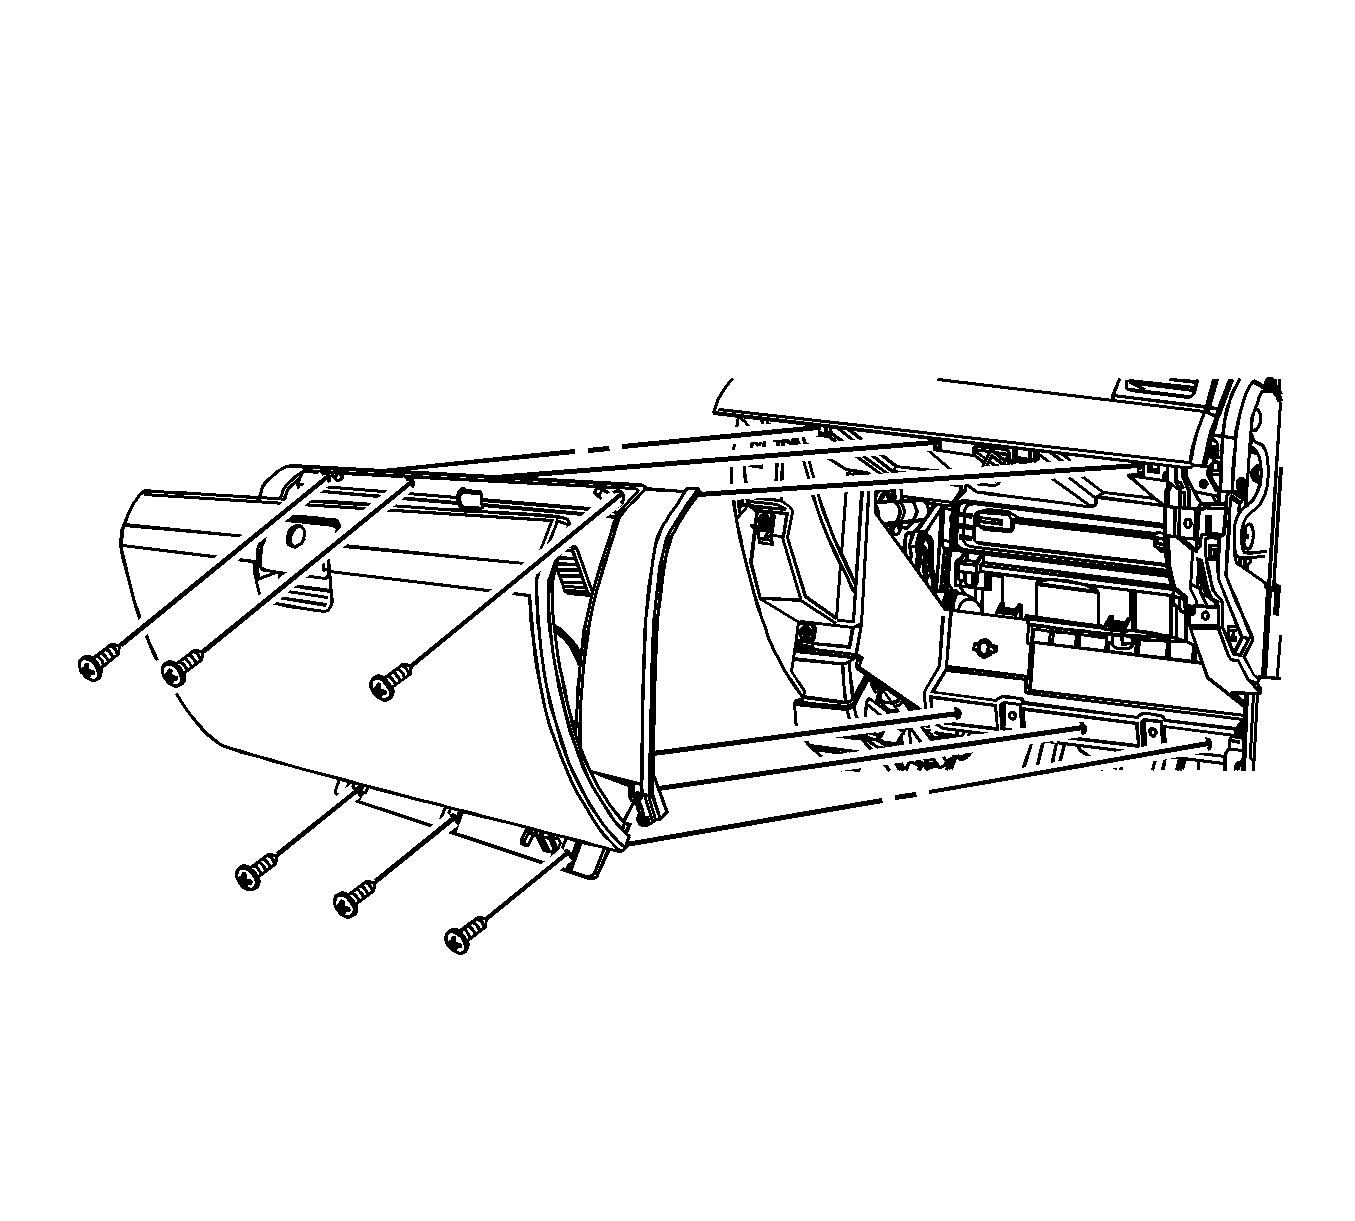
- Remove the storage compartment. Refer to Instrument Panel Storage Compartment Replacement .
- Disconnect the instrument compartment electrical connectors.
- Remove the knee bolster. Refer to Knee Bolster Replacement .
- Remove the instrument panel side covers.
- Remove the body control module. Refer to Body Control Module Replacement .
- Remove the steering wheel. Refer to Steering Wheel Replacement .
- Remove the headlamp switch. Refer to Headlamp Switch Replacement .
- Remove the wiper/washer switch. Refer to Windshield Wiper and Washer Switch Replacement .
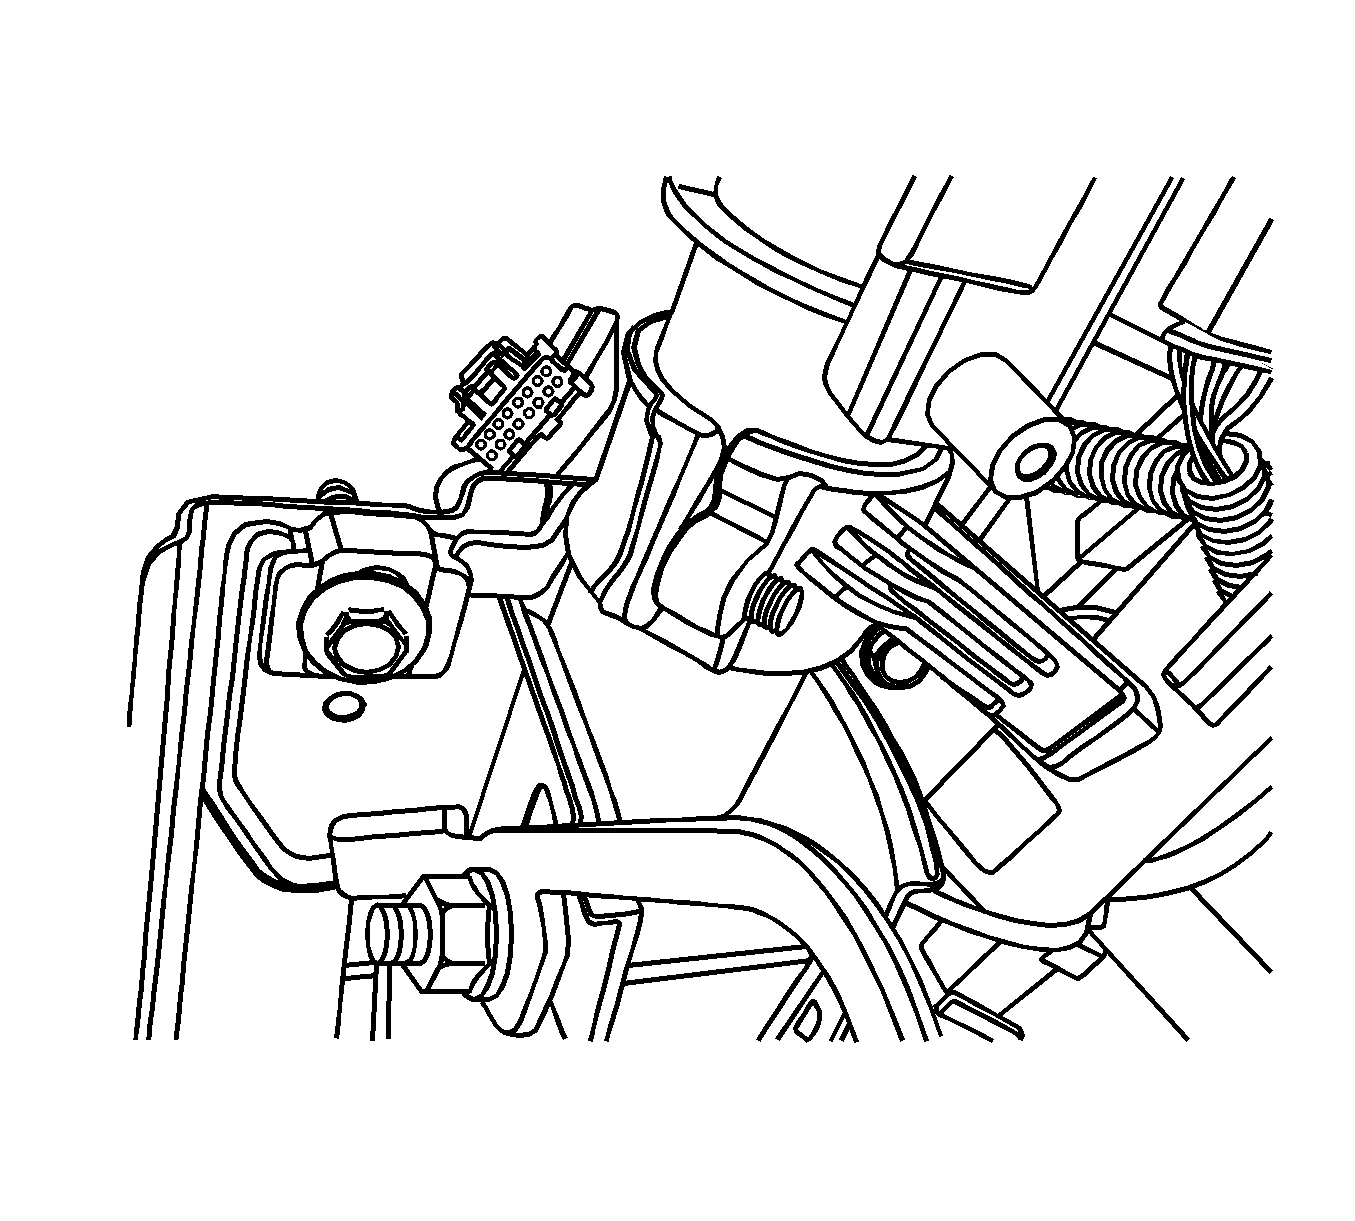
- Remove the nuts and the bolts securing the steering column.
- Disconnect the steering column electrical connector.
- Lower the steering column.
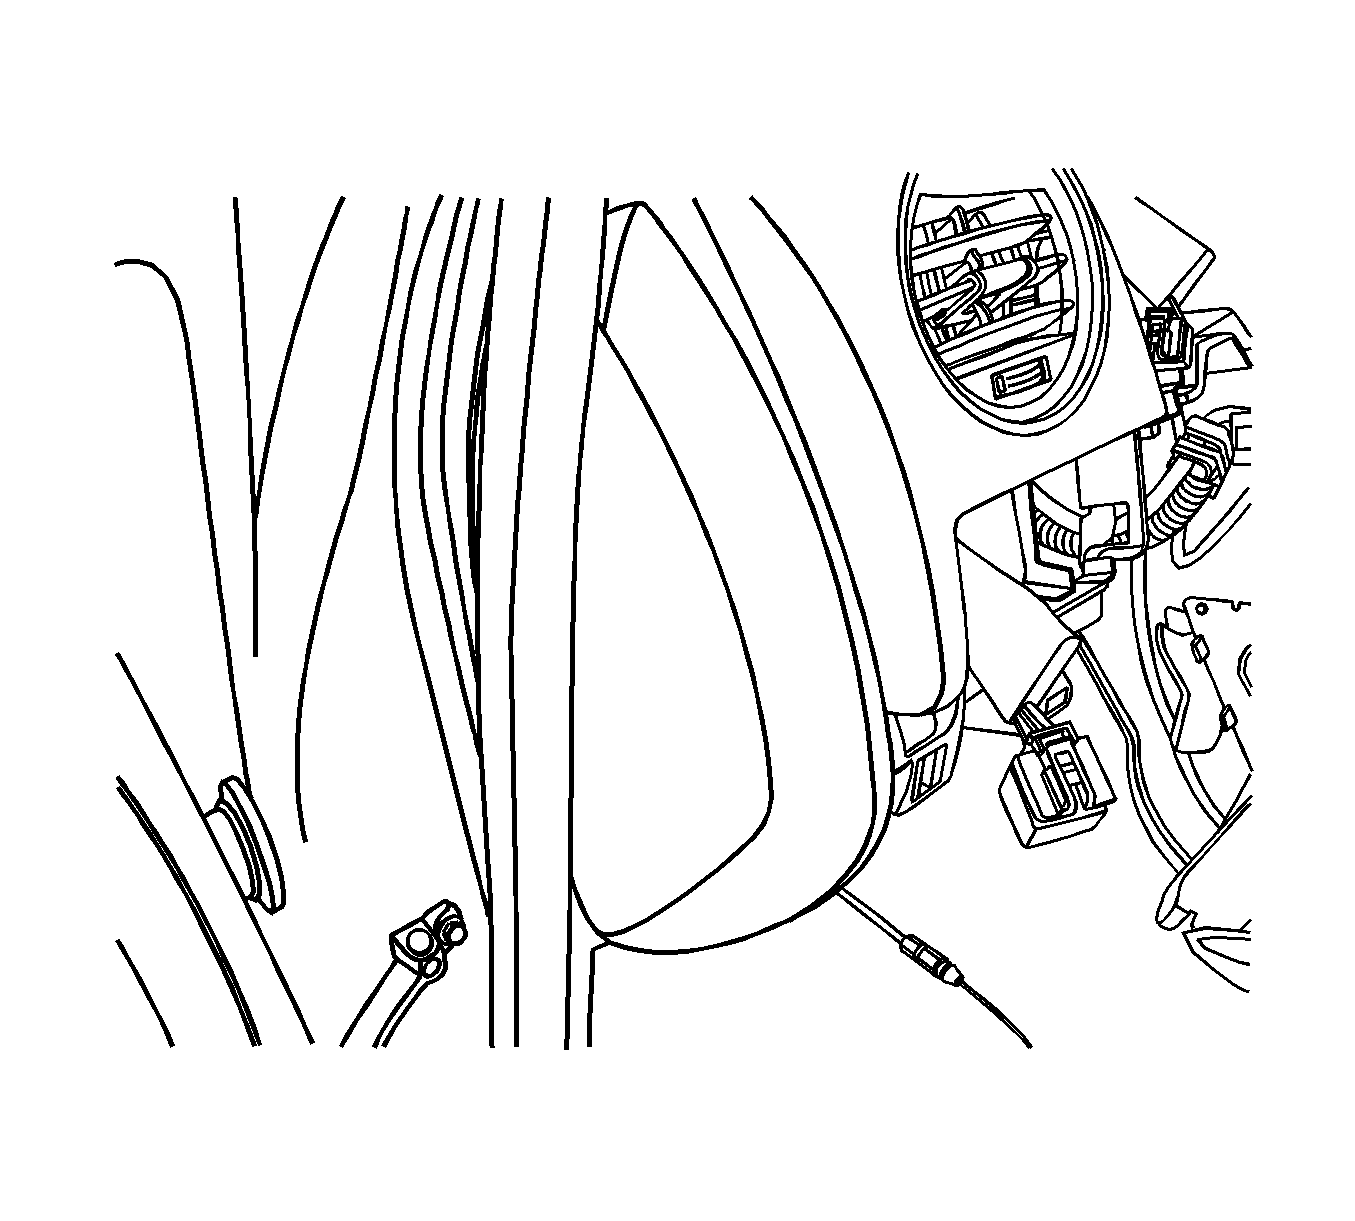
- Remove the A-pillar trim.
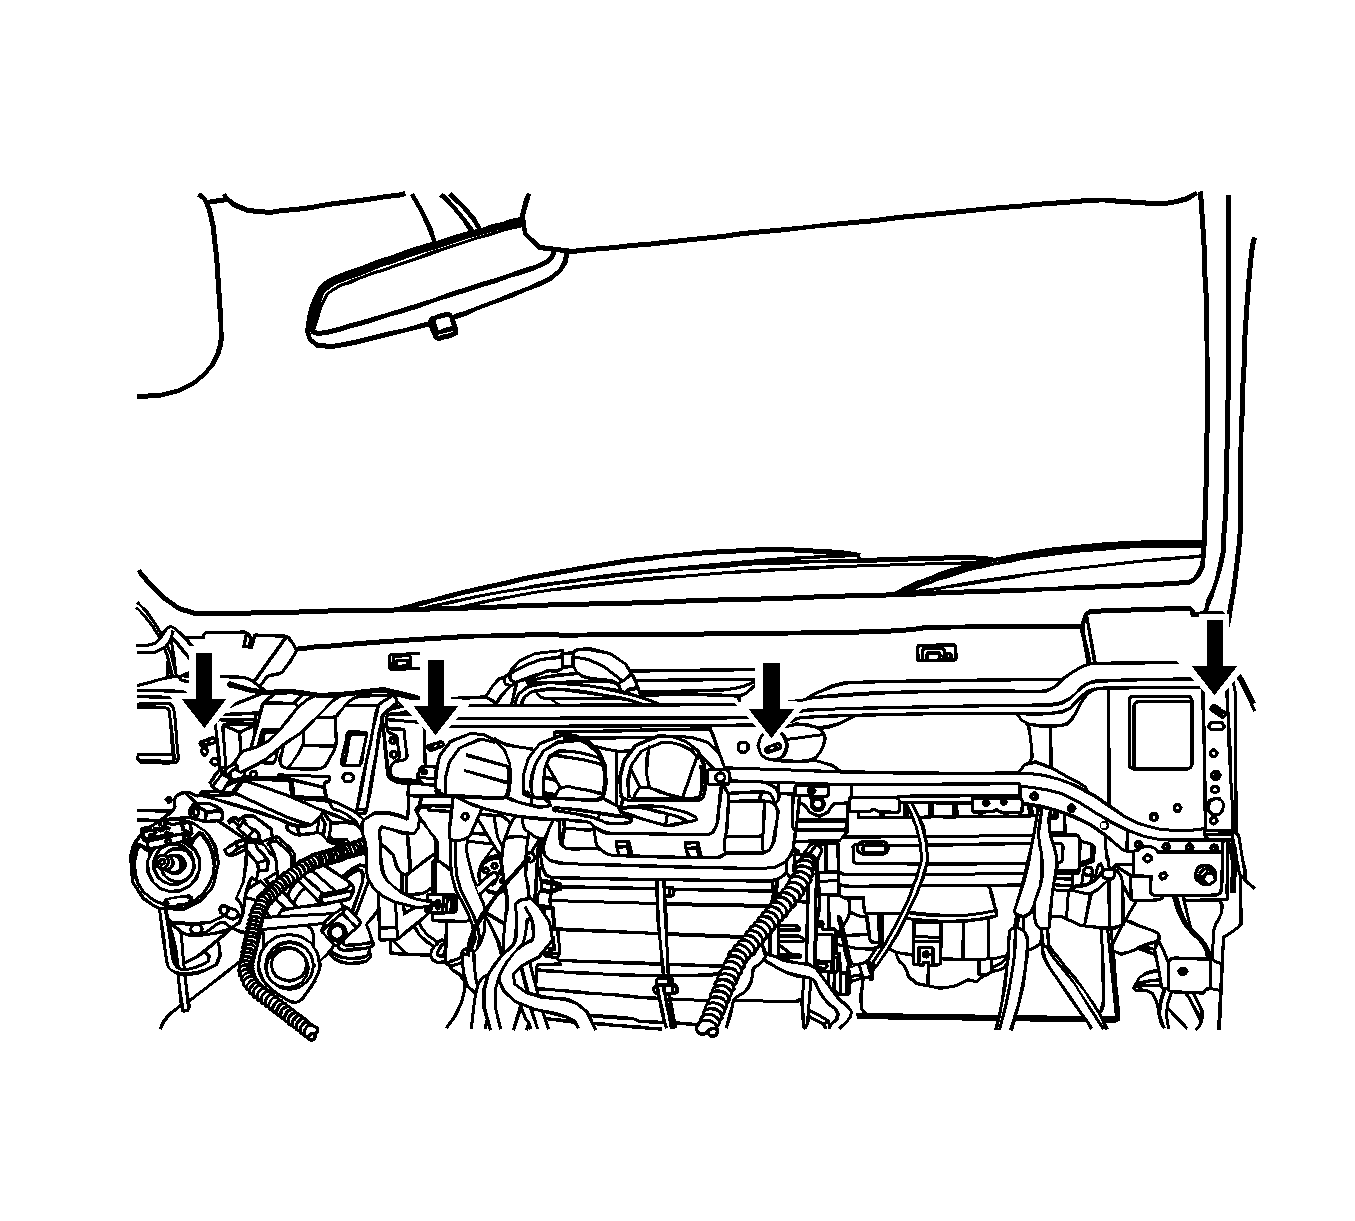
- Remove the instrument panel bolts below the windshield.
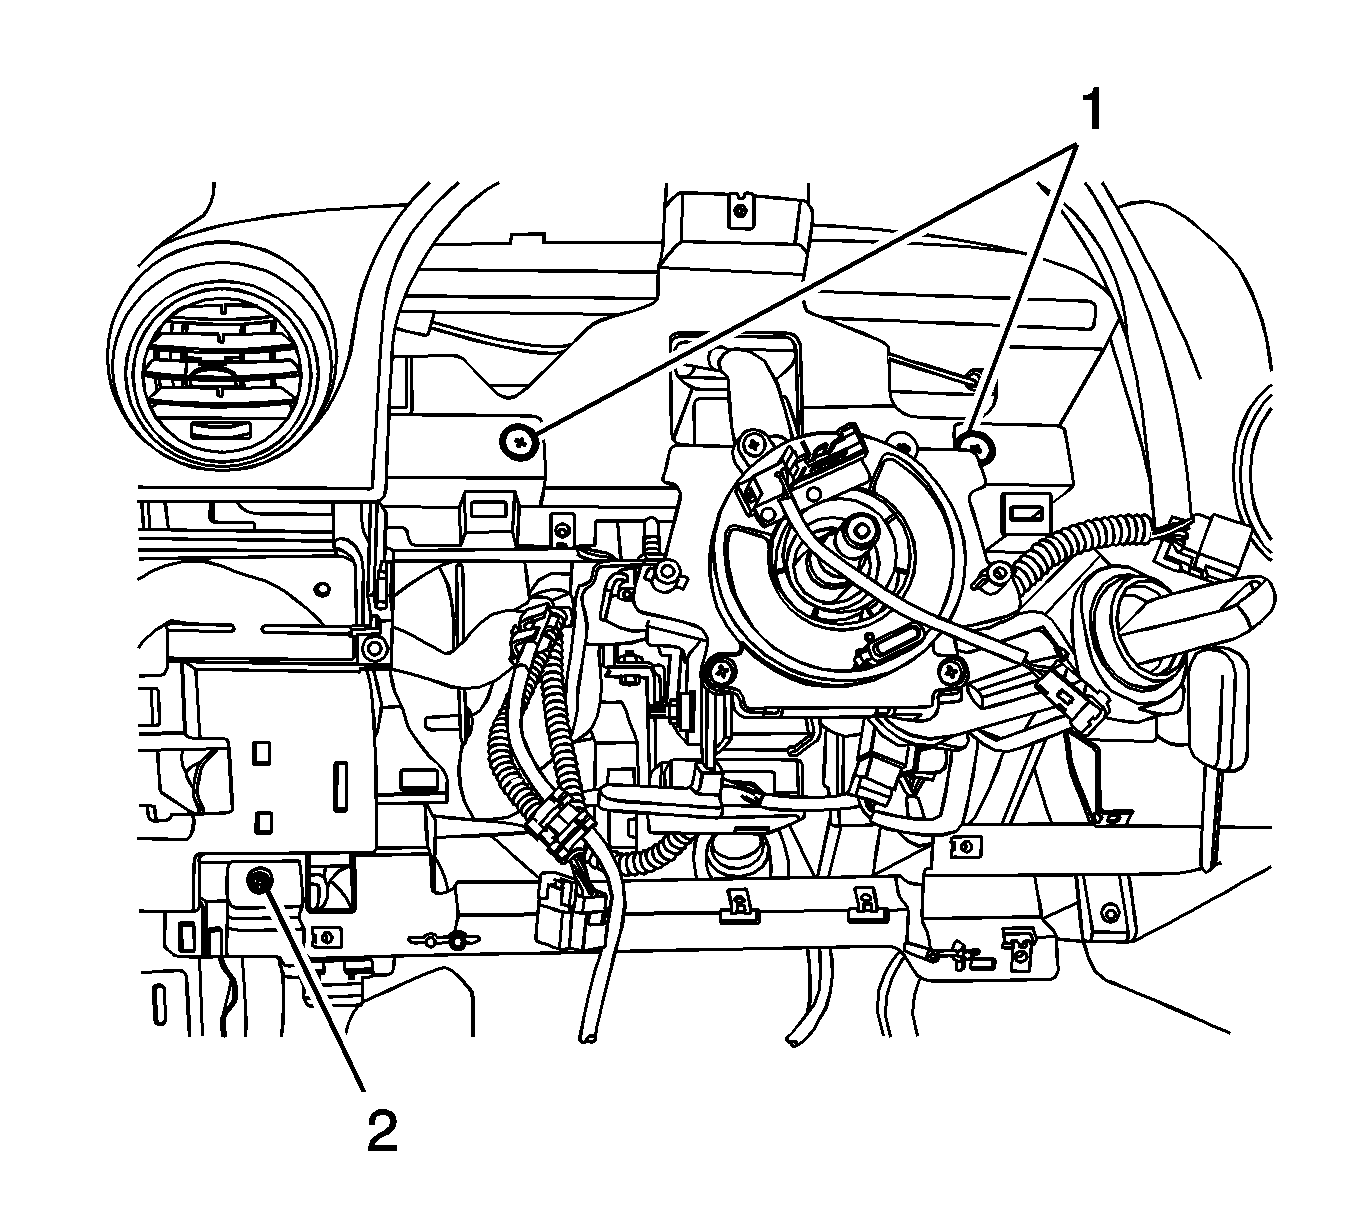
- Remove the screws (1) and the left lower instrument panel retaining bolt (2).
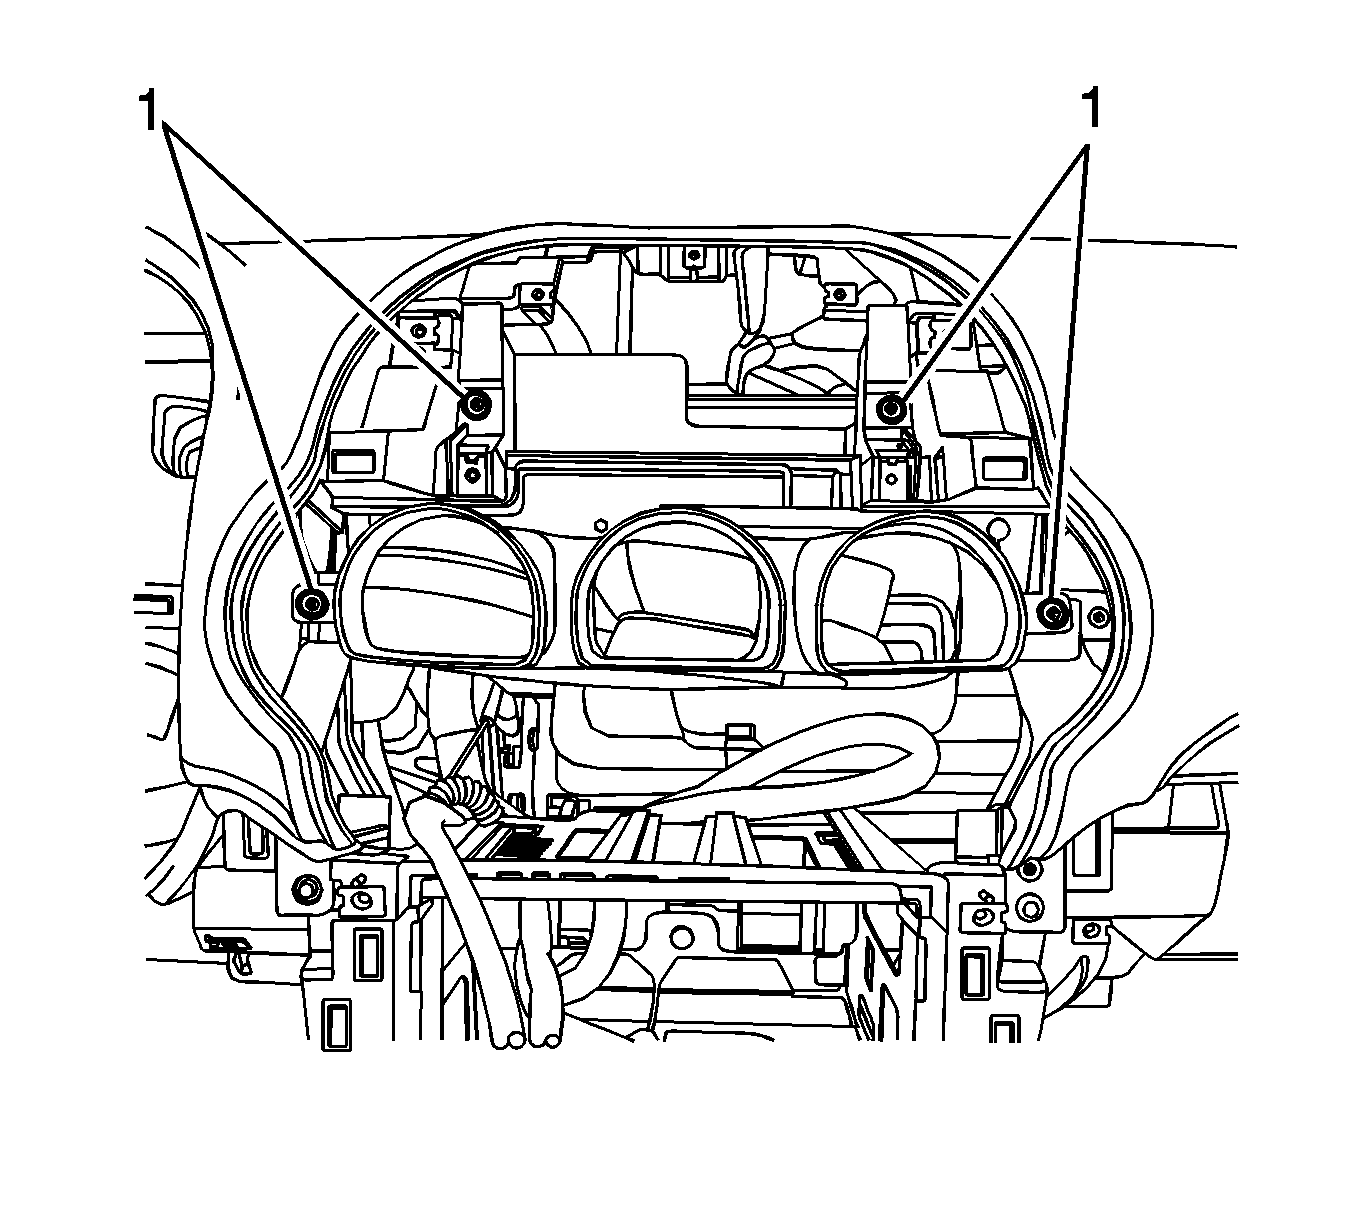
- Remove the screws (1) securing the instrument panel center.
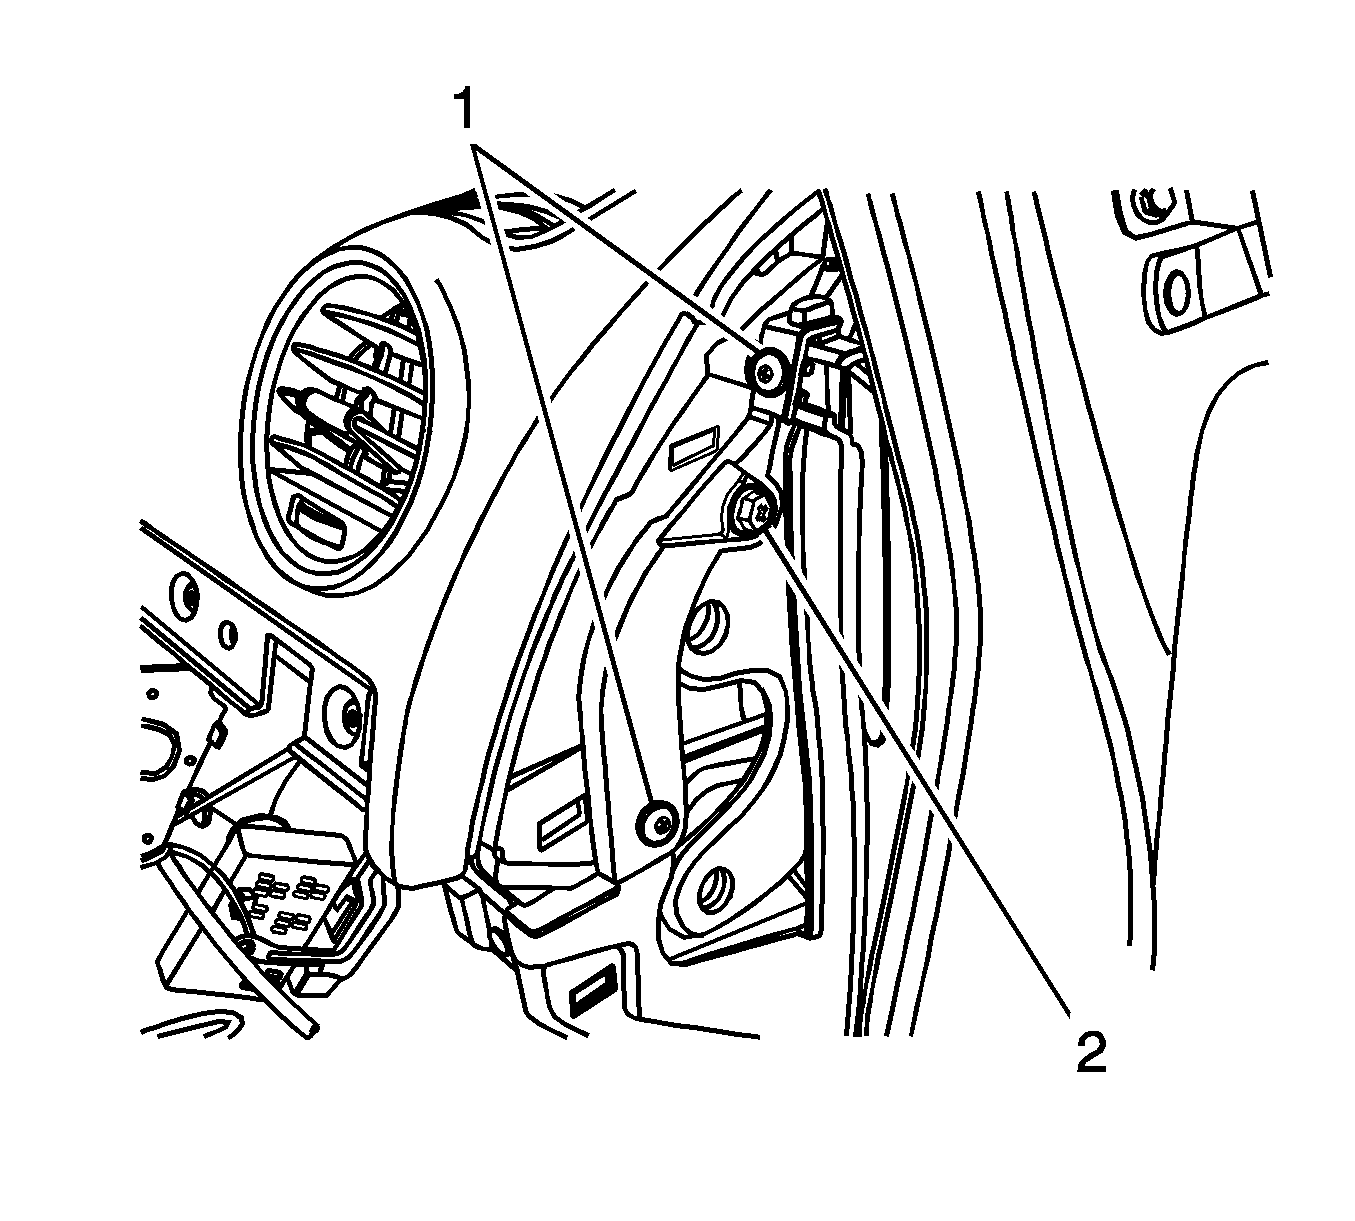
- Remove the instrument panel left and right side screws (1) and bolt (2).
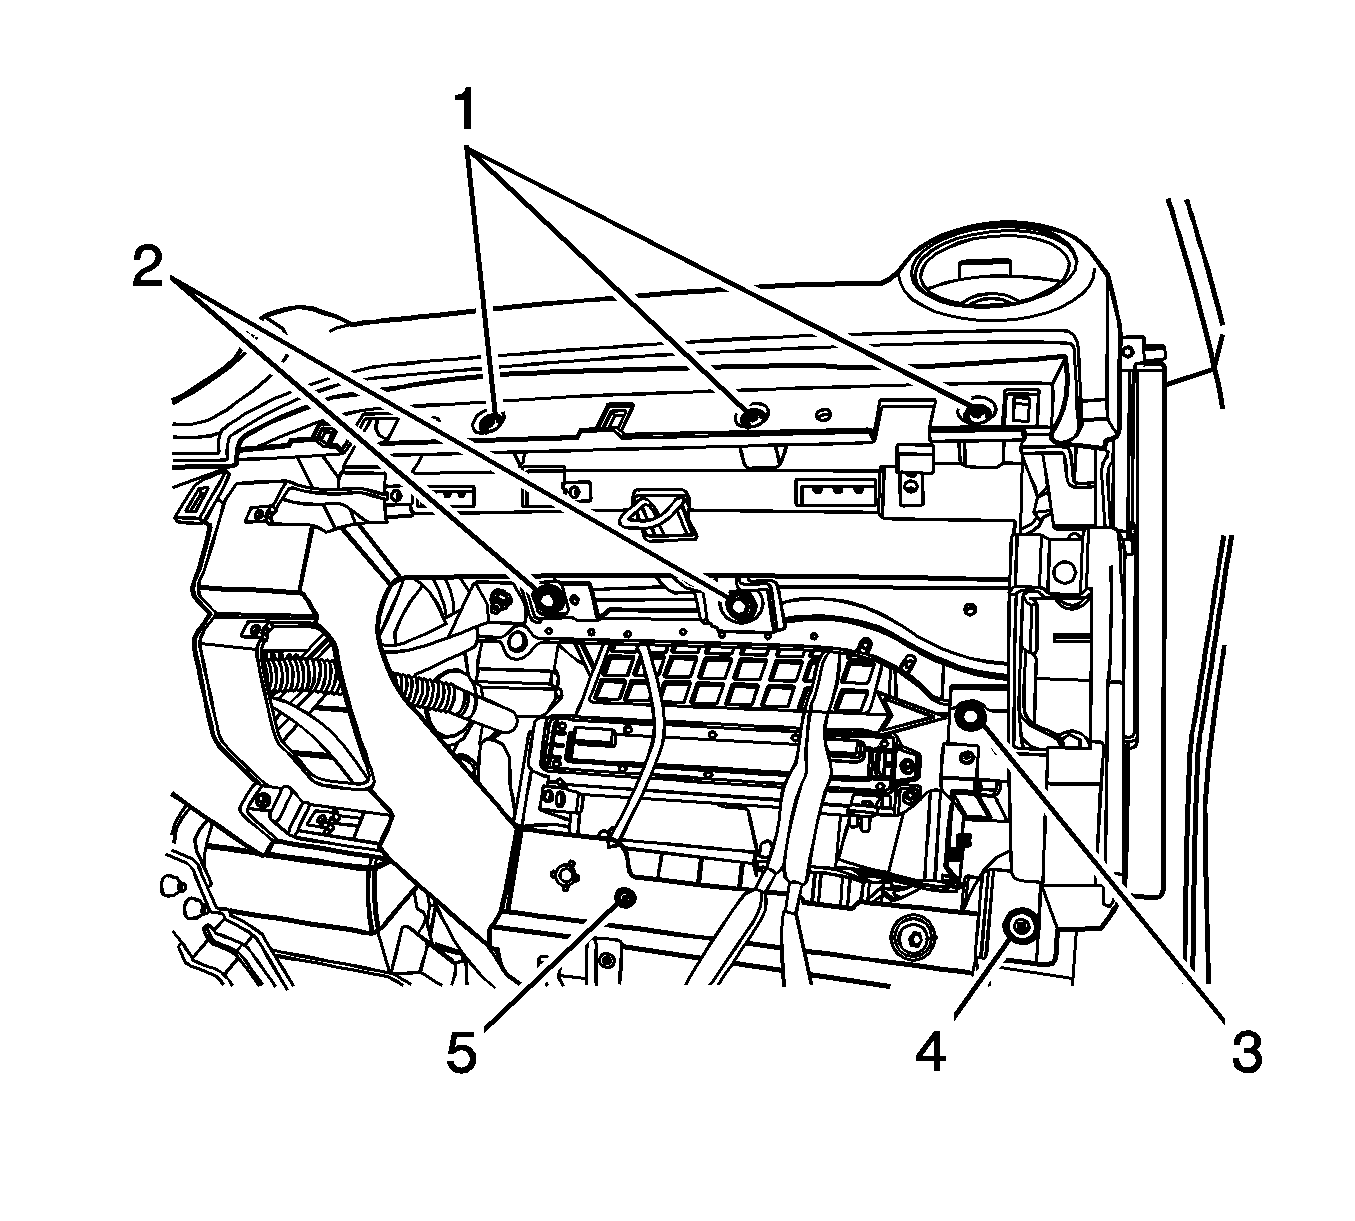
- Remove the screws (1) near the instrument panel compartment.
- Remove the air bag retaining bolts (2).
- Remove the screw (5) near the blower motor.
- Remove the right lower instrument panel retaining bolt (4).
- Remove the nut (3) securing the instrument panel backside.
- Lift up the instrument panel and remove the instrument panel to T-bar nuts.
- Disconnect the electrical connectors.
- Remove the instrument panel from the vehicle.
Caution: Refer to Battery Disconnect Caution in the Preface section.
Important: Left - Hand Drive Shown, Right - Hand Drive Similar.


Installation Procedure
- Position the instrument panel in the vehicle.
- Connect the instrument panel electrical connectors.
- Lift up the instrument panel and install the instrument panel to T-bar nuts.
- Install the nut (3) securing the instrument panel backside.
- Install the right lower instrument panel retaining bolt (4).
- Install the screw (5) near the blower motor and the screws (1) near the instrument panel compartment.
- Install the air bag retaining bolts (2).
- Install the instrument panel left and right side screws (1).
- Install the instrument panel bolt (2).
- Install the screws (1) securing the instrument panel center.
- Install the instrument panel screws (1).
- Install the instrument panel retaining bolt (2).
- Install the instrument panel bolts below the windshield.
- Install the A-pillar trim.
- Raise the steering column.
- Connect the steering column electrical connector.
- Install the bolts securing the steering column.
- Install the headlamp switch. Refer to Headlamp Switch Replacement .
- Install the wiper/washer switch. Refer to Windshield Wiper and Washer Switch Replacement .
- Install the steering wheel. Refer to Steering Wheel Replacement .
- Install the body control module. Refer to Body Control Module Replacement .
- Install the instrument panel side covers.
- Install the knee bolster. Refer to Knee Bolster Replacement .
- Install the instrument panel lower left trim. Refer to Instrument Panel Lower Trim Panel Replacement - Left Side .
- Connect the instrument compartment electrical connectors.
- Install the storage compartment. Refer to Instrument Panel Storage Compartment Replacement .
- Install the kick panels.
- Install the instrument cluster. Refer to Instrument Cluster Replacement .
- Install the automatic temperature controls assembly. Refer to Heater and Air Conditioning Control Replacement .
- Install the instrument cluster trim panel.
- Install the headlamp leveling switch assembly. Refer to Headlamp Leveling Switch Replacement .
- Install the radio . Refer to Radio Replacement .
- Install the ambient light sensor . Refer to Ambient Light Sensor Replacement
- Install the floor console. Refer to Console Replacement .
- Connect the negative battery cable. Refer to Battery Negative Cable Disconnection and Connection .

Notice: Refer to Fastener Notice in the Preface section.
Tighten
Tighten the instrument panel to T-bar nuts to 10 N·m (89 lb in).

Tighten
Tighten the instrument panel backside nut to 10 N·m (89 lb in).
Tighten
Tighten the right lower instrument panel retaining bolt to 10 N·m (89 lb in).
Tighten
Tighten the screws near the blower motor and the instrument panel compartment to 2 N·m (18 lb in).
Tighten
Tighten the air bag retaining bolts to 10 N·m (89 lb in).

Tighten
Tighten the left and right side instrument panel screws to 2 N·m (18 lb in).
Tighten
Tighten the instrument panel bolt to 10 N·m (89 lb in).

Tighten
Tighten the instrument panel center screws to 2 N·m (18 lb in).

Tighten
Tighten the instrument panel screws to 10 N·m (89 lb in).
Tighten
Tighten the instrument panel retaining bolt to 10 N·m (89 lb in).

Tighten
Tighten the instrument panel bolts below the windshield to 23 N·m (17 lb ft).

Tighten
Tighten the steering column bolts to 22 N·m (16 lb ft).


