Description
Inspection of the transaxle fluid level, correct type of fluid, and the condition of the fluid for accurate operation of the transaxle.
Procedure

Note: Routine inspection of the transaxle fluid is not required. Transaxle fluid inspection is only required if there is a symptom indicating a concern with the fluid.
- Park the vehicle on a flat level surface.
- Operate the vehicle in order for the transmission fluid temperature to reach the normal operating range of
70-80°C (158-176°F).
- With the engine at idle, manual shift through all transaxle ranges and return to the PARK position. Leave the engine idling.
- Clean any dirt or debris away from the area of the transaxle fluid level indicator.
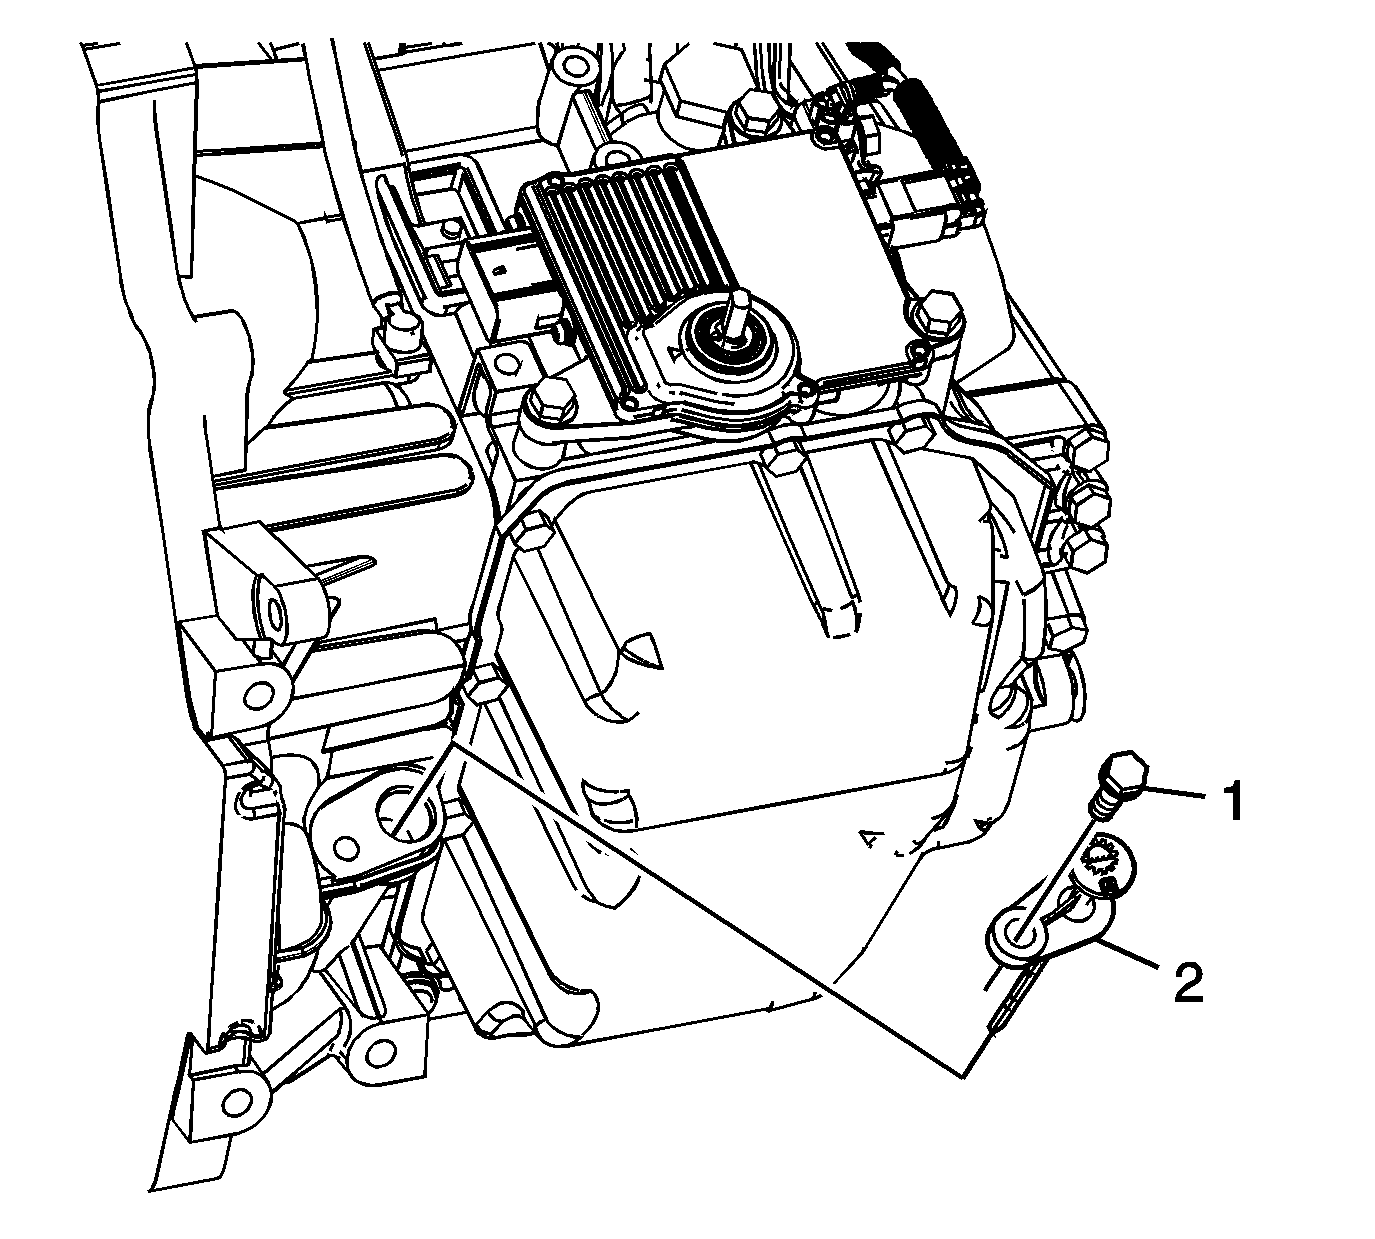
- Remove the transaxle fluid level indicator bolt (1) from the transaxle.
- Remove the transaxle fluid level indicator (2).
- Wipe away any transaxle fluid from the indicator.
- Insert the indicator into the transaxle until fully seated.

Note: Inspecting transaxle fluid level when not at normal temperature can give an incorrect measurement. The transaxle fluid expands when warm.
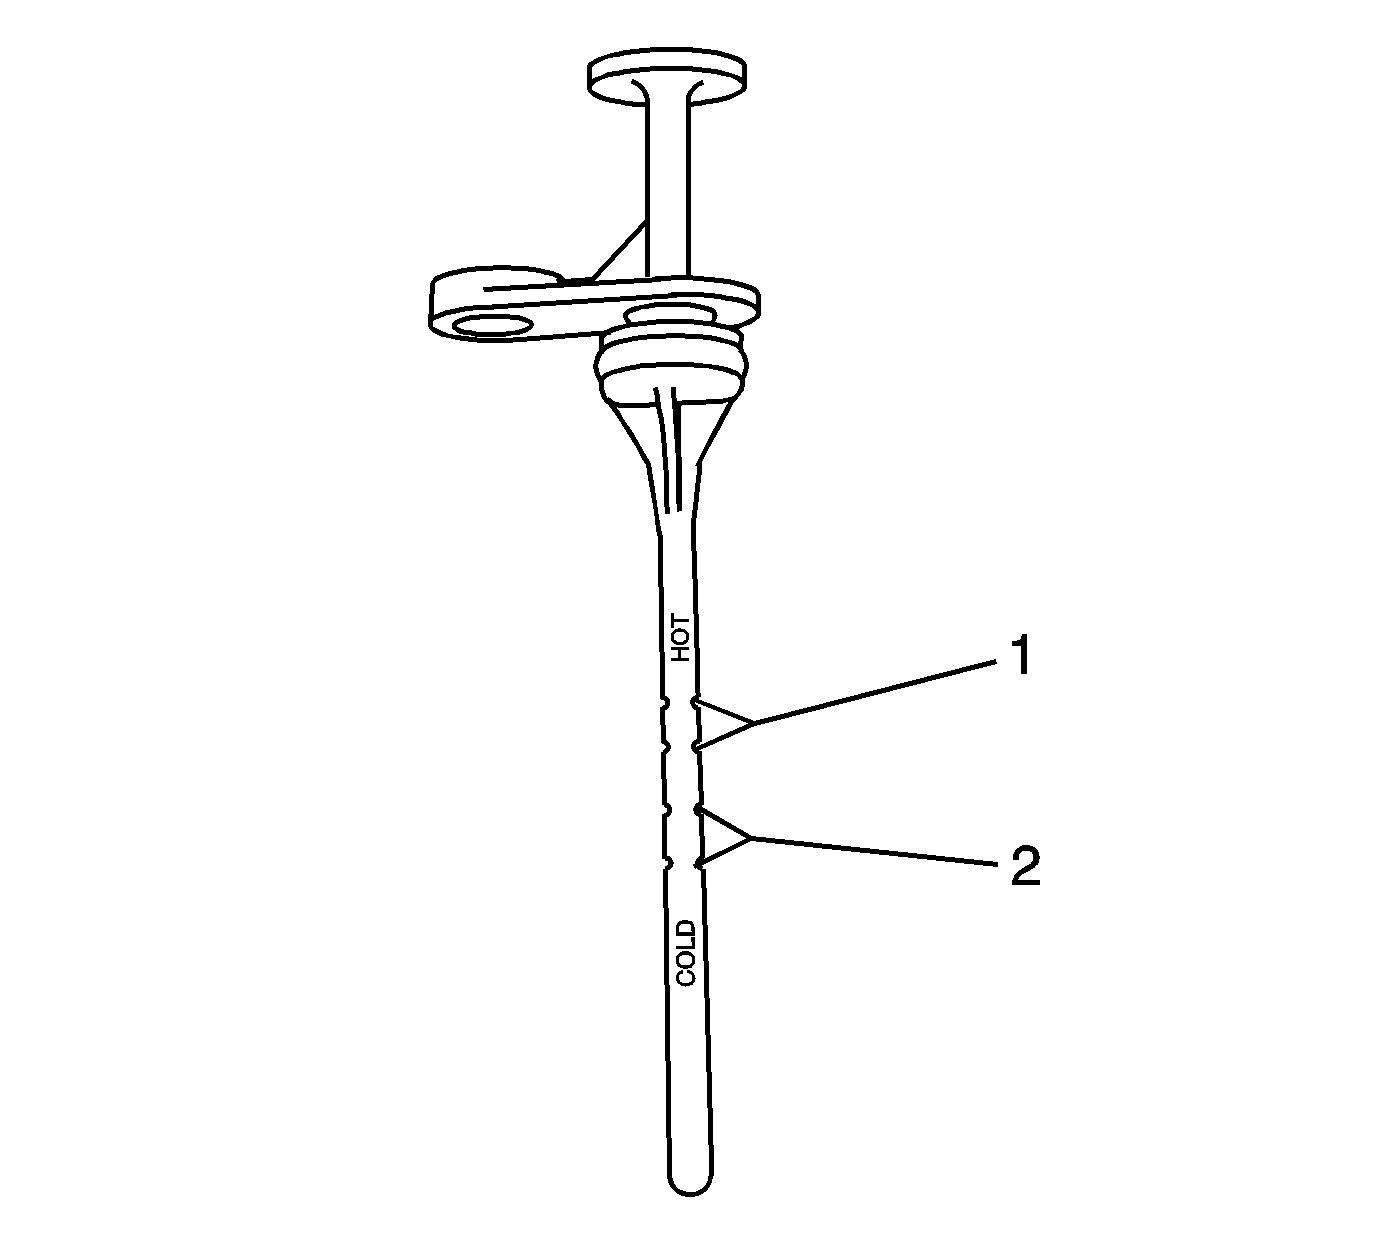
- Remove the indicator and inspect the level and the condition of the oil on the indicator:
| • | Transmission fluid level at normal operating temperature (1) |
| • | Transmission fluid level if cold (2) |
- If the fluid level is incorrect inspect for the following conditions:
| • | Fluid above level, inspect for contamination of the fluid. |
Note: The transaxle uses T-IV fluid, GM P/N 88900925 (Canadian P/N 22689186). The fluid is normally red in color. The oil may darken in color with more miles on a vehicle.
- Inspect the condition of the fluid for the following conditions:
| • | Excessively dirty with particles in the fluid |
| - | If drivability concerns are present disassemble and inspect for a cause. |
| - | Inspect for conditions that may of cause overheating of the transmission fluid. Refer to
Transmission Overheats. |
| - | If drivability concerns are present disassemble and inspect for cause. |
| - | Disassemble the transaxle and inspect for components that may have over heated. |
| • | Milky or white tint in color from coolant or water |
| - | Inspect for missing or improperly routed vent hose. |
| - | Inspect for missing fill plug. |
- Install the fluid level indicator.
Caution: Use the correct fastener in the correct location. Replacement fasteners must be the correct part number for that application. Fasteners requiring replacement or fasteners requiring the use of
thread locking compound or sealant are identified in the service procedure. Do not use paints, lubricants, or corrosion inhibitors on fasteners or fastener joint surfaces unless specified. These coatings affect fastener torque and joint clamping force and may
damage the fastener. Use the correct tightening sequence and specifications when installing fasteners in order to avoid damage to parts and systems.
- Install the fluid indicator bolt to
10 N·m (89 lb in).


