For 1990-2009 cars only
Special Tools
Snap On® A145 Clutch Alignment Set or Equivalent
Removal Procedure
- Remove the transmission. Refer to Transmission Replacement.
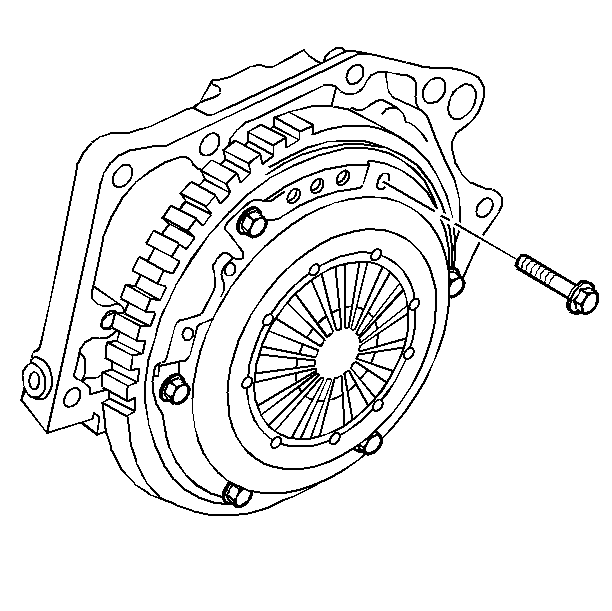
- Remove the clutch cover bolts one turn at a time, until spring pressure is relieved.
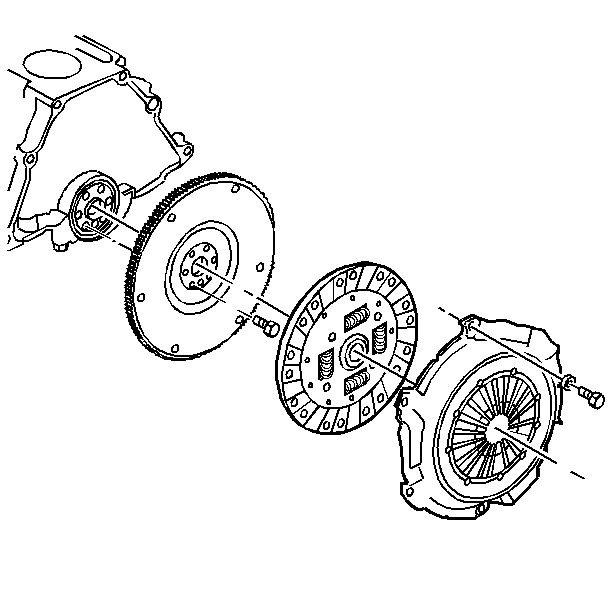
- Remove the clutch cover and the clutch disc.


Installation Procedure
- Adjust the clutch pressure plate, if necessary. Refer to Clutch Pressure Plate Adjustment.
- Install the clutch disc and the clutch cover.
- Hand start the clutch cover to flywheel bolts, leaving the clutch cover loose enough to reposition for alignment.
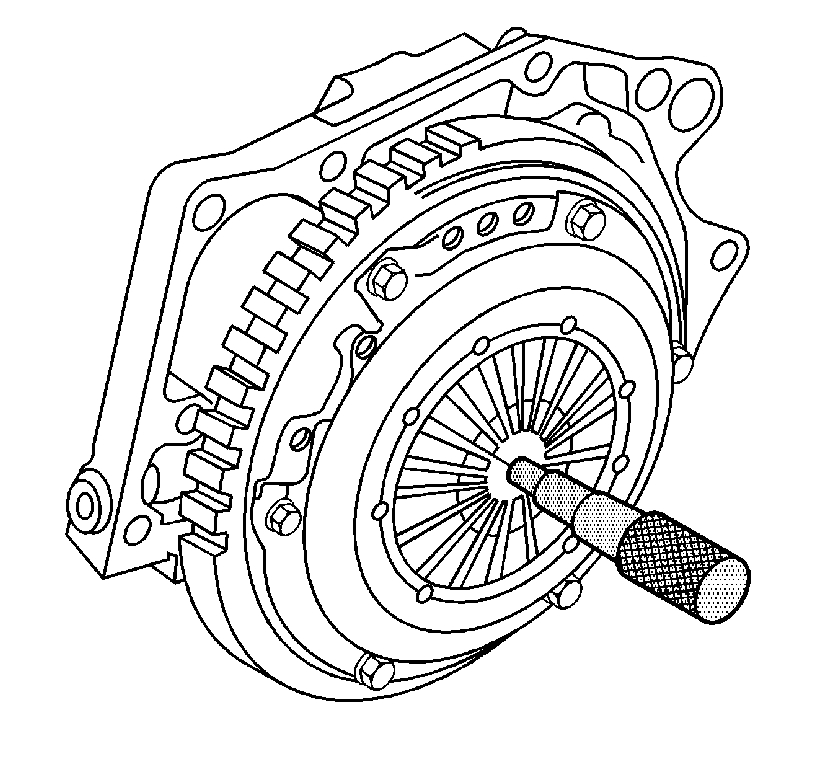
- Install the correct alignment tool from the Snap On® A145, Clutch Alignment Set, or equivalent, in order to support the clutch cover to the flywheel assembly.
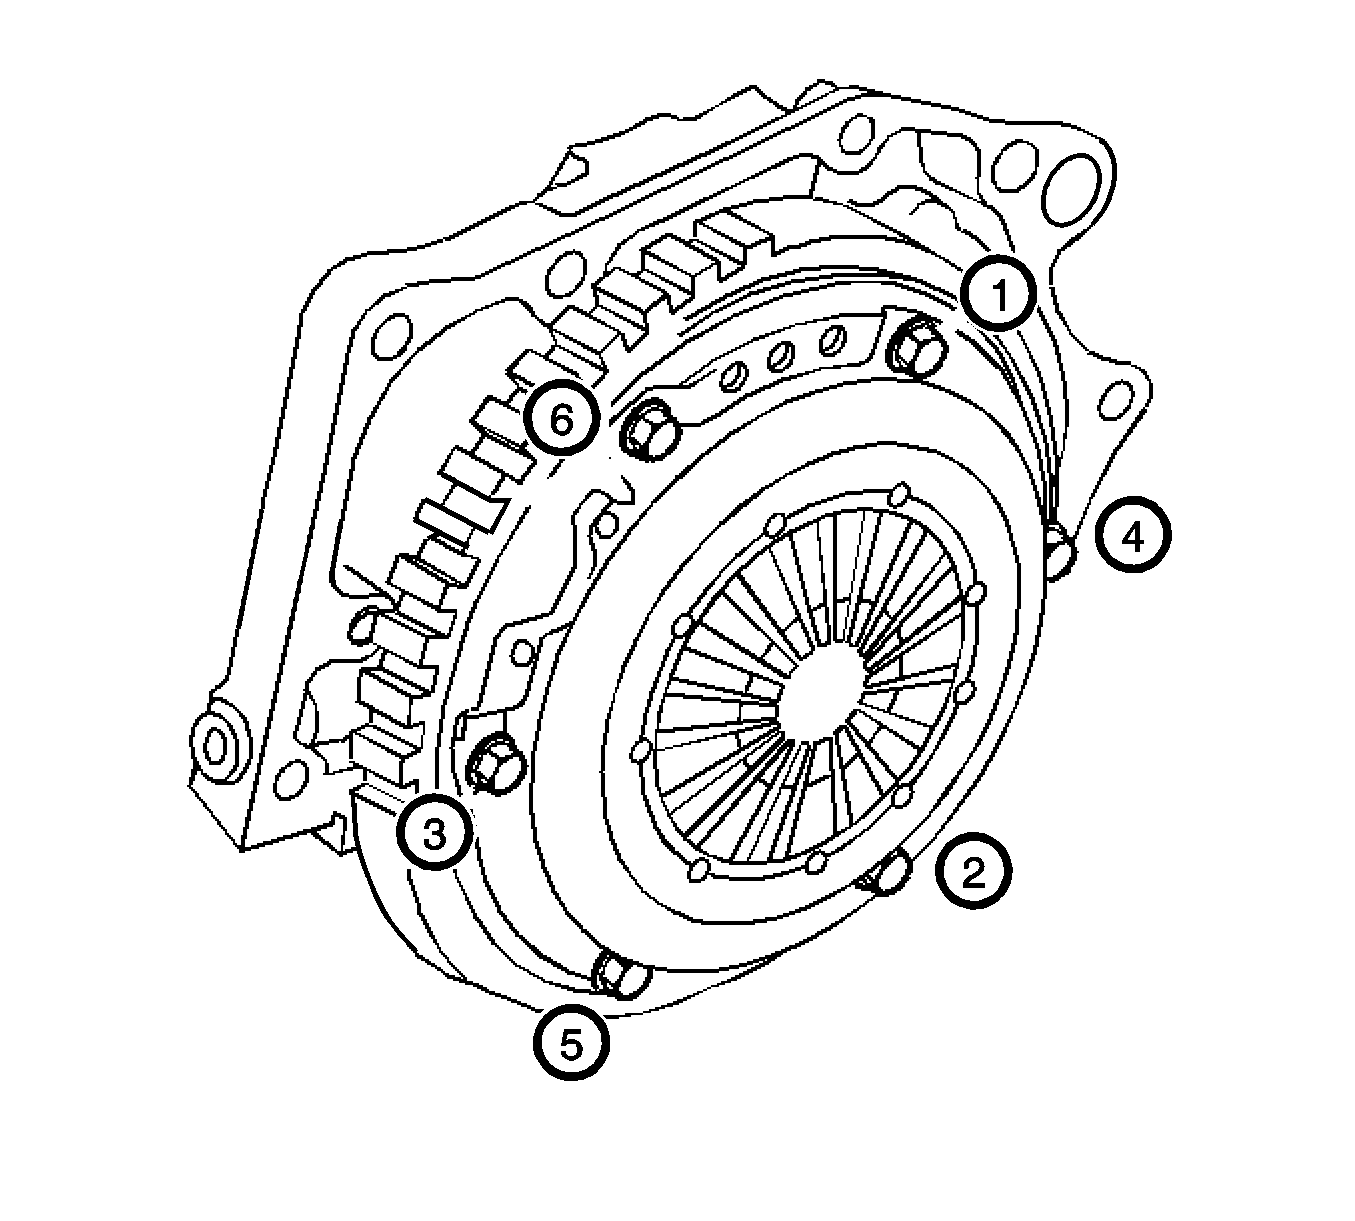
- Tighten the clutch cover to flywheel bolts in the sequence shown.
- Recheck each bolt torque using the tightening sequence.
- Remove the Snap On® A145 tool.
- Lubricate the inside diameter of the bearing.
- Install the transmission. Refer to Transmission Replacement.
- Bleed the hydraulic system. Refer to Hydraulic Clutch Bleeding.
- Connect the negative battery cable.


Caution: Refer to Fastener Caution in the Preface section.

Tighten
Tighten the bolts to 30 N·m (22 lb ft).
Note: Excessive amounts of lubricant on the input shaft splines may contaminate the clutch disc and cause clutch shudder.
