For 1990-2009 cars only
Caution: Refer to Fastener Caution in the Preface section.
Special Tools
CH-49289 Centering Adapter Subframe Body
For equivalent regional tools, refer to Special Tools.
Removal Procedure
- Remove the front wheels. Refer to Tire and Wheel Removal and Installation.
- Remove the undertray.
- Remove the front fascia. Refer to Front Bumper Fascia Replacement.
- Tie the radiator, air conditioning condenser, and fan module assembly to the upper radiator support to keep the assembly with the vehicle when the frame is lowered.
- Remove the resonator. Refer to Resonator Replacement.
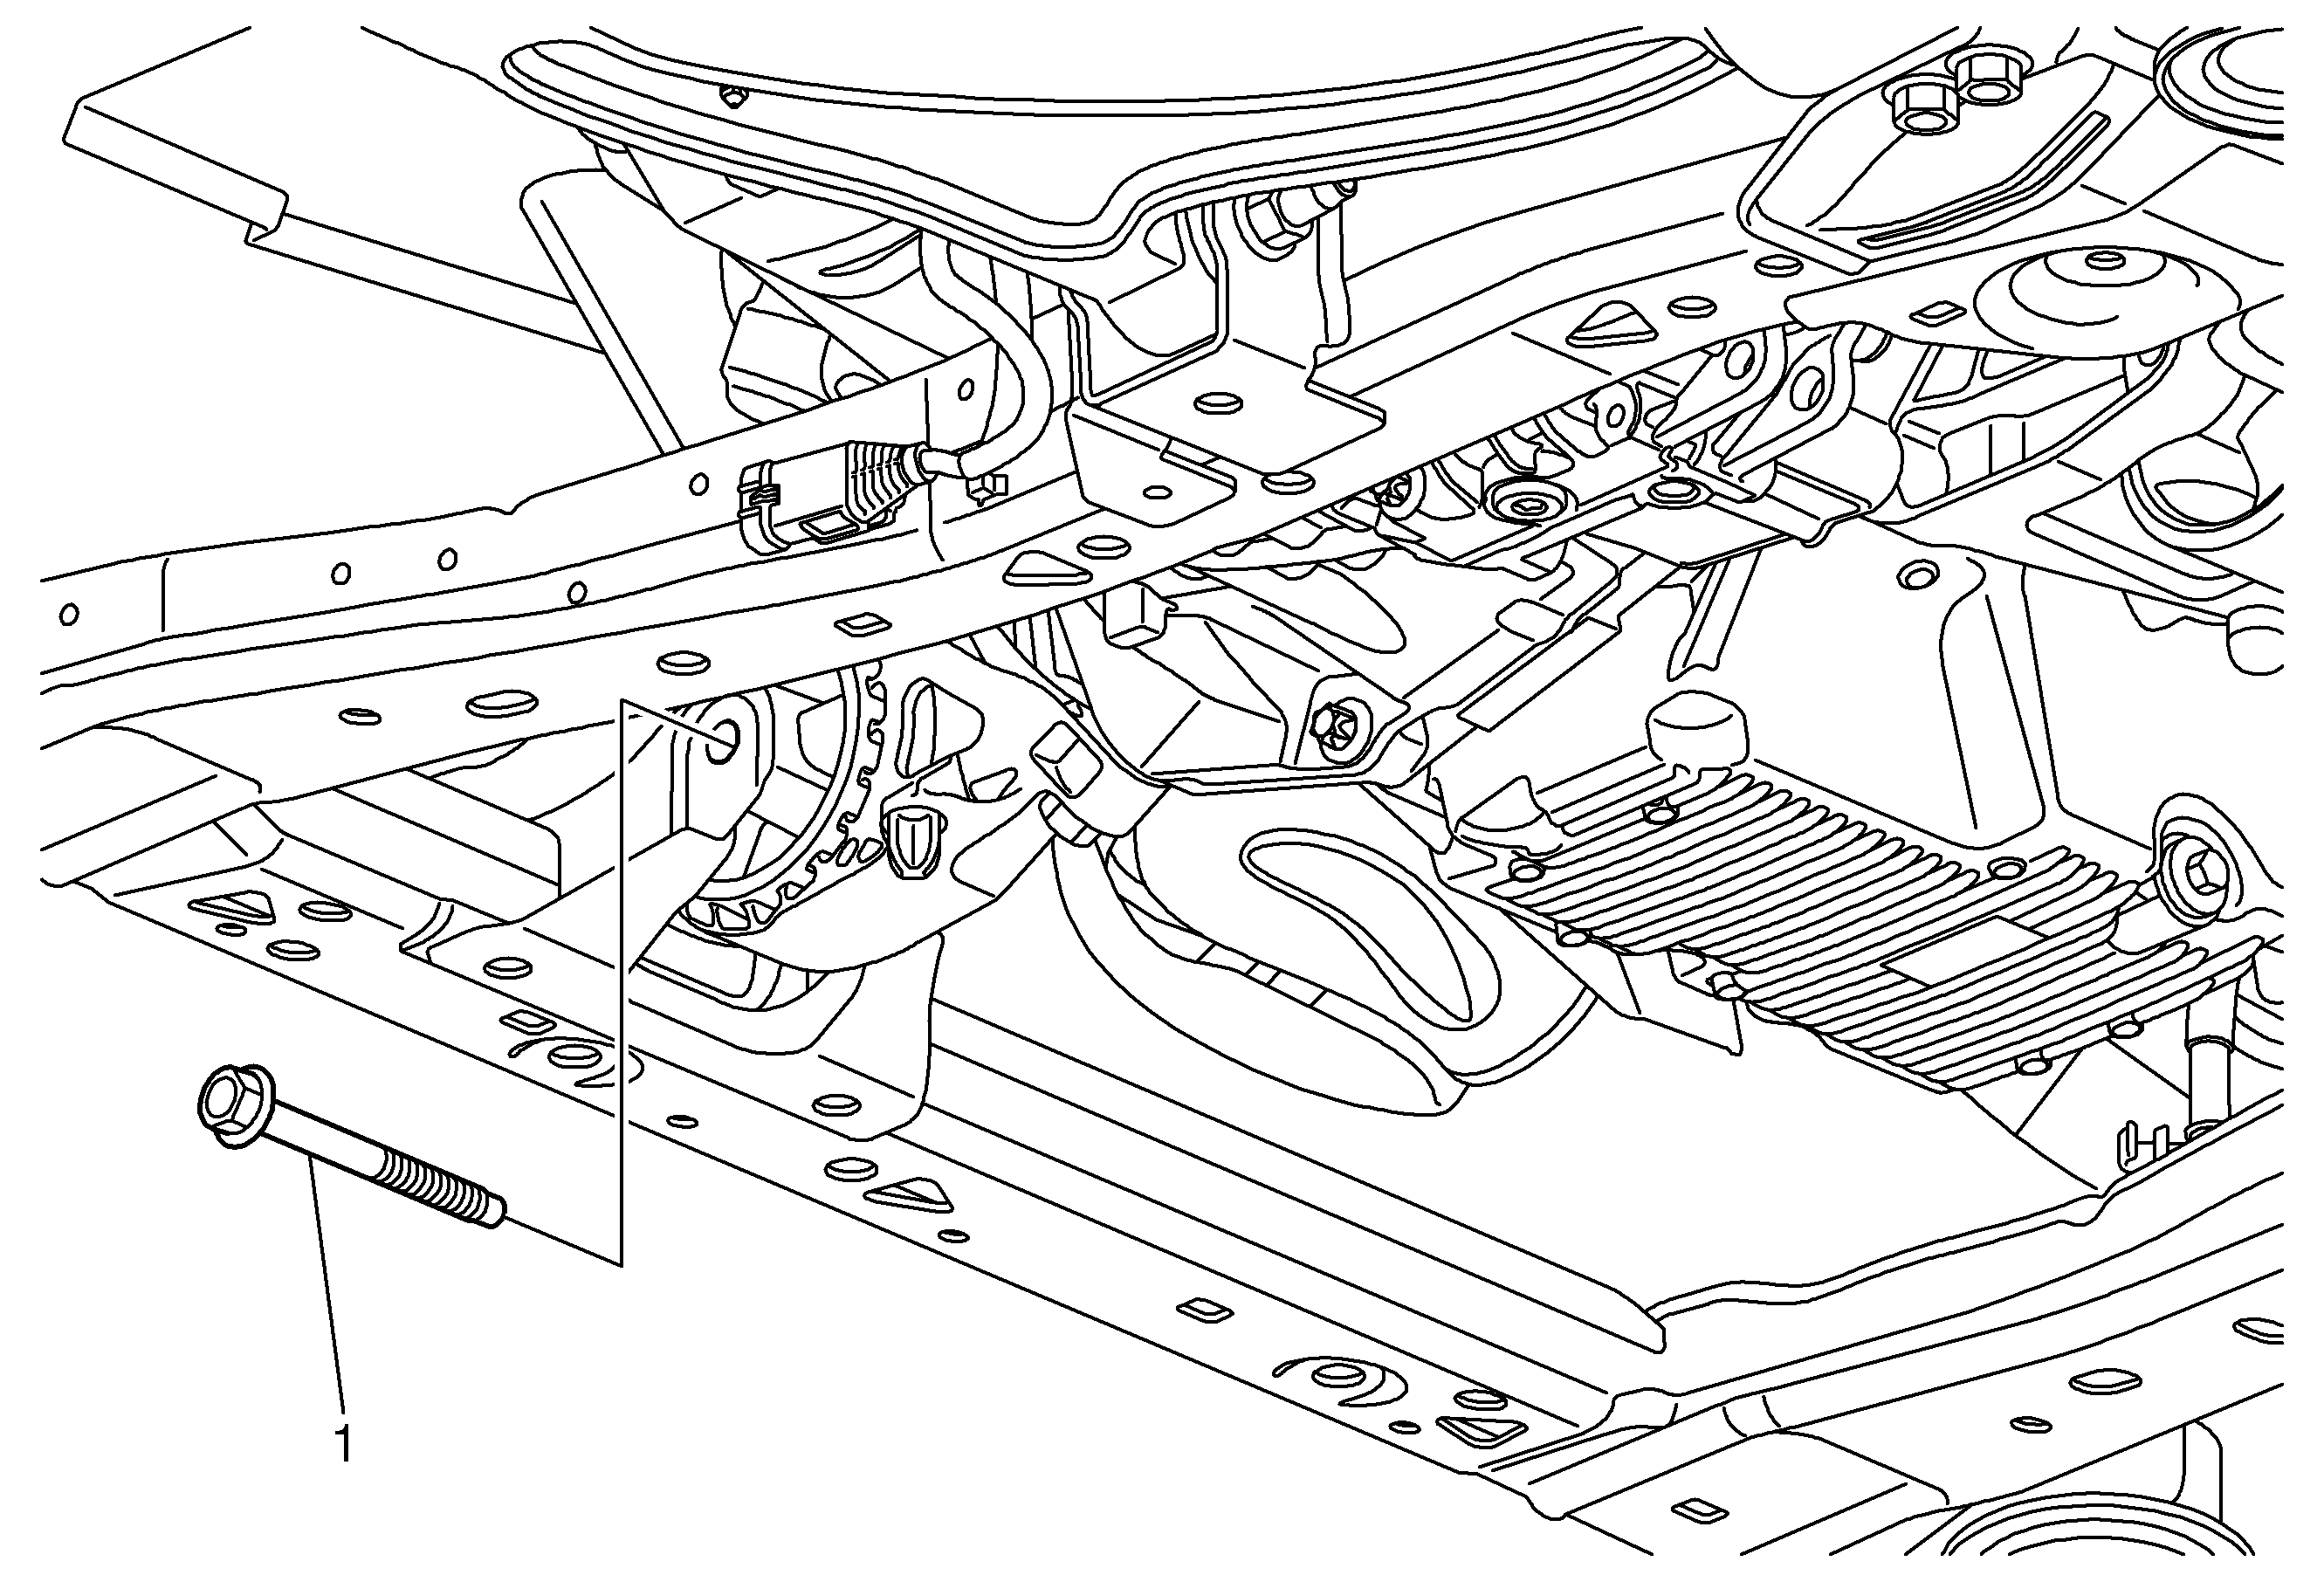
- Remove the front transmission mount-to-frame bolt (1).
- Separate the lower ball joint from the steering knuckle (1). Refer to Lower Control Arm Replacement.
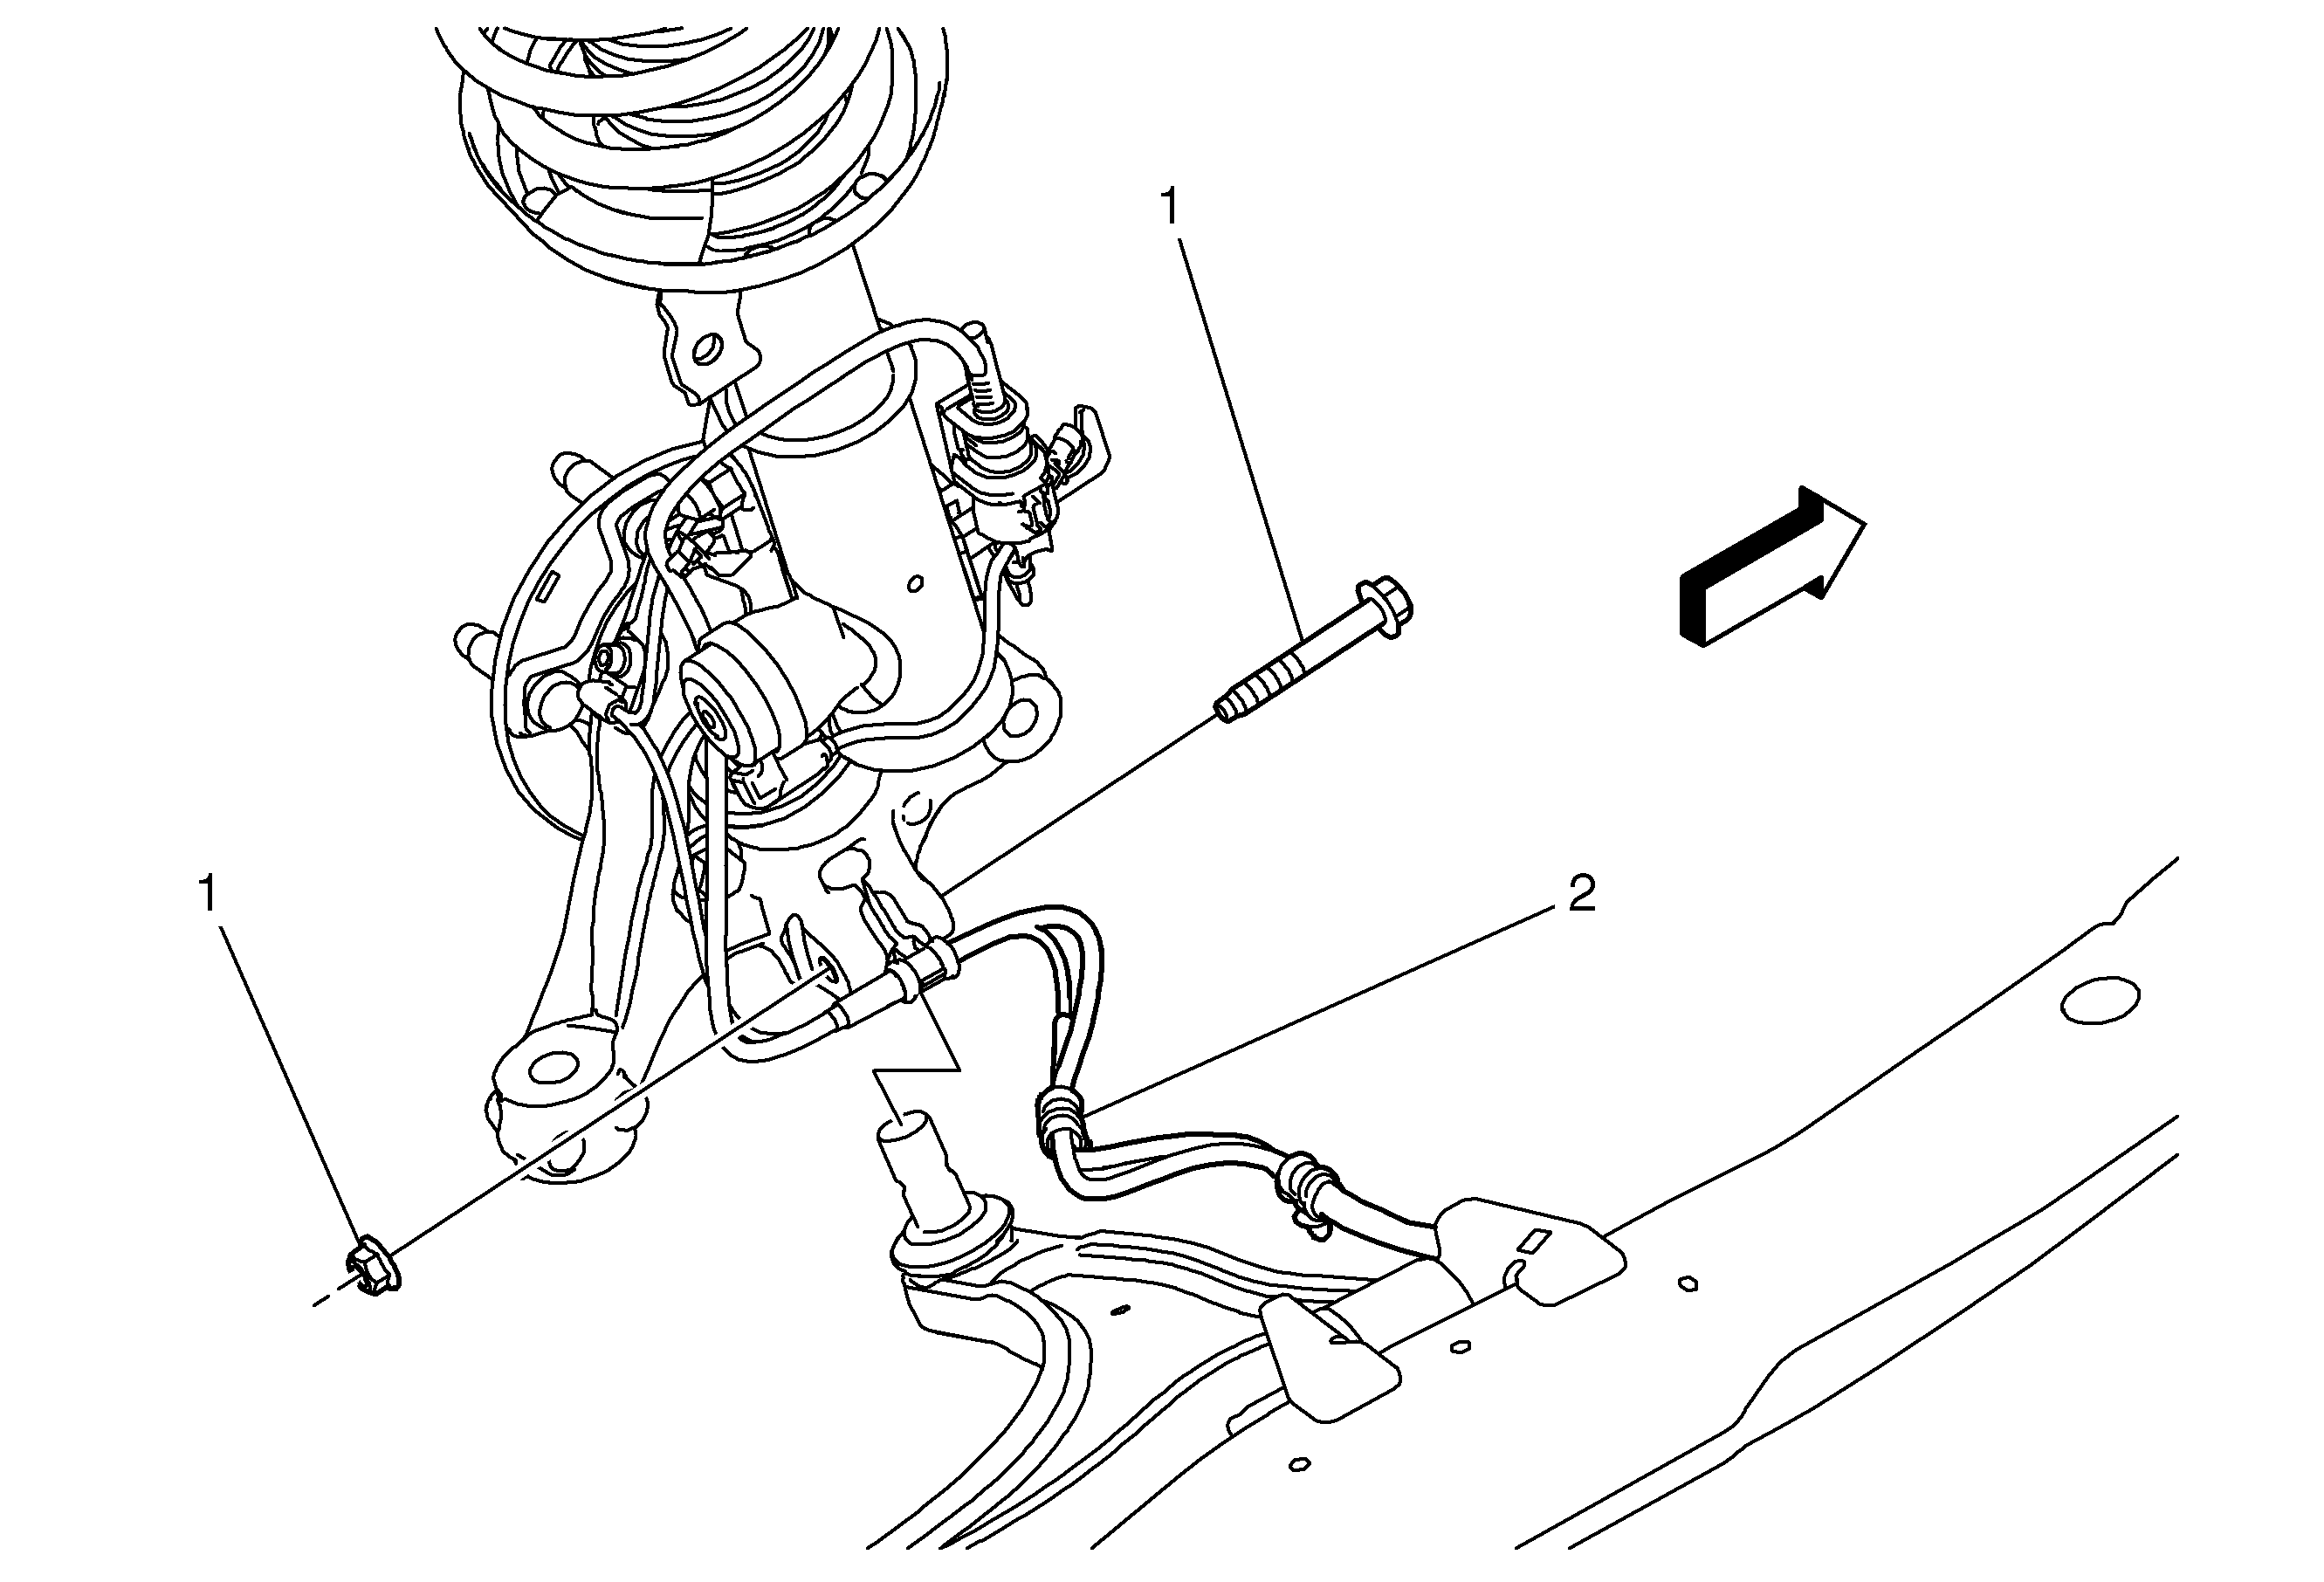
- Remove the electrical harness and the power steering cooler line from the clips in the frame (2).
- Carefully raise the CH-49289 centering adapter tool until the frame contacts.
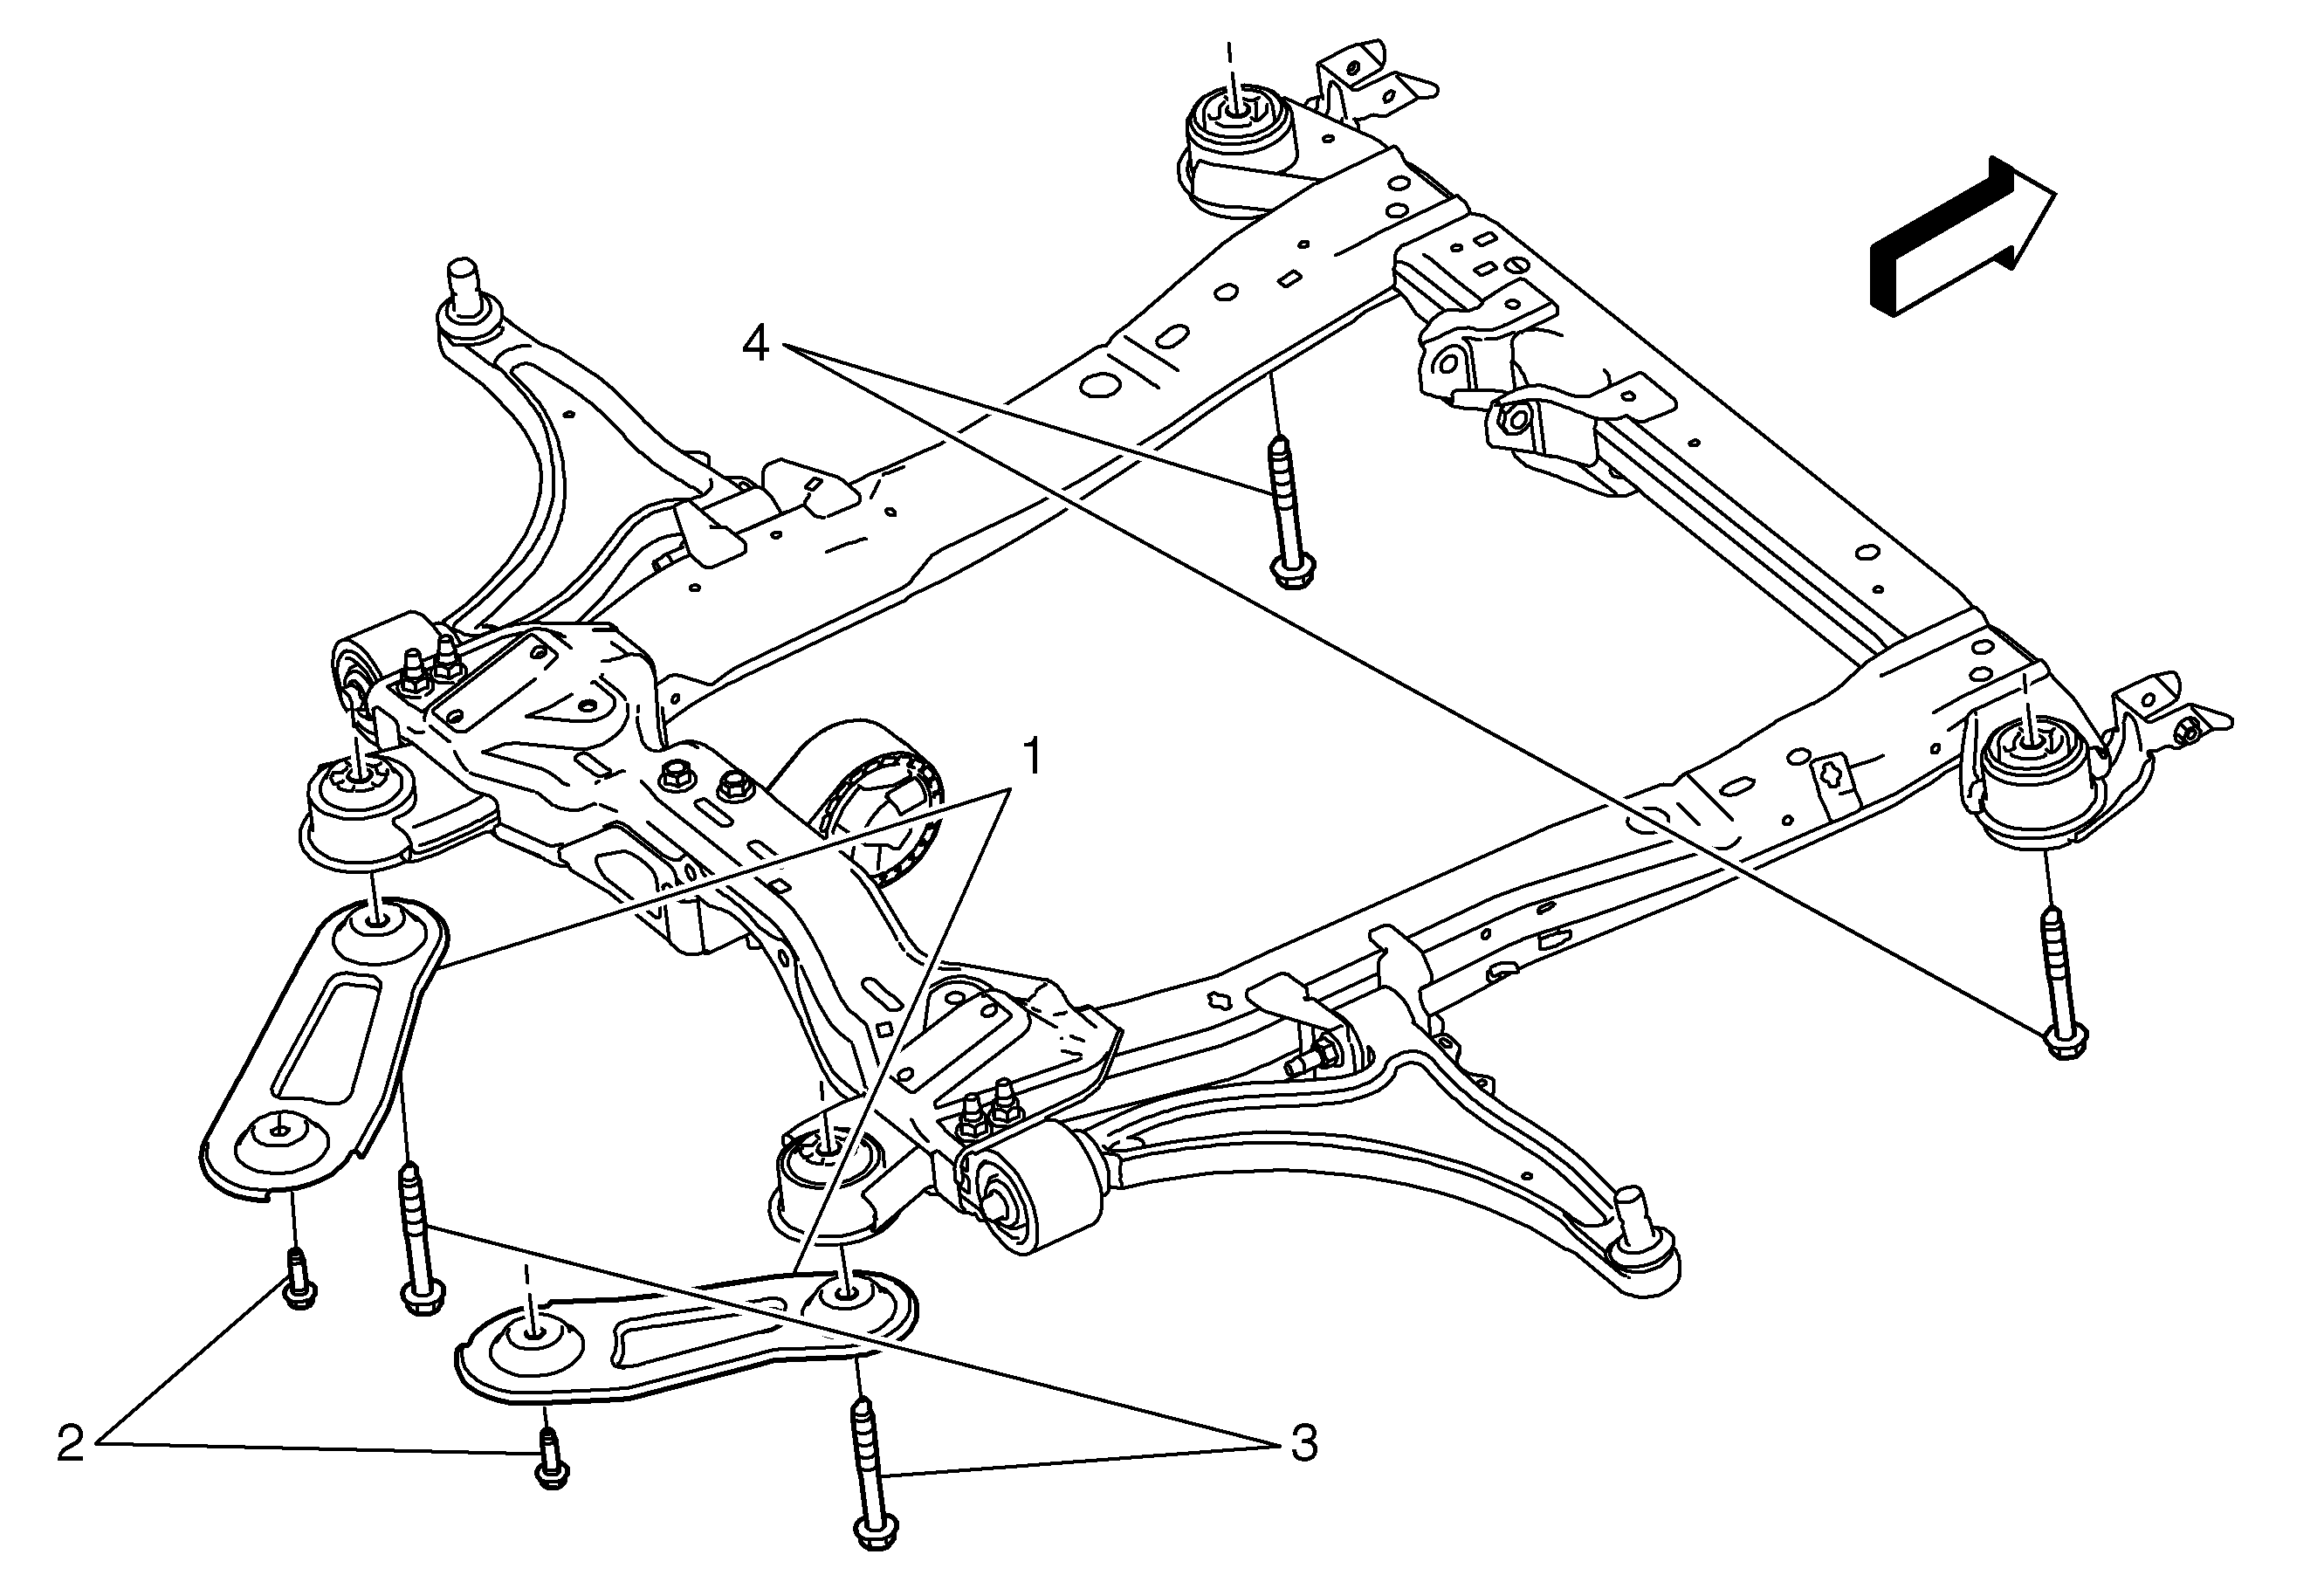
- Remove the reinforcement bolts (2).
- Remove the rear frame to body bolts (3). DISCARD the bolts.
- Remove the reinforcement (1) from the vehicle.
- Remove the front frame-to-body bolts (4). DISCARD the bolts.
- Remove the rear transmission mount-to-frame bolt (1).
- Carefully lower the CH-49289 centering adapter tool in order to separate the frame from the body approximately 50 mm.
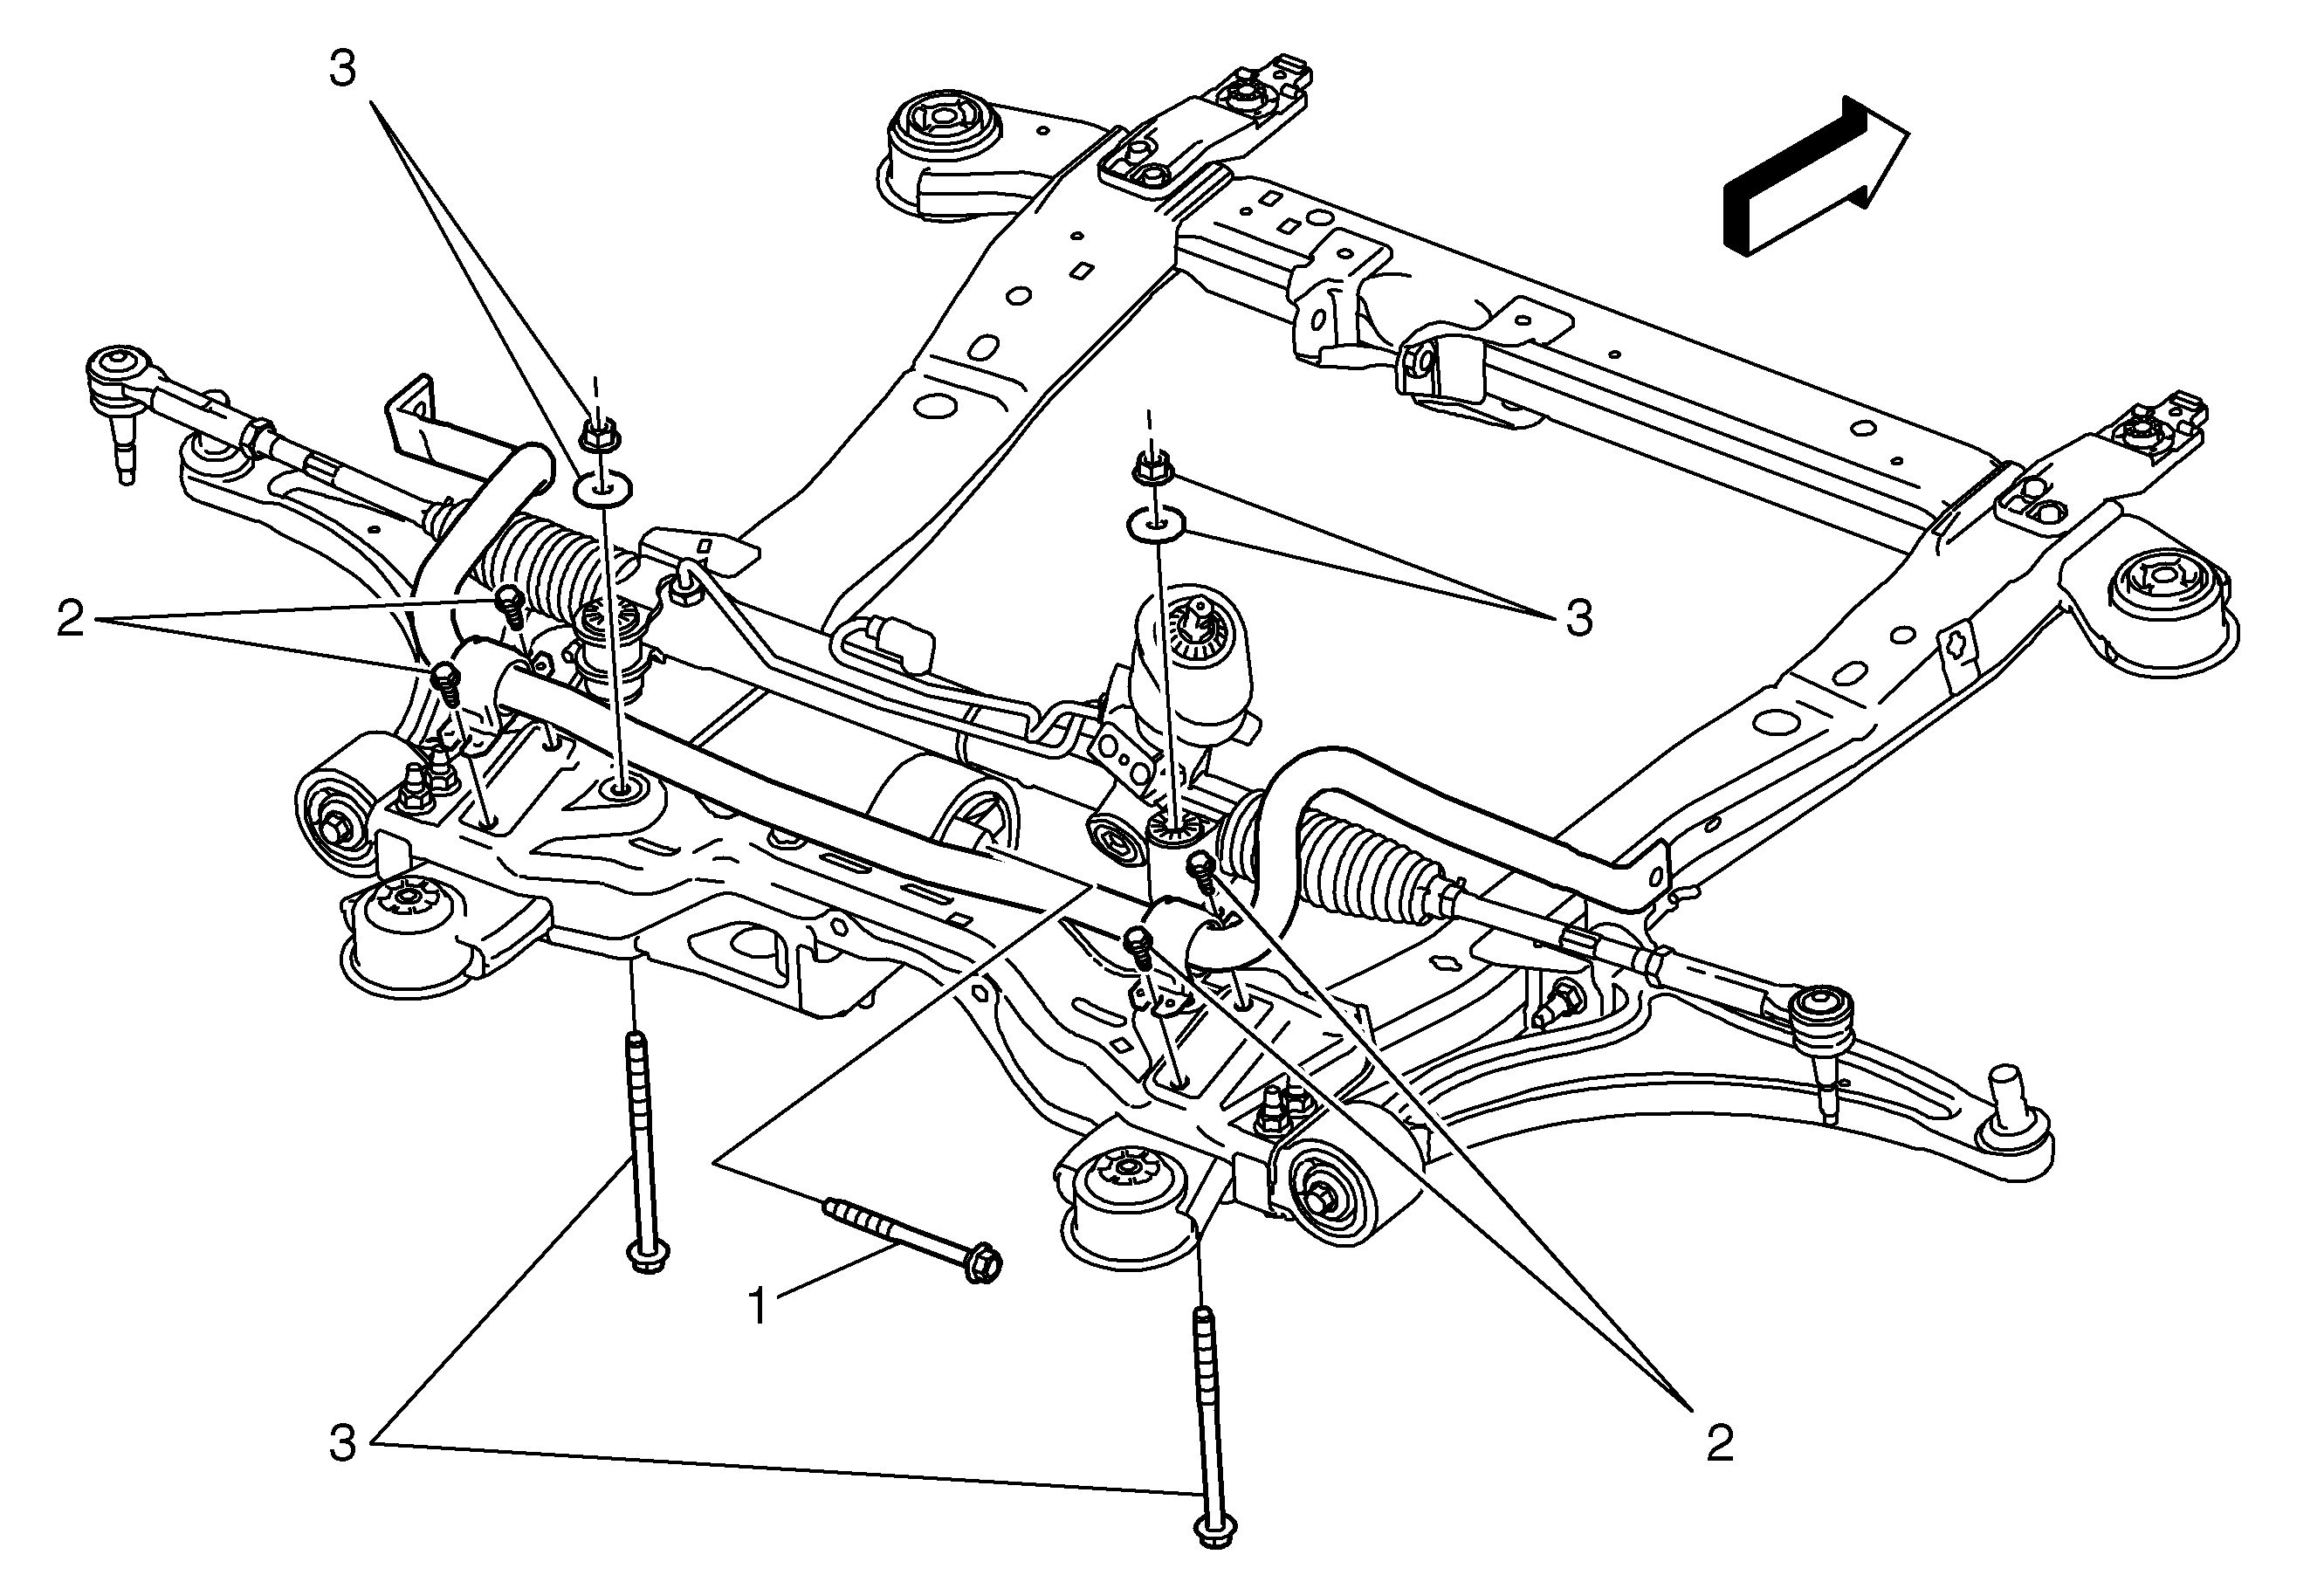
- Remove the stabilizer shaft clamp-to-frame bolts (2).
- Remove the steering gear-to-frame fasteners (3).
- Using mechanics wire, secure the steering gear and the stabilizer shaft properly to the vehicle.
- Carefully lower the CH-49289 centering adapter tool in order to separate the frame from the body.

Installation Procedure
- Carefully raise the CH-49289 centering adapter tool. The frame shall be approximately 50 mm from the body in order to get access with the torque wrench.
- Install the stabilizer shaft clamp to the frame.
- Remove the mechanics wire and install the steering gear.
- Install the electrical harness and the power steering cooler line to the clips in the frame (2).
- Connect the ball joint stud to the steering knuckle (1). Refer to Lower Control Arm Replacement.
- Carefully raise the CH-49289 centering adapter tool in order to attach the frame to the body.
- Loosely install NEW front frame-to-body bolts (4).
- Position the reinforcement (1) to the vehicle.
- Loosely install NEW rear frame to body bolts (3).
- Loosely install the reinforcement bolts (2).
- Carefully lower the CH-49289 centering adapter tool from the frame.
- Install the rear transmission mount-to-frame bolt (1).
- Tighten the frame-to-body reinforcement bolts (2).
- Tighten the frame-to-body bolts.
- Install the front transmission mount-to-frame bolt (1).
- Untie the radiator, air conditioning condenser, and fan module assembly from the upper radiator support.
- Install the front fascia. Refer to Front Bumper Fascia Replacement.
- Install the undertray.
- Install the front wheels. Refer to Tire and Wheel Removal and Installation.
- Lower the vehicle.
Tighten
50 N·m (37 lb ft) + 22 degrees + 30-45 degrees
Tighten
110 N·m (81 lb ft) + 150 degrees + 15 degrees
Caution: Refer to Fastener Caution in the Preface section.
Tighten
100 N·m (74 lb ft)
Tighten
60 N·m (44 lb ft) + 30-45 degrees
Tighten
160 N·m (118 lb ft)
Tighten
100 N·m (74 lb ft)
