For 1990-2009 cars only
Control Valve Body Replacement for Opel Insignia NB (Global Epsilon) 2009
Removal Procedure
- Remove control valve body cover. Refer to Control Valve Body Cover Replacement.
- Detach the wiring harness for the solenoid valves. (The illustration shows how to use a screwdriver for detaching the different connectors.)
- Unplug the engine speed sensor connectors.
- Remove the temperature sensor.
- Move the wiring harness for the solenoid valves and the wiring harness for the engine speed sensors aside.
- Remove the cover (1).
- Remove the valve housing.
- Lower the car to the floor.
- Unhook the clutch rod. (1)
- Carefully lift the valve housing upwards.
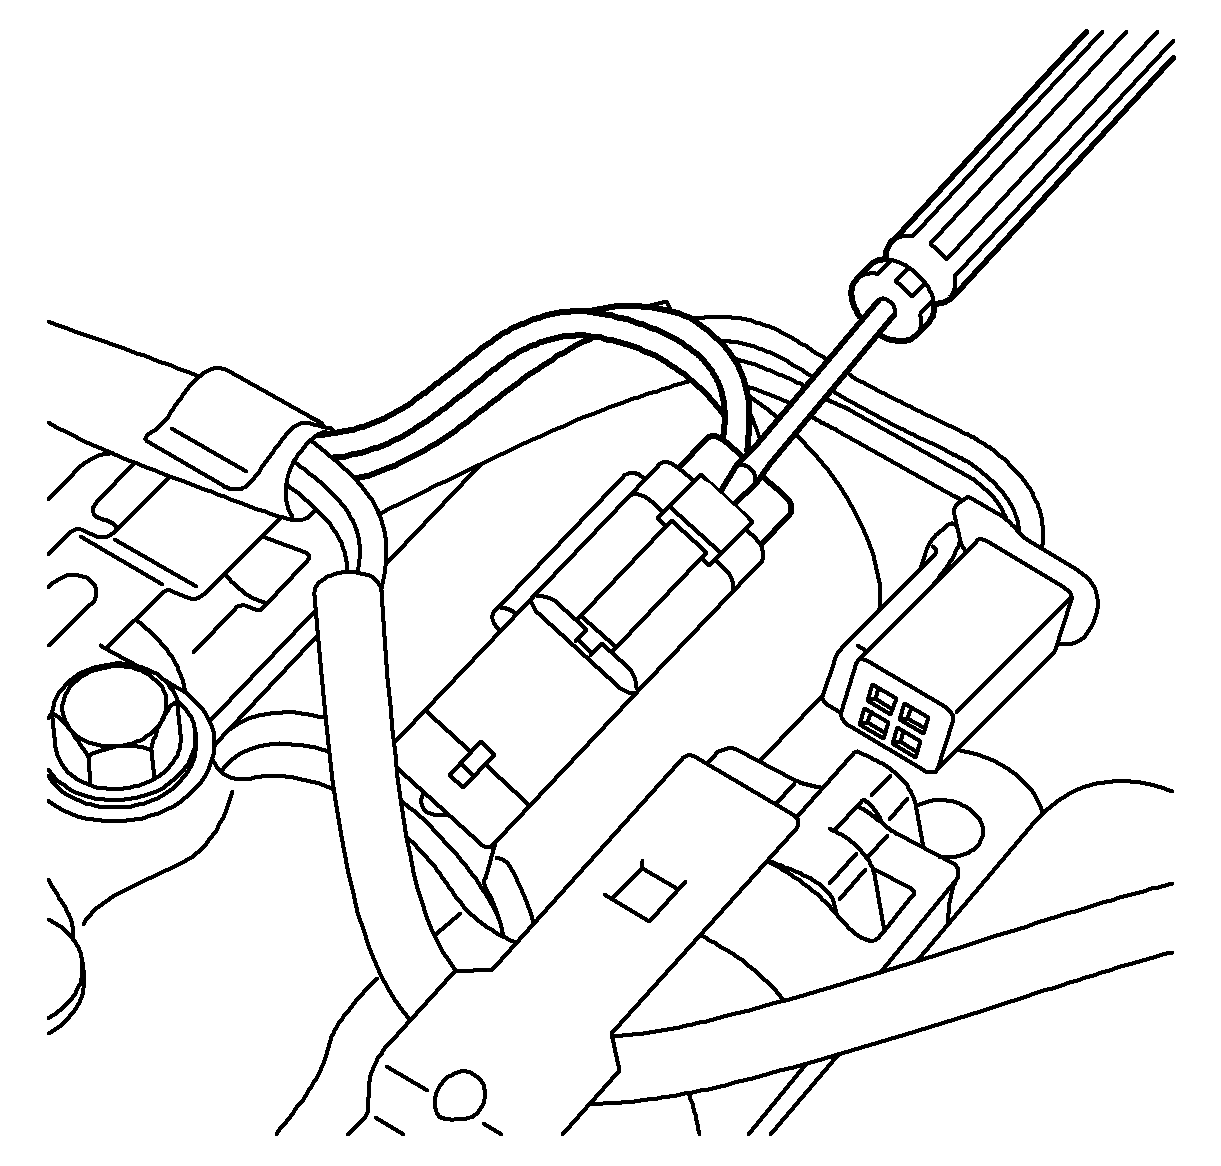
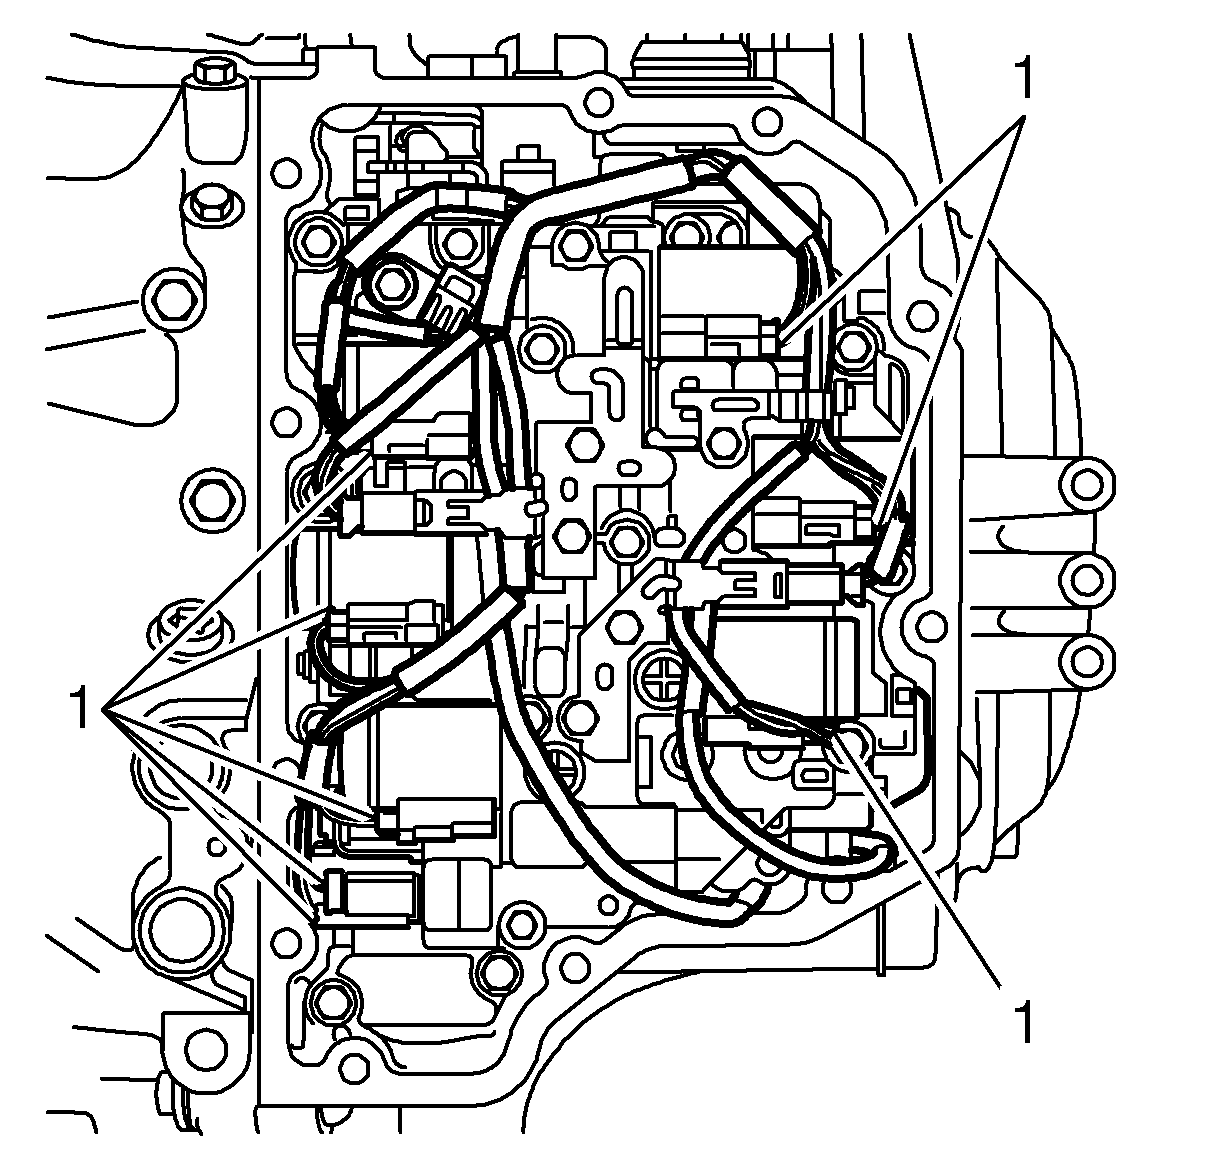
| • | Detach 8 connectors from the solenoid valves (1). |
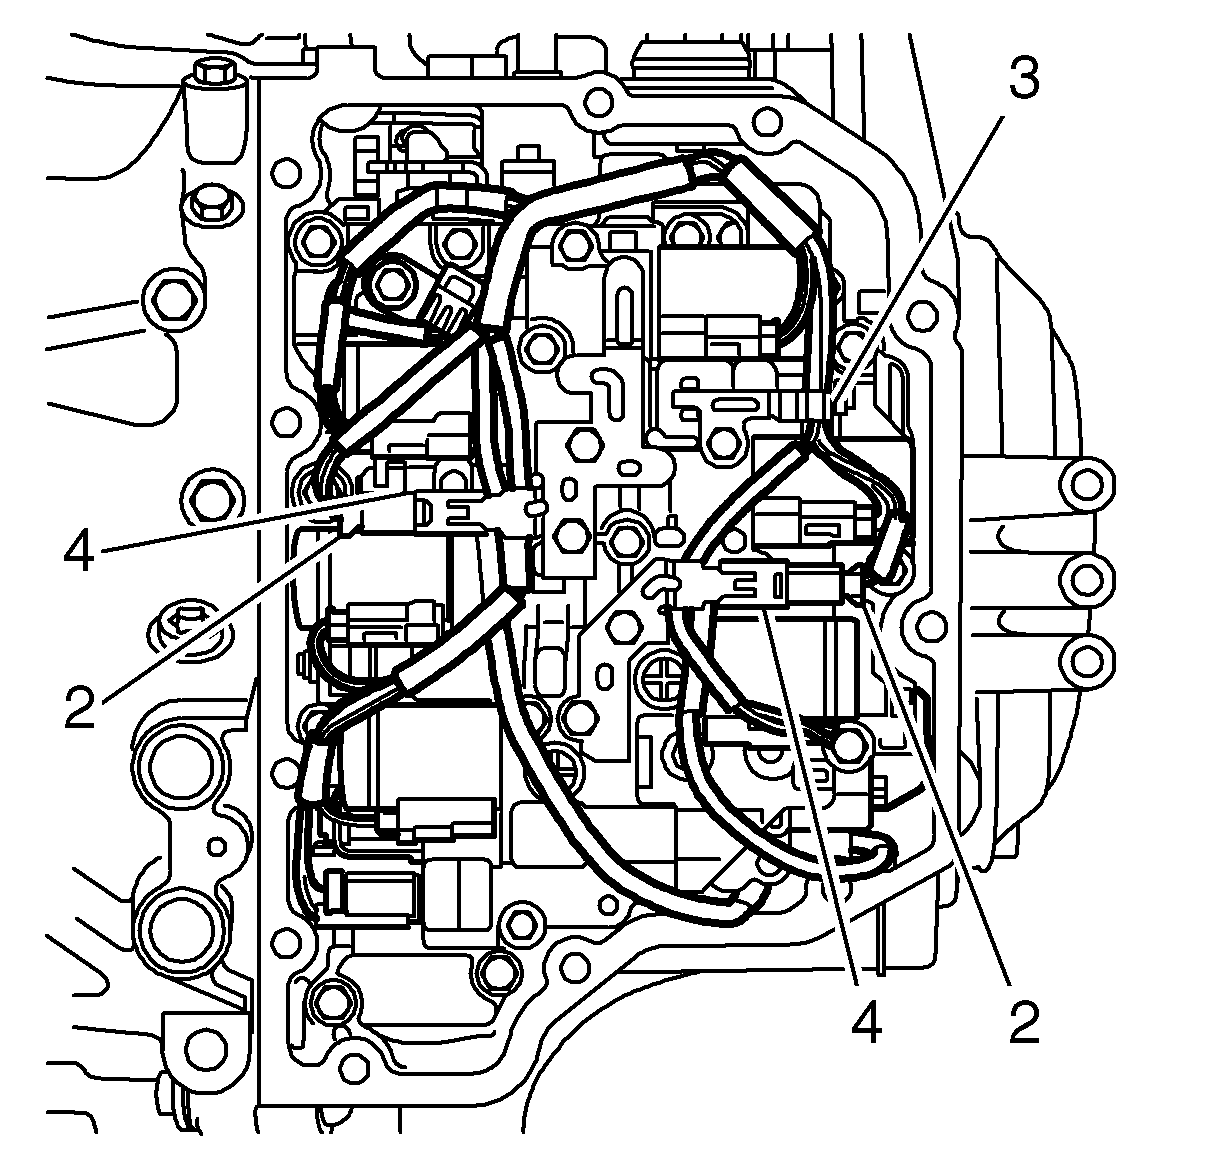
| • | Unplug the 2 connectors from the engine speed sensors. (2) |
| • | Remove the wiring harness from the 2 retaining clips. (3) |
Detach the connectors from the two mountings. (4)
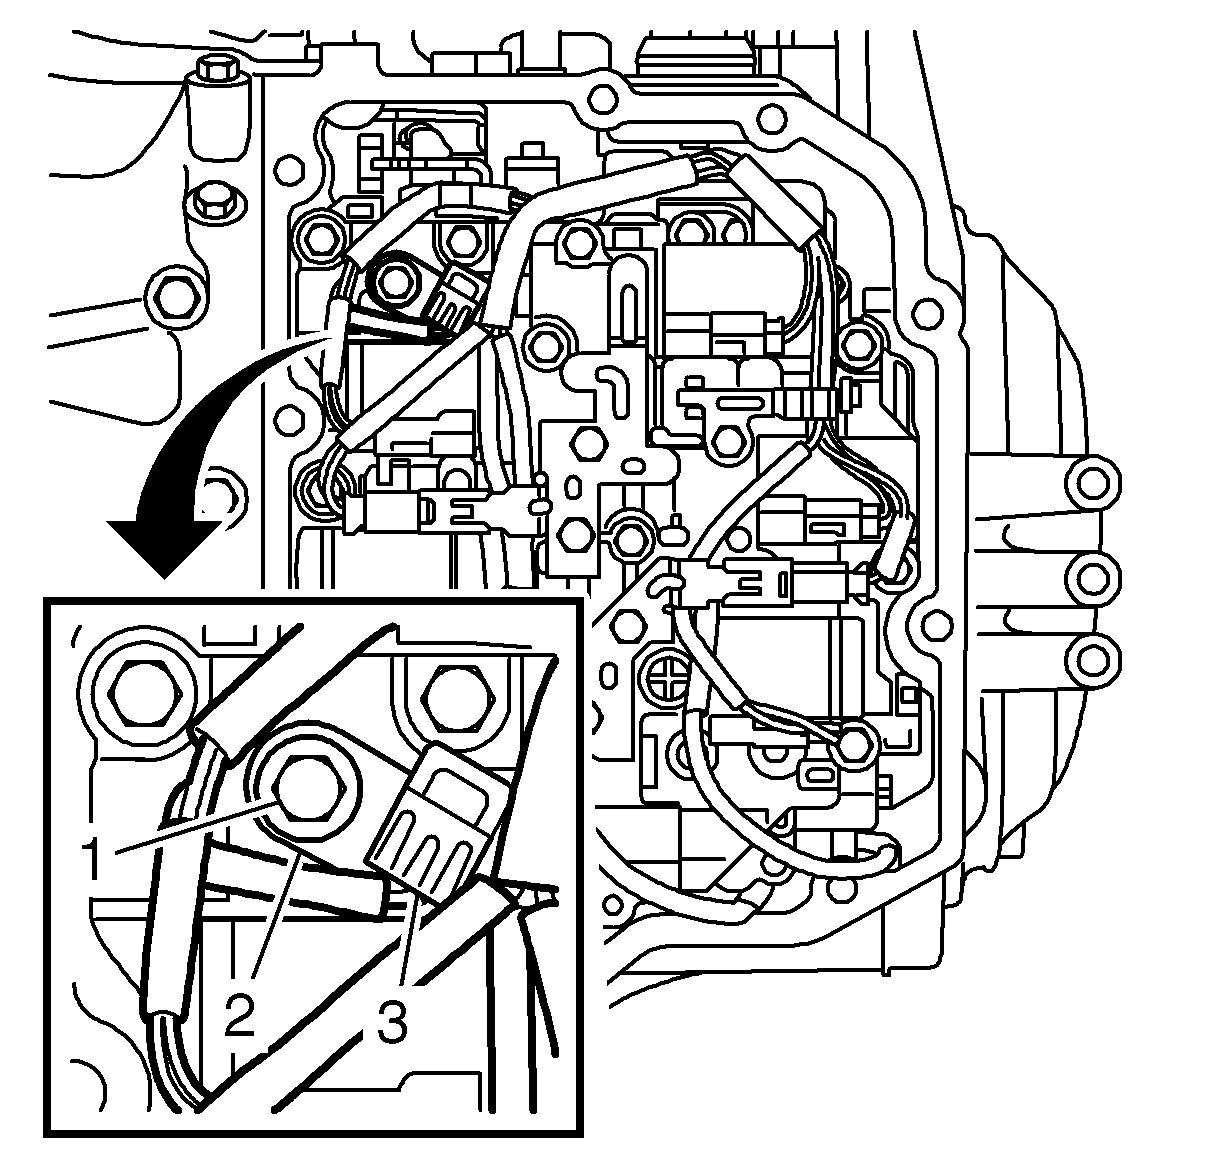
| • | Remove the screw. (1) |
| • | Lift away the attaching plate. (2) |
| • | Remove the temperature sensor (3) |
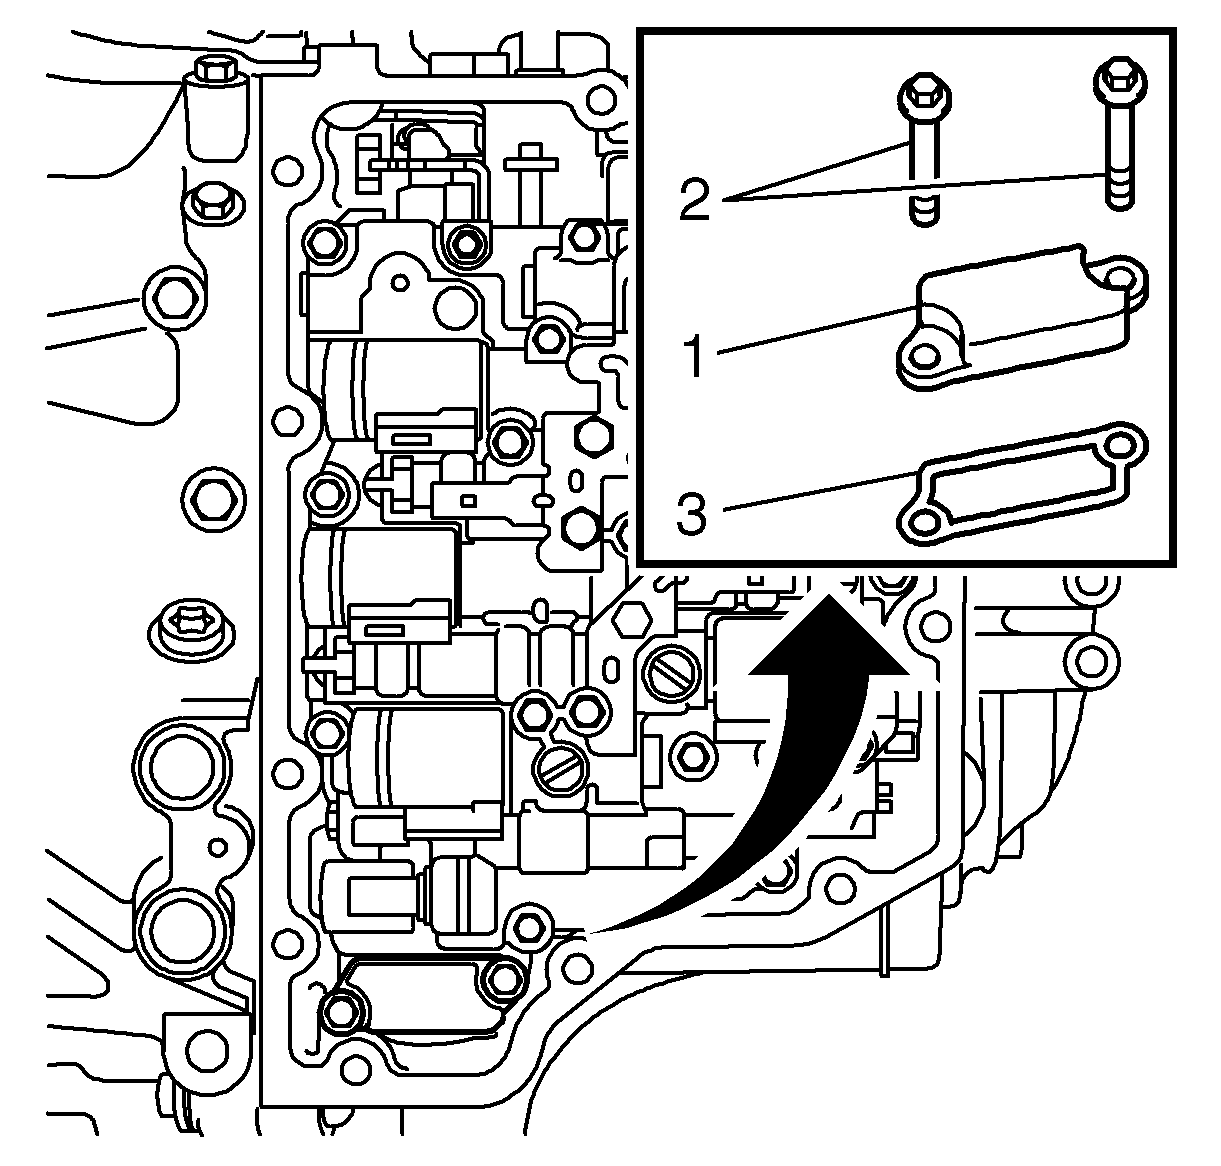
| • | Remove the screws. (2) |
| • | Remove the gasket. (3) |
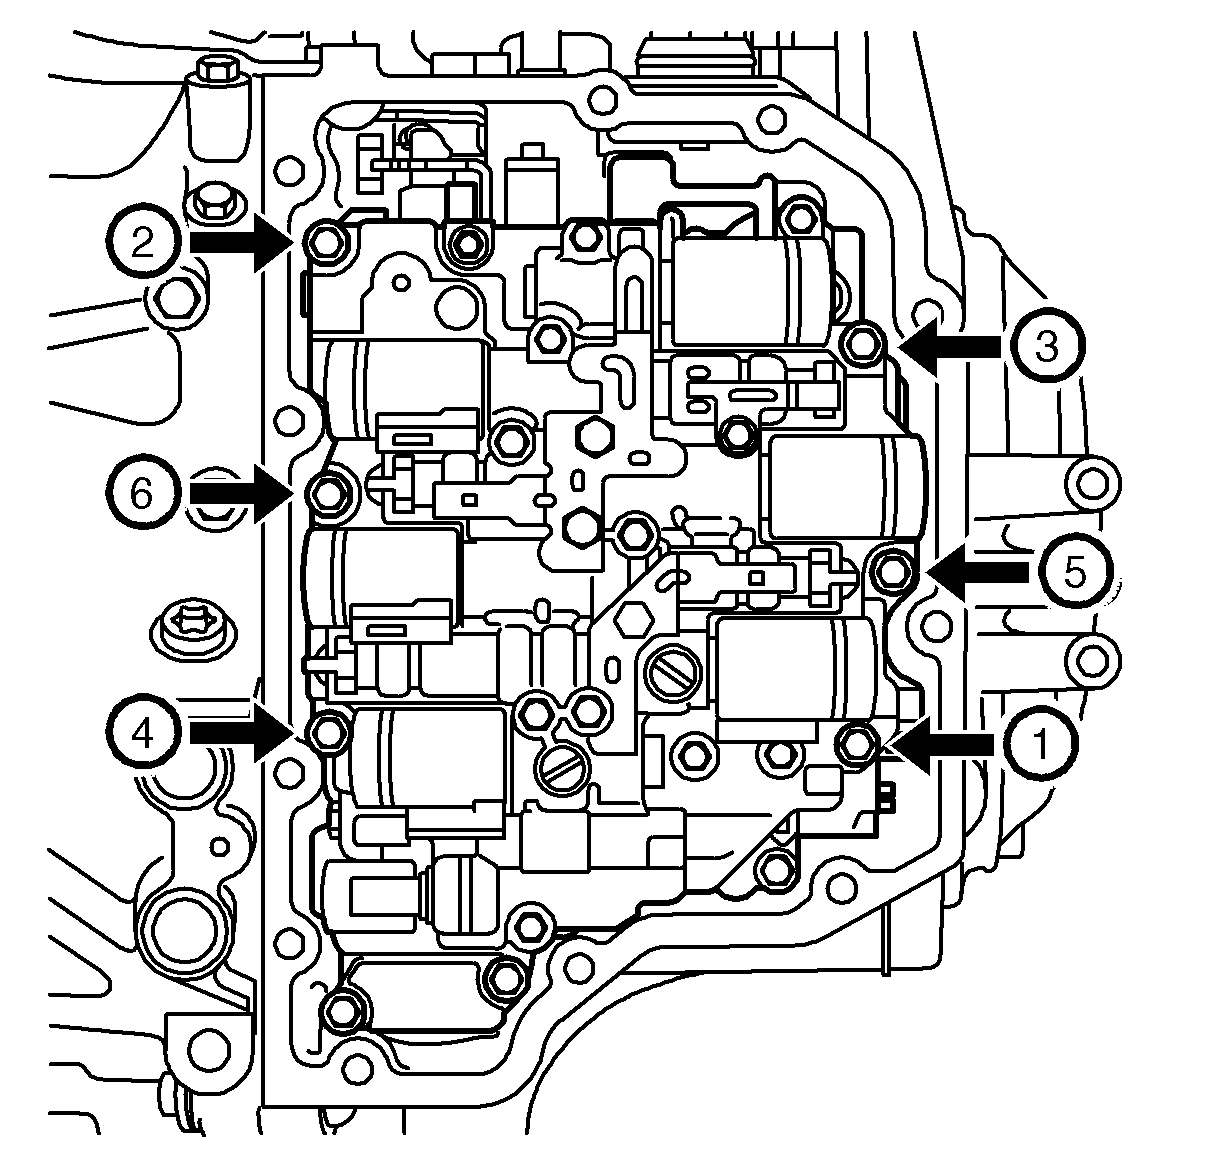
| • | Undo the fasteners in the specified order. |
| • | Remove the fasteners. |
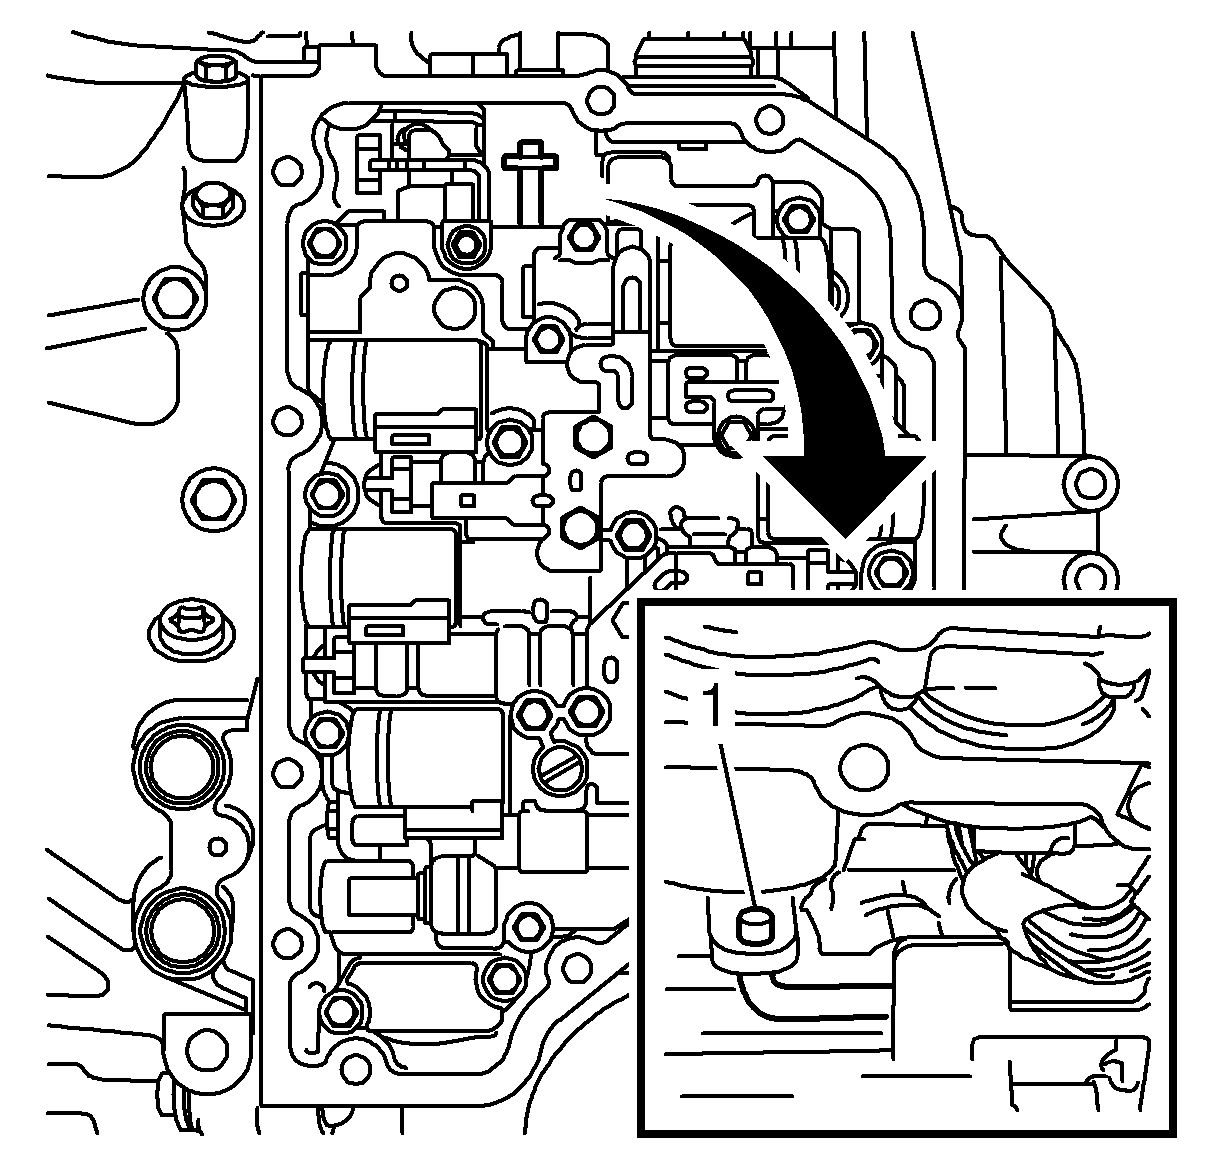
Note: The ducts are filled with oil.
Installation Procedure
- Clean the sealing surfaces.
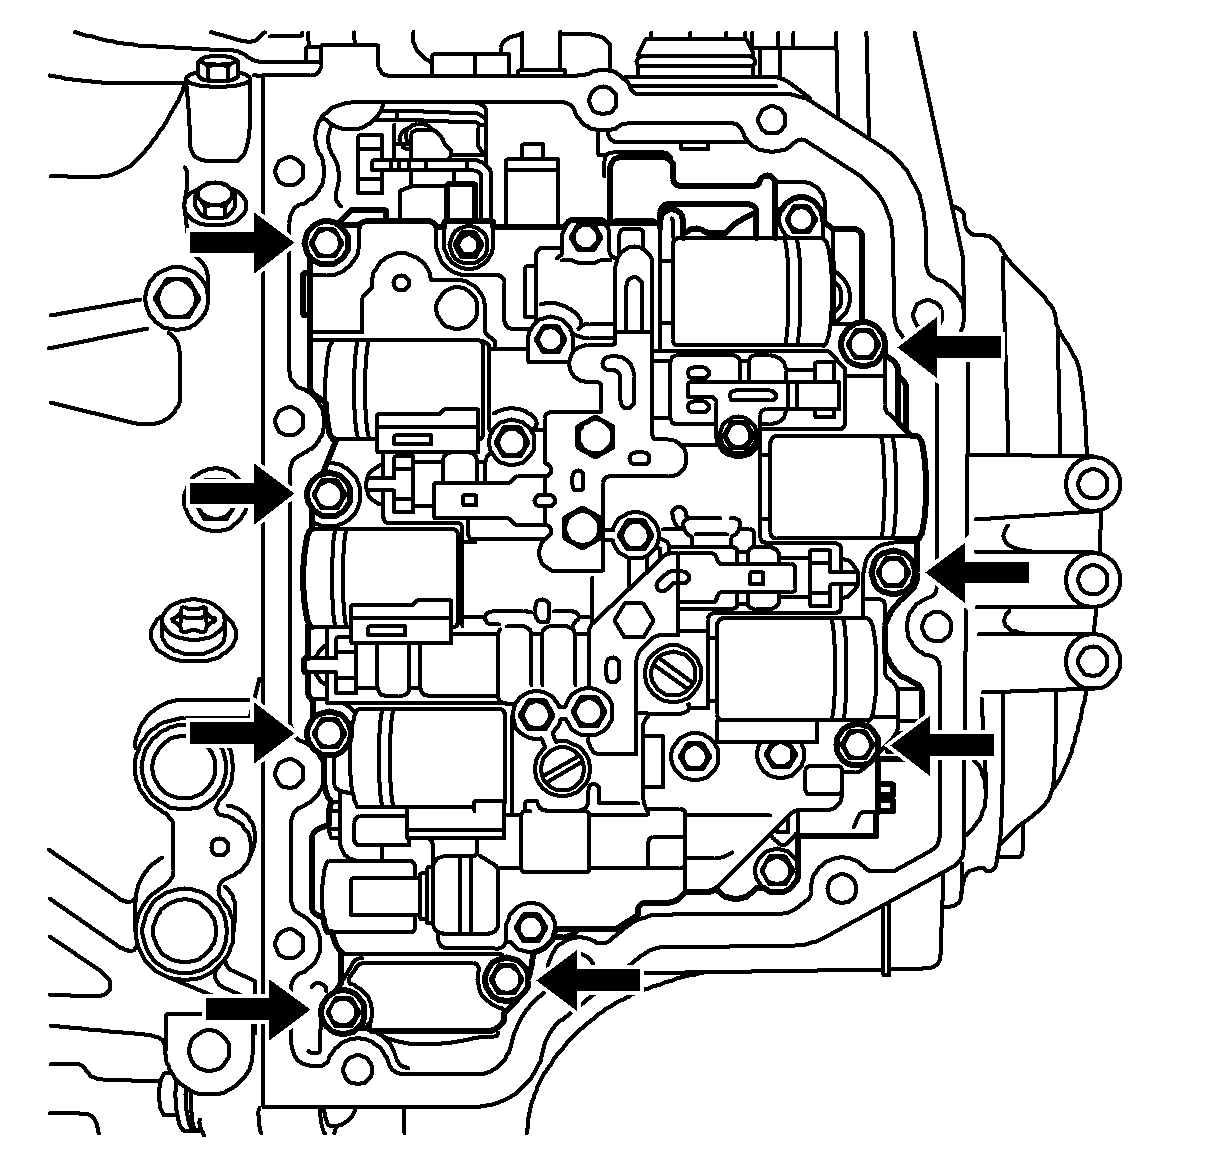
- Clean the threads. (arrows)
- Install the valve housing.
- Raise and support the vehicle. Refer to Lifting and Jacking the Vehicle.
- Install the cover.
- Finish fitting the valve housing.
- Tighten the 8 fasteners (arrows) in the specified order.
- Install the temperature sensor (3).
- Plug in the engine speed sensor connectors.
- Plug in the connector for the solenoid valves.
- Install control valve body. Refer to Control Valve Body Cover Replacement.
- Lower the vehicle.
| • | Hook in the clutch rod. (1) |
| • | Install 6 fasteners. |
| • | Install a new gasket. (3) |
| • | Install the cover. (1) |
| • | Install two screws. (2) |
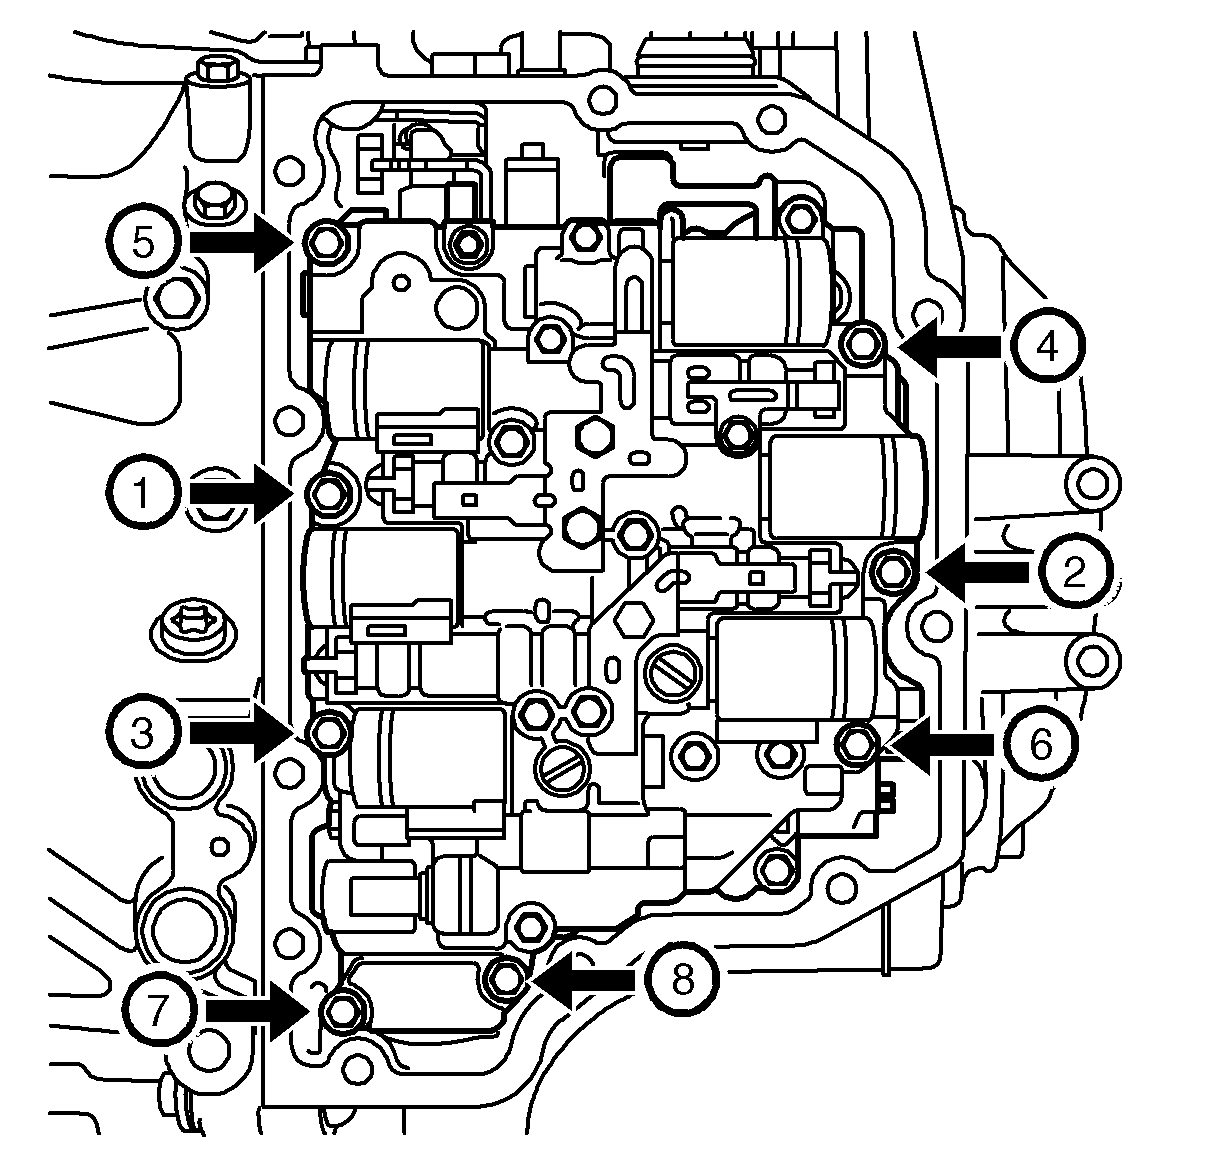
Caution: Refer to Fastener Caution in the Preface section.
Tighten
10 N·m (88 lb in)
| • | Moisten the temperature sensor O-ring with gearbox oil. |
| • | Install the attaching plate (2). |
| • | Tighten the fastener (1). |
Tighten
10 N·m (88 lb in)
Attach the connectors to the two mountings (4).
| • | Secure the wiring harness in the 2 retaining clips (3). |
| • | Plug in the 2 connectors for the engine speed sensors (2). |
| • | Plug in the 8 connectors for the solenoid valves (1). |
