Cylinder Head Cleaning and Inspection LDK
Valve Cleaning and Inspection
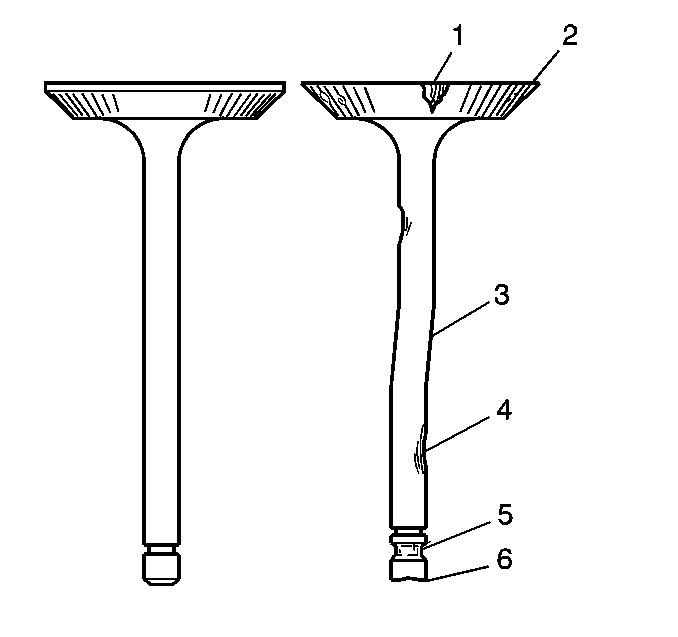
Note: Do not scratch the valve stem with the wire brush.
- Clean the valves of carbon, oil and varnish. Carbon can be removed with a wire brush. Varnish can be removed by soaking in Parts Immersion Solvent GM P/N 12345368 (Canadian P/N 10953514) or equivalent.
- Clean the valve guides.
- Inspect the valve stem for wear (4).
- Inspect the valve keeper groove for chipping or wear (5). Replace the valve if chipped or worn.
- Inspect the valve face for burning or cracking (1). If pieces are broken off, inspect the corresponding piston and cylinder head area for damage.
- Inspect the valve stem for burrs and scratches. Burrs and minor scratches may be removed with an oil stone.
- Inspect the valve stem for straightness and the valve head for bending or distortion (3) using V-blocks. Bent or distorted valves must be replaced.
- Clean the deposits from the valve face. Inspect the valve face for grooving.
- Replace the valve if the face is grooved. Valve faces cannot be machined. If worn, or damaged, the valves must be replaced.
- The valves may be lightly lapped to the valve seats.
Cylinder Head and Gasket Surface Cleaning and Inspection
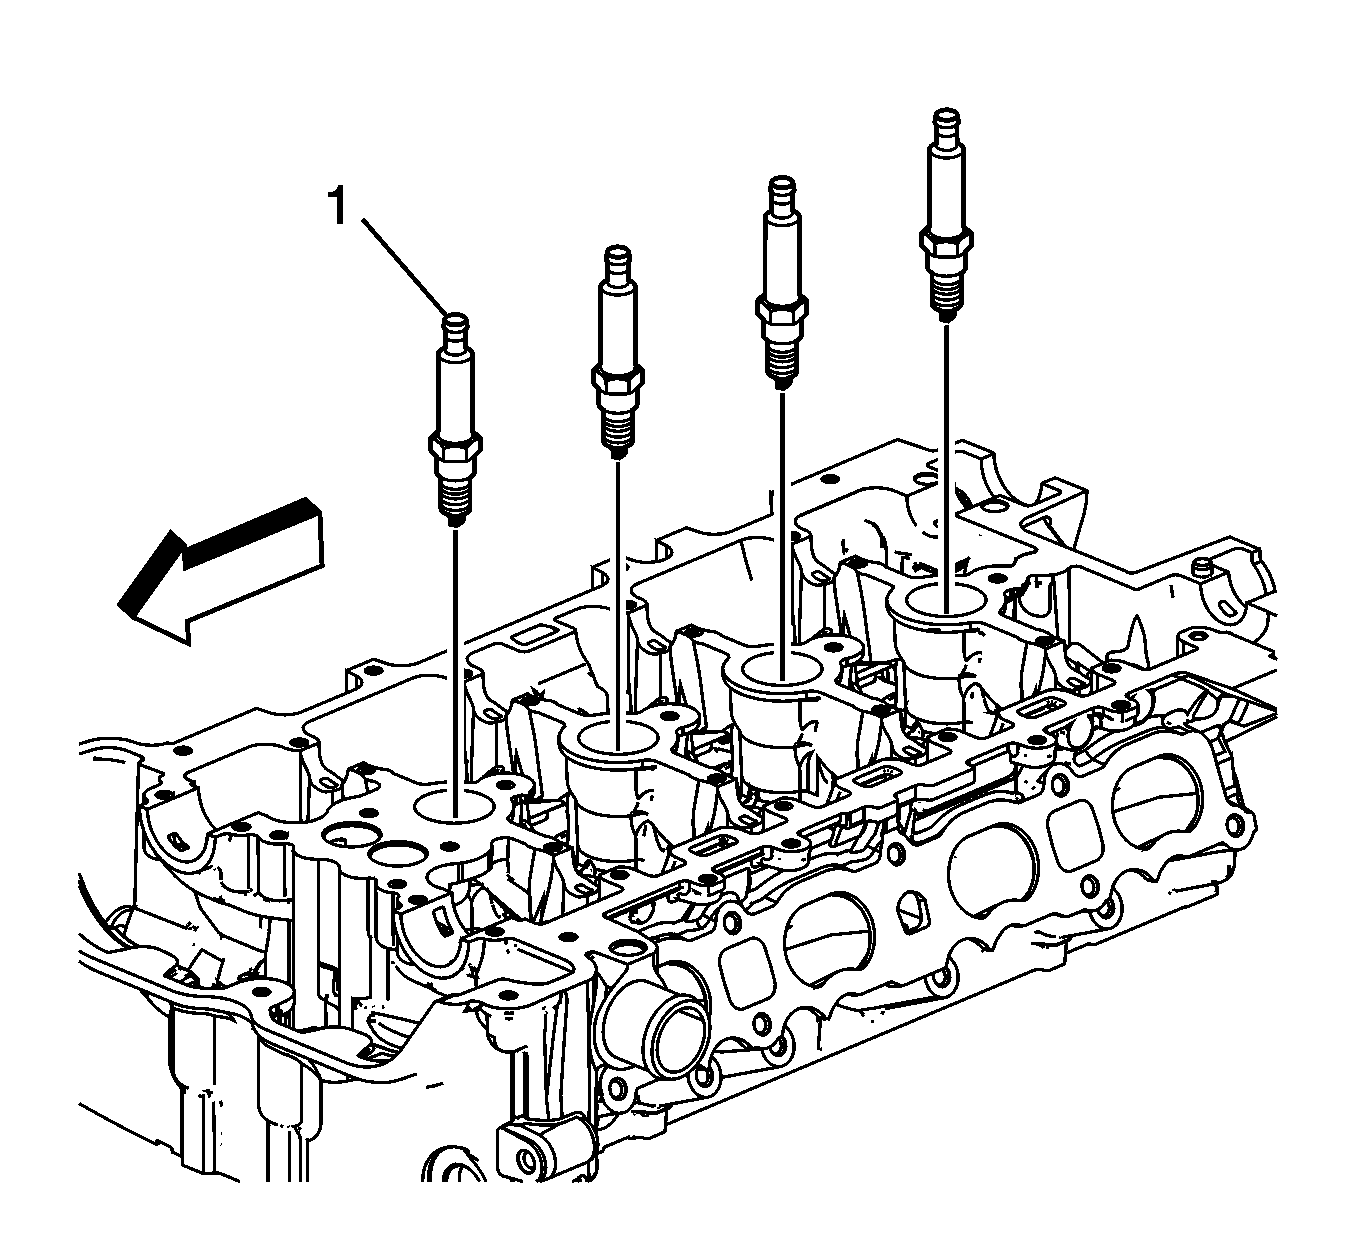
- Remove the spark plugs (1).
- Inspect the cylinder head gasket and mating surfaces for leaks, corrosion, and blow-by. If the gasket has failed, use the following faults to determine the cause:
| 2.1. | Improper installation |
| 2.2. | Loose or warped cylinder head |
| 2.3. | Missing, off location or not fully seated dowel pins |
| 2.4. | Corrosion in the seal area around the coolant passages |
| 2.5. | Chips or debris in the cylinder head bolt holes |
| 2.6. | Bolt holes in the cylinder block not drilled or tapped deep enough |
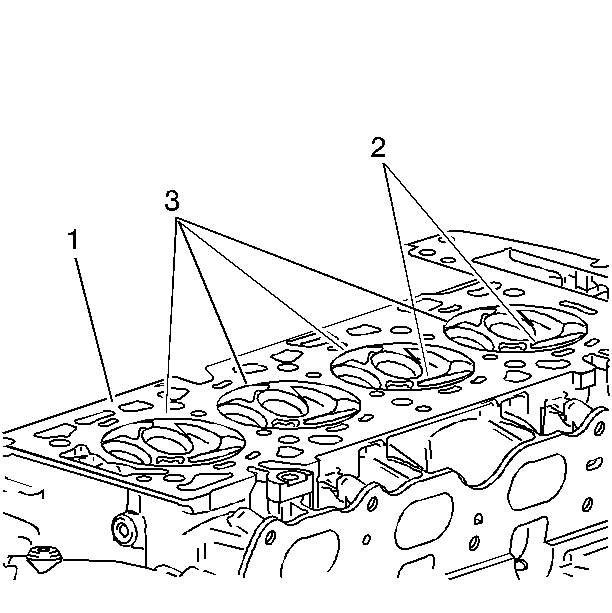
- Inspect the cylinder head gasket surface.
| • | The cylinder head may be reused if corrosion is found only outside a 4 mm (0.375 in) band around each combustion chamber (1). |
| • | Replace the cylinder head if the area between the valve seats is cracked (2). |
| • | Replace the cylinder head if corrosion has been found inside a 4 mm (0.375 in) band around each combustion chamber (3). |
- Clean the cylinder head bolts.
Note: Do not use a wire brush on any gasket sealing surface.
- Clean the cylinder head. Remove all varnish, soot and carbon to the bare metal.
- Clean the valve guides.
- Clean the threaded holes. Use a nylon bristle brush.
- Clean the remains of the sealer from the plug holes.
- Inspect the cylinder head bolts for damaged threads or stretching and damaged heads caused by improper use of tools.
- Replace all suspect bolts.
- Inspect the cylinder head for cracks. Inspect between the valve seats and in the exhaust ports.
Note: Do not attempt to weld the cylinder head; replace it.
- Inspect the cylinder head deck for corrosion, sand inclusions and blow holes.
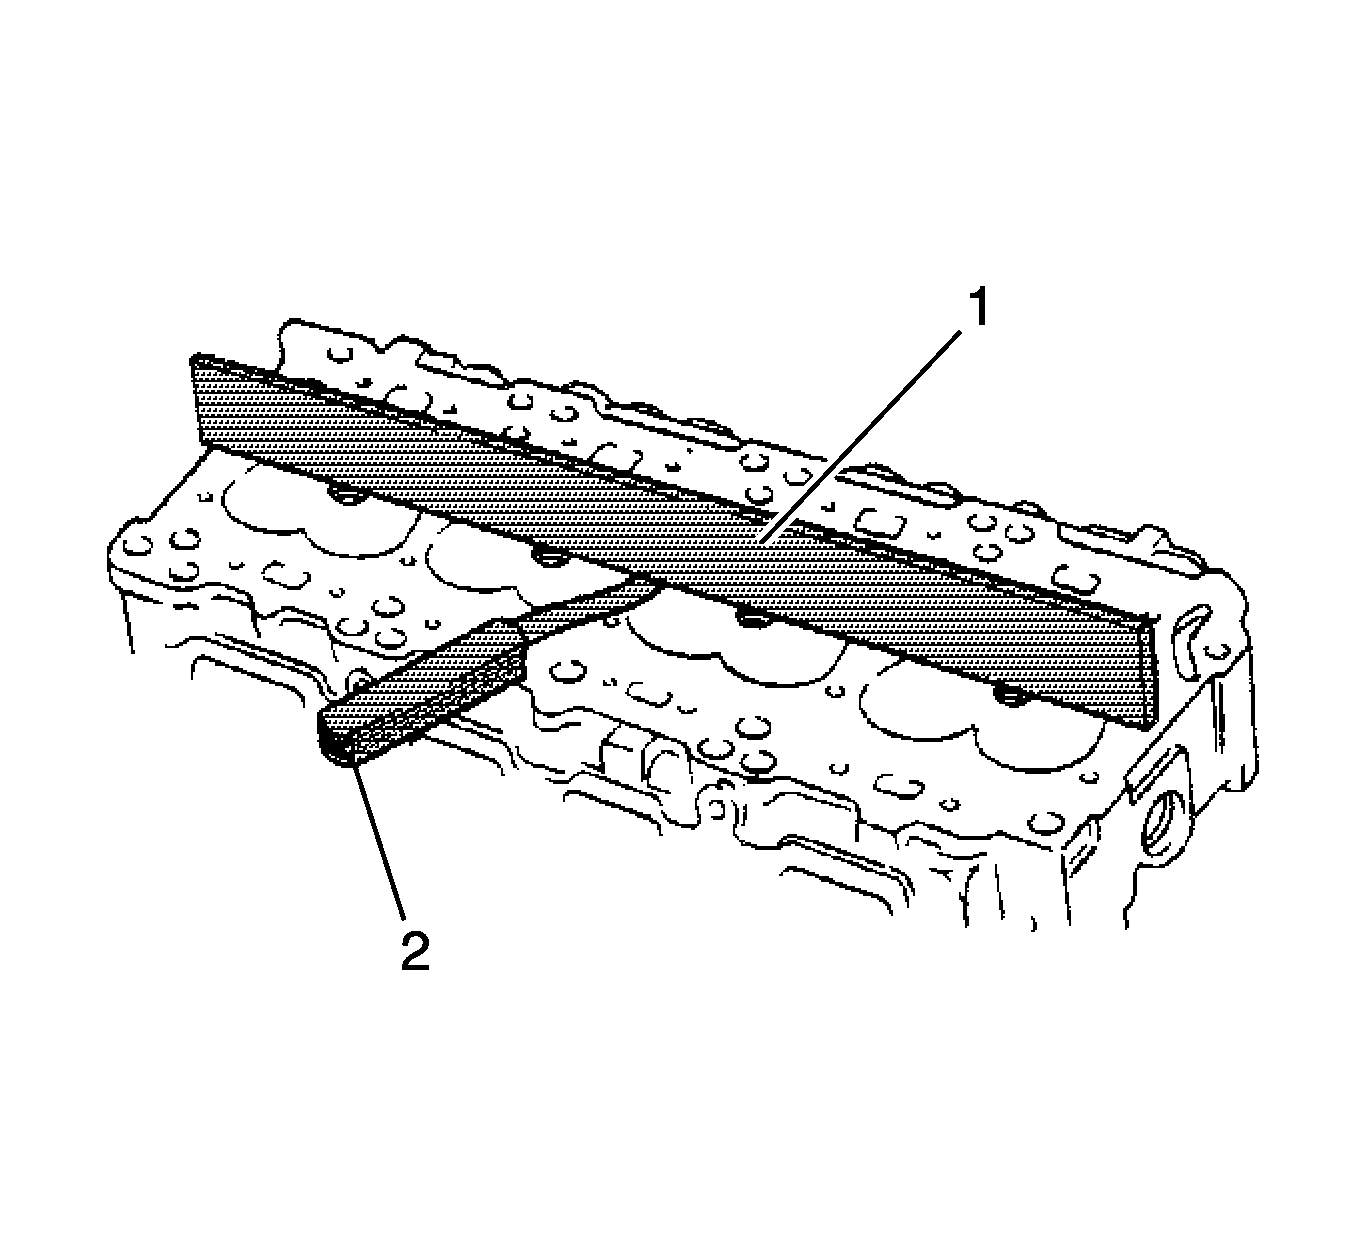
- Inspect the cylinder head deck surface for flatness using a straight edge (1)
and feeler gage (2). Refer to
Engine Mechanical Specifications. If the cylinder head is out of specification, replace the cylinder head. Do not machine the cylinder head.
- Inspect all the threaded holes for damage. Threads may be reconditioned with thread inserts.
- Inspect the sealing surfaces.
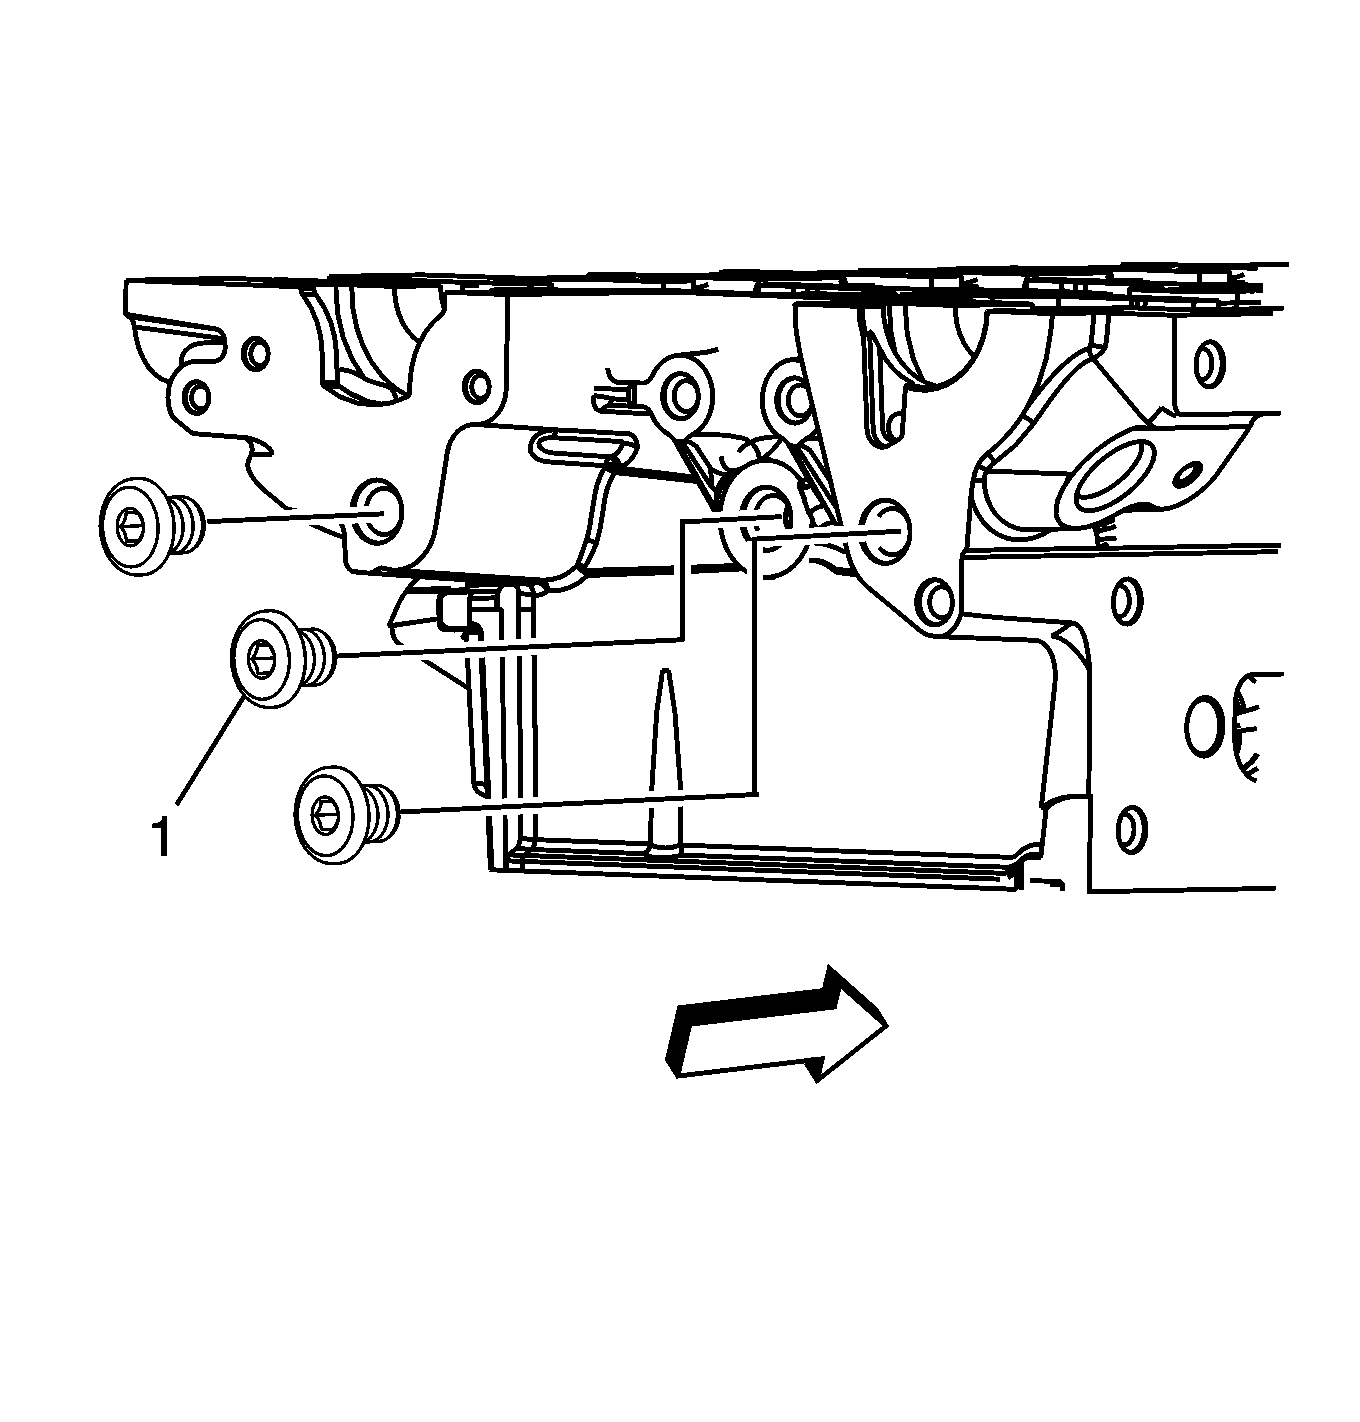
- Inspect the cylinder head plugs (1).
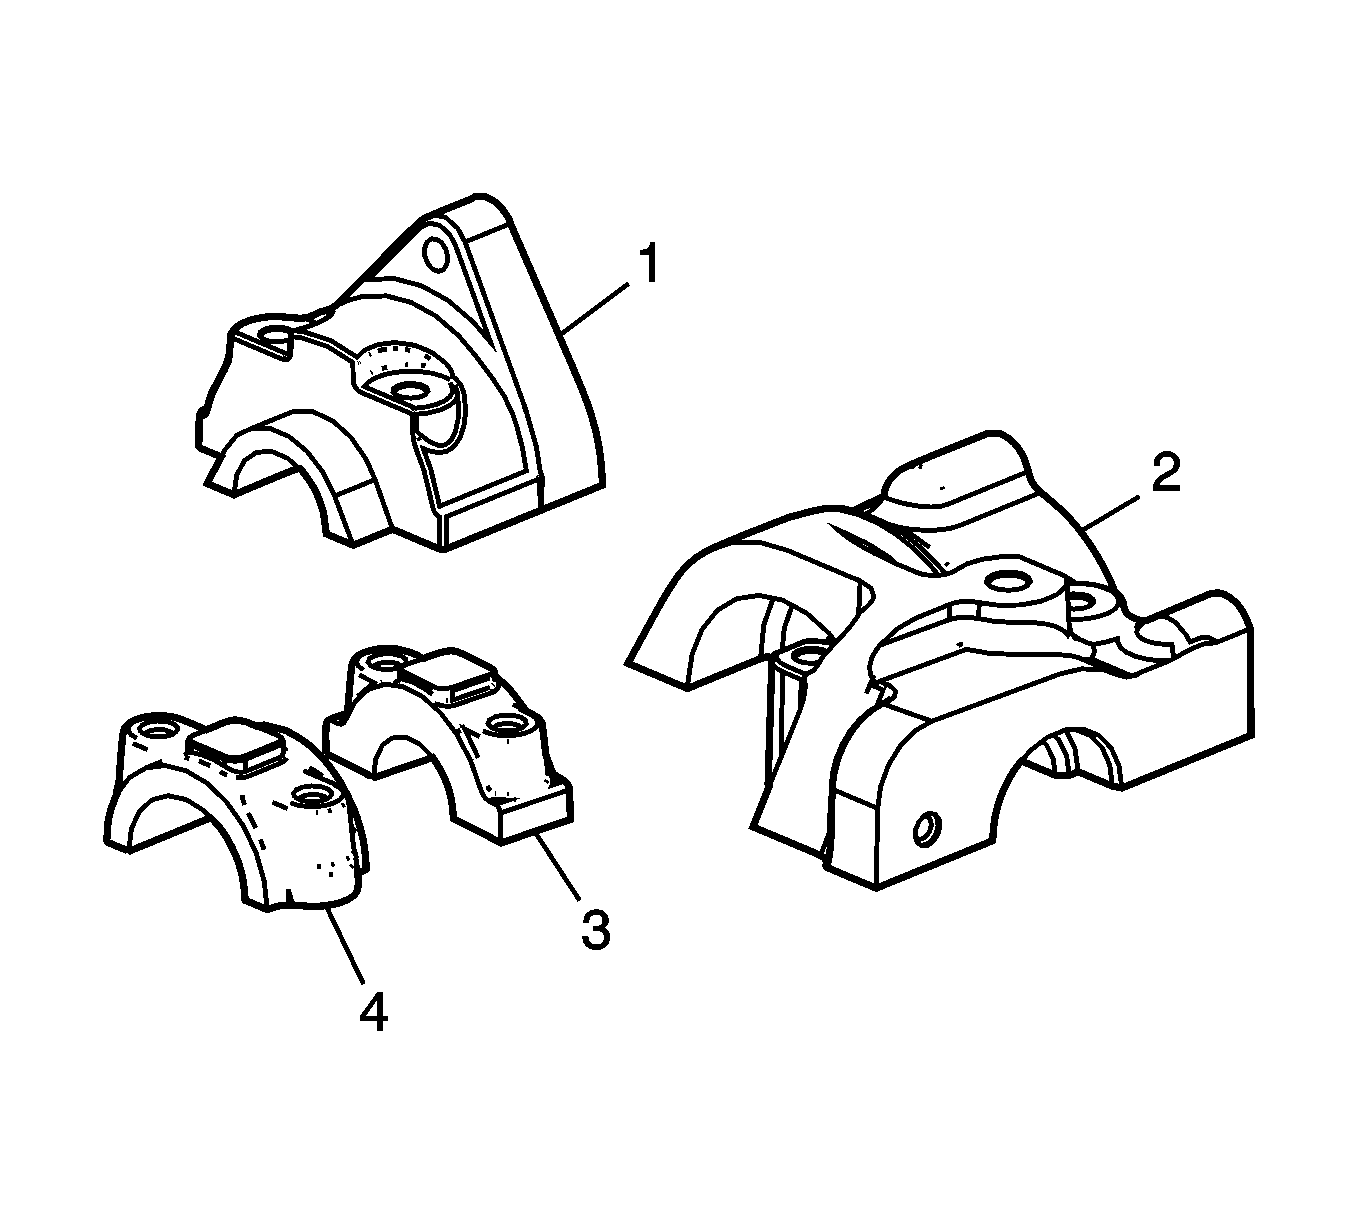
- Inspect the intake and exhaust camshaft
bearing rear caps (1, 2) for damage.
- Inspect the rear bearing mating surfaces for damage.
- Inspect the remaining bearing caps (3, 4) for damage.

- Install the spark plugs (1) and tighten to
20 N·m
(15 lb ft).
- Inspect the lifter bore for damage. Ensure the bore is clean of debris.


