Special Tools
| • | BO-46974 Glass Removal System |
| • | BO-641 Suction Holder |
For equivalent regional tools, refer to Special Tools.
Note: The following document describes the procedure for removing the rear window replacement using glass removal system BO-46974. As a supplement to the existing video VT 54, concise steps will be shown for removing the rear window replacement without destroying it. With the introduction of BO-46974 glass removal system , the conventional glass removing methods are no longer used.
Position the vehicle on level ground and move the front wheels to the straight-ahead position.
Tool BO-46974 glass removal system is recommended for removing glass without destroying it. Further information can be found in video VT 54.
Before cutting out a stationary window, apply a double layer of masking tape around the perimeter of the painted surfaces.
Warning: Approved safety glasses and gloves should be worn when performing this procedure to reduce the chance of personal injury.
Removal Procedure
- Open the rear compartment lid.
- Remove the rear window trim finish panel. Refer to Rear Window Trim Finish Panel Replacement.
- Remove the body lock pillar upper trim panel. Refer to Body Lock Pillar Upper Trim Panel Replacement.
- Cut the cutting wire to length.
- Unroll 6 m (19.68 ft ) of cutting wire from the roll of wire.
- Insert awl through the adhesive bed.
- Attach cutting wire to the awl.
- Pull the awl and cutting wire into the vehicle.
- Lay the cutting wire on the rear window replacement all the way round.
- Position winches on rear window replacement.
- Cut out the rear window.
- Cut out with winch (II).
- Cut out the rear window.
- Cut out the rear window.
- Remove rear window.
- Cut adhesive bead on the vehicle.
- Repair any paint damage.
- Cut adhesive bead on the rear window.
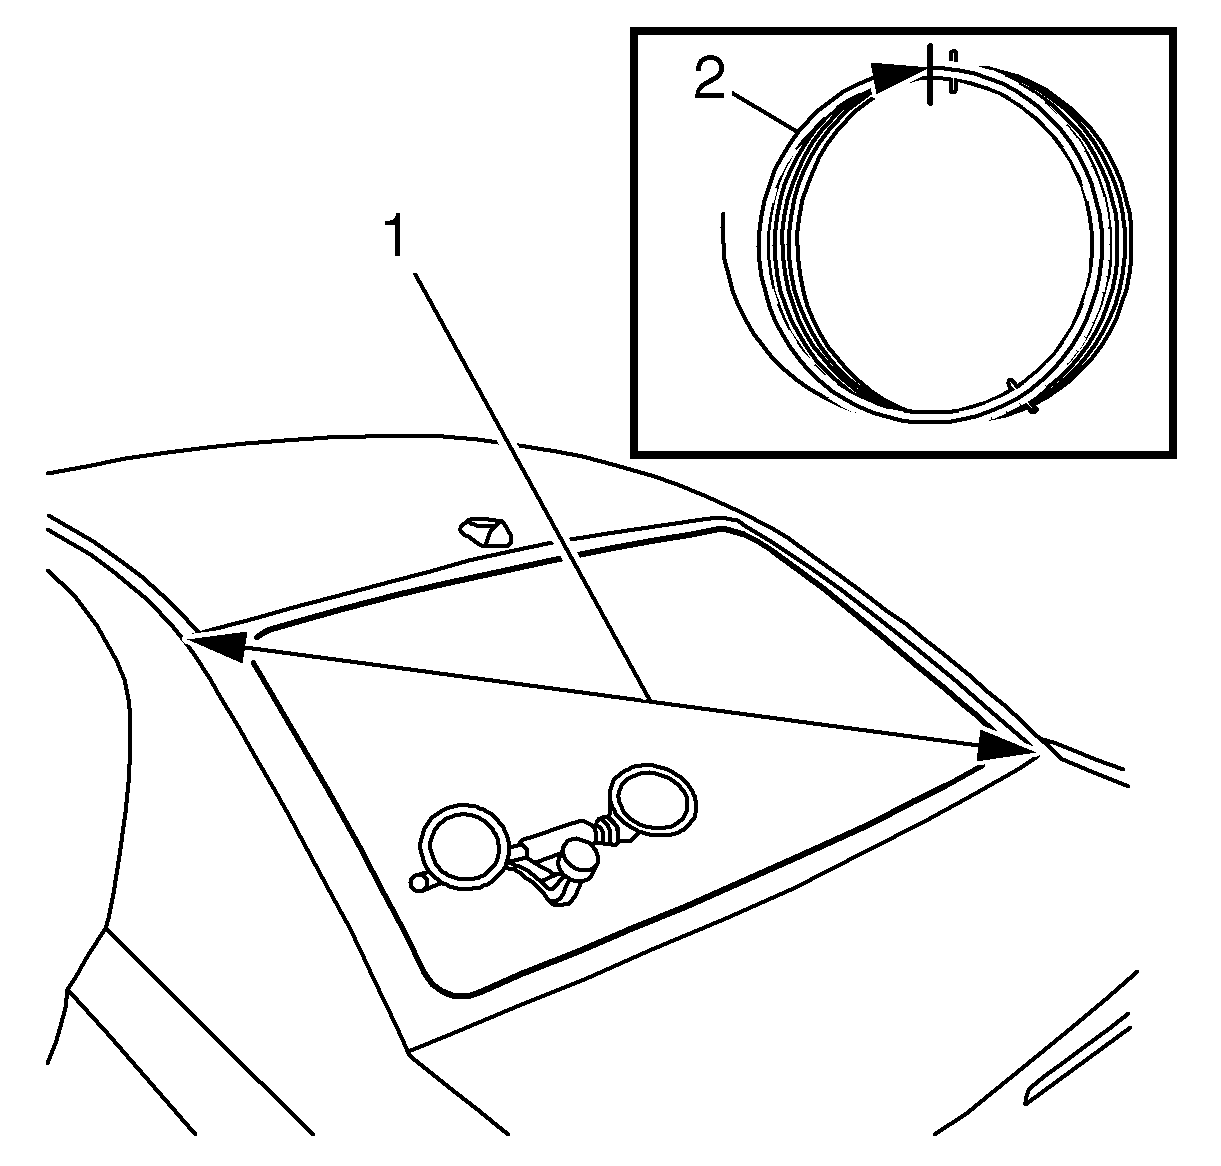
Note: The circumference (2) of the roll of wire is approximately 1 m (3.28 ft ).
Note: The length of wire required for removing the glass is the diagonal length (1) of the rear window replacement multiplied by 4.
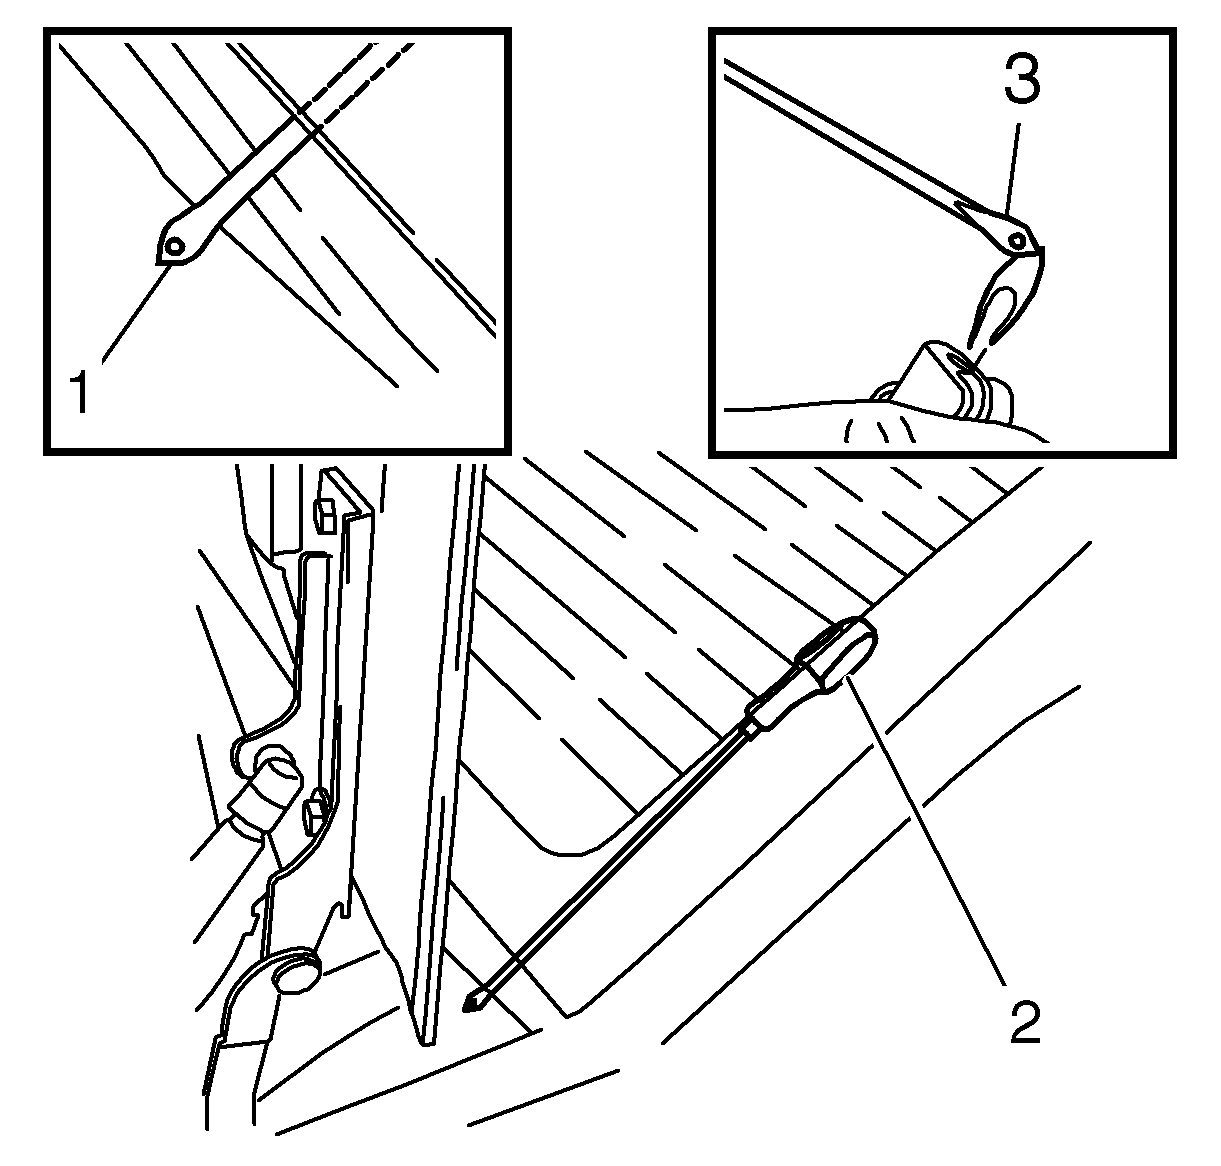
Note: Twisting the tip of the awl (1) when inserting it will damage the rear window replacement.
| • | Insert the awl (2) (by applying pressure and making slight movements parallel with the adhesive bed). |
| • | To make insertion with the awl easier, heat the tip (3) of the awl. |
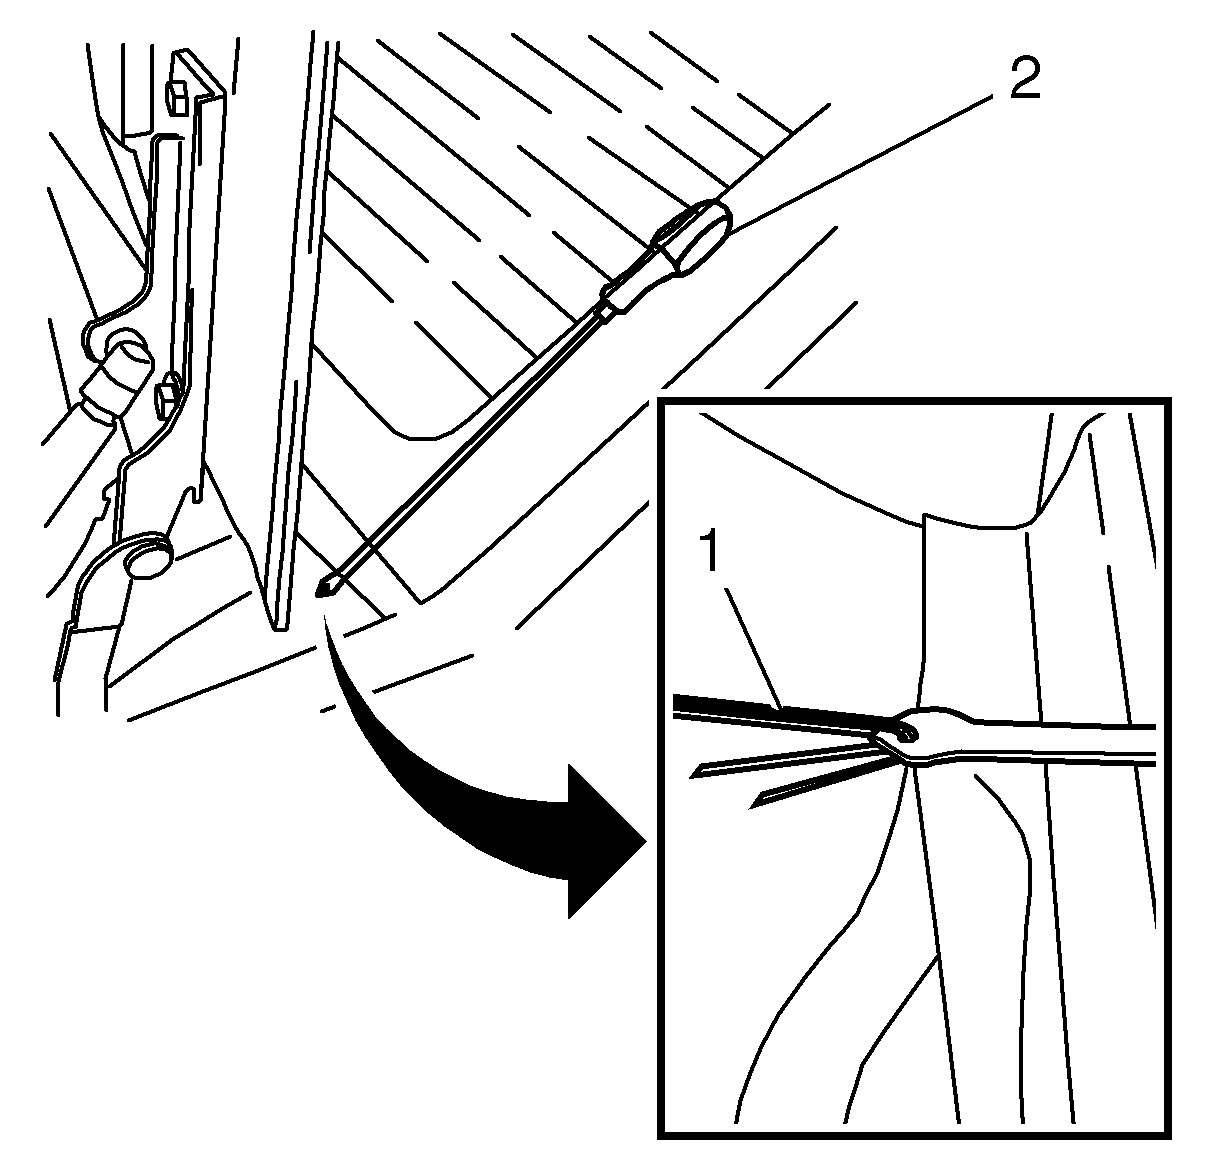
| • | Thread the cutting wire (1) through the hole of the awl (2). |
| • | Bend over the cutting wire. |
| Note: The cutting wire is bent at right angles to the "tip" of the awl, to minimize resistance when pulling it in. |
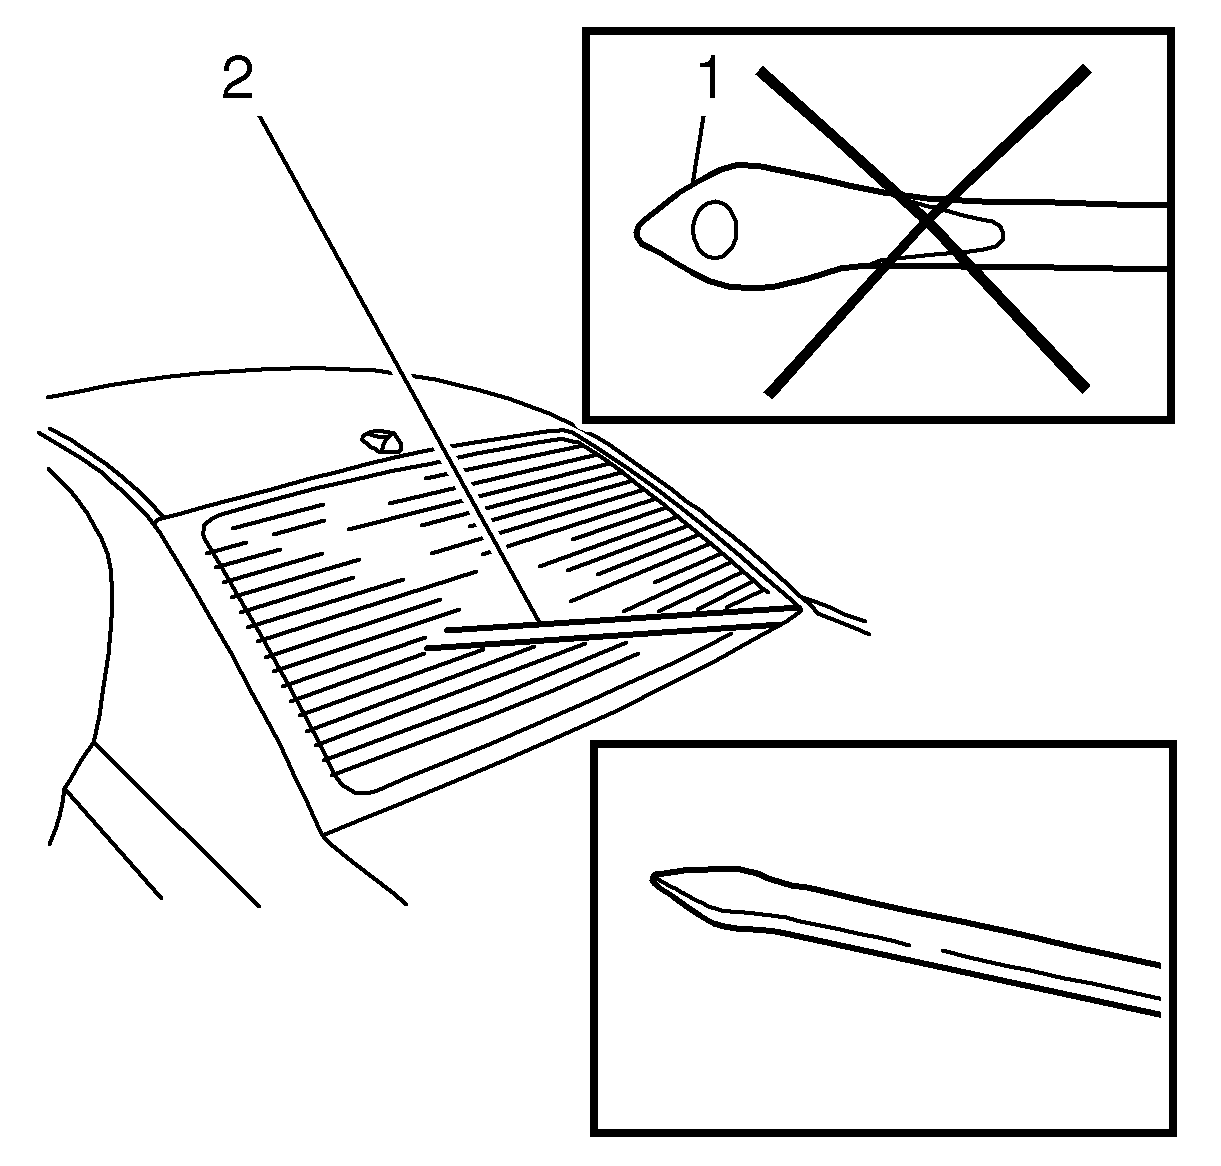
Note: When pulling in the cutting wire do not twist the "tip" (1) of the awl (to avoid damaging the rear window replacement).
Pull the cutting wire (2) with awl into the position shown.
Note: When pulling through, keep the flat side of the awl "tip" (1) parallel with the edge of the rear window replacement.
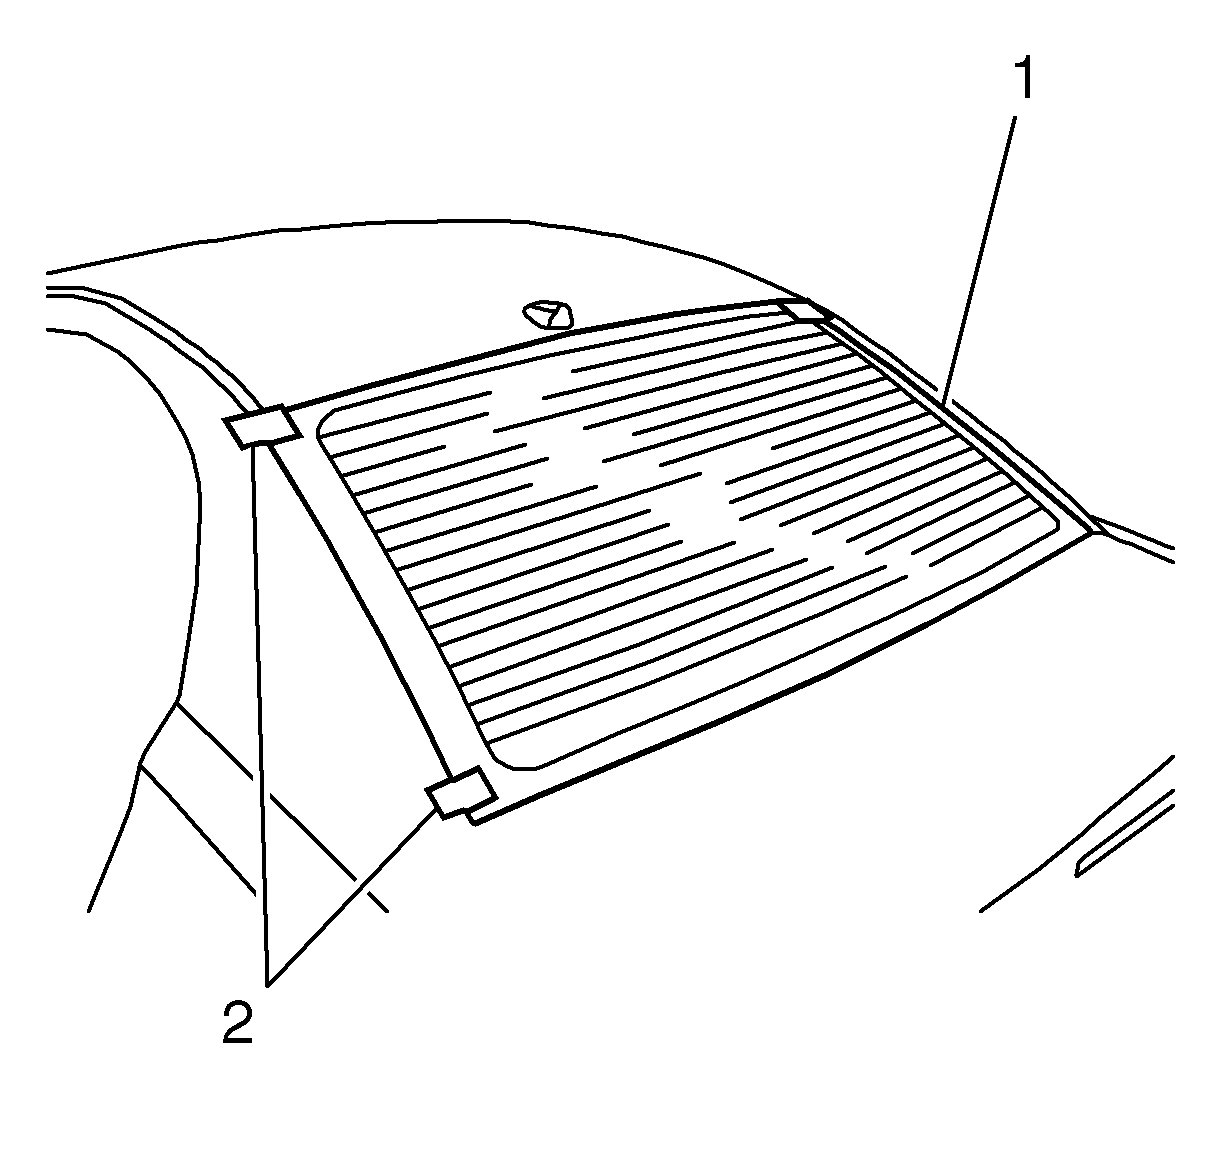
| • | In the area of the four radii (2), lay the cutting wire (1) under the rear window replacement. |
| • | Fix the cutting wire in position with fabric tape (3). |
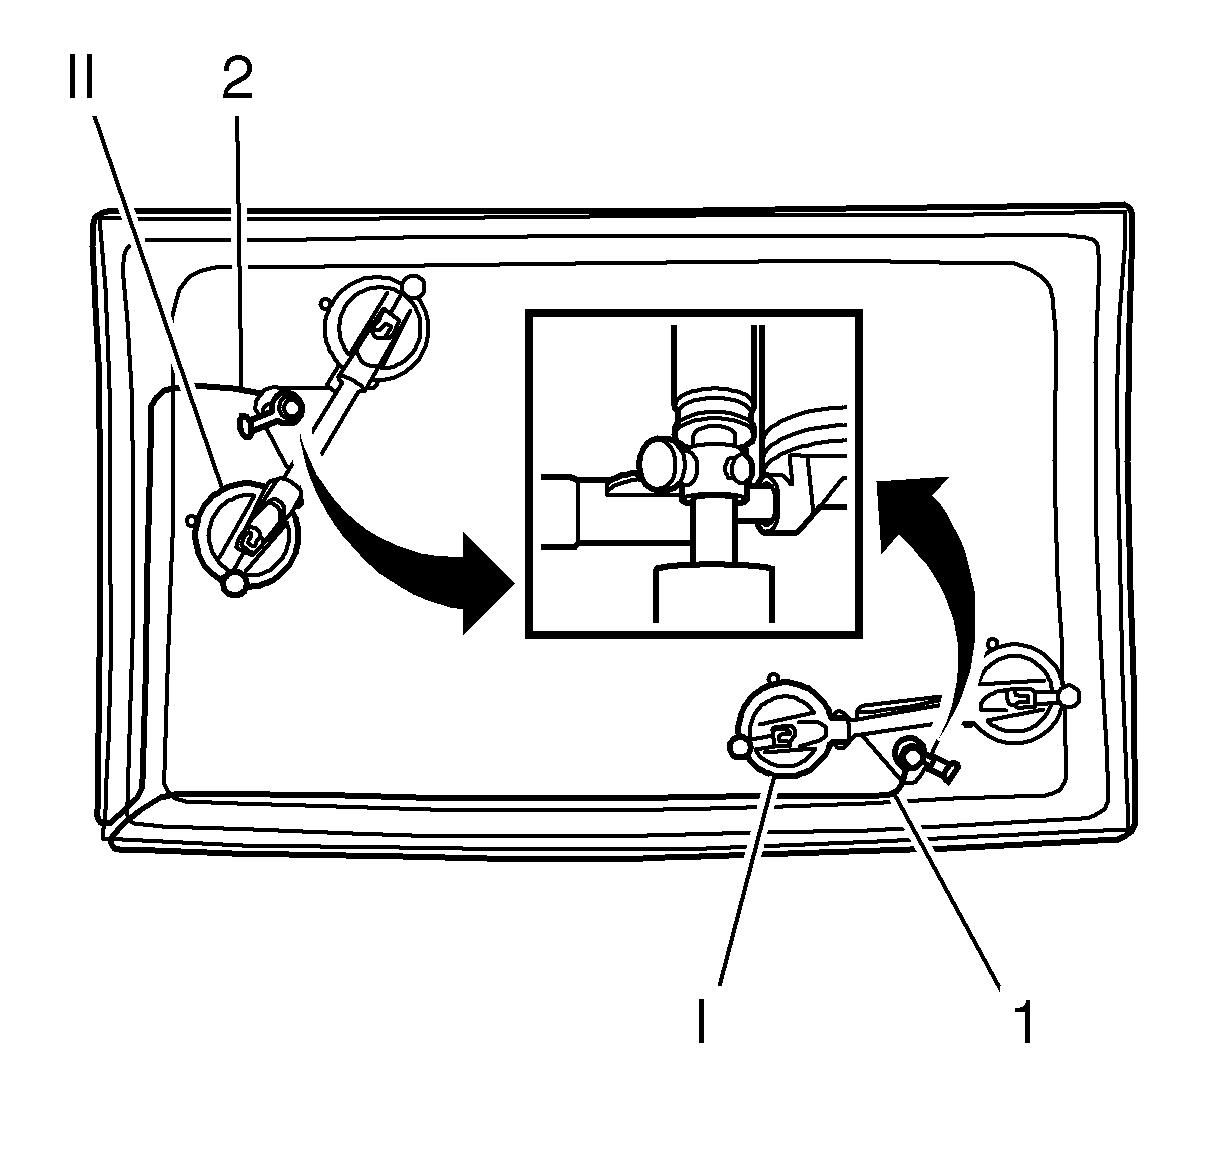
| • | Position winches (I) and (II) and attach cutting wire (1) and (2) to the winding heads of winches (I) and (II). |
| • | Insert the transfer ratchet on winch (I) and pre-tension the cutting wire. |
| Note: Check that the cutting wire has been laid correctly all round, correct if necessary. |
| • | Roll the cutting wire under the rubber seal of the rear window replacement all the way round. |
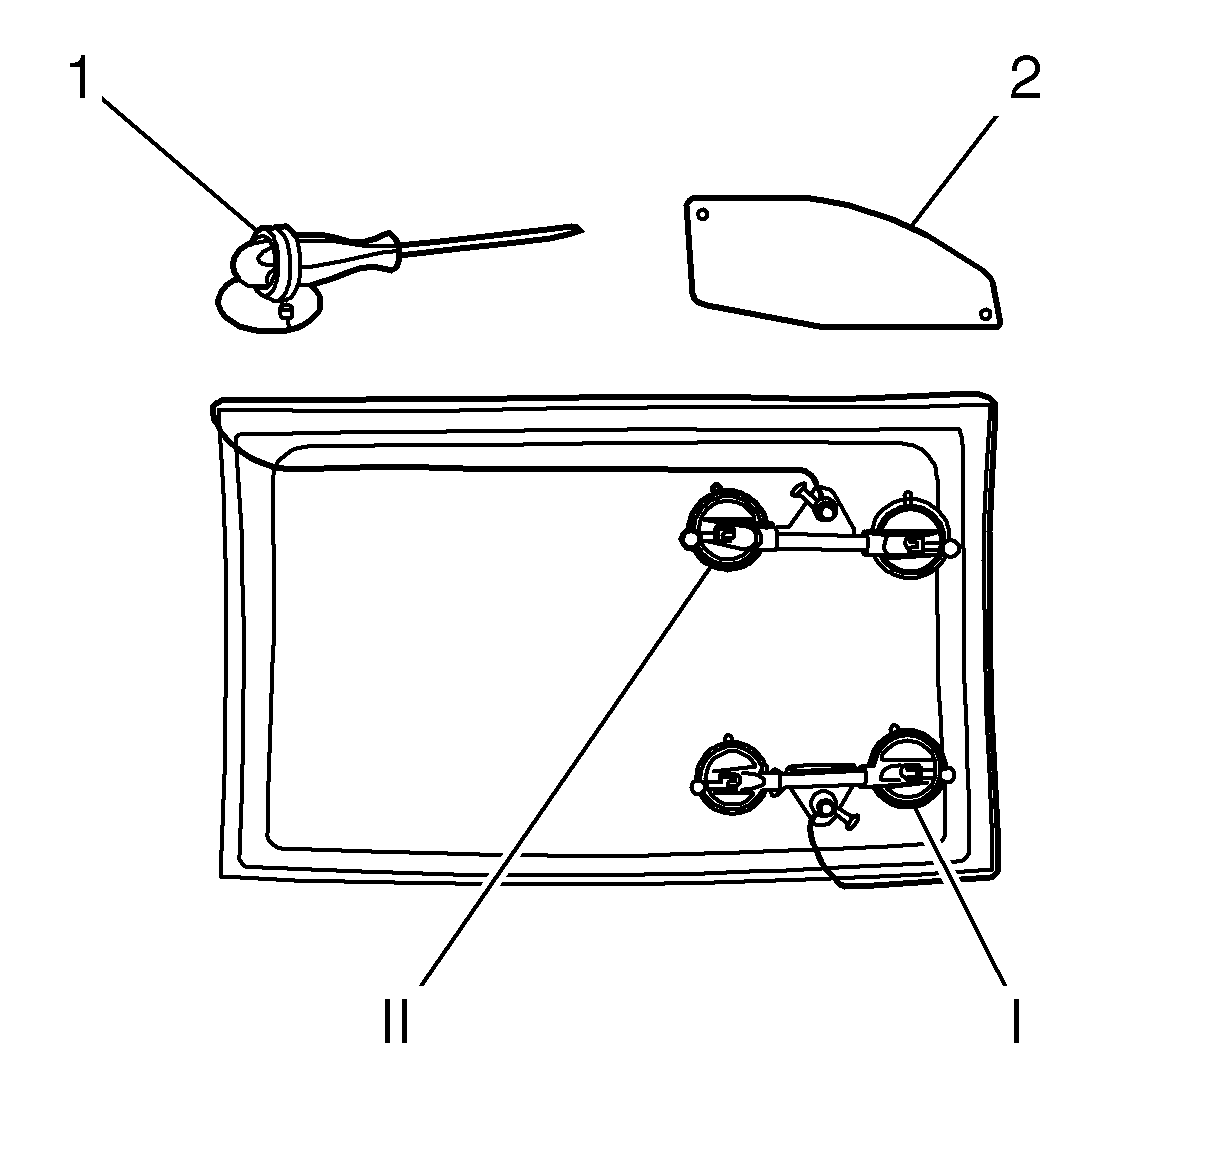
Note: For a rational rear window replacement cutting operation, the winches (I, II) must be positioned on the rear window replacement in the order shown.
When cutting out with the winch, more pulling force is required to cut the areas around the radii. The hold-down positioner (1) and the plastic plate (2) should also be used when cutting in the critical areas.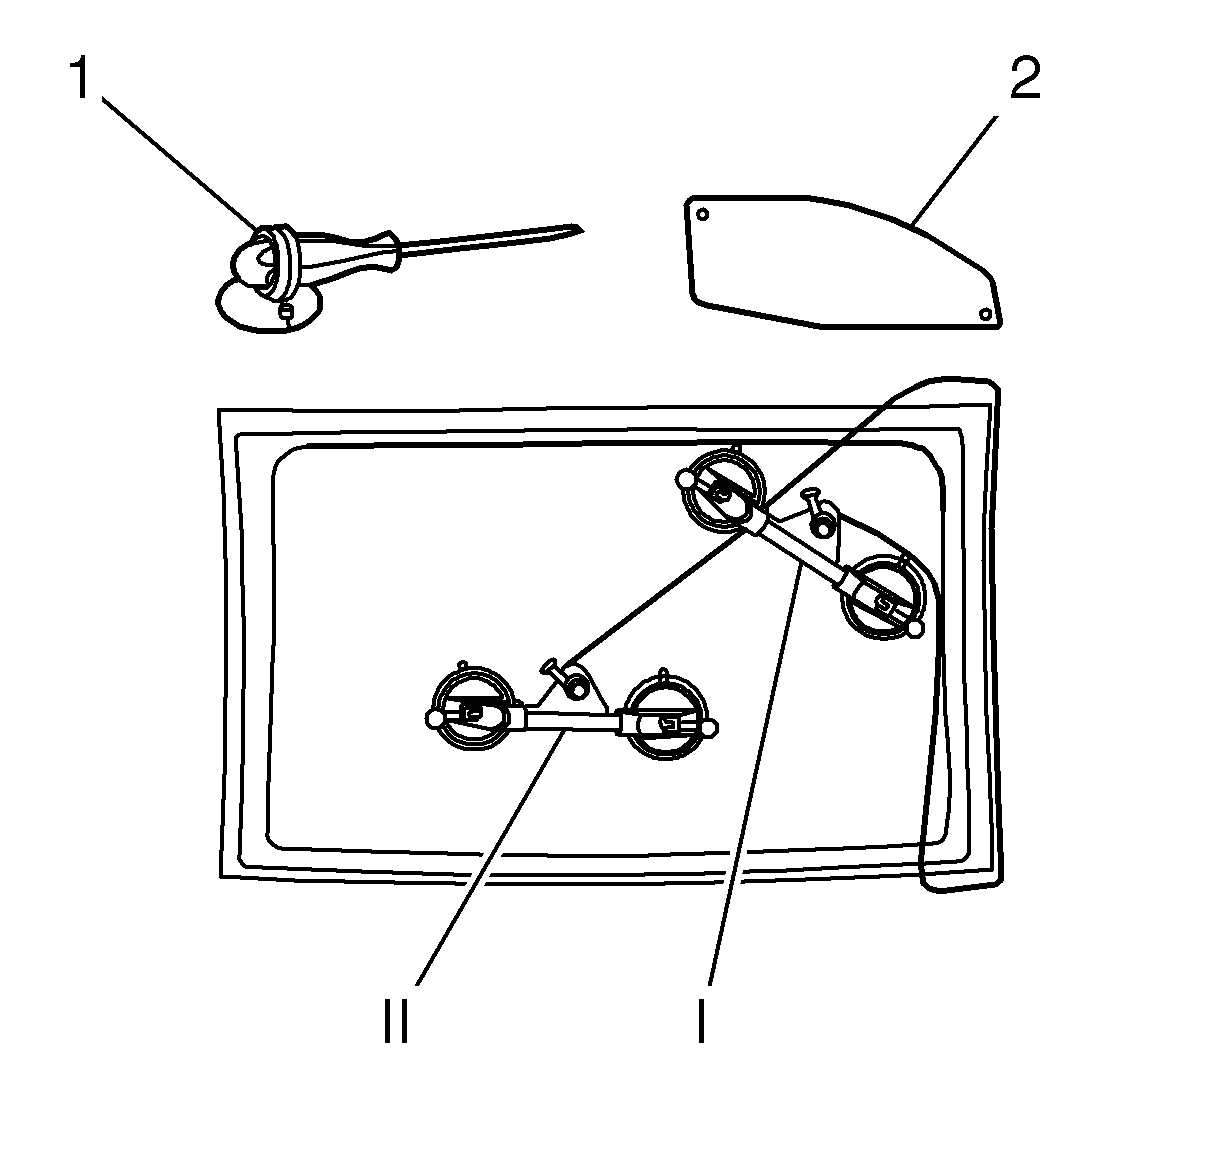
Re-position winch (II) and continue cutting with winch (I).
Note: Use hold-down positioner (1) and plastic plate (2) in the critical areas.
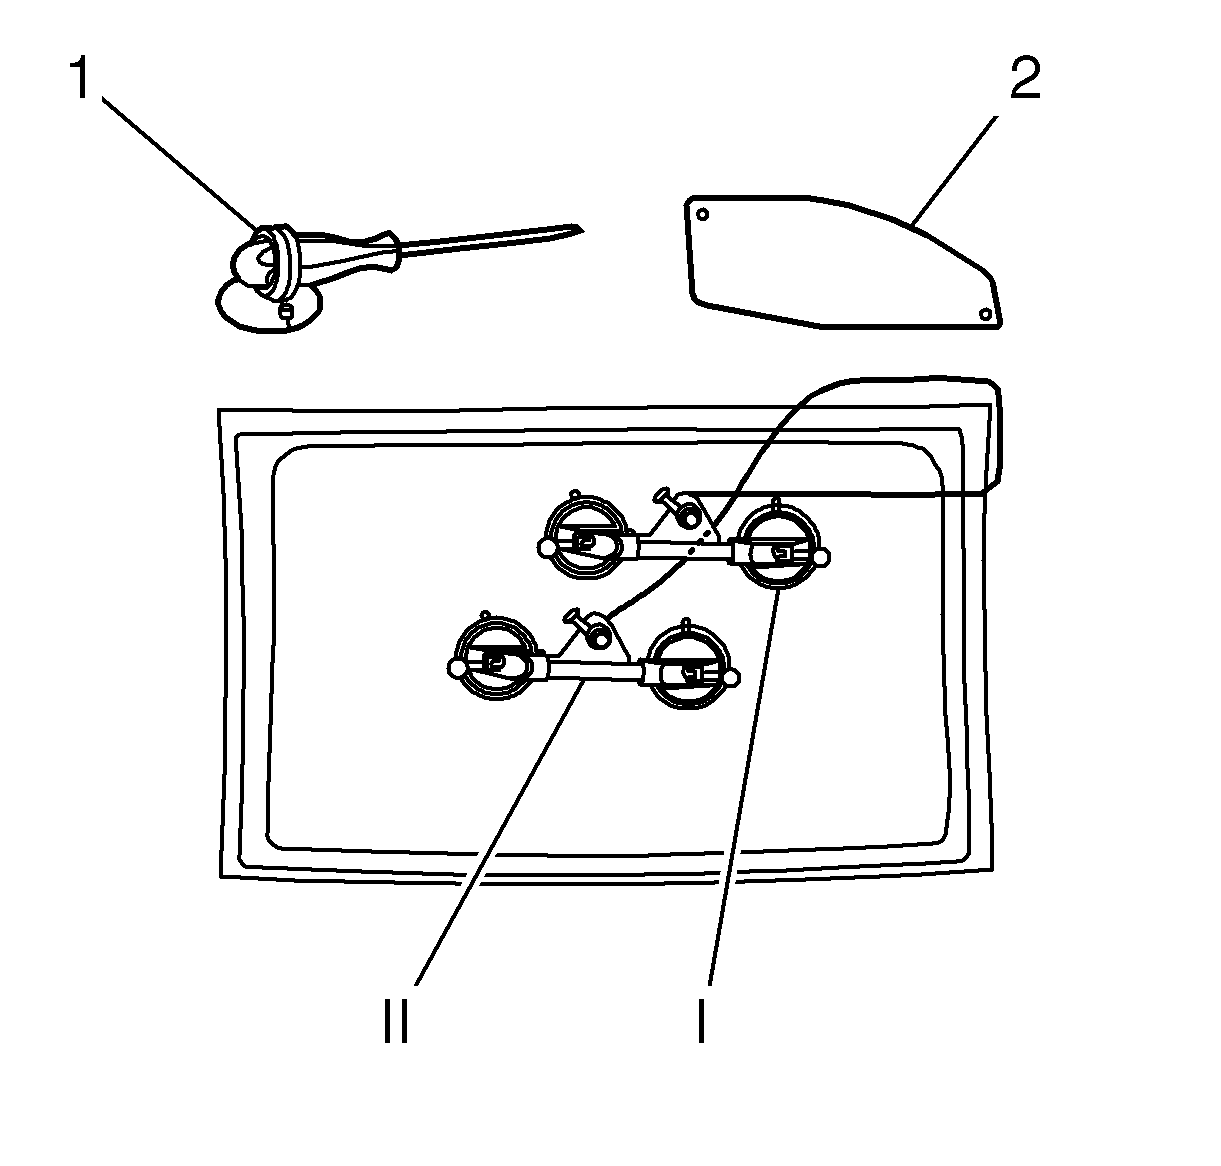
Re-position winch (I) and finish cutting out.
Note: Use hold-down positioner (1) and plastic plate (2) in the critical areas.
Remove rear window with second mechanic.
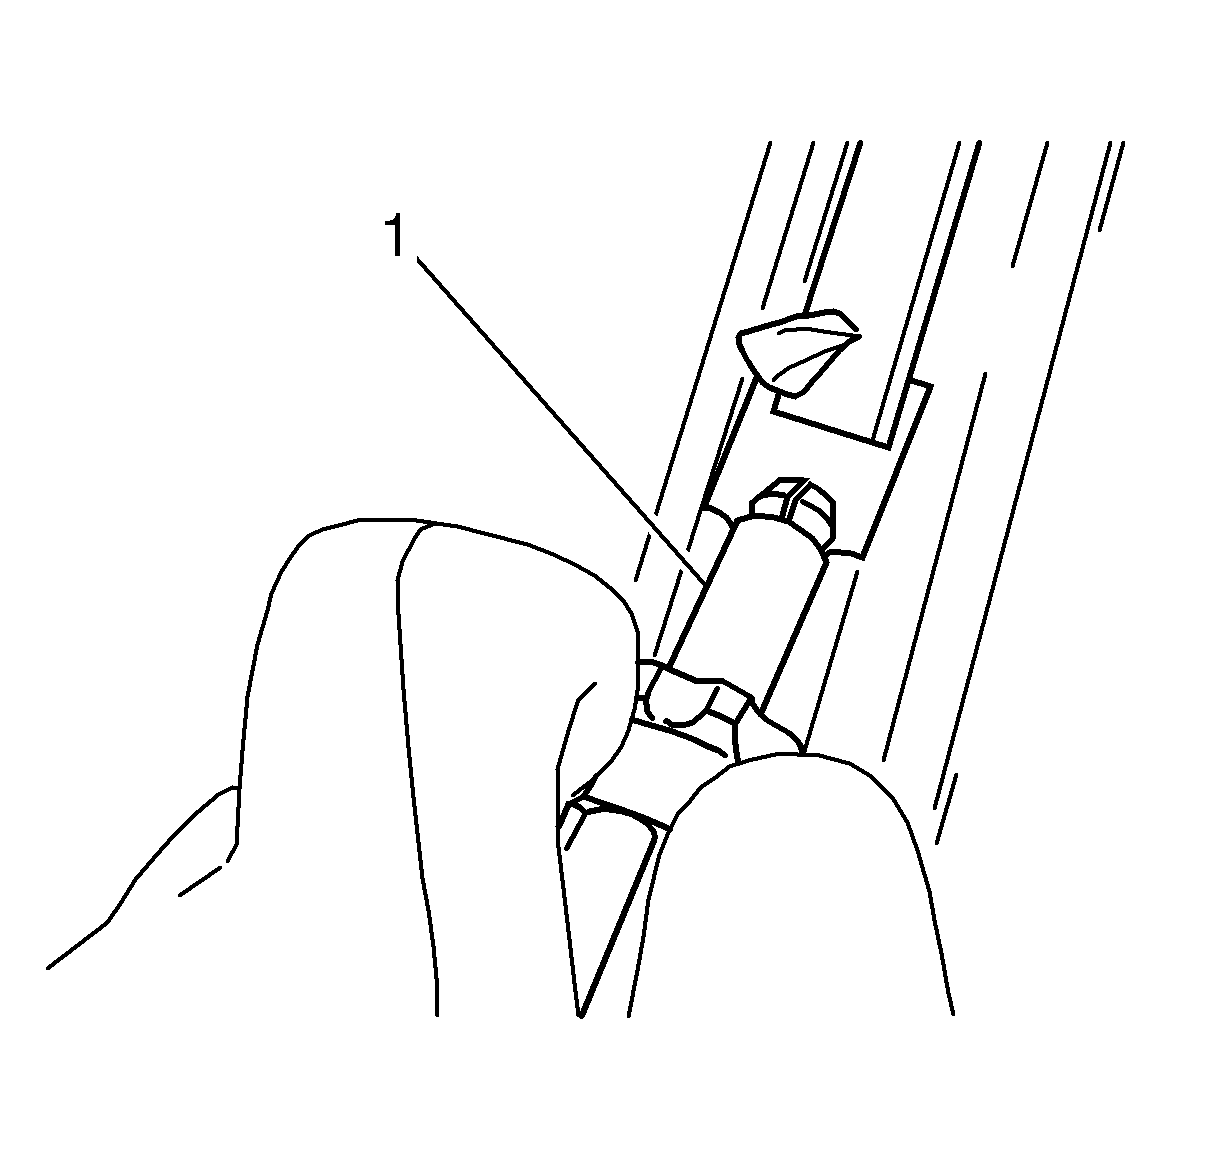
Cut the adhesive bead all round using the knife supplied (1) to around 1 mm (0.04 in) thickness.
Using a touch-up pen to match the color of the vehicle, repair any paint damage.
Cut the adhesive bead all round using the knife supplied to around 1 mm (0.04 in) thickness.
Installation Procedure
- Apply primer.
- Apply adhesive bead.
- Install rear window into the opening.
- Remove BO-641 suction holder .
- Install the rear window trim finish panel. Refer to Rear Window Trim Finish Panel Replacement.
- Install the body lock pillar upper trim panel. Refer to Body Lock Pillar Upper Trim Panel Replacement.
- Remove the double layer of masking tape around the perimeter of the painted surfaces.
- Close the rear compartment lid.
Note: Only with new rear window pane.
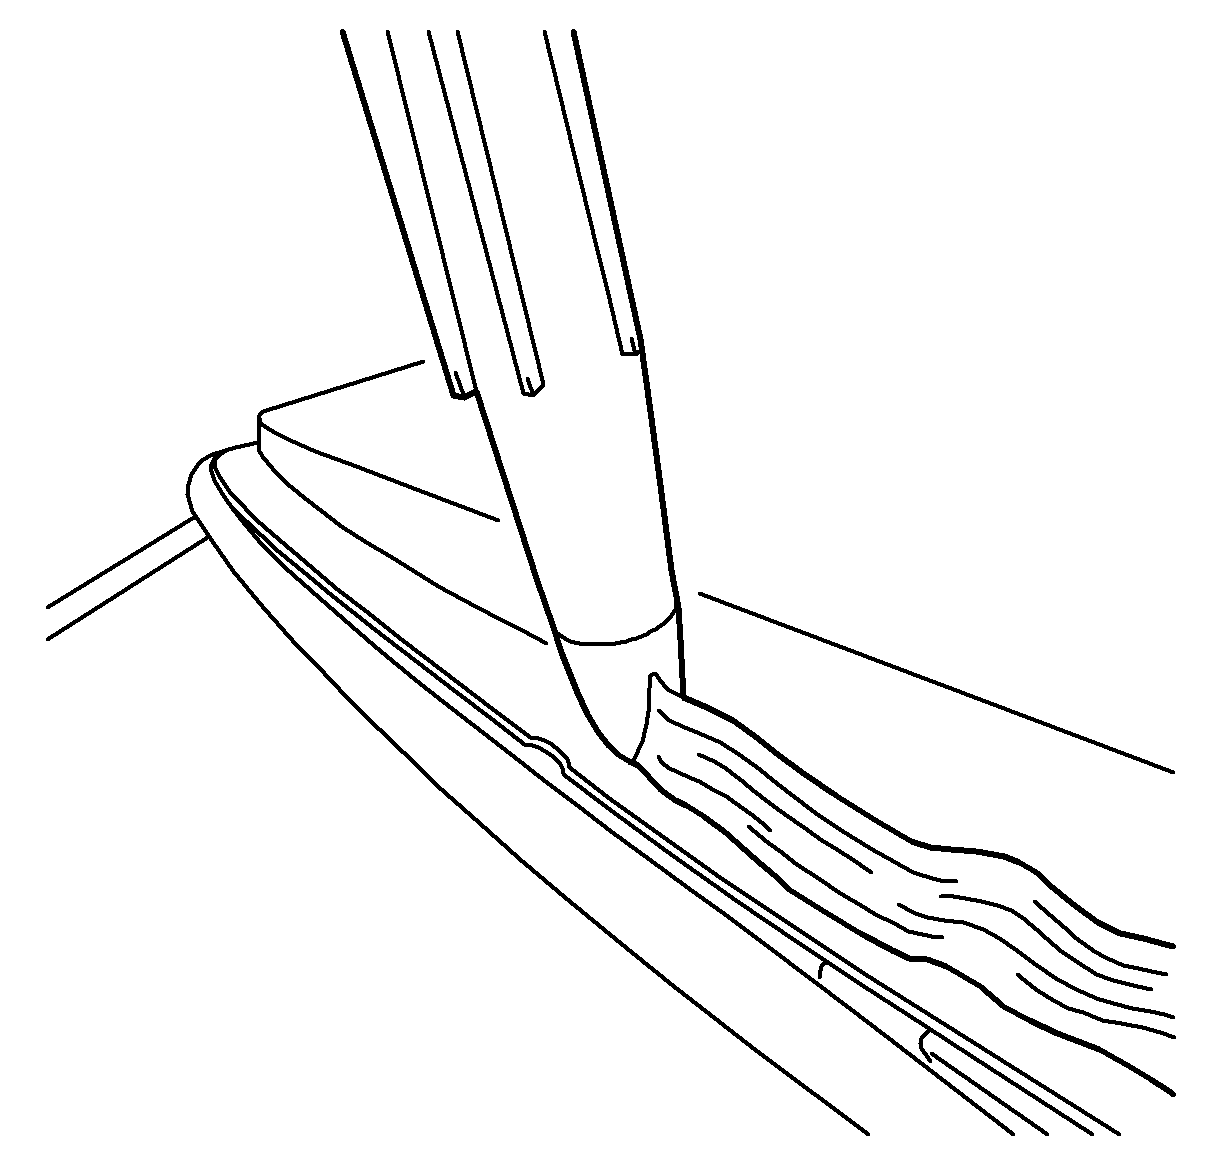
Cut into the tip of the cartridge in such a way that a bead of adhesive approximately 13 mm (0.5 in) thick is produced.
| • | Second mechanic required. |
| • | Insert rear window with BO-641 suction holder . |
| • | Position using fibre tape. |
