Generator Replacement LA1
Removal Procedure
- Remove the battery ground (negative) cable from the battery. Refer to Battery Negative Cable Disconnection and Connection .
- Rotate and secure the engine forward to access rear generator bolts. Refer to Rotating the Engine for Service Access in Engine Mechanical - 3.4L.
- Remove the generator B+ terminal nut.
- Remove the generator B+ lead.
- Remove the generator electrical connector.
- Remove the drive belt from the generator. Refer to Drive Belt Replacement in Engine Mechanical - 3.4L.
- Remove the generator front bolt.
- Remove the generator rear bolts.
- Remove the generator from the generator bracket and position the generator above the drive axle.
- Remove the drive belt tensioner. Refer to Drive Belt Tensioner Replacement in Engine Mechanical-3.4L.
- Remove the generator bracket. Refer to Generator Bracket Replacement .
- Remove the power steering pipes from the power steering pipe retainer.
- Remove the fuel pressure test port (schrader valve) cap from the fuel injector rail.
- Remove the power steering pump and reposition the power steering pump in front of the timing chain cover in order to provide access for the generator. Refer to Power Steering Pump Replacement in Power Steering System.
- Remove electrical harness from retainer on right fender well and position aside.
- Remove the generator from the vehicle.
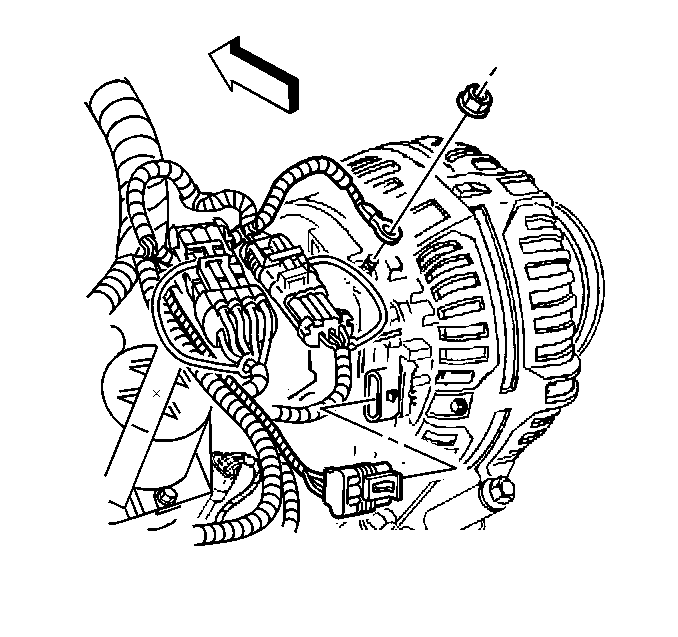
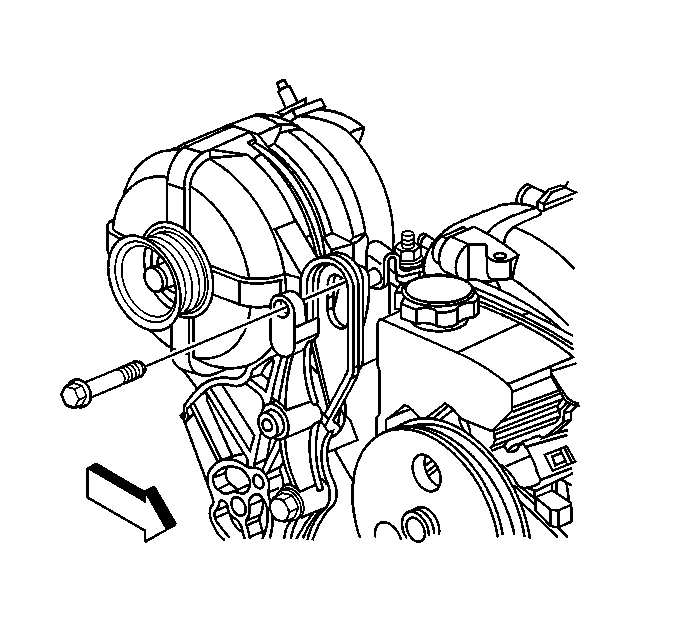
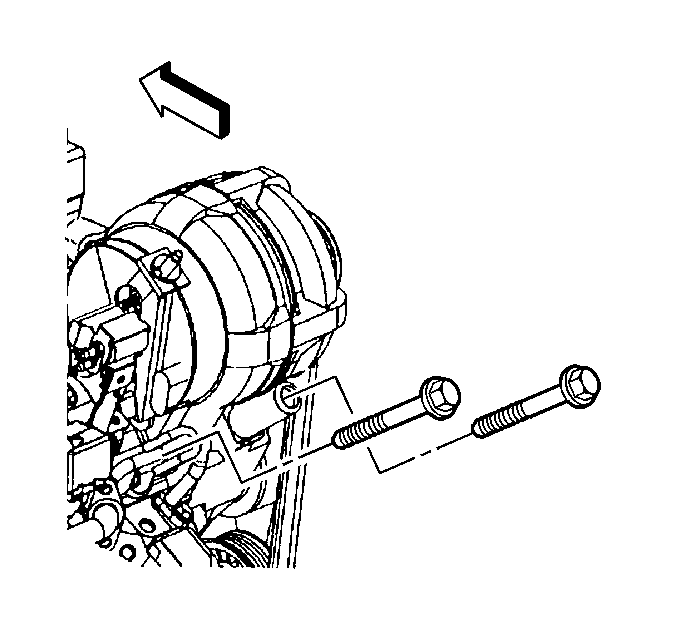
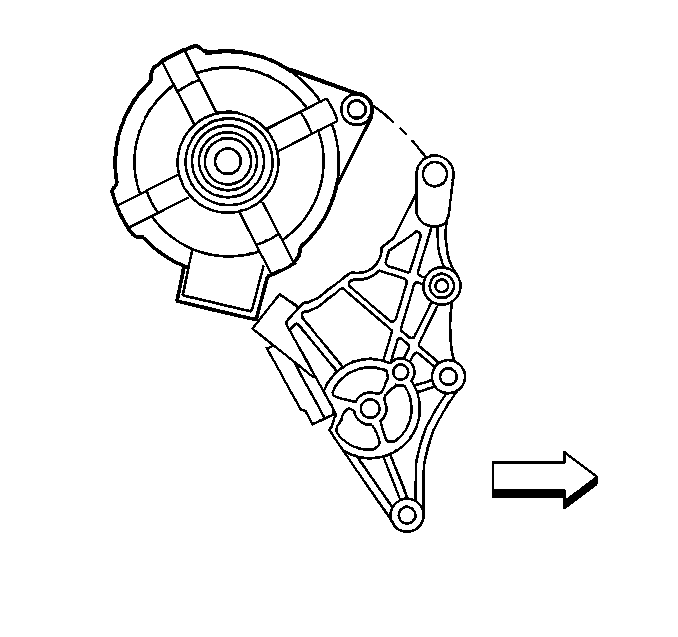
Important: Do not disconnect the power steering pipes from the power steering pump.
Installation Procedure
- Install the generator to the vehicle and position the generator above the drive axle.
- Install electrical harness to retainer on right fender well.
- Install the power steering pump to the engine. Refer to Power Steering Pump Replacement in Power Steering System.
- Install the fuel pressure test port (schrader valve) cap to the fuel injector rail.
- Install the power steering pipes from the power steering pipe retainer.
- Install the generator bracket. Refer to Generator Bracket Replacement .
- Install the drive belt tensioner. Refer to Drive Belt Tensioner Replacement in Engine Mechanical - 3.4L.
- Install the generator to the generator bracket and position the generator above the drive axle.
- Install the drive belt tensioner. Refer to Drive Belt Tensioner Replacement in Engine Mechanical - 3.4L.
- Install the generator to the generator bracket.
- Install the generator front bolt.
- Install the generator rear bolts.
- Install the drive belt. Refer to Drive Belt Replacement in Engine Mechanical - 3.4L.
- Install the generator electrical connector.
- Install the generator B+ lead.
- Install the generator B+ terminal nut.
- Rotate the engine rearward and install the engine mount strut bracket bolts. Refer to Rotating the Engine for Service Access in Engine Mechanical - 3.4L.
- Install the battery ground (negative) cable to the battery. Refer to Battery Negative Cable Disconnection and Connection .


Notice: Use the correct fastener in the correct location. Replacement fasteners must be the correct part number for that application. Fasteners requiring replacement or fasteners requiring the use of thread locking compound or sealant are identified in the service procedure. Do not use paints, lubricants, or corrosion inhibitors on fasteners or fastener joint surfaces unless specified. These coatings affect fastener torque and joint clamping force and may damage the fastener. Use the correct tightening sequence and specifications when installing fasteners in order to avoid damage to parts and systems.
Tighten
Tighten the generator bolts to 50 N·m
(37 lb ft).

Tighten
Tighten the generator B+ terminal nut to 13 N·m
(115 lb in).
Generator Replacement LY7
Removal Procedure
- Disconnect the battery ground (negative) cable from the battery. Refer to Battery Negative Cable Disconnection and Connection .
- Remove the torque struts and rotate the engine in order to provide access to remove the generator. Refer to Engine Mount Strut Replacement - Left Side and Engine Mount Strut Replacement - Right Side in Engine Mechanical - 3.6L (LY7).
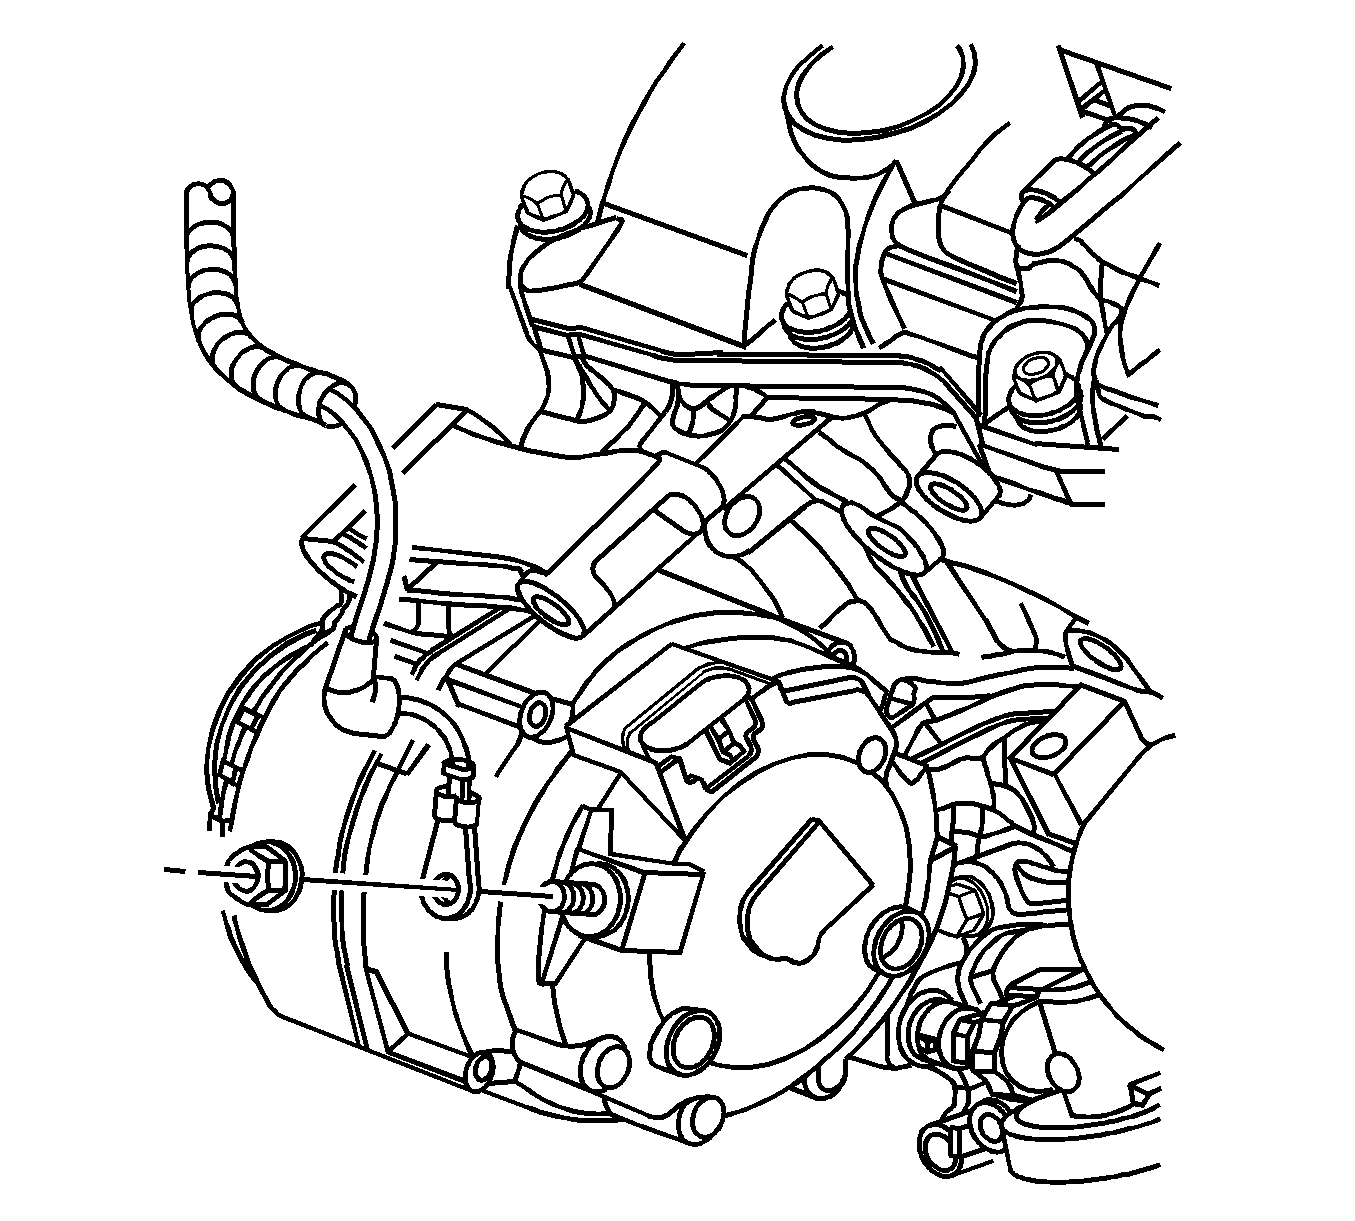
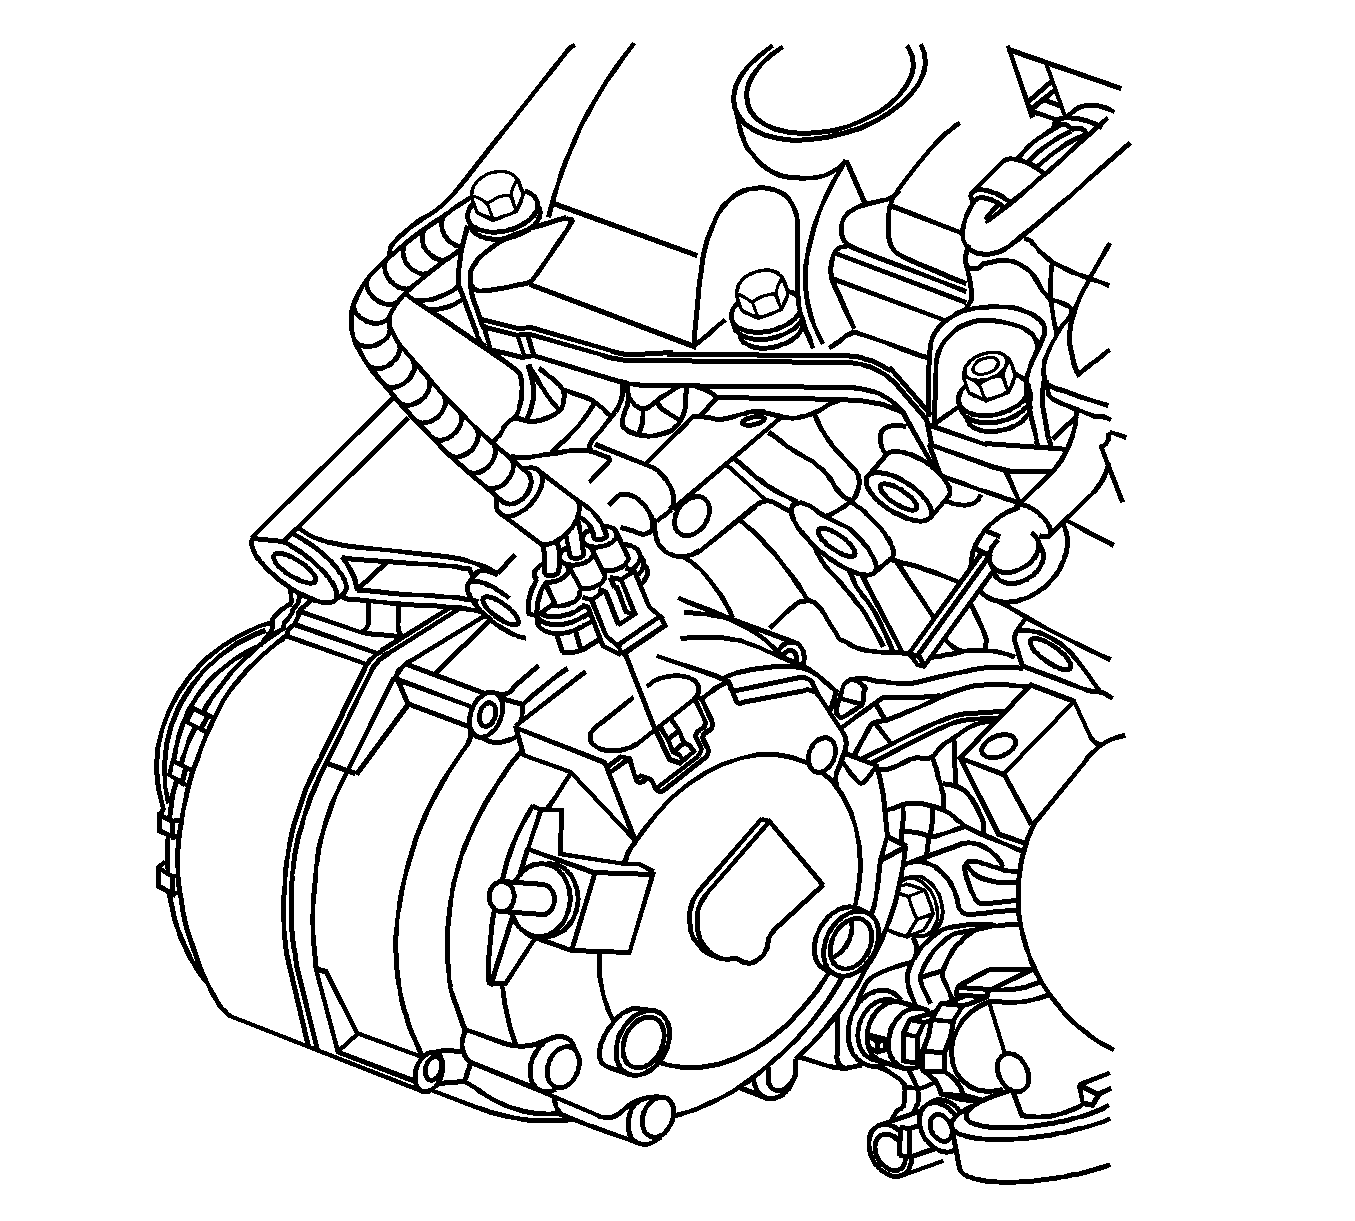
- Remove the generator B+ terminal nut and the battery cable from the generator.
- Disconnect the generator electrical connector.
- Remove the drive belt from the generator. Refer to Drive Belt Replacement in Engine Mechanical - 3.6L (LY7).
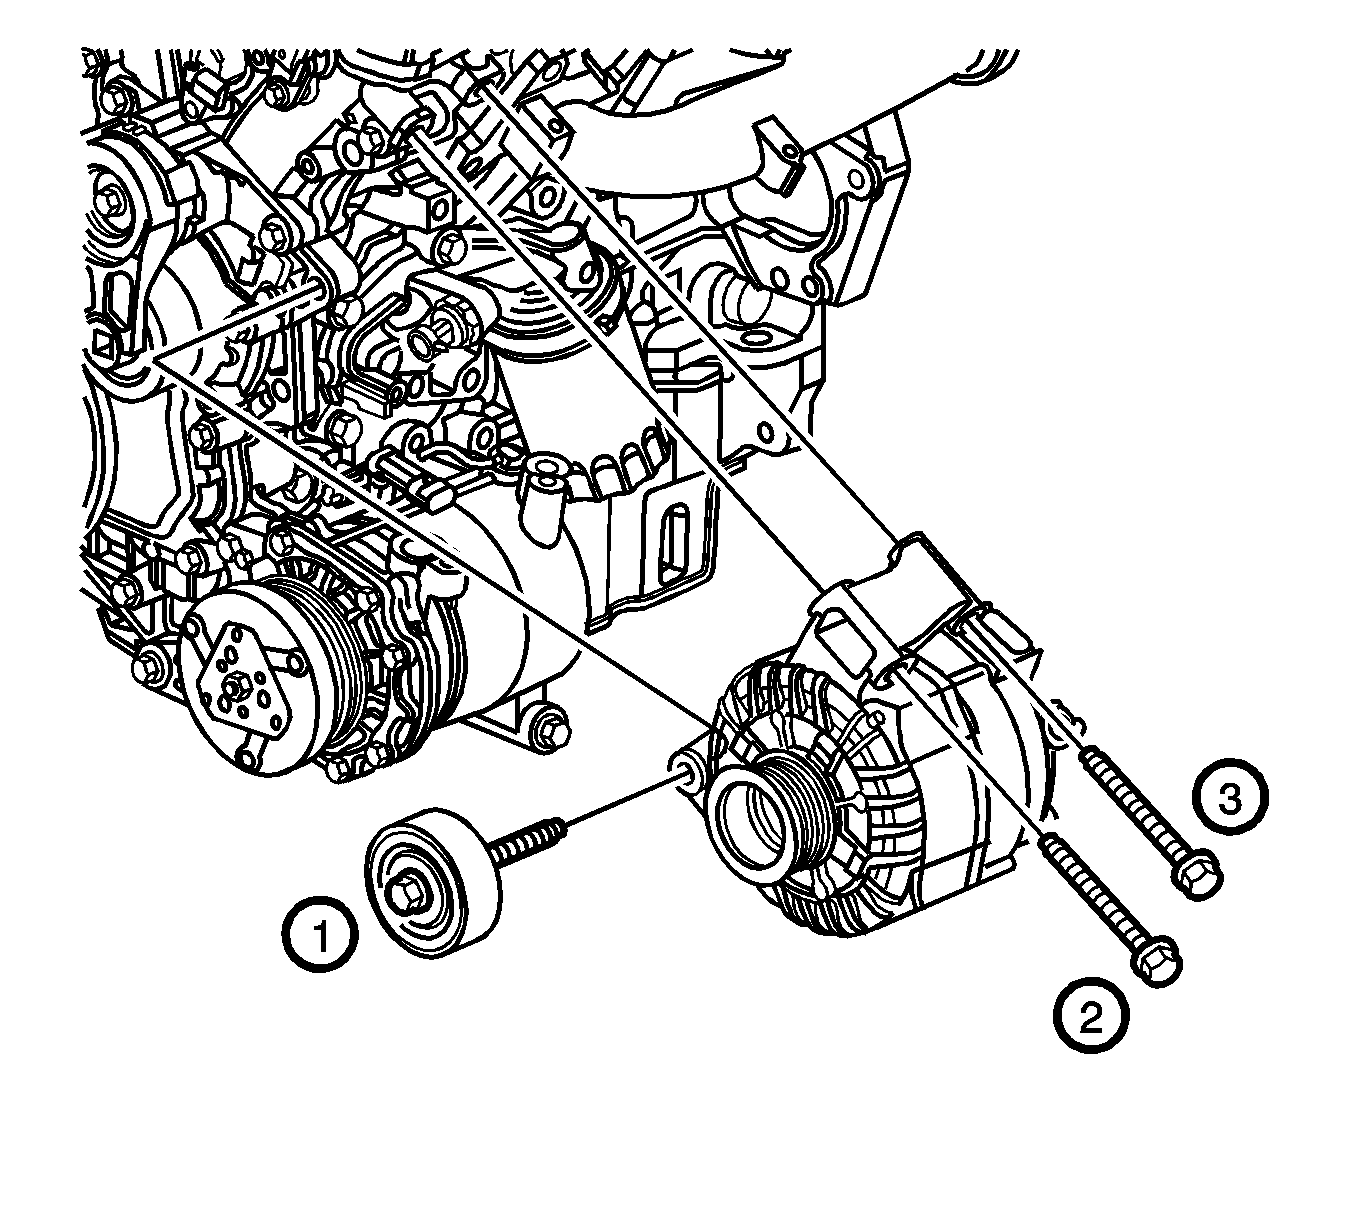
- Remove the idler pulley. Refer to Drive Belt Idler Pulley Replacement in Engine Mechanical - 3.6L (LY7).
- Remove the generator bolts.
- Remove the generator from the vehicle.
Installation Procedure
- Install the generator to the vehicle.
- Install the generator bolts.
- Install the idler pulley. Refer to Drive Belt Idler Pulley Replacement in Engine Mechanical - 3.6L (LY7).
- Install the drive belt. Refer to Drive Belt Replacement in Engine Mechanical - 3.6L (LY7).
- Connect the generator electrical connector.
- Install the battery cable and the generator B+ terminal nut to the generator.
- Install the torque struts. Refer to Engine Mount Strut Replacement - Left Side and Engine Mount Strut Replacement - Right Side in Engine Mechanical - 3.6L (LY7).
- Connect the battery ground (negative) cable to the battery. Refer to Battery Negative Cable Disconnection and Connection .

Notice: Refer to Fastener Notice in the Preface section.
Tighten
Tighten the generator bolts to 50 N·m
(37 lb ft).


Tighten
Tighten the generator B+ terminal nut 20 N·m
(15 lb ft).
