Wheel Speed Sensor Jumper Harness Replacement Left Front
Removal Procedure
- Turn OFF the ignition.
- Raise the vehicle. Refer to Lifting and Jacking the Vehicle in General Information.
- Remove the left front wheel. Refer to Tire and Wheel Removal and Installation in Tires and Wheels.
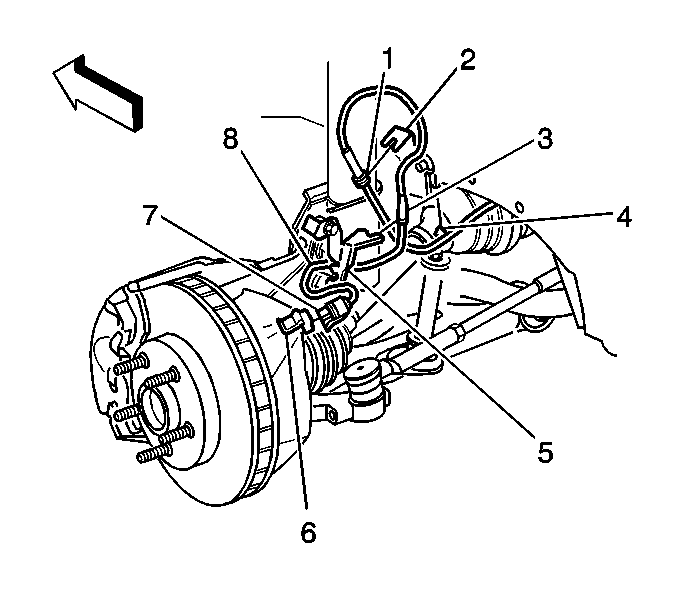
- Remove the wheel speed sensor connector (7) from the wheel speed sensor (6).
- Remove the harness grommet (3) from the strut bracket (5).
- Remove the harness grommet (1) from the rail bracket (2).
- Remove the harness clip (4) from the rail bracket (2).
- Route the wheel speed sensor wiring (8) through the top of the engine compartment.
- Lower the vehicle. Refer to Lifting and Jacking the Vehicle in General Information.
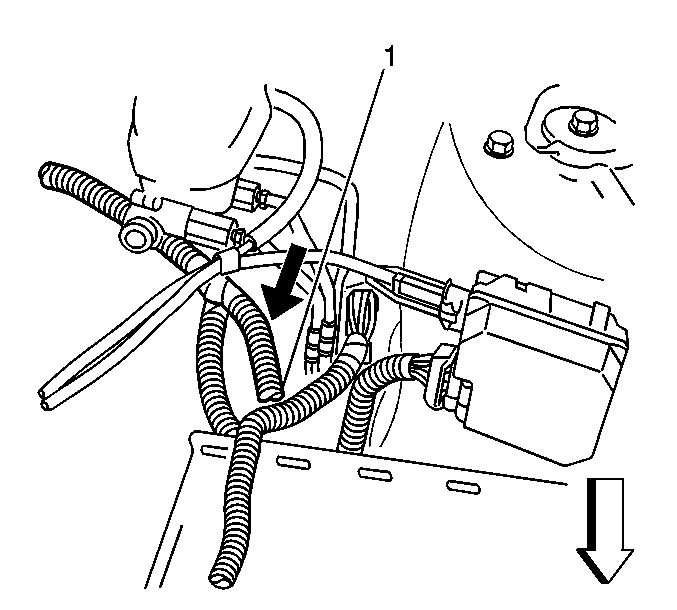
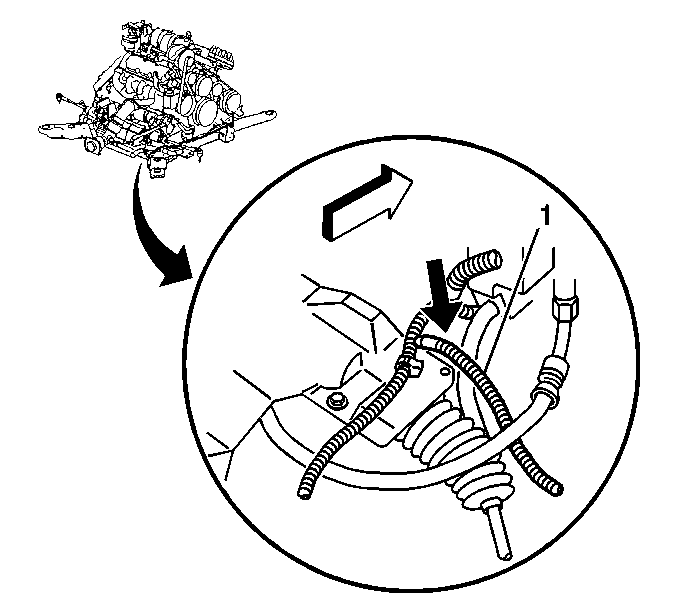
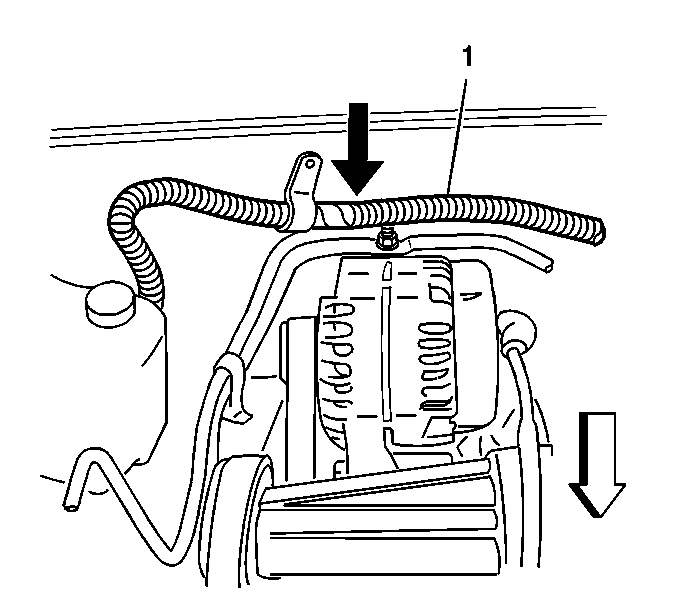
- Cut the engine harness conduit (1) at the shown location.
- Locate the 2 heat shrink sealed splices.
- Cut the 2 twisted dark blue and yellow wires on the engine side of the splices.
- Remove the wheel speed sensor wiring from the engine harness.
Important: The wheel speed sensor wiring is included in the engine harness. The wiring between the wheel speed sensor and the heat shrink sealed splices is high-flex cable and must not be repaired or spliced. This procedure replaces the high-flex cable with a jumper harness from a supplied repair kit.
Important: Leave a sufficient amount of wiring so that the new jumper terminals can be assembled.
Installation Procedure
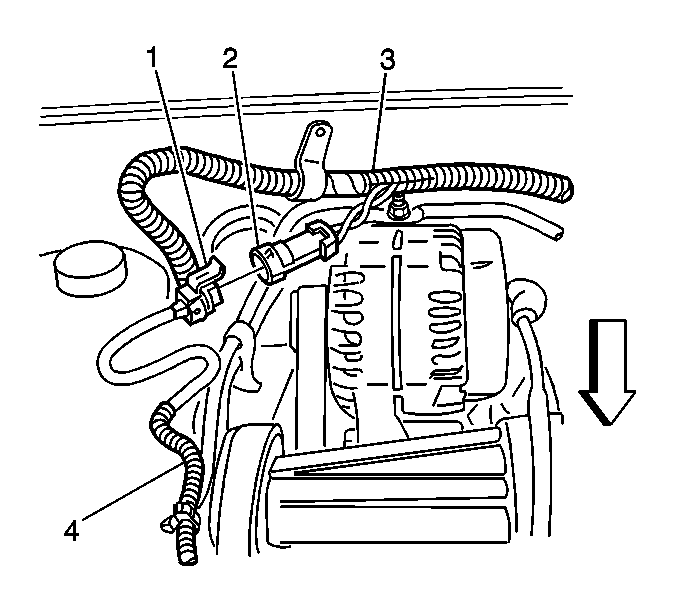
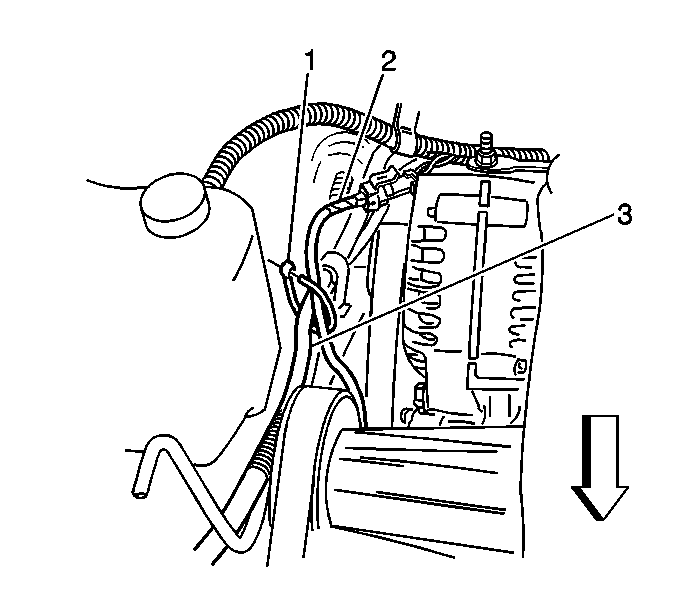
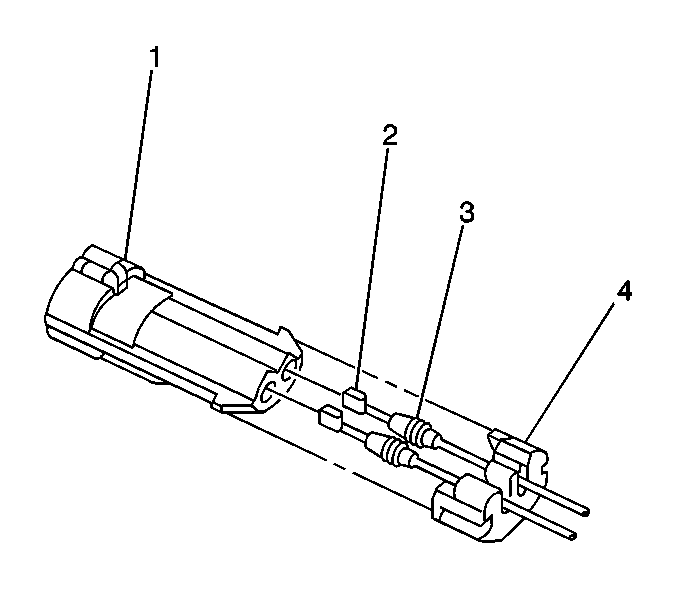
- Install the terminals (2) and cable seals (3) to the engine side of the wire. Refer to Wiring Repairs in Wiring Systems.
- Install the connector (1) and terminal position assurance (4) to the engine side of the wire. Refer to Wiring Repairs in Wiring Systems.
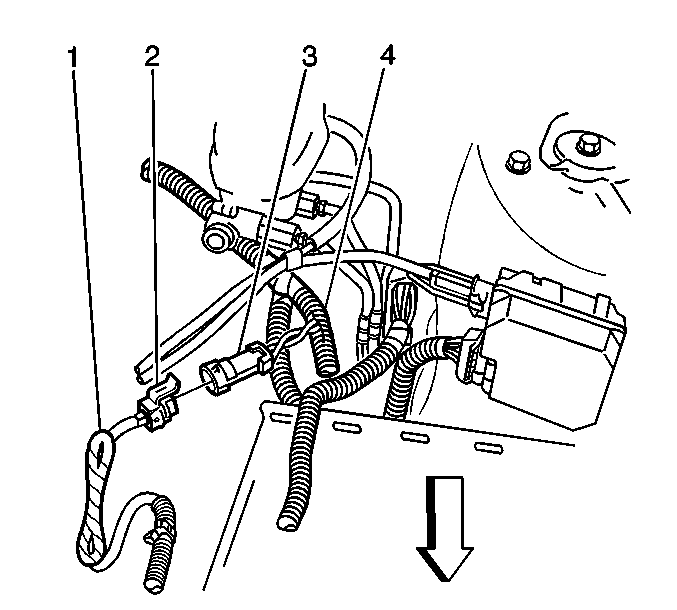
- Install the wheel speed sensor jumper connector (2) to the assembled connector (3).
- Route the wheel speed sensor jumper (1) through the engine compartment to the wheel well.
- Raise the vehicle. Refer to Lifting and Jacking the Vehicle in General Information.
- Install the wheel speed sensor connector (7) to the wheel speed sensor (6).
- Install the harness grommet (3) to the strut bracket (5).
- Install the harness grommet (1) to the rail bracket (2).
- Install the harness clip (4) the rail bracket (2).
- Install the left front wheel. Refer to Tire and Wheel Removal and Installation in Tires and Wheels.
- Lower the vehicle. Refer to Lifting and Jacking the Vehicle in General Information.
- Perform the ABS Diagnostic System Check. Refer to Diagnostic System Check - ABS .
Important: Maintain the twisting of the wheel speed sensor wires.

Wheel Speed Sensor Jumper Harness Replacement Right Front
Removal Procedure
- Turn OFF the ignition.
- Raise the vehicle. Refer to Lifting and Jacking the Vehicle in General Information.
- Remove the right front wheel. Refer to Tire and Wheel Removal and Installation in Tires and Wheels.
- Remove the wheel speed sensor connector (7) from the wheel speed sensor (6).
- Remove the harness grommet (3) from the strut bracket (5).
- Remove the harness grommet (1) from the rail bracket (2).
- Remove the harness clip (4) from the rail bracket (2).
- Cut the engine harness conduit (1) at the shown location.
- Cut the 2 twisted wires on the engine side of the 2 heat shrink sealed splices.
- Remove the wheel speed sensor wiring from the engine harness.
- Lower the vehicle. Refer to Lifting and Jacking the Vehicle in General Information.
- Cut the engine harness conduit (1) at the shown location.
- Cut the 2 twisted dark green and tan wires.
- Pull the ends of the wires on the engine side out of the conduit.

Important: The wheel speed sensor wiring is included in the engine harness. The wiring between the wheel speed sensor and the heat shrink sealed splices is high-flex cable and must not be repaired or spliced. This procedure replaces the high-flex cable with a jumper harness from a supplied repair kit.
Important: Make the cut as close to the harness breakout as possible.
Important: Leave a sufficient amount of wiring so that the new jumper terminals can be assembled.
Installation Procedure
- Install the terminals (2) and cable seals (3) to the engine side of the wire. Refer to Wiring Repairs in Wiring Systems.
- Install the connector (1) and terminal position assurance (4) to the engine side of the wire. Refer to Wiring Repairs in Wiring Systems.
- Install the wheel speed sensor jumper connector (1) to the assembled connector (2).
- Cut the tape on the wheel speed senor jumper (4).
- Route the wheel speed sensor jumper (4) through the engine compartment to the wheel well.
- Using the strap (1), secure the wheel speed sensor jumper (2) to the HVAC lines (3).
- Raise the vehicle. Refer to Lifting and Jacking the Vehicle in General Information.
- Install the wheel speed sensor connector (7) to the wheel speed sensor (6).
- Install the harness grommet (3) to the strut bracket (5).
- Install the harness grommet (1) to the rail bracket (2).
- Install the harness clip (4) to the rail bracket (2).
- Install the right front wheel. Refer to Tire and Wheel Removal and Installation in Tires and Wheels.
- Lower the vehicle. Refer to Lifting and Jacking the Vehicle in General Information.
- Perform the ABS Diagnostic System Check. Refer to Diagnostic System Check - ABS .

Important: Maintain the twisting of the wheel speed sensor wires.
