Info - Door Trim Removal Procedure/Proper Installation of Door Water Deflectors

| Subject: | Door Trim Removal Procedure/Auxiliary Water Deflector Inside Door/Proper Installation of Door Water Deflectors |
| Models: | 2000 Pontiac Bonneville |
This bulletin covers three new issues for the 2000 Pontiac Bonneville:
| • | A new door trim removal procedure |
| • | A new water deflector inside the door |
| • | The proper installation of the door water deflector |
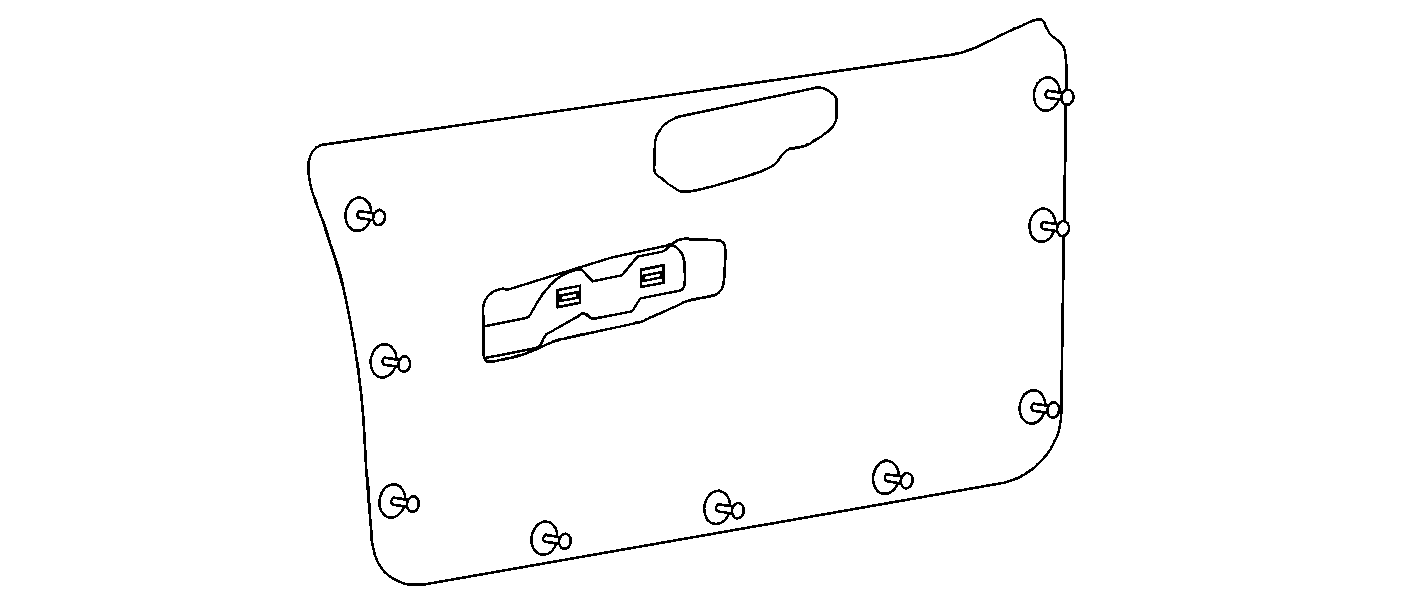
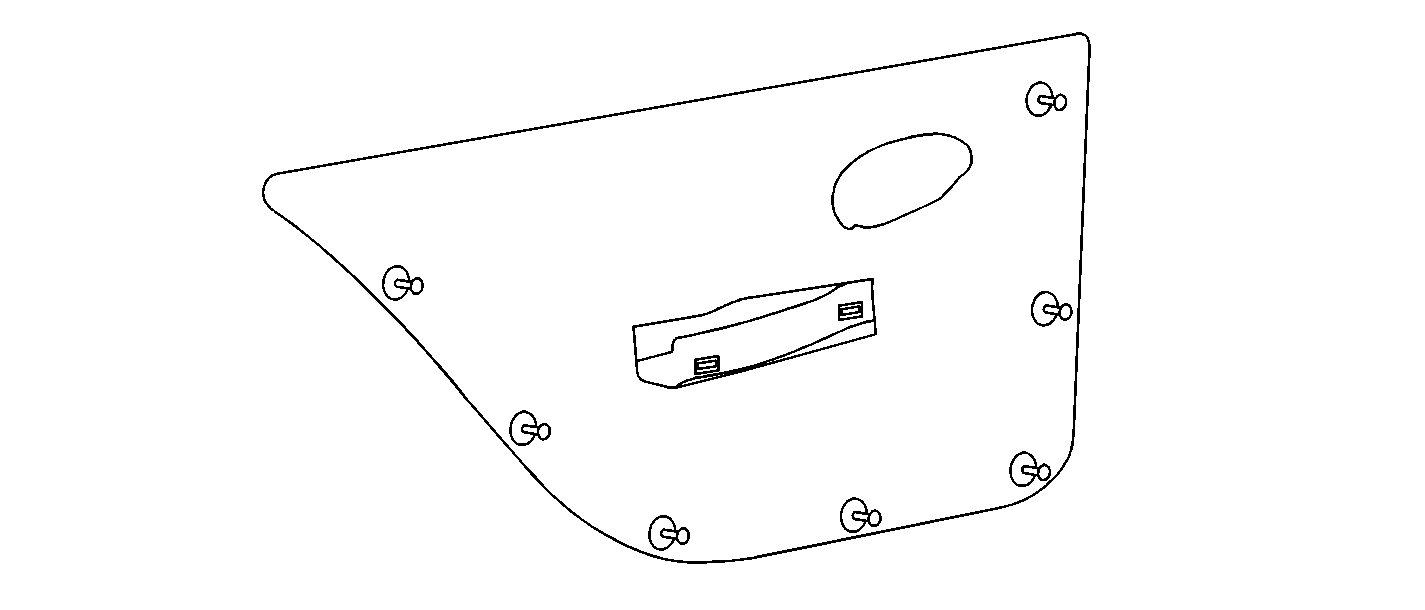
Door Trim Removal (Front and Rear Doors)
- Remove the door handle bezel by prying outboard on the front. Then pull forward in order to remove the bezel.
- Remove the front side door upper trim (mirror patch) using the J 38778 Door Trim Pad and Garnish Clip.
- Using the J 38778, disengage all the push-in retainers. Refer to the illustrations for the location of the front and the rear door retainers.
- When all the push-in retainers have been disengaged from the door inner panel, remove all the push-in retainers from the trim panel.
- Pull upward on the door trim panel in order to remove the panel.
- Using needle-nose pliers, remove the two spring clips from the metal bracket on the door trim pad.
- Reinsert the spring clips in the plastic retainers on the inner door panel with the flat side of the spring clip facing upward.
- Hold the top of the trim pad away from the top of the door. Align the three lower push pins in the door retainers.
- With all the pins aligned, set the three lower pins. This automatically aligns the metal clips to the plastic retainers.
- Set all the remaining clips.
- Push the top of the trim pad outward in order to set it. This will engage the top of the trim pad over the inner belt retaining flange.
- Install the door handle bezel.
- Install the front side door upper trim (mirror patch).
The bezel is attached with one retainer.
Auxiliary Inner Water Deflector (Front Doors)
The inside water deflector is installed in order to direct water away from the inner panel. Whenever service to the inside of the door is required, make sure the water deflector is installed properly. Use the following procedure in order to properly install the deflector.
- Insert the deflector through the belt line.
- Position the deflector against the mirror patch.
- Fold the perforated portion of the deflector over the inner belt retaining flange. Press in order to secure the deflector. Refer to the illustration for the location.
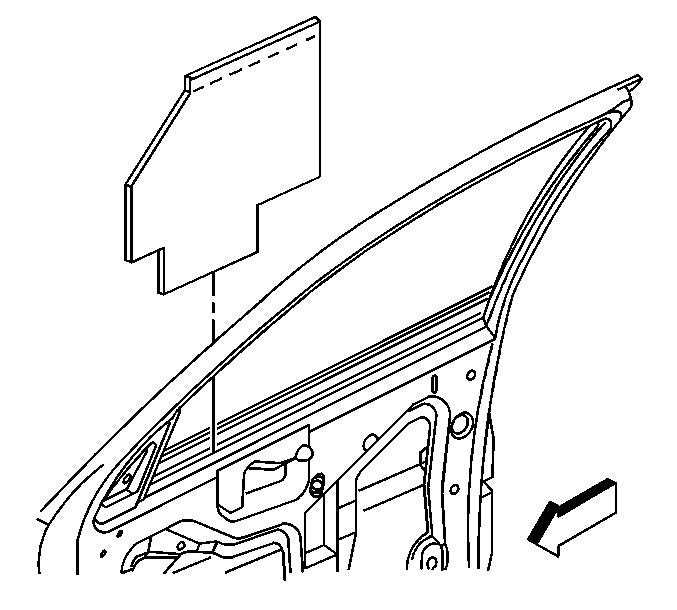
Important: Install the inner water deflector before installing the inner belt seal and after glass installation.
The deflector must be inboard of the door glass.
Auxiliary Inner Water Deflector (Rear Doors)
The inside water deflector is installed in order to direct water away from the inner panel. Whenever service to the inside of the door is required, make sure the water deflector is installed properly. Use the following procedure in order to properly install the deflector.
- Insert the deflector through the belt line.
- Position the deflector against the mirror patch.
- Fold the perforated portion of the deflector over the inner belt retaining flange. Press in order to secure the deflector. Refer to the illustration for the location.
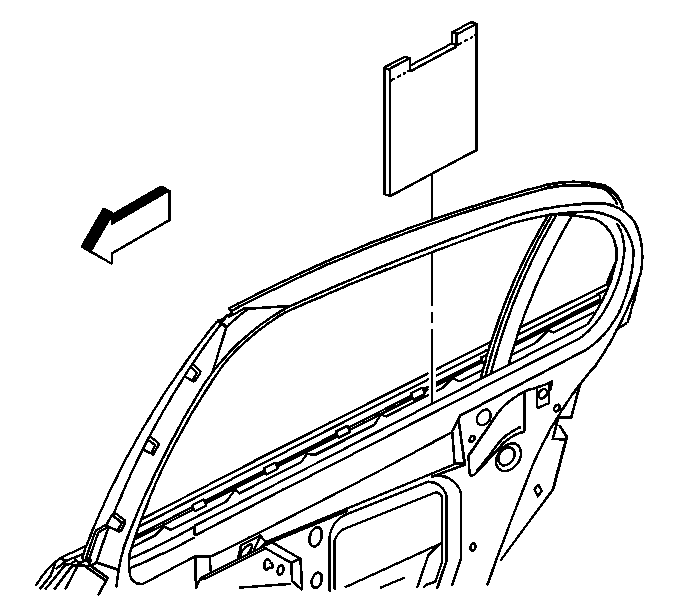
Important: Install the inner water deflector before installing the inner belt seal and after glass installation.
The deflector must be inboard of the door glass.
Door Water Deflector
Whenever service is performed causing the water deflector to be disturbed, the deflector must then be properly sealed to the door inner panel in order to prevent water leaks.
- Clean the door surface (around the perimeter of the water deflector) with one of the cleaners listed below, or equivalent.
- Using a 2 in. wallpaper roller, roll out the butyl adhesive. Start at the bottom center and work outboard up the right and left sides.
| • | 3M™ General Purpose Adhesive Cleaner, P/N 08984 |
| • | Dominion Sure Seal Sure Solve Stock BSS |
| • | Kent Acrysol™ |
Important: The door surface must be at room temperature or the adhesive will not stick.
A 2 in. roller may be purchased at your local hardware or wallpaper store.
