General Wind Noise/Windrush (Install Sealer)

| Subject: | Technical -- General Wind Noise/Windrush (Install Sealer) |
| Models: | 2000 Pontiac Bonneville |
This bulletin contains information on several conditions.
Condition 1
Some customers may comment about windrush at the mirror.
Cause
Figure 1
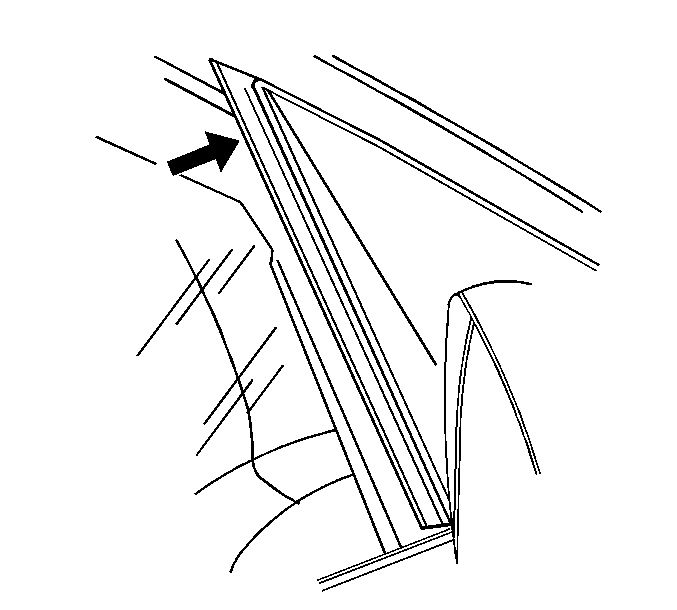
This condition may be caused by air disturbance around the mirror to the diversion lip. Refer to Figure 1.
Correction
Remove the mirror and discard the diversion lip attached to the mirror housing. Refer to the Doors sub-section of Body & Accessories in the Service Manual. Proceed to Condition 3 before reinstalling the mirror.
Condition 2
For vehicles built before VIN breakpoint Y4273476:
Some customers may comment on wind noise/windrush around the door glass.
Correction
Replace the window run channel. Refer to the Doors sub-section of Body & Accessories in the Service Manual.
Condition 3
Some customers may comment on wind noise around the mirror patch.
Cause
There may be voids in the sheet metal around the mirror patch.
Correction
Complete the following three correction procedures (Correction A, B, and C).
Important: During installation of the mirror, torque sequence and assembly is critical. The mirror edge must be positioned under the auxiliary molding and tightened following this sequence: top, forward, rear. Tighten the bolts to 9 N·m (80 lb in).
Correction A
- Remove the mirror.
- Remove the reveal molding screw behind the mirror patch.
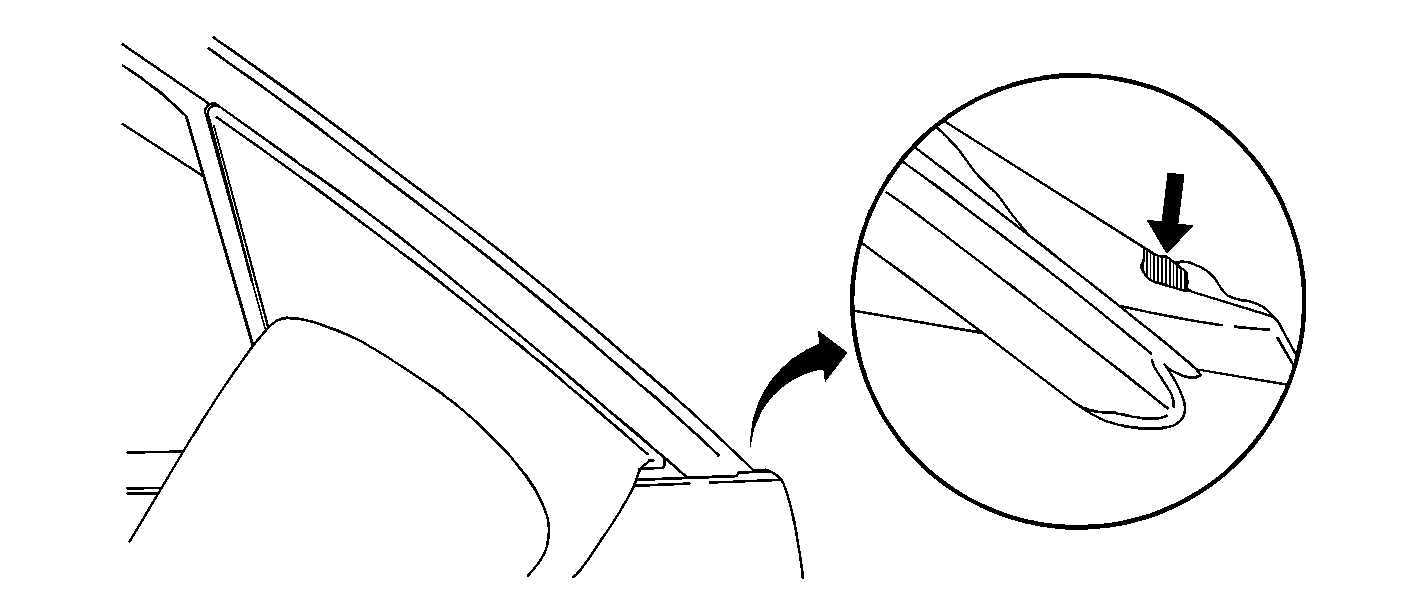
- Lift up on the lower portion of the reveal molding and fill the void with thumb grade sealer. Refer to Figure 2.
Figure 2
Correction B
Figure 3
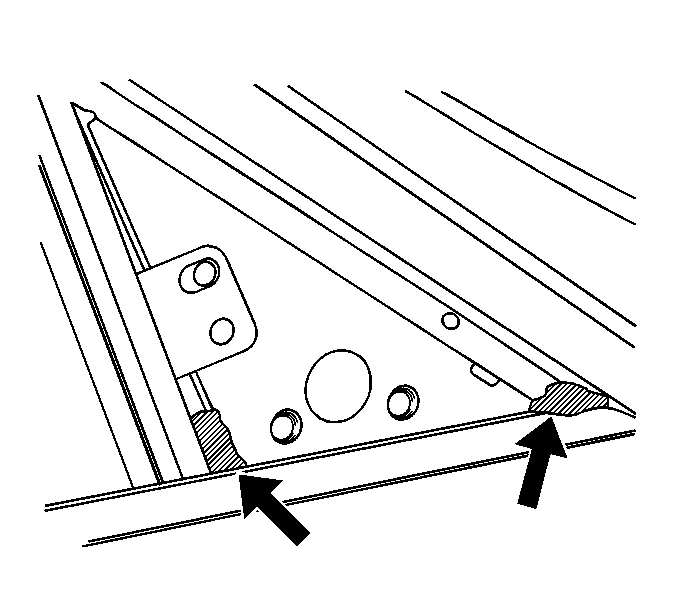
Fill the holes in the front and the rear corners of the mirror patch with thumb grade sealer. Refer to Figure 3.
Correction C
Figure 4
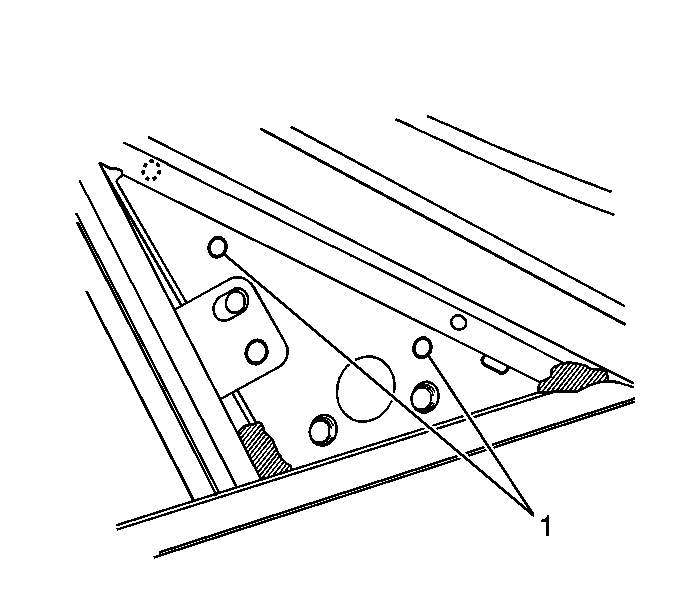
Cover the gage holes in the sheet metal with duct tape or the equivalent. Refer to Figure 4.
Correction D
Figure 5

Make sure the foam gasket surrounding the sheet metal, cut out in the inner panel, seats firmly to the inner sheet metal. Refer to Figure 5.
Correction E
In some rare cases, it may be necessary to foam the front corner of the door. Follow the procedure below:
- Remove the outer belt sealing strip.
- Tape the outside front corner of the mirror patch to stop foam from expanding outboard. Refer to Figure 6.
- From the mirror access hole, fill the front corner with foam up to the mirror attachment holes. Refer to Figure 7.
Figure 6

Figure 7

Condition 4
Some customers may comment on wind noise at the top rear corner of the front door or top front corner of the rear door.
Cause
The run channel may not be seated to the door frame.
Correction
- Pull the run channel from the door frame.
- Squeeze the run channel together for better retention.
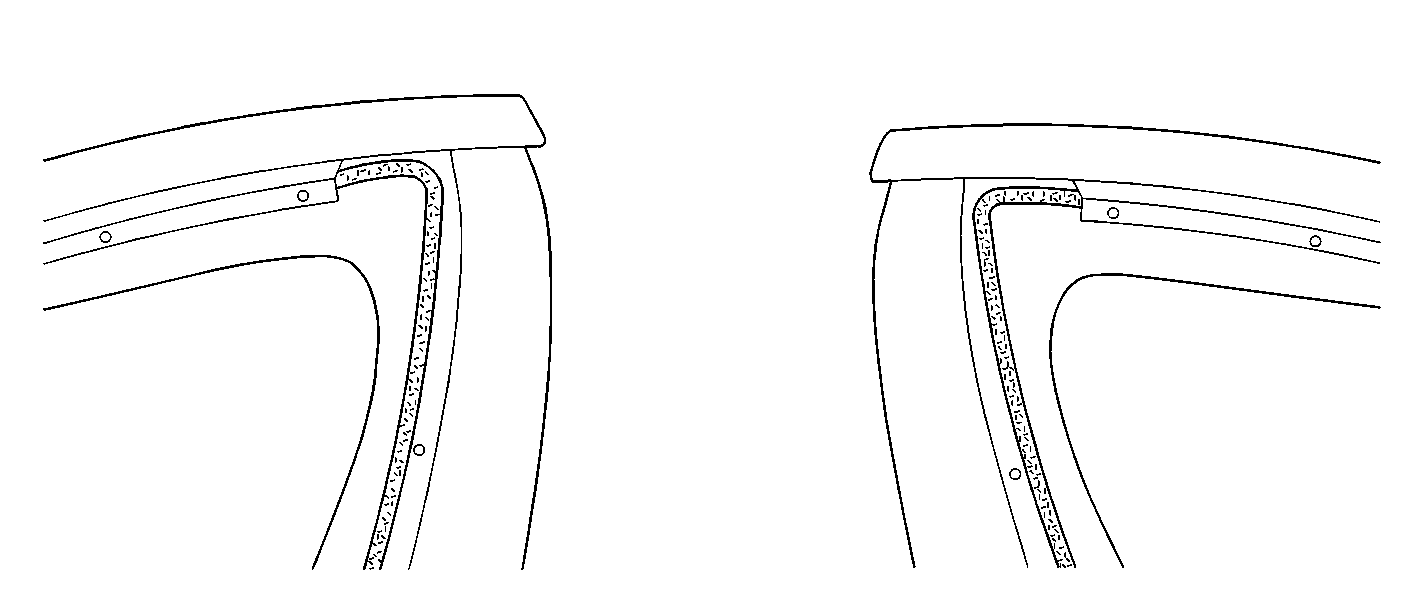
- Apply a bead of 3M™ Bedding and Glazing Compound* to the top 76.2 mm (3 in) of the door to the corner and down the rear portion of the door approximately 254 mm (10 in). Refer to Figure 8.
- Reinstall the run channel starting in the corner, moving to the rear edge and then to the top of the run channel.
Figure 8
Condition 5
Some customers may comment on wind noise at the top of the division post.
Cause
Figure 9
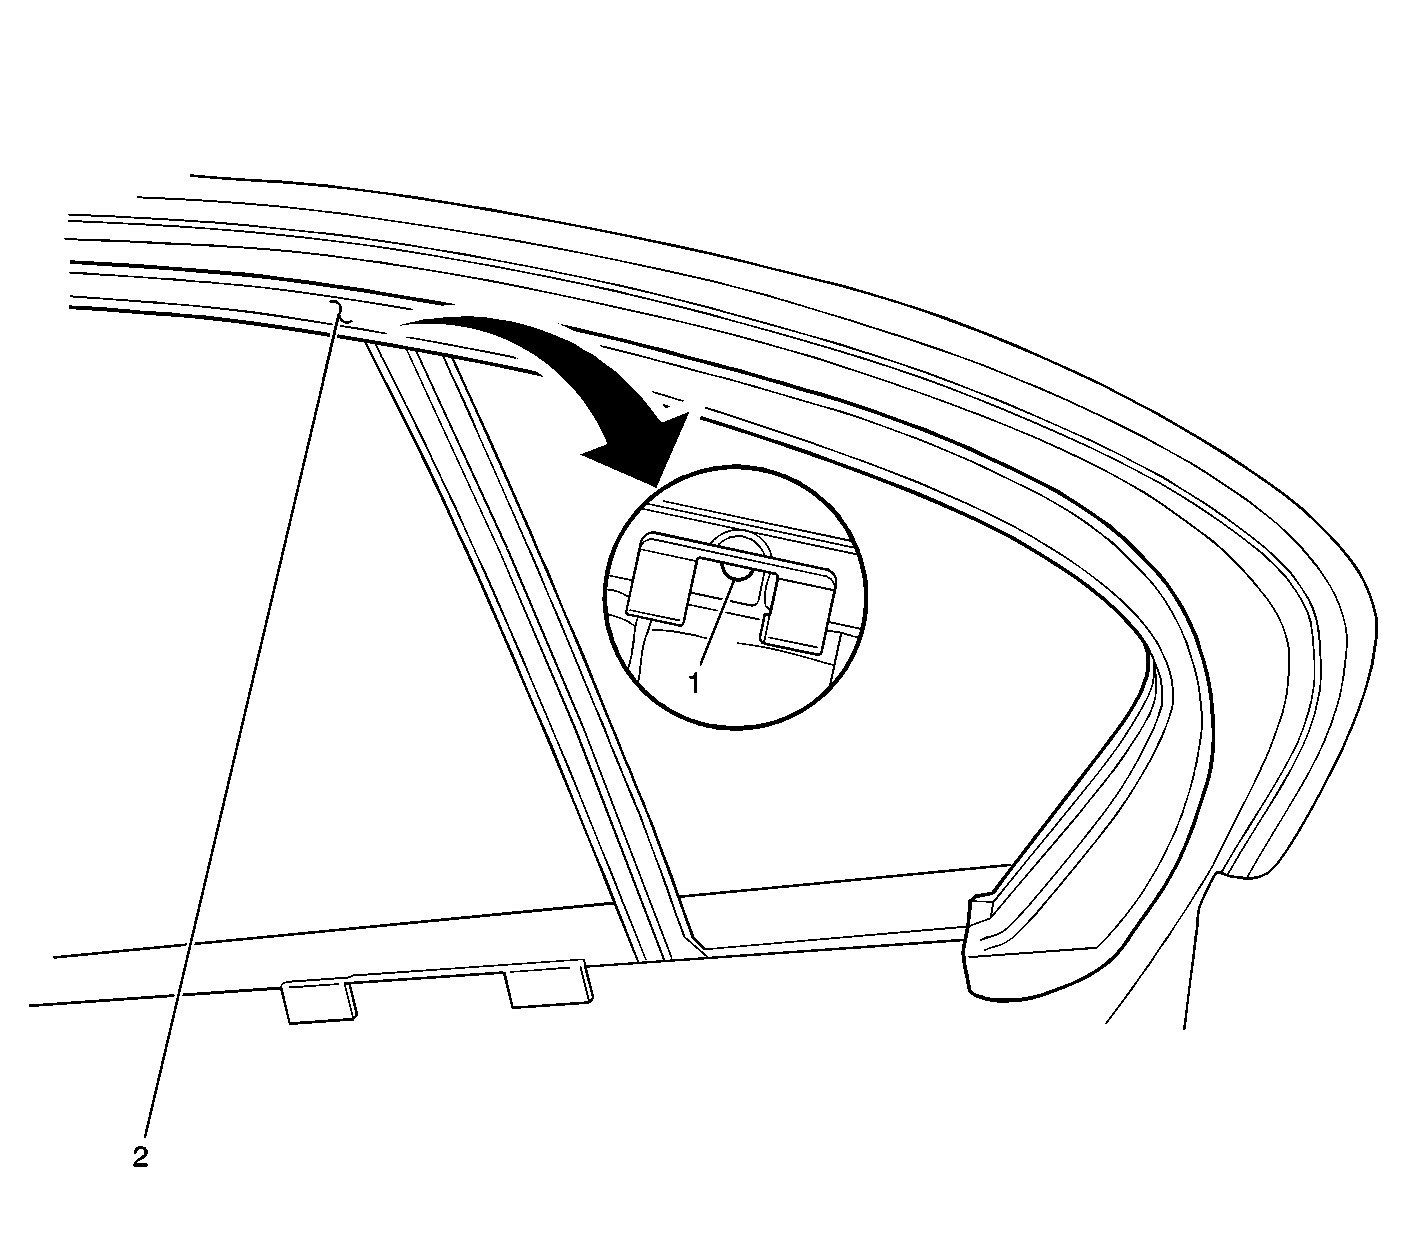
| • | The division post is not seated properly. Refer to item 1 in Figure 9. |
| • | The glass run channel lip does not seat properly against the door sheet metal at the top of the division post. Refer to item 2 in Figure 9. |
Correction A
- With the door trim removed, take off the plastic cap below the division post.
- Remove the lower division post attaching bolt.
- Move the division post until seated properly.
On the backside of the retaining clip, at the top of the division post, there is a round portion of the clip (1) that fits into the door sheet metal when seated properly. Refer to Figure 9.
Correction B
Pull the glass run channel lip down at the top of the division post and apply a piece of butyl to the division post retaining clip. Seat the glass run channel lip to the door panel. Refer to item 2 in Figure 9.
Condition 6
Some customers may comment on road noise at the base of the rear door quarter glass.
Correction
- Remove the door trim and inner belt strip.
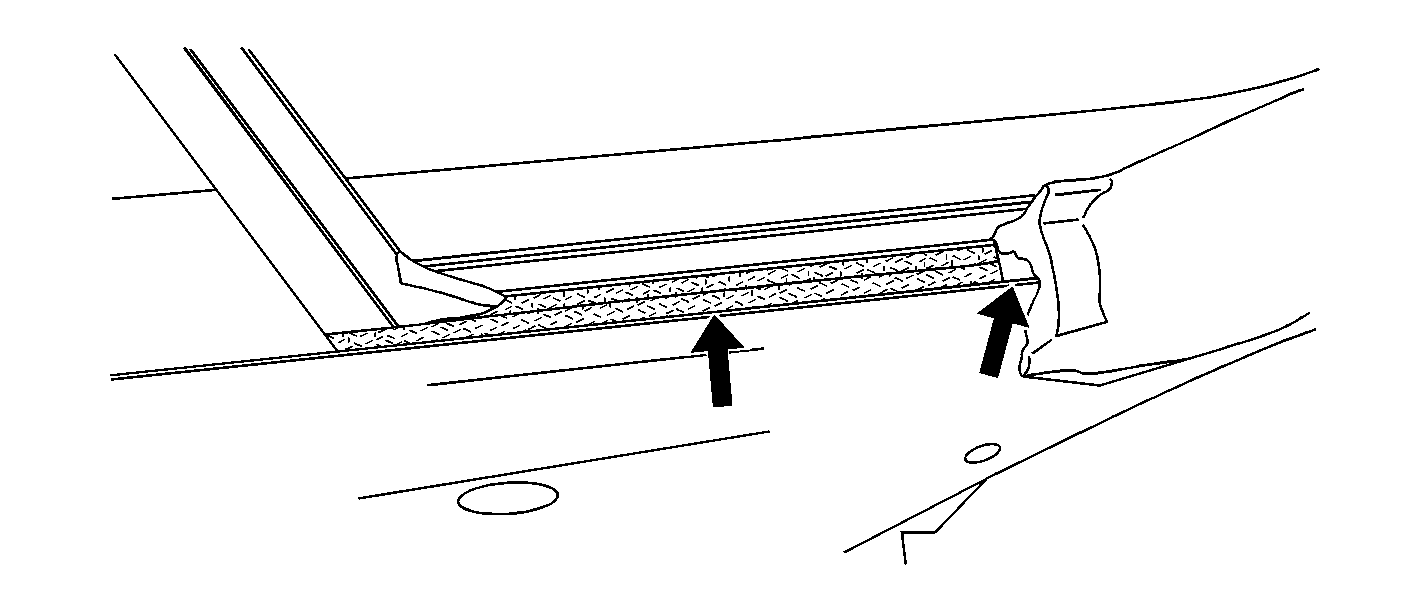
- Using two layers of Kent sponge rubber weatherstripping*, Stock No. 470, P/N 46505, fill the void between the vent glass and the inner panel. Refer to Figure 10.
- With the two layers installed at the base of the quarter glass, fill the void at the rear of the vent glass with approximately a 25 mm (1 in) long piece of foam. Refer to the arrow at the rear of the quarter glass in Figure 10.
Figure 10
Condition 7
Some customers may comment of wind noise around the perimeter of the vent glass.
Cause
The vent glass retaining lip may not be seated around the perimeter of the door frame.
Correction
Figure 11
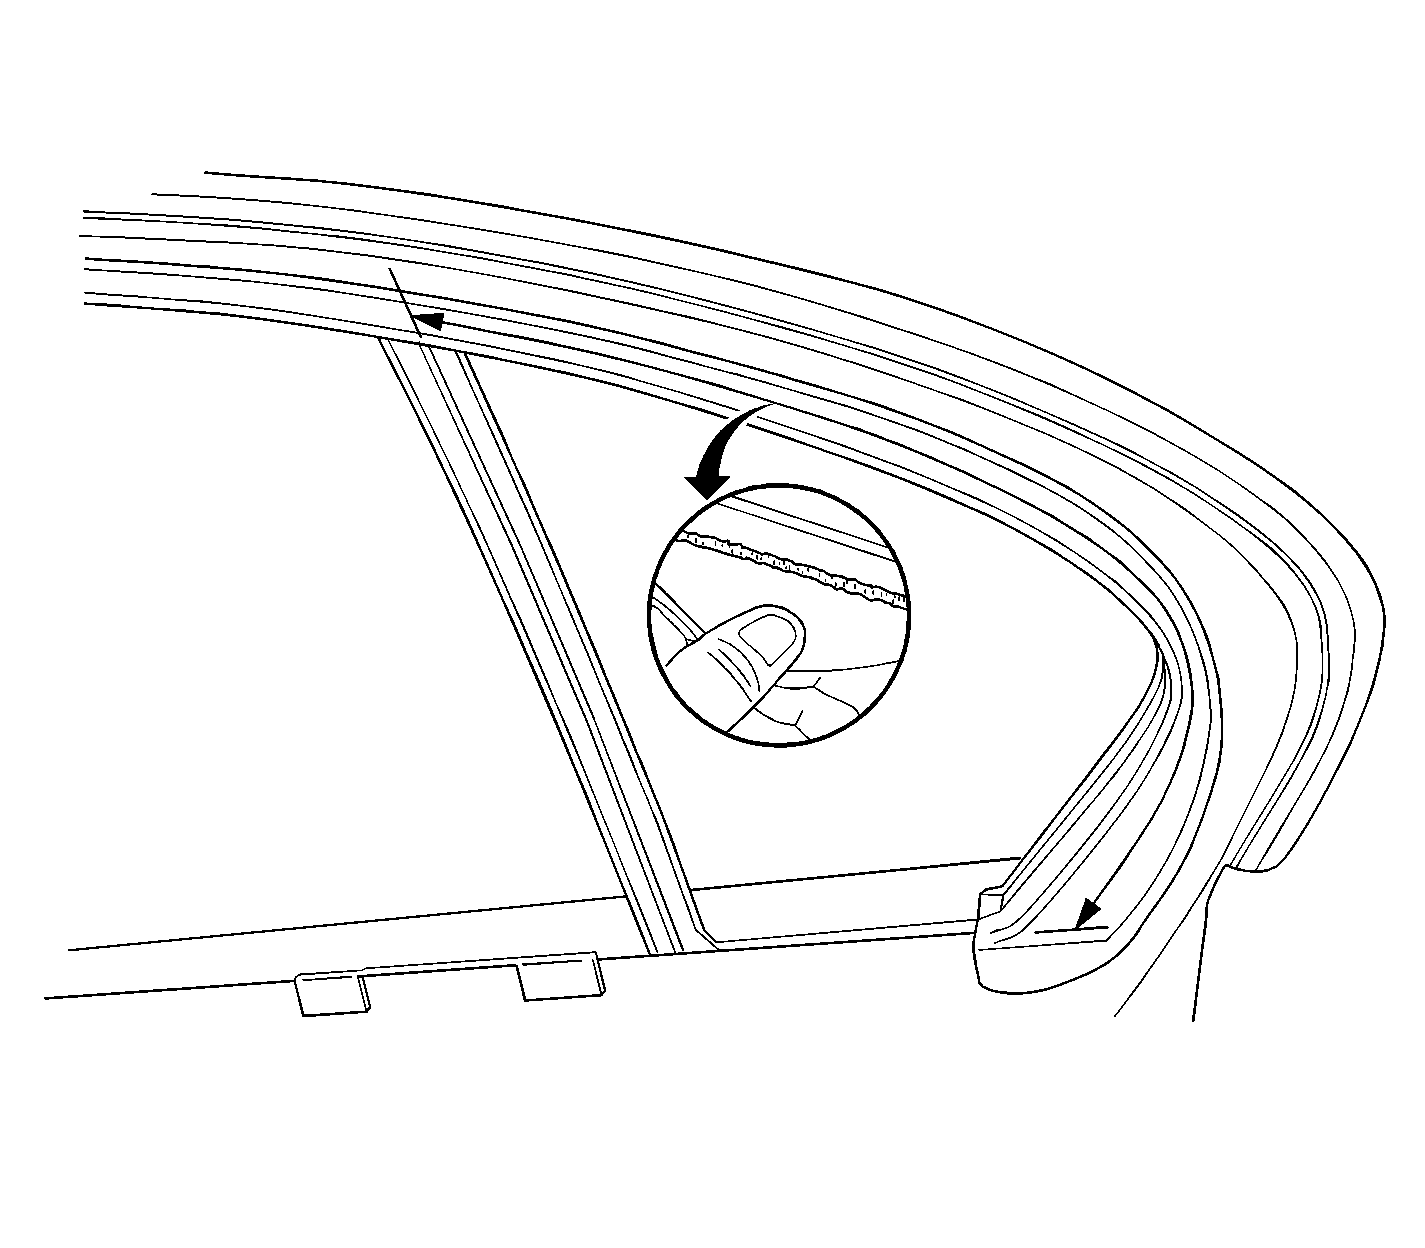
Pull down on the vent glass retainer and apply 3M™ Bedding and Glazing Compound* from the top of the division post to the bottom of the quarter glass. Refer to the location shown in Figure 11.
*We believe these sources and their materials to be reliable. There may be additional manufacturers of such materials. General Motors does not endorse, indicate any preference for or assume any responsibility for the products from these firms or for any such items which may be available from other sources.
Parts Information
Part Number | Description |
|---|---|
25719206 | RH Weatherstrip Side Door Window |
25719207 | LH Weatherstrip Side Door Window |
Parts are currently available from GMSPO.
Warranty Information
For vehicles repaired under warranty, use:
Labor Operation | Description | Labor Time |
|---|---|---|
C1940 | Weatherstrip, Front Door Window Run Channel (LH) - Replace | 1.2 hrs |
B4805 | Front/Rear Door Wind Noise - All Four Doors | 1.6 hrs |
