Rear Compartment Seat Back Trim Panel Attachment Arms/Straps Sag or Trim Panel is Loose (Remove Arms/Straps, Install Tie Straps or Apply Adhesive)

| Subject: | Rear Compartment Seat Back Trim Panel Attachment Arms/Straps Sag or Trim Panel Is Loose (Remove Arms/Straps, Install Tie Straps or Apply Adhesive) |
| Models: | 2000-2003 Buick LeSabre |
| 2001-2003 Oldsmobile Aurora |
| 2000-2003 Pontiac Bonneville |
This bulletin is being revised to update model year information and repair procedures. Please discard Corporate Bulletin Number 00-08-66-003 (Section 08-Body & Accessories).
Condition #1 2000-2001 LeSabre, Bonneville and 2001 Aurora
Some customers may comment that the attachment arms/straps of the rear compartment seat back trim panel are loose or sagging and are hanging down into the trunk.
Correction #1
Remove the attachment arms/straps from the rear compartment seat back trim panel and secure the trim panel to the LH and RH supports of the rear window panel reinforcement assembly with two 25 cm (10 in) black tie straps.

Repair Procedure #1
- Remove the rear compartment trim panel using the steps below.
- Carefully remove the LH and RH attachment arms/straps from the trim panel.
- Install the trim panel to the vehicle.
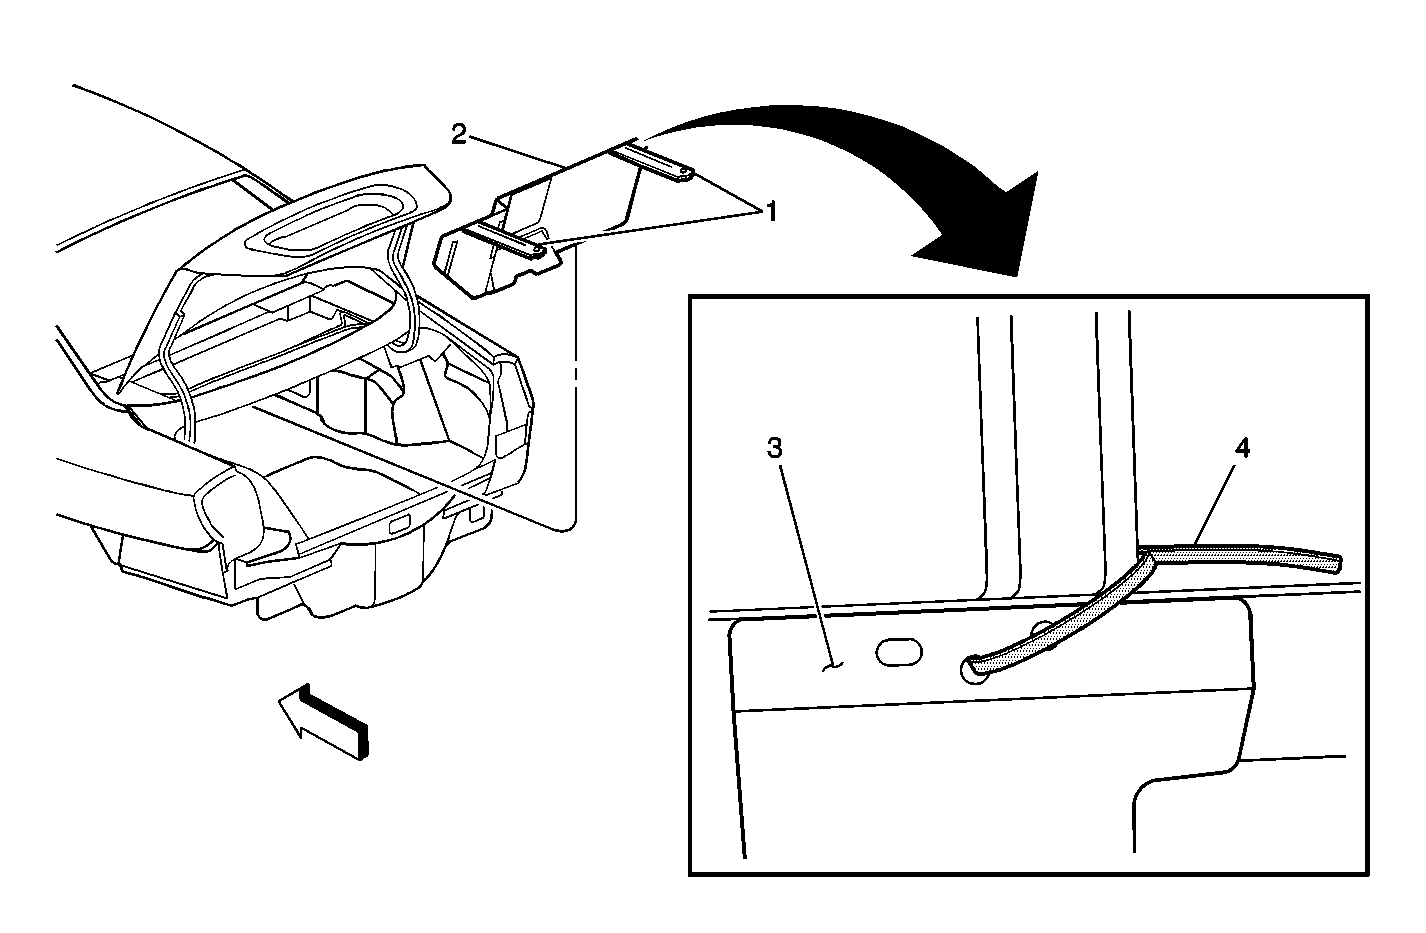
- Secure the trim panel to the LH support of the rear window panel reinforcement assembly with a 25 cm (10 in) black tie strap (4).
- Secure the trim panel to the RH support of the rear window panel reinforcement assembly with a 25 cm (10 in) black tie strap (4).
| 1.1. | Release the LH and RH attachment arm/strap retainers (1). |
| 1.2. | Remove the trim panel (2) from the vehicle. |
Important: Take care not to damage the arm/strap to trim panel attachment area or holes (3).
Condition #2 2002-2003 LeSabre, Bonneville and Aurora
Some customers may comment that the rear compartment seat back trim panel is loose and falling down into the trunk.
Cause #2

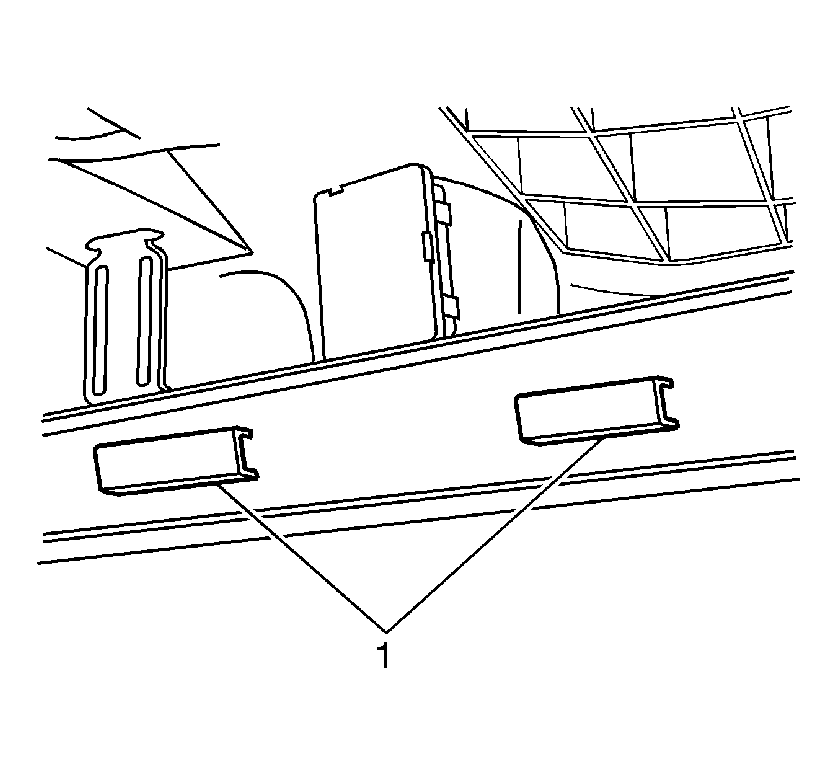
This condition may be due to the existing adhesive not having sufficient strength in high ambient temperatures. This causes the trim panel attachment magnets to separate from the foam or the magnet and foam (1) to separate from the trim panel.
Correction #2
Apply adhesive between the trim panel attachment magnets and foam or between the magnet and foam and trim panel.
Repair Procedure #2
- Remove the rear compartment trim panel.
- If the magnet and foam (1) is to be bonded to the trim panel, use sand paper to scuff up the trim panel's smooth surface.
- Apply a high strength, rapid curing adhesive such as 3M® Quick Fix Adhesive (Cyanoacrylate/Super Glue), P/N 08155, Goodwrench® Instant Gel Adhesive, GM P/N 12345632 (in Canada, P/N 10953475), or an equivalent, to one of the surfaces to be bonded.
- Place parts together and apply pressure for approximately 30 seconds.
Parts Information
Parts are currently available from GMSPO.
Warranty Information
For vehicles repaired under warranty, use:
Labor Operation | Description | Labor Time |
|---|---|---|
C4660 | Rear Compartment End Panel Trim - Repair | 0.3 hr* |
*This is a unique labor operation time to be used only with this bulletin. It will not be published in the Labor Time Guide. | ||
