Removal Procedure
Notice: Servicing of the supercharger unit itself is limited to replacement only. No attempt should be made to disassemble the supercharger, as parts damage may result.
- Remove the fuel injector sight shield. Refer to Fuel Injector Sight Shield Replacement .
- Remove the supercharger belt. Refer to Drive Belt Replacement .
- Disconnect the vacuum brake booster hose from the vacuum connections and position aside.
- Remove the evaporative emission canister purge valve and secure the hose to the air inlet grill. Refer to Evaporative Emission Canister Purge Solenoid Valve Replacement in Engine Controls-3.8L.
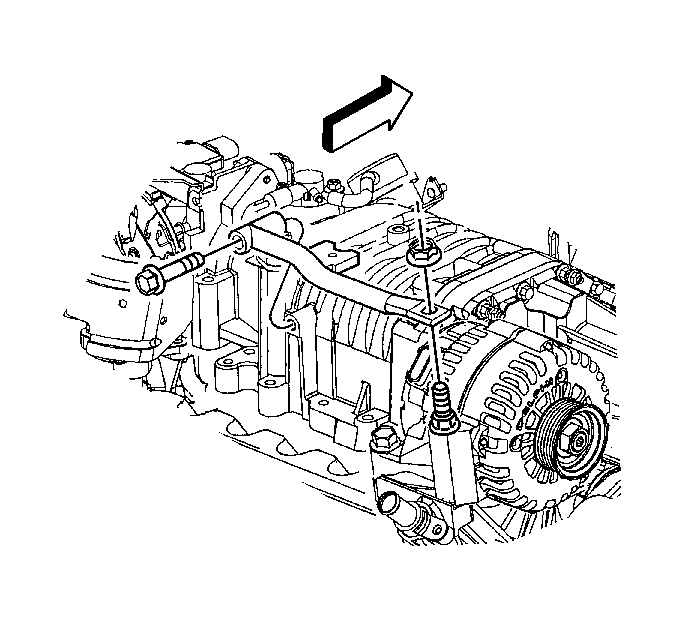
- Remove the fasteners securing the generator brace.
- Remove the generator brace.
- Disconnect the right side spark plug wires from the ignition module and position aside.
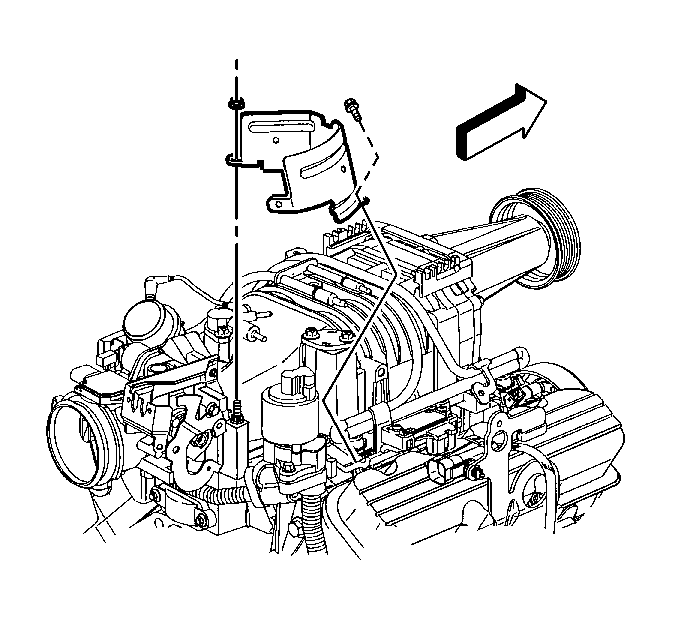
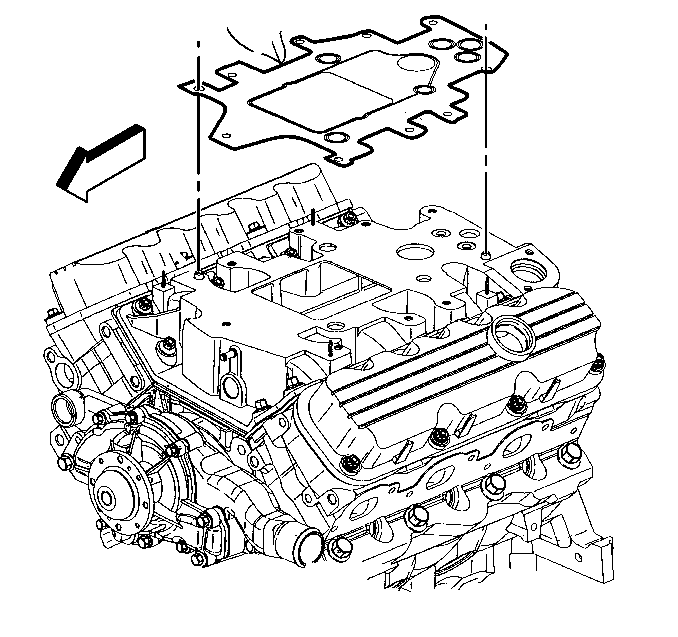
- Remove the engine wiring harness heat shield fasteners.
- Remove the engine wiring harness heat shield.
- Remove the fuel rail mounting bolts and the fuel rail with the injectors. Refer to Fuel Injection Fuel Rail Assembly Replacement in Engine Controls - 3.8L.
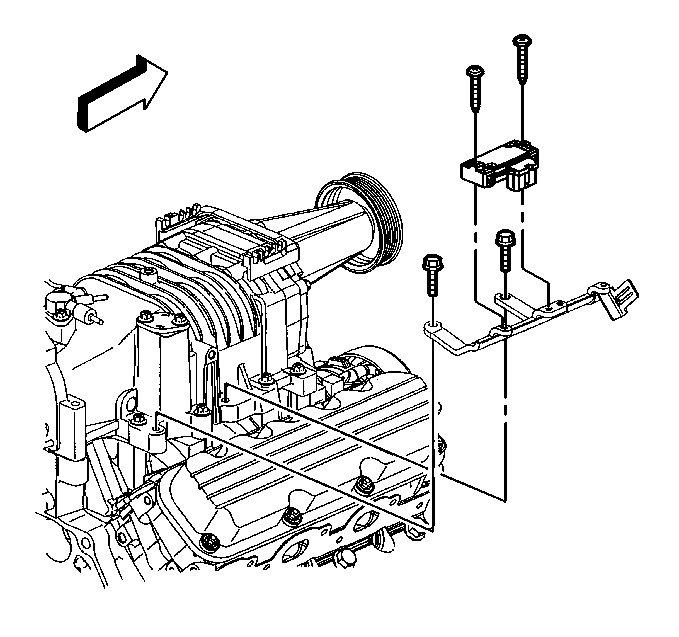
- Disconnect the MAP sensor connector and hose.
- Remove the MAP sensor bracket and bolts.
- Remove the boost control solenoid. Refer to Boost Control Solenoid Replacement in Engine Controls-3.8L.
- Remove the air cleaner intake duct. Refer to Air Cleaner Inlet Duct Replacement in Engine Controls-3.8L.
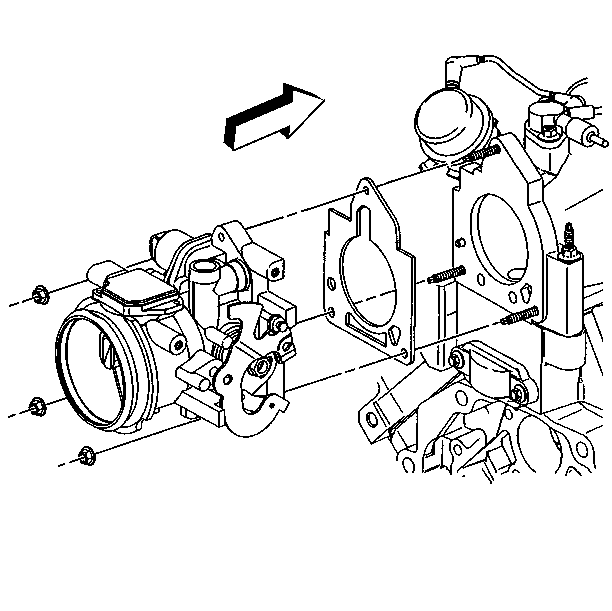
- Remove the nuts securing the throttle body to the supercharger.
- Remove the throttle body and position aside.
- Remove the throttle body gasket.
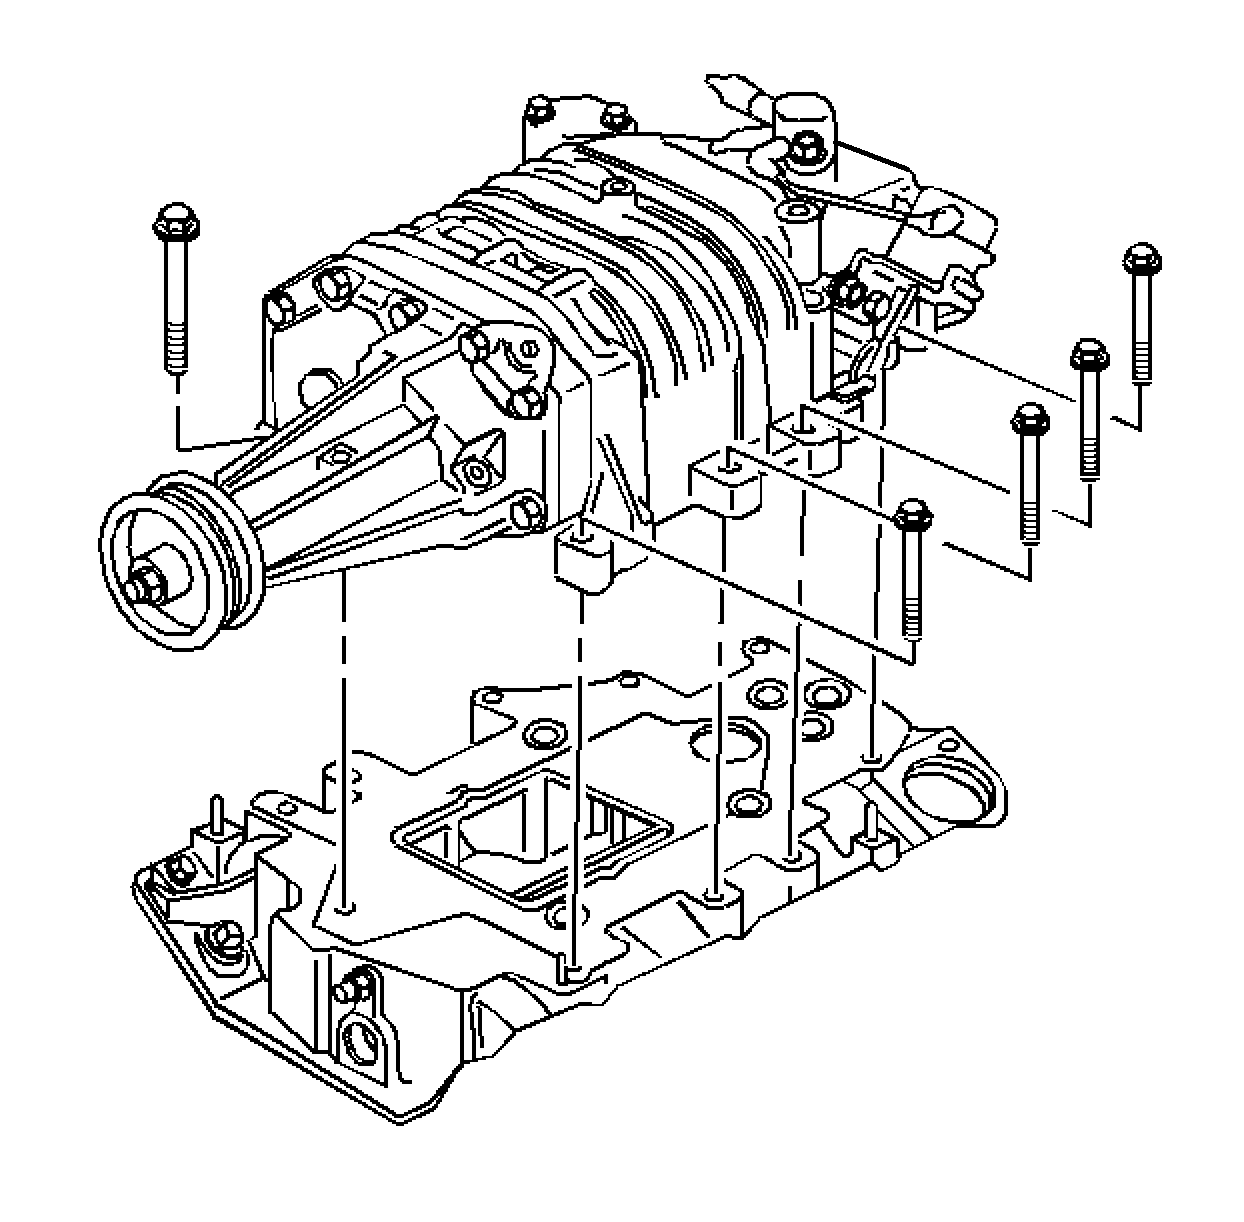
- Remove the supercharger mounting bolts.
- Remove the supercharger from the intake manifold.
- Clean and inspect the supercharger. Refer to Supercharger Cleaning and Inspection in the Engine Mechanical-3.8L Unit Repair.
- Clean the lower intake manifold mating surface.
Installation Procedure
- Install the new supercharger gasket.
- Position the supercharger to the intake manifold.
- Install the supercharger mounting bolts.
- Position a new throttle body gasket to the supercharger.
- Install the throttle body to the supercharger.
- Install the nuts securing the throttle body to the supercharger.
- Install the air cleaner intake duct. Refer to Air Cleaner Inlet Duct Replacement in Engine Controls-3.8L.
- Install the boost control solenoid. Refer to Boost Control Solenoid Replacement in Engine Controls-3.8L.
- Position the MAP sensor bracket to the engine.
- Install the MAP sensor bracket bolts.
- Connect the MAP sensor connector and hose.
- Install the fuel rail assembly. Refer to Fuel Injection Fuel Rail Assembly Replacement in Engine Controls - 3.8L.
- Position the engine wiring harness heat shield to the engine.
- Install the engine wiring harness heat shield fasteners.
- Connect the right side spark plug wires to the ignition module.
- Install the generator brace and fasteners.
- Install the evaporative emission canister purge valve. Refer to Evaporative Emission Canister Purge Solenoid Valve Replacement in Engine Controls-3.8L.
- Connect the vacuum brake booster hose to the vacuum connections.
- Install the supercharger belt. Refer to Drive Belt Replacement .
- Install the fuel injector sight shield. Refer to Fuel Injector Sight Shield Replacement .
Important: Do not use any sealer on the gasket.
Notice: Use the correct fastener in the correct location. Replacement fasteners must be the correct part number for that application. Fasteners requiring replacement or fasteners requiring the use of thread locking compound or sealant are identified in the service procedure. Do not use paints, lubricants, or corrosion inhibitors on fasteners or fastener joint surfaces unless specified. These coatings affect fastener torque and joint clamping force and may damage the fastener. Use the correct tightening sequence and specifications when installing fasteners in order to avoid damage to parts and systems.
Tighten
Tighten the supercharger mounting bolts to 23 N·m (17 lb ft).
Tighten
Tighten the throttle body nuts to 10 N·m (89 lb in).
Tighten
Tighten the MAP sensor bracket bolts to 30 N·m (22 lb ft).
Tighten
Tighten the engine wiring harness heat shield fasteners to 10 N·m
(89 lb in).
Tighten
| • | Tighten the generator brace nut to 50 N·m (37 lb ft). |
| • | Tighten the generator brace bolt to 30 N·m (22 lb ft). |
