Removal Procedure
Notice: Turn the ignition OFF when installing or removing the PCM connectors and disconnecting or reconnecting the power to the PCM (battery cable, PCM pigtail, PCM fuse, jumper cables, etc.) in order to prevent internal PCM damage.
- Record the Transaxle Fluid and Engine Oil Life Indexes.
- Turn OFF the ignition.
- Disconnect the battery negative cable. Refer to Battery Negative Cable Disconnection and Connection in Engine Electrical.
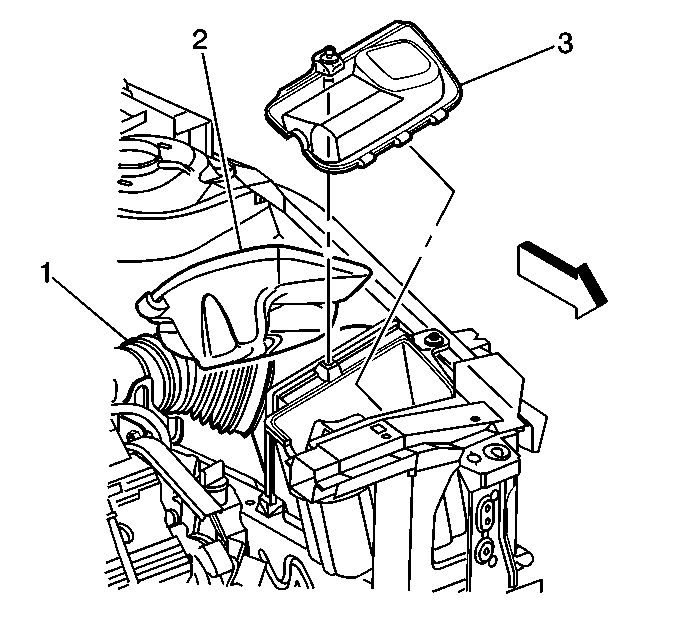
- Remove the screw retaining the intake air duct/resonator (3) to the powertrain control module (PCM) housing.
- Unsnap the air filter housing clamps on top of the air cleaner housing assembly.
- Pull the intake air duct/resonator assembly (2) up enough to remove the air cleaner cover (3) and the PCM.
- Slide the air cleaner element assembly toward the fender to separate the air cleaner element assembly from the air inlet assembly.
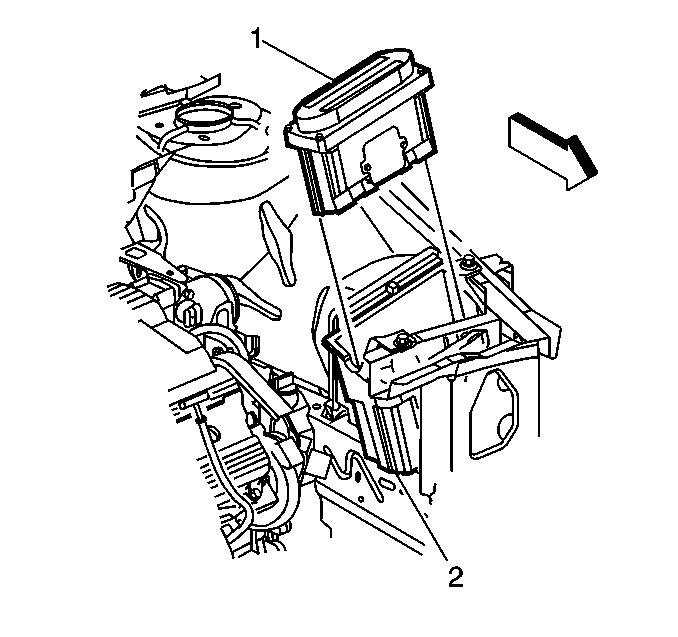
- Loosen the PCM connector attaching bolts.
- Disconnect both PCM connectors.
- Remove the PCM (1).

Installation Procedure
Important: If the PCM is being programmed using the Off-Board method, perform the programming before continuing with the steps listed below. Refer to the Off-Board procedure in Service Programming System (SPS) in Programming.
- Install the PCM (1).
- Install the PCM connectors.
- Install the air cleaner cover (3) onto the air inlet housing.
- Snap the assembly clamps into place.
- Align the intake air duct/resonator assembly (3) into place.
- Install the screw onto the intake air duct/resonator assembly.
- Connect the battery negative cable. Refer to Battery Negative Cable Disconnection and Connection in Engine Electrical.
- Program the PCM. Refer to Service Programming System (SPS) in Programming.
Notice: Use the correct fastener in the correct location. Replacement fasteners must be the correct part number for that application. Fasteners requiring replacement or fasteners requiring the use of thread locking compound or sealant are identified in the service procedure. Do not use paints, lubricants, or corrosion inhibitors on fasteners or fastener joint surfaces unless specified. These coatings affect fastener torque and joint clamping force and may damage the fastener. Use the correct tightening sequence and specifications when installing fasteners in order to avoid damage to parts and systems.
Tighten
Tighten the PCM connectors screws to 8 N·m
(71 lb in).
Tighten
Tighten the intake air duct clamp to 3 N·m
(27 lb in).
